Create Reporting Alerts
Updated
Sprinklr's Alert Manager allows you to create Smart Alerts and Custom Volumetric Alerts.
Smart Alerts: Smart Alerts leverage artificial intelligence to analyze brand conversations and alert your team when changes are detected in mentions, engagement, and other action-worthy trends from your audience.
Custom Volumetric Alerts: Custom Volumetric Alerts help you monitor spikes in listening volumes on specific conditions and notify key stakeholders.
In this article, we will help you learn how to create Smart Alerts using Alert Manager.
To create a Smart Alert from Alert Manager
Click the New Tab icon
. Under Governance Console, click Alert Manager within Love.
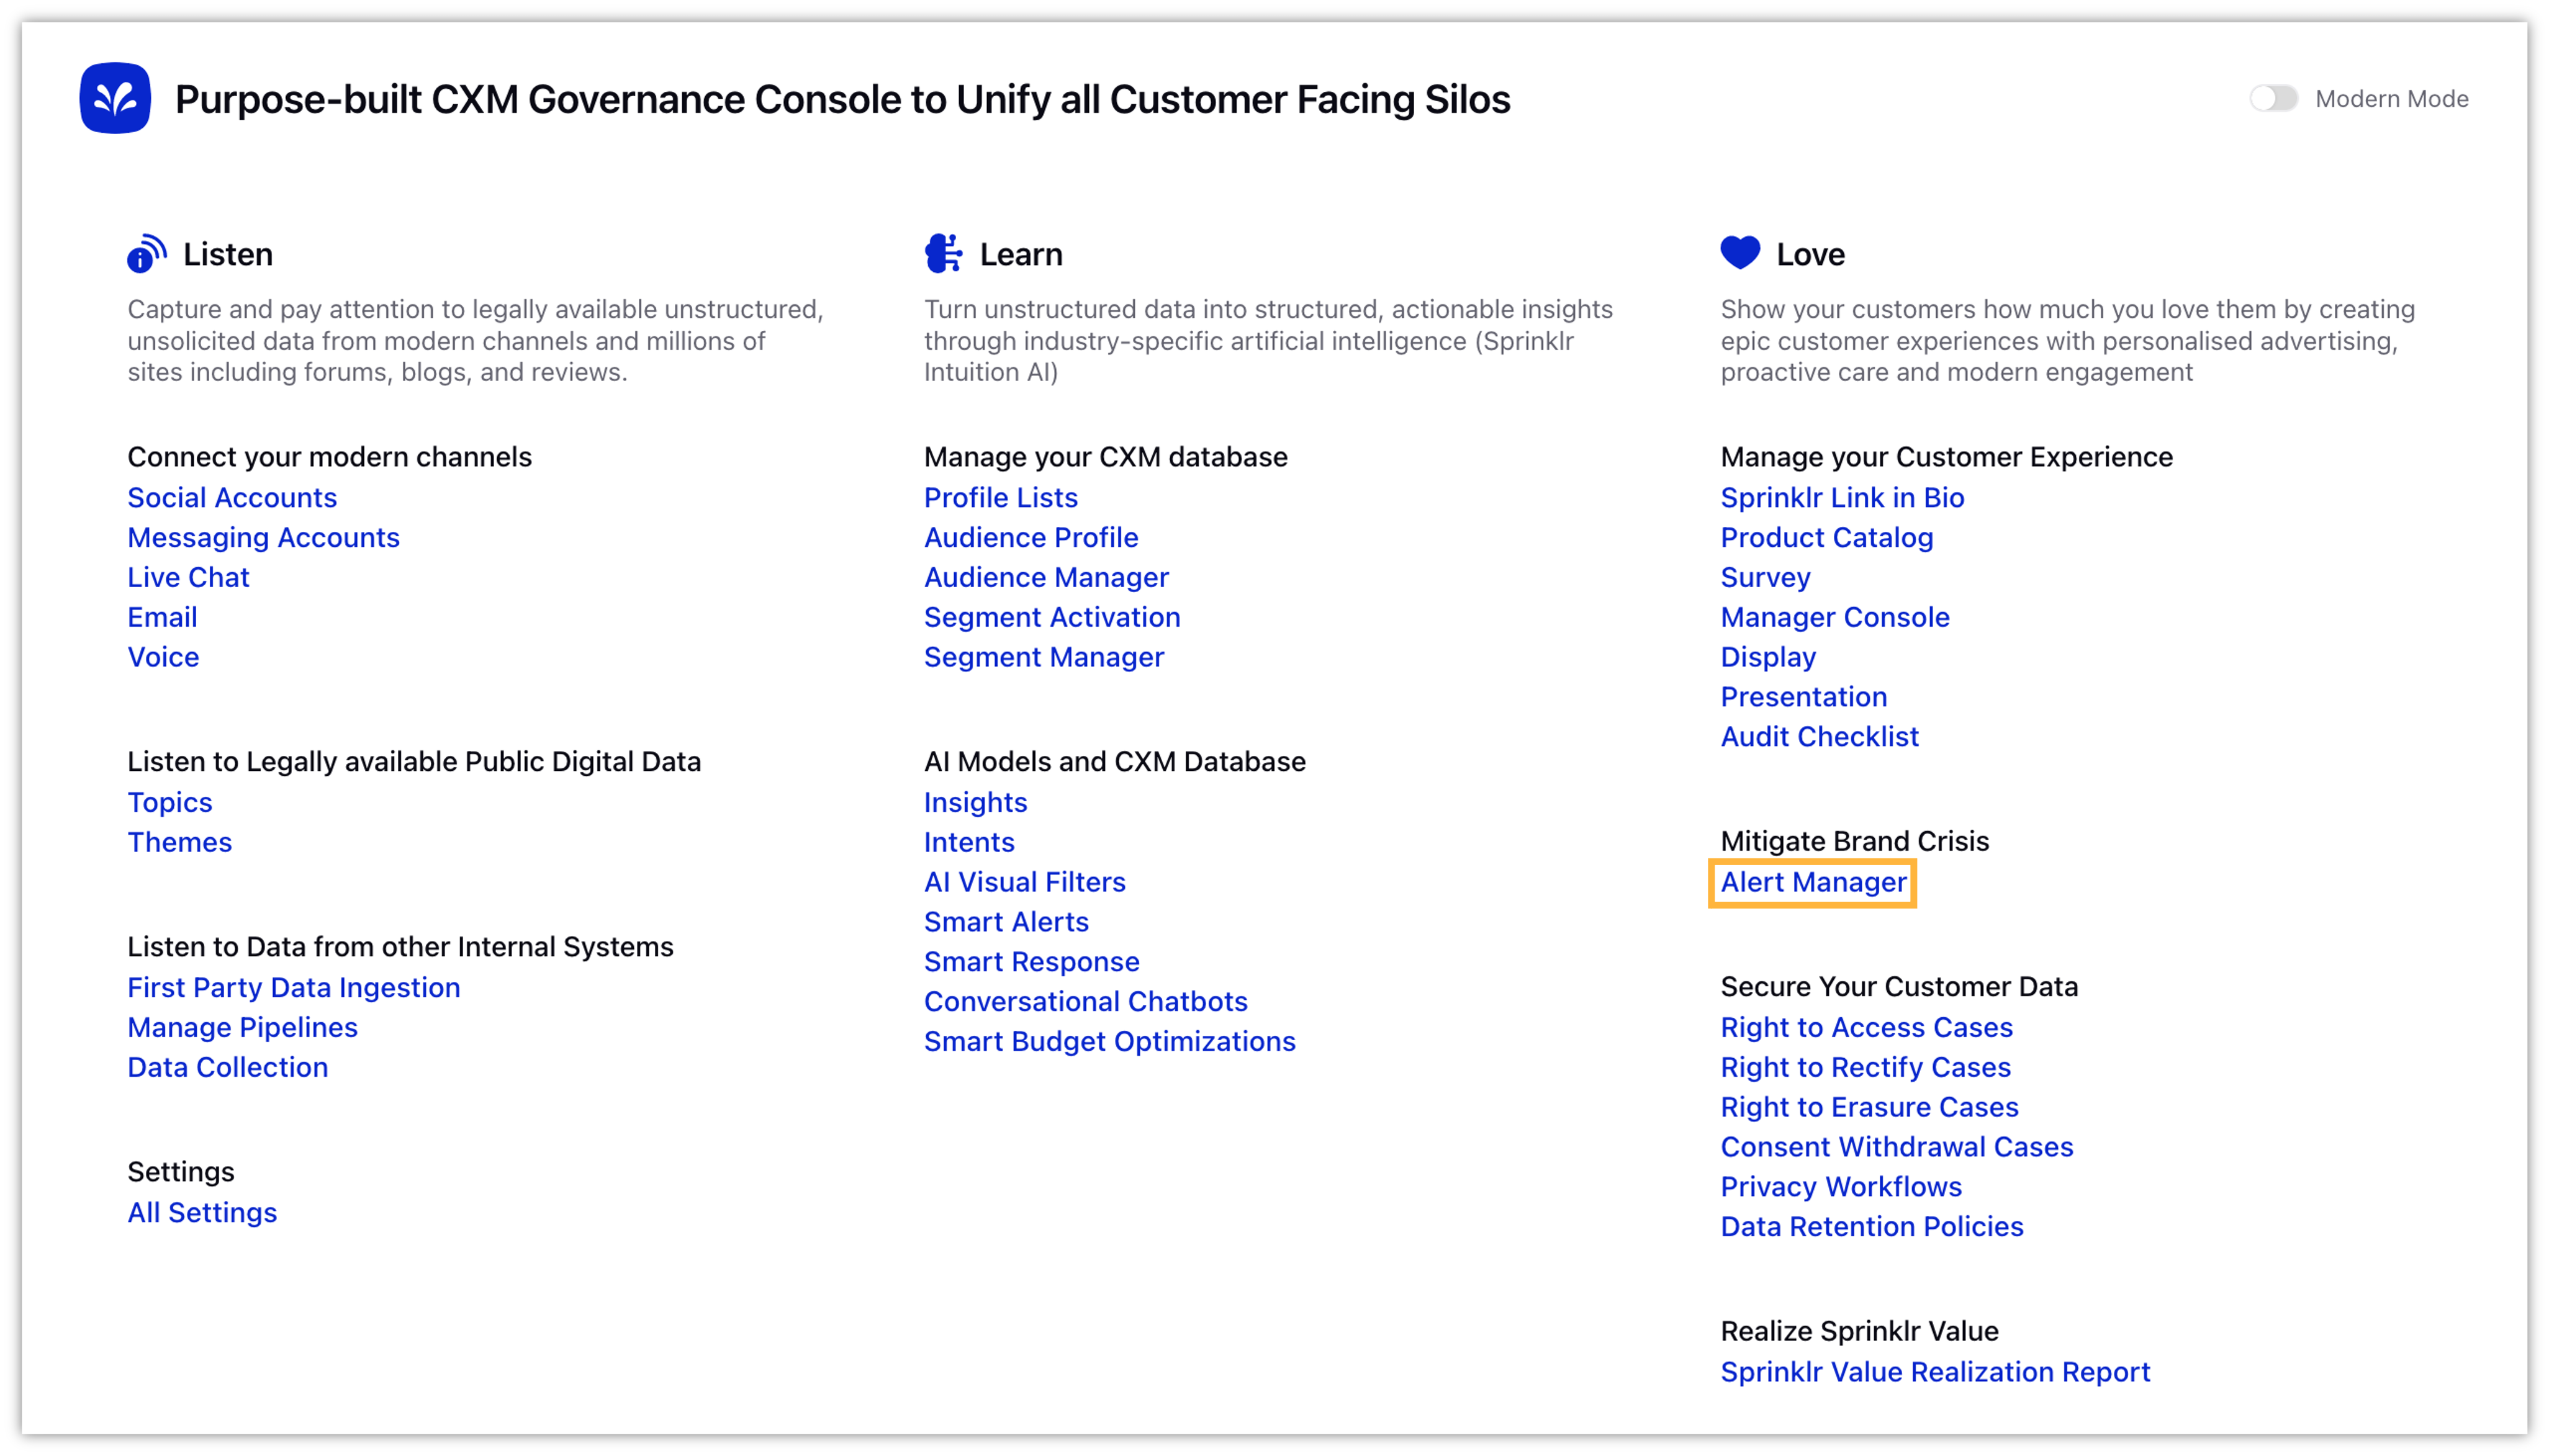
On the Alert Manager window, click New Alert in the top-right corner.

On the Alert Configuration window, you can create smart alerts on the various entities by filling out the form. For more information, see New Alert — Fields & Description.
 Note: Previously, alert configurations were restricted to a fixed template, limiting you from tailoring notifications based on their specific needs (e.g., adding custom headers, footers, or contextual details). This meant all alerts followed a standard format with no ability to personalize structure or content.
Now, you can customize alert notifications while creating or editing an alert on any dashboard widget. Within the Alert Distribution Details section, a new “Customize Mailing Details” option is available, allowing you to customize the alert message structure.
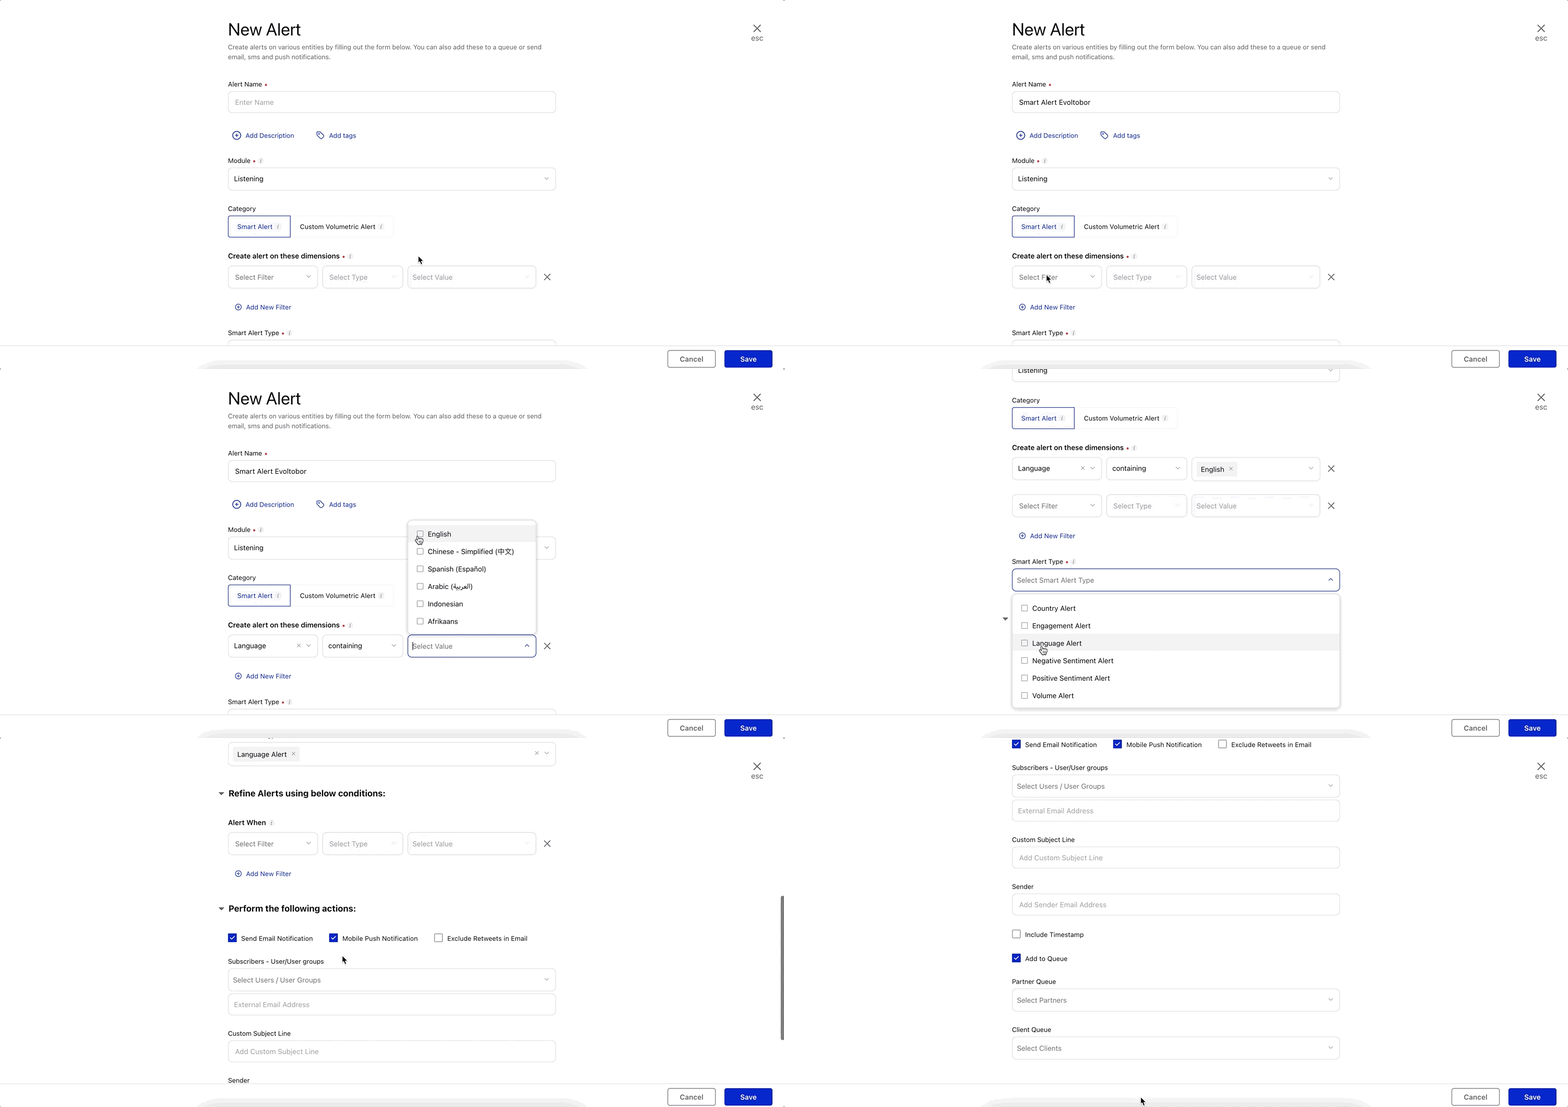
Click Save in the bottom-right corner to save the smart alert.
To edit an alert from Alert Manager
Click the New Tab icon
. Under Governance Console, click Alert Manager within Platform Setup.
On the Alert Manager window, click the Options icon
and select Edit.
On the Alert Configuration window, make the changes to your alert as per your requirement.
To delete an alert from Alert Manager
Click the New Tab icon
. Under the Governance Console, click Alert Manager within Platform Setup.
On the Alert Manager window, click the Options icon
and select Delete.
To clone an alert from Alert Manager
Click the New Tab icon
. Under the Governance Console, click Alert Manager within Platform Setup.
On the Alert Manager window, click the Options icon
and select Clone.
To audit alerts from Alert Manager
Click the New Tab icon
. Under the Governance Console, click Alert Manager within Platform Setup.
On the Alert Manager window, click the Options icon
and select Audit.
Note
The Audit Alert feature helps admins analyze the changes made in individual alerts like removal of the user from subscription, changes in dimension/post filter configuration, etc. This also helps in maintaining and updating the alerts as per organizational changes.
New Alert — Fields & Description
Term | Description |
Alert Name | Enter a name for the Alert you are creating. |
Add Description | Enter the description (optional) for the Alert you are creating. Note: Alerts now leverage the optional description provided during alert creation to enrich the notification content. When a description is available, it is included in the triggered alert message to clearly explain the intent or context behind the alert. This helps you quickly understand not just that an alert fired, but why it fired. In cases where no description is provided, the system will intelligently generate contextual information using the configured filters and metric conditions to ensure the alert remains meaningful and interpretable. |
Add Tags | Select the tags (optional) for the Alert you are creating. |
Module | Select the Module you want to create an alert for, i.e. Listening, Benchmarking, Location Insights, or Product Insights. |
Category | Select the alert category: Smart Alert, to create a smart alert |
Alert On | Select a condition for your alert by selecting/entering the values in the following fields: |
Add New Filter | Click this option to add more conditions. You can add up to four conditions, whereas selecting at least one condition is mandatory. |
Customize Mailing Details | You can customize alert notifications while creating or editing an alert on any dashboard widget. Within the Alert Distribution Details section, a new “Customize Mailing Details” option is available, allowing you to customize the alert message structure. |
Use this DP to enable timezone: LST_ALERT_EMAIL_TIMEZONE