How to use Callback Manager?
Updated
The Callback Manager screen in the Supervisor Console enables supervisors to monitor and manage the callbacks scheduled by agents. Supervisors can view the callback details, including case number, campaign name, agent's name, and callback status. They can also take actions on the callbacks, such as cancelling or rescheduling callbacks.
Access Callback Manager
To access Callback Manager, follow these steps:
1. Open the Supervisor Console persona app from the launchpad.
2. In the left pane, click Callbacks.
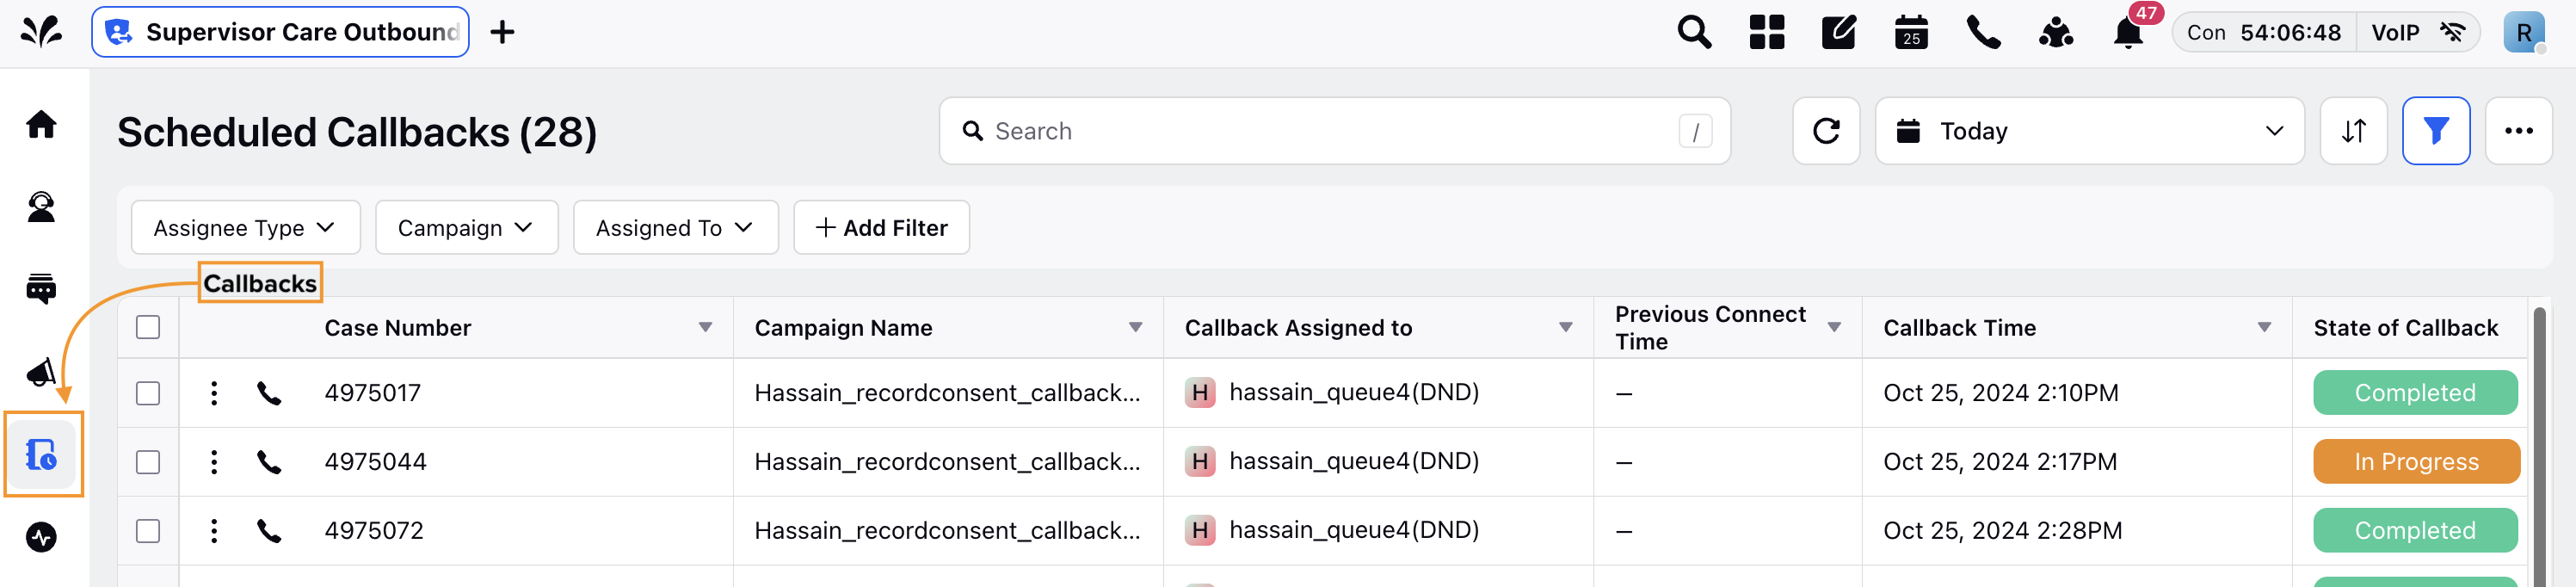
Components of Callback Manager
The default dashboard that the supervisor can view has the following components:
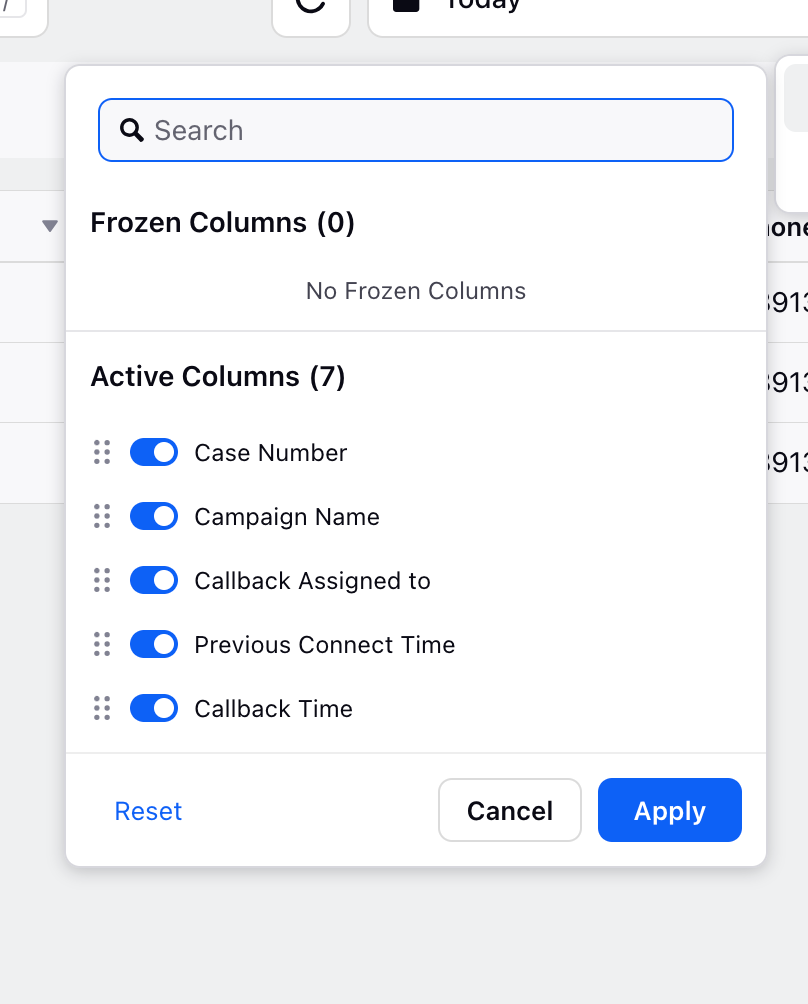
Column | Description |
Case Number | The supervisor can see the case number on which the callback is scheduled. |
Campaign Name | It specifies the campaign name under which a call was first made to the customer. |
CallBack Assigned To | This shows to whom the callback is assigned. The callback can be assigned to the agent or to the work queue. Based on the selection, the agent name or the queue name will be displayed. |
Previous Connect Time | This will show when the call was connected the last time. The date and the time, both are shown in this column. |
Callback Time | This will show when the callback is scheduled. The date and time both are shown in this column. |
Customer Phone Number | It shows the phone number of a customer on which the callback is scheduled. |
State of Callback | The supervisor can see the state of callbacks such as :
|
Voice Status | It represents the telephony‑level lifecycle of a callback, indicating its current execution or retry stage beyond the high‑level callback state (such as New or In Progress). It provides clear visibility into whether a callback is completed, pending retry, or awaiting action, helping eliminate confusion caused by mismatched states and ensuring accurate tracking of callback progress, agent actions, and customer contact outcomes. Some of the important Voice statuses are:
|
Agent Experience
As the callback time approaches, logged in agents will receive popup on their screen which displays the information of the assigned call.
Callback Actions
Supervisors can view the details of the case associated with the callbacks. They can also take actions on the scheduled callbacks such as rescheduling, cancelling, or initiating a guided workflow.
Manually Dial a Callback from Callback Manager
Agents can manually initiate a callback from Callback Manager using the Dial icon via a "Manual Task" type of dialer. If the callback task contains a customer-provided callback number, the dialer automatically selects that number by default. This helps agents call the number requested by the customer without manually verifying or selecting a phone number.
Working of Callback Number Selection
When agents manually dial a callback, the system uses the callback number captured during callback creation, within the scheduled callback node, as the default selected number in the dialer. The customer's profile phone numbers remain available in the dropdown and can be selected manually if needed. The callback number does not overwrite any phone numbers stored on the customer profile. If no callback number is available on the task, the dialer selects the customer's profile phone number by default.
Manually Dial a Callback
To manually initiate a callback, follow these steps:
Navigate to Callback Manager.
Locate the callback task you want to call.
Click the Dial icon.
Verify the preselected callback number, if applicable.
Select a different phone number from the dropdown if required.
Click Call to initiate the callback.

 Note: If an agent manually calls a callback that is scheduled for a future time, the system automatically cancels the scheduled callback because the customer has already been contacted.
Reschedule a Callback
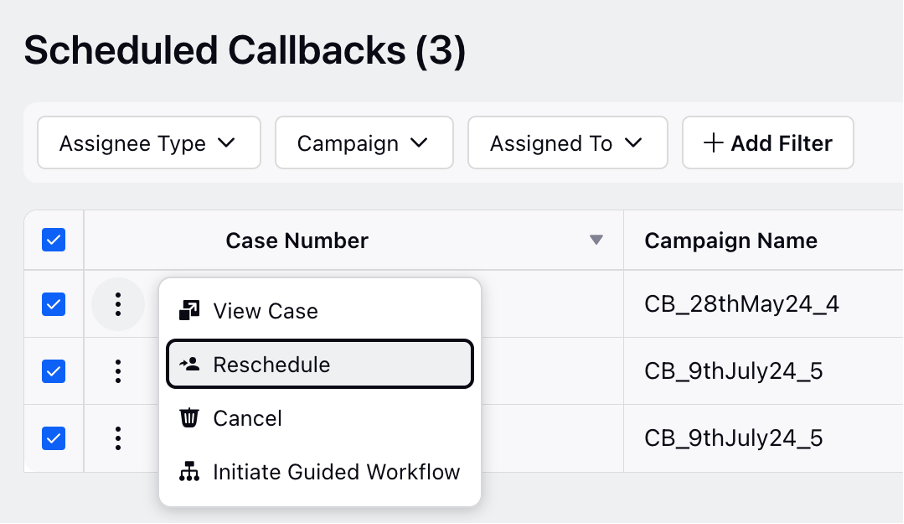
Supervisors can reschedule a call to a different date by selecting the date and time on the calendar. While rescheduling the callback, they can assign the callback to an agent, queue, or to themselves.
To reschedule a callback, follow these steps:
1. In the Scheduled Callbacks screen, locate the callback you want to reschedule.
2. Click the three-dot icon next to the callback.
3. Click Reschedule.
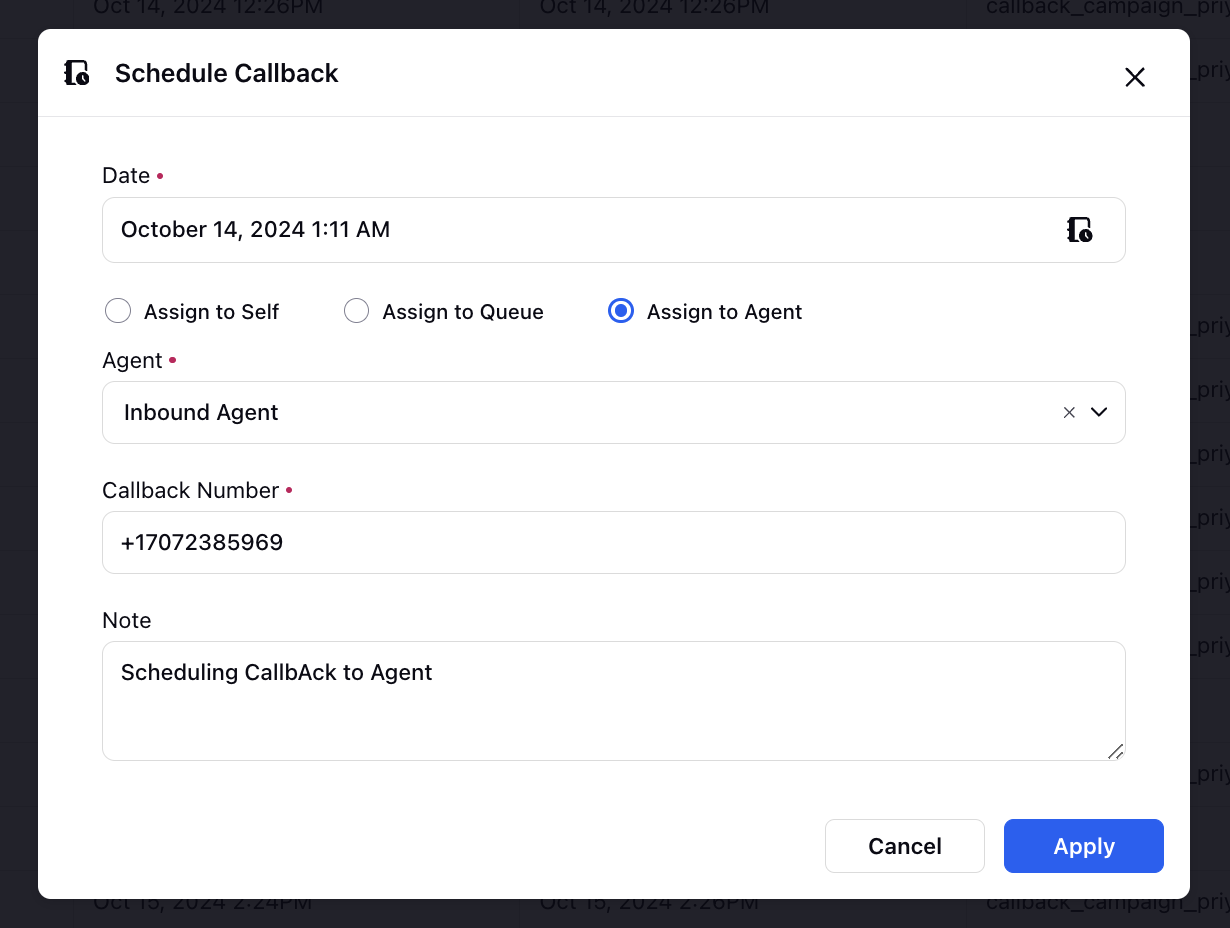
4. On the Schedule Callback screen, select the date and time. Select the assignment option and then select the agent or queue. Enter a note describing the reason for rescheduling the callback. Click Apply.
Cancel One or Multiple Callbacks
Supervisors can cancel callbacks individually or in bulk.
To cancel a individual callback, follow these steps:
1. In the Scheduled Callbacks screen, locate the callback you want to cancel.
2. Click the three-dot icon next to the callback.
3. Click Cancel. A cancel confirmation message is displayed.

4. Click Cancel Callback to confirm. A success message will confirm that the callback has been cancelled.
To cancel callbacks in bulk, follow these steps:
1. On the Scheduled Callbacks screen, select the callbacks you want to cancel.
A pop-menu with the Cancel button is displayed.
 Note: Callbacks can only be cancelled if they are in the New state.
2. On the pop-up menu, click Cancel. A cancel confirmation message is displayed.
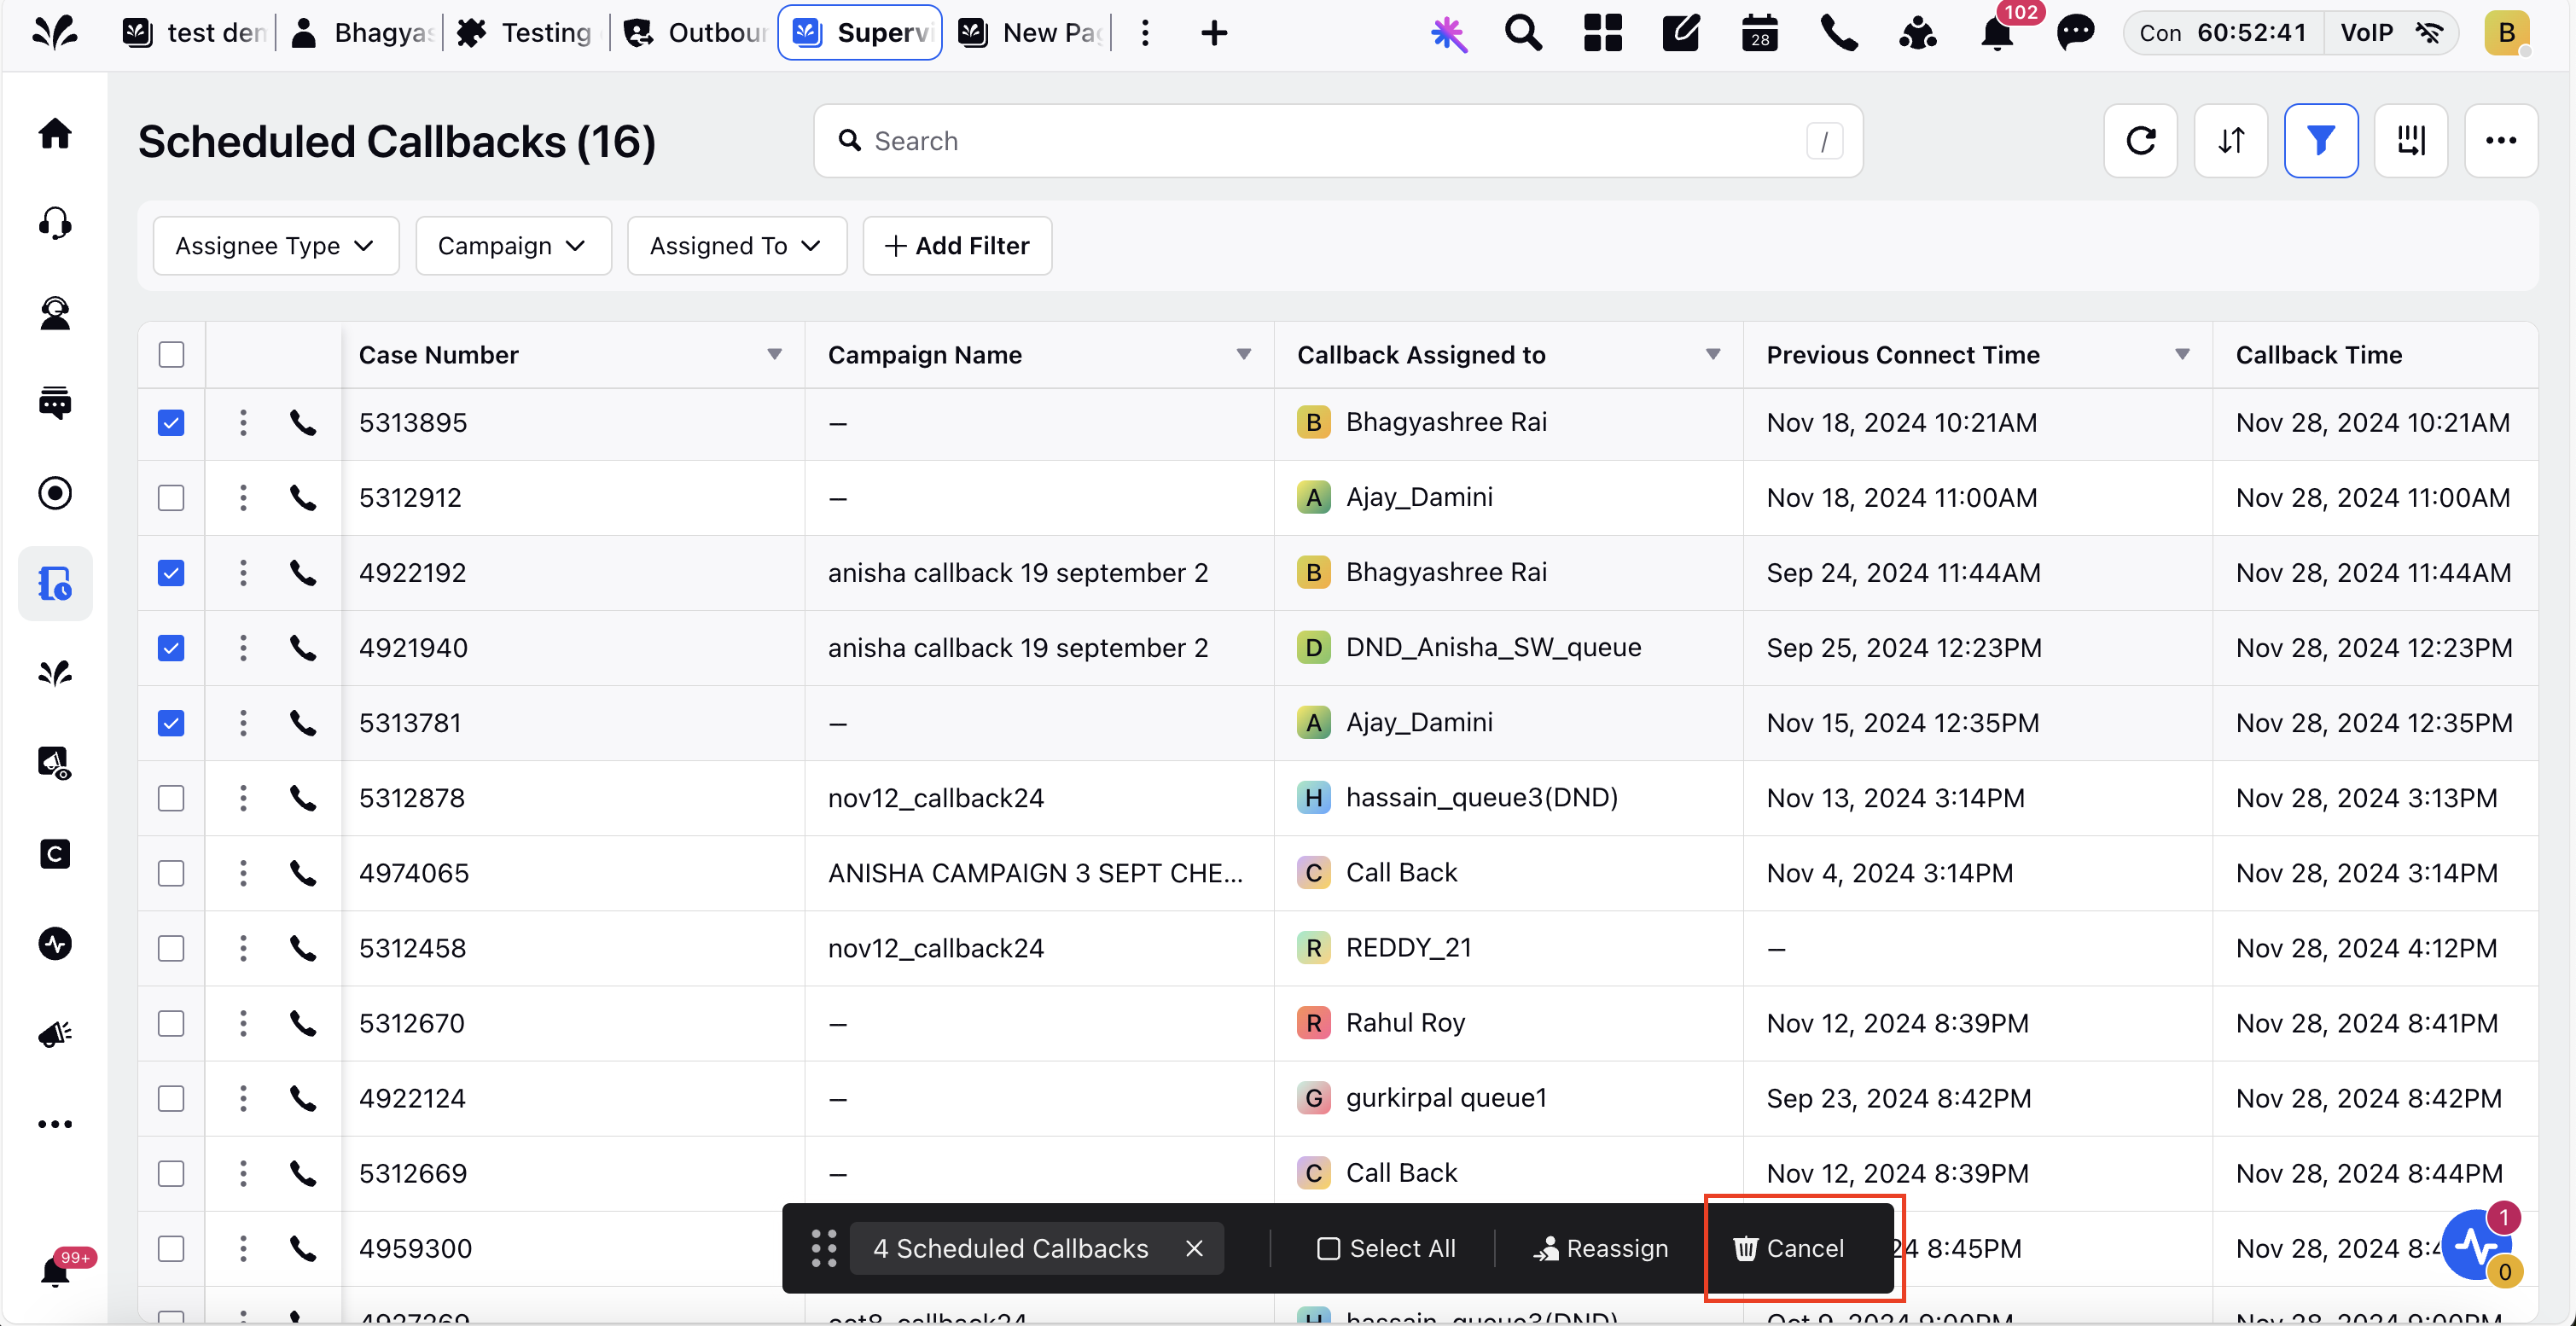
3. Click Cancel Callbacks. A success message will confirm that the callbacks have been cancelled.
Initiate Guided Workflow
Initiate the intended guided workflow for scheduled callbacks, such as sending an SMS with the original and updated time, when the callback is rescheduled to a new time.
Note: To implement a guided workflow, raise a support ticket at tickets@sprinklr.com.