Add Fields to a Disposition Plan
Updated
Disposition fields help agents capture structured information during or after an interaction. These fields ensure consistent data collection for reporting, analytics, and downstream workflows. This article explains how to add and configure fields in a disposition plan.
This article is intended for:
- Contact center administrators
- Contact center supervisors
- Platform administrators configuring After Call Work (ACW)
Prerequisite
Ensure you have:
- Permissions to create or edit Disposition Plans
Access the Disposition Plan
- Click Launchpad
 or New Tab .
 Click Sprinklr Service tab. Under Resolve > Agent Augementation, select After Call Work.

From the left pane, select Dispositon Plan.
Field Types
Following are the field types that you can add to a Disposition Plan:
Date - Captures dates, limited by business hours or specified ranges, with errors shown for out-of-range selections.
Date-Time - Records both date and time, ensuring precise data logging.
Number - Accepts only numerical values. Submission errors occur if non-numeric input is detected.
Picklist - Dropdown selection allowing a single option.
Multi-Picklist - Dropdown allowing multiple selections.
Text Area - Input area for long-form text, with adjustable character limits.
Text Input - Input field for single-line text, without a character limit.
Add a Field to a Disposition Plan
Follow these steps to add a new field:
- On the disposition plan where you want to add a field, click the three dots and then select Edit Fields.
- Drag and drop the field type (for example, text, dropdown, checkbox, or number) from the list of Field types available on the right pane.
Configure the basic field properties:
Label - The label visible to agents. Field name as it appears on the disposition plan (required).
Mark Field as Mandatory - Ensures agents cannot submit ACW without completing this field.
Default Value - Pre-populates the field with a specified value or resource, aiding in faster data entry.
- Configure any additional settings based on the selected field type. For more information, refer to .
- Save the disposition plan.
The field is now available to agents during After Call Work.
Whenever a field is added by dragging and dropping, the user is directed to an interface, which is valid for all field types except for Picklist and Multi Picklist (more information about the differences is highlighted in subsequent sections).
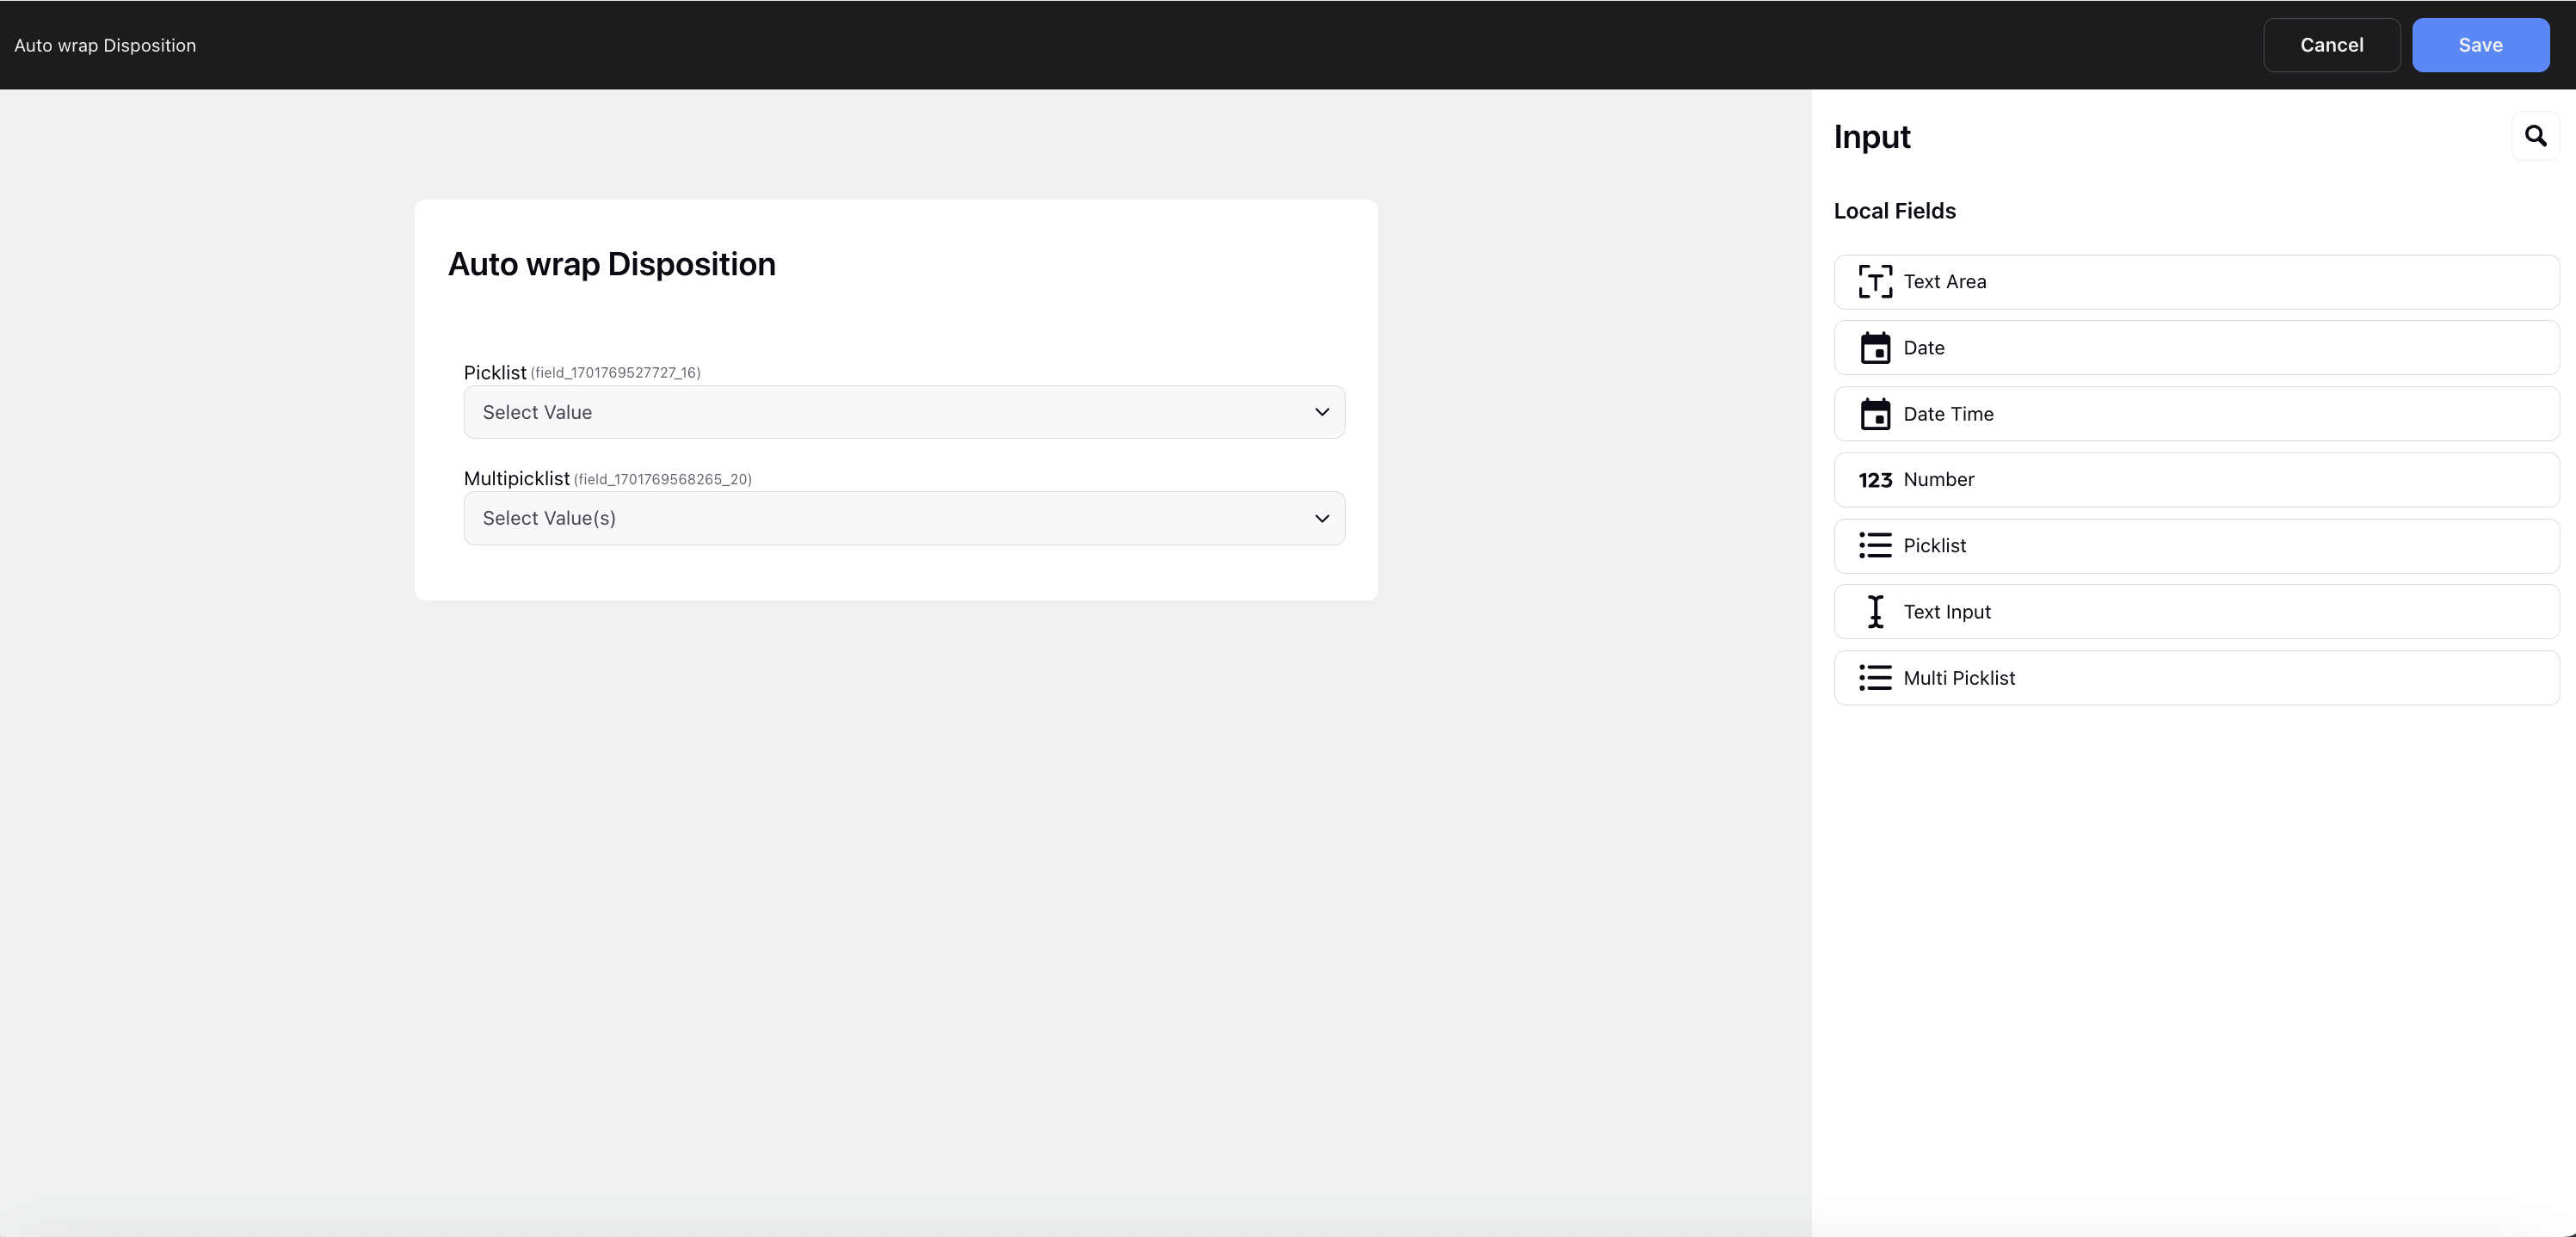
Field Types
The following are the key field components:
Type: Type is a mandatory field that determines the kind of input an agent can provide. The field type depends on the use case. The following field types are available:
Date: Captures a date value. Agents can select only dates within the range defined by the Date and Time Conditions. Dates outside configured business hours are disabled. If an agent manually enters a date outside the allowed range, the system displays an error message.
Date Time: Captures both date and time values. Agents can select only date and time combinations within the range defined by the Date and Time Conditions. Options outside configured business hours are disabled. Manual entries outside the allowed range trigger an error message.
Number: Captures numeric values only. If an agent attempts to submit After Call Work (ACW) with non‑numeric input, the system displays an error.
Picklist: Displays a dropdown list that allows the agent to select one option.
Multi Picklist: Displays a dropdown list that allows the agent to select multiple options.
Text area: Captures free‑form text. You can define the maximum number of characters an agent can enter.
Text Input: Captures free‑form text without a configurable character limit.
Multi Picklist: Picklists are drop-downs in which the agent can select multiple options.
Label: Label is a mandatory field used to define the display name of the field. This label is visible to agents while completing After Call Work.
AI Prefill Instructions (Required for AI Prefill) - AI Prefill Instructions describe what information a field captures and how the AI should populate it. These instructions help the model understand the business context and expectations for the field beyond technical constraints such as data type or character limits.
 Note: When you turn on Enable AI Prefill for an After Call Work (ACW) Disposition Plan, each input field will include AI Prefill Instructions.
 Access to the AI Prefill Instructions is controlled by the dynamic property AI_PREFILL_REVAMP_ENABLED. To enable this feature in your environment, contact your Success Manager. Alternatively, you can submit a request at tickets@sprinklr.com.
Use AI Fill Instructions to explain:
- The purpose of the field
- How the field is used downstream (for example, reporting or routing)
- Any business rules or context not enforced through configuration
- Example: Summarize the customer’s main issue discussed during the call in one or two sentences. Do not include internal notes or agent opinions.
- The AI Autofill Examples fields are available for Picklist and Radio Groups fields so that the user can manually define the options to improve AI accuracy.
Mark Field as Mandatory: When enabled, agents must provide a value for the field before submitting After Call Work.
Visibility Conditions: Visibility Conditions control when a field appears in After Call Work. These conditions consist of nested AND and OR logic that determines field visibility.
Disposition and Sub-Disposition
Values of previously created fields - These conditions help control which fields appear in the ACW based on specific criteria, ensuring a streamlined experience for agents.
Option Source (Picklist and Multi Picklist only): For Picklist and Multi Picklist field types, you must define an Option Source to determine how dropdown values are populated.The following option sources are available:
Manual: Manually enter the picklist or multi‑picklist options.
By Variable: Provide a variable name and API details to dynamically populate options in After Call Work.
Custom Field: Use an existing custom field as the source for picklist options.
By API: Configure API details to fetch picklist or multi‑picklist options dynamically.
Display in Manage Segment as Selector: For Picklist and Multi Picklist fields, you can enable Display in Manage Segment as Selector. When enabled:
The field appears as a selector in Manage Segment
You can re‑churn segments based on the field’s values
Controlling Fields: For dependent dropdowns, Choose Controlling Fields to specify fields that determine which options display based on previous field selections. This feature is only available for Picklist and Multi-Picklist fields using static sources.
Default Value - Pre-populates the field with a specified value or resource, aiding in faster data entry.
Static Value: Manually enter a default value.
Source Variable: Use a resource variable to dynamically populate the field.
Source Custom Field: Choose a custom field as the default value.