Manage Knowledge Base Articles
Updated
In the Knowledge Base Builder, you can perform a wide range of actions to manage and maintain your articles efficiently. These actions help you keep content organized, up to date, and aligned with your publishing workflows. Whether you need to update an article, reorganize categories, control visibility, or prepare content for release, the builder provides all the tools you need to manage your Knowledge Base from a single, central workspace.
Take Action on Articles
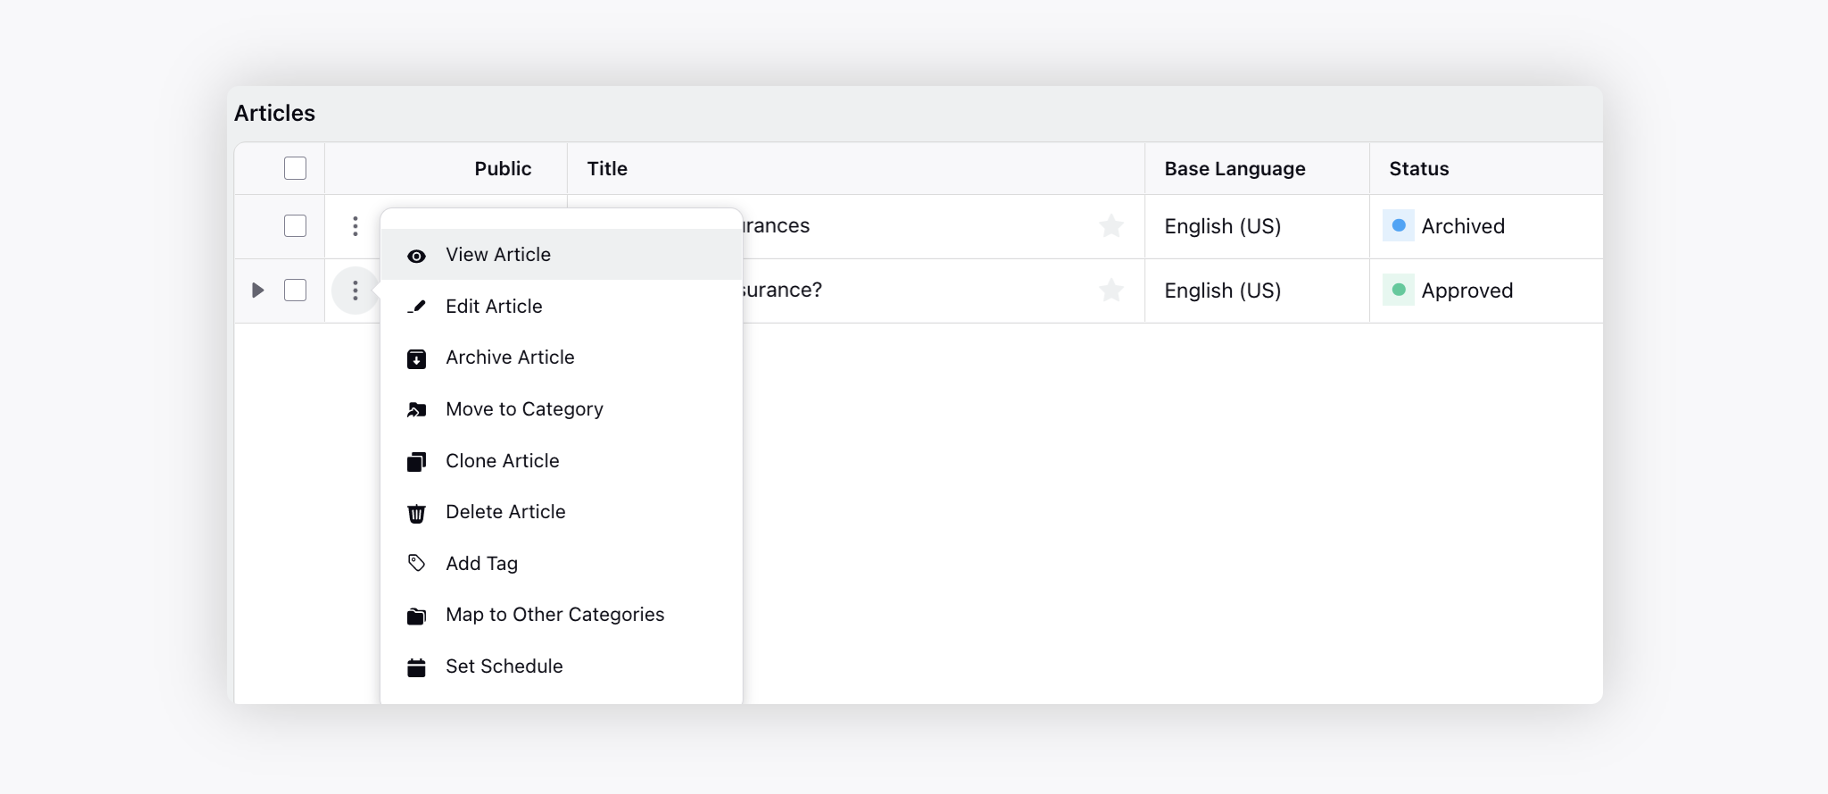
On the Article Manager window, hover over the Options icon alongside the article and select the desired option.
Article Status
Before we delve into the various actions that can be performed on the article, let's first gain a detailed understanding of different article status.
Article Status | Status Definition |
Draft | The article is in the initial stage of creation. It is not yet complete and is not visible to the public/agent. |
Approval | The article has been completed and is awaiting review by editors. It is not yet published. |
Ready to Publish | The article has been reviewed and approved. It is ready to be published but has not yet been made live. |
Approved | The article has passed all necessary reviews and approvals. It is visible to the public/agent. |
Rejected | The article has been reviewed but did not meet the necessary criteria for approval. It will not be published and may require revisions. |
Archive | The article is no longer active or relevant. It has been removed from public view but is stored for record-keeping or future reference. |
Inactive | The article is not currently active or visible to the public. This status can be used for content that may be reactivated in the future. |
View Article
Open the article in the view mode. To get the article opened in a new tab, please work with your Success Manager.
![]() Note: While viewing or editing an article, its current status, such as Draft, Approved, or In Translation, appears at the top of the page.
Note: While viewing or editing an article, its current status, such as Draft, Approved, or In Translation, appears at the top of the page.

Edit Article
Open the article in the edit mode to make the desired changes. To get the article opened in a new tab, please work with your Success Manager.
To prevent simultaneous editing conflicts, the system restricts access to an article when one user is actively editing it. This measure prevents potential data loss and ensures collaboration efficiency by allowing only one user to edit the article at any given time.
Additionally, a predefined duration can be implemented, determining the period after which editing access will be granted again once the user closes or saves the article. To get this capability enabled, please work with your Success Manager.

When an article is open in edit mode, you will be automatically exited from edit mode under the following conditions:
You send the article for approval by clicking the Send for Approval button.
You close the article.
You switch to another Sprinklr tab.
You remain inactive on the article for a specified period.
![]() Note: The functionality of automatically exiting from edit mode is Dynamic Property (DP) controlled. Please contact your Success Manager or submit a request at tickets@sprinklr.com to get it enabled.
Note: The functionality of automatically exiting from edit mode is Dynamic Property (DP) controlled. Please contact your Success Manager or submit a request at tickets@sprinklr.com to get it enabled.
The inactivity duration can be configured through the Dynamic Property after which the system automatically exits Edit Mode. The minimum supported duration is 2 minutes.
Quick Switch Between Edit and View Modes
You can switch between Edit mode and View mode by clicking the toggle at the top of the article editor. If you're in Edit mode, clicking the toggle will take you to View mode, and if you're in View mode, it will switch to Edit mode.

![]() Note: This funtionality is Dynamic Property (DP) controlled. Please contact your Success Manager or submit a request at tickets@sprinklr.com to get it enabled.
Note: This funtionality is Dynamic Property (DP) controlled. Please contact your Success Manager or submit a request at tickets@sprinklr.com to get it enabled.
Share Article
You can share articles by copying the article URL directly from your browser. You can also copy the article link from the article’s Third Pane. Ensure that the article is shared with the recipient so they can access it.

If you access an article through a Persona App and share its URL with someone who does not have access to that Persona App, the recipient can still open the article by selecting the button on the Access Denied page, provided they have permission to the underlying article.

If the shared link points to a Third Pane resource, the overlay view is displayed even if access to the Persona App is restricted.
![]() Note: The mode in which you open the article is preserved when sharing:
Note: The mode in which you open the article is preserved when sharing:
If you share the article while it is open in Edit mode, the recipient opens it in Edit mode.
If you share the article while it is open in View mode, the recipient opens it in View mode.
Create Anchor URLs
While editing an article, you can copy anchor URLs for various components, such as headings (H1, H2), collapsible sections, and tabs. These URLs allow you to create hyperlinks that navigate directly to specific sections within the same article or to other articles, without scrolling.
![]() Note: This functionality is not supported in Safari or Mozilla Firefox due to browser limitations.
Note: This functionality is not supported in Safari or Mozilla Firefox due to browser limitations.
Follow these steps to copy the anchor URL for each component:

Heading: To copy the anchor URL of a heading, hover over it and click the Copy Link button that appears next to it. A toast notification will confirm that the link has been copied successfully.
.png")
Collapsible Section: To copy the anchor URL of a collapsible section, hover over the section and click Copy link to section from the toolbar. For headings inside a collapsible section, expand the section first, then click the Copy Link button next to the relevant heading.
.png "Copy Anchor URL (Tabs).png")
Tab: To copy the anchor URL of a specific tab, select the tab, click the dropdown icon, and then choose Copy Link.

After copying the anchor URL to your clipboard, select any word or phrase in the article (in Edit mode) to open a dialog box where you can paste the URL. Press Enter after pasting to create the hyperlink. If you want the link to open in a new browser tab, select the Open URL in same window checkbox.
Hyperlinkings executed using this dialog box will appear in the Embedded Content and Referenced In sections of the relevant article's Third Pane.
Archive Article
Archive the article. On archiving, the public toggle will be turned off automatically and all the translations will get private, too. Select Restore Article to restore the article and translations in a draft state. Additionally, you have the option to handle specific translations separately without affecting the base article.
The archived articles will not appear in the search results of Smart Assist, Live Chat KB Widget, and Community.
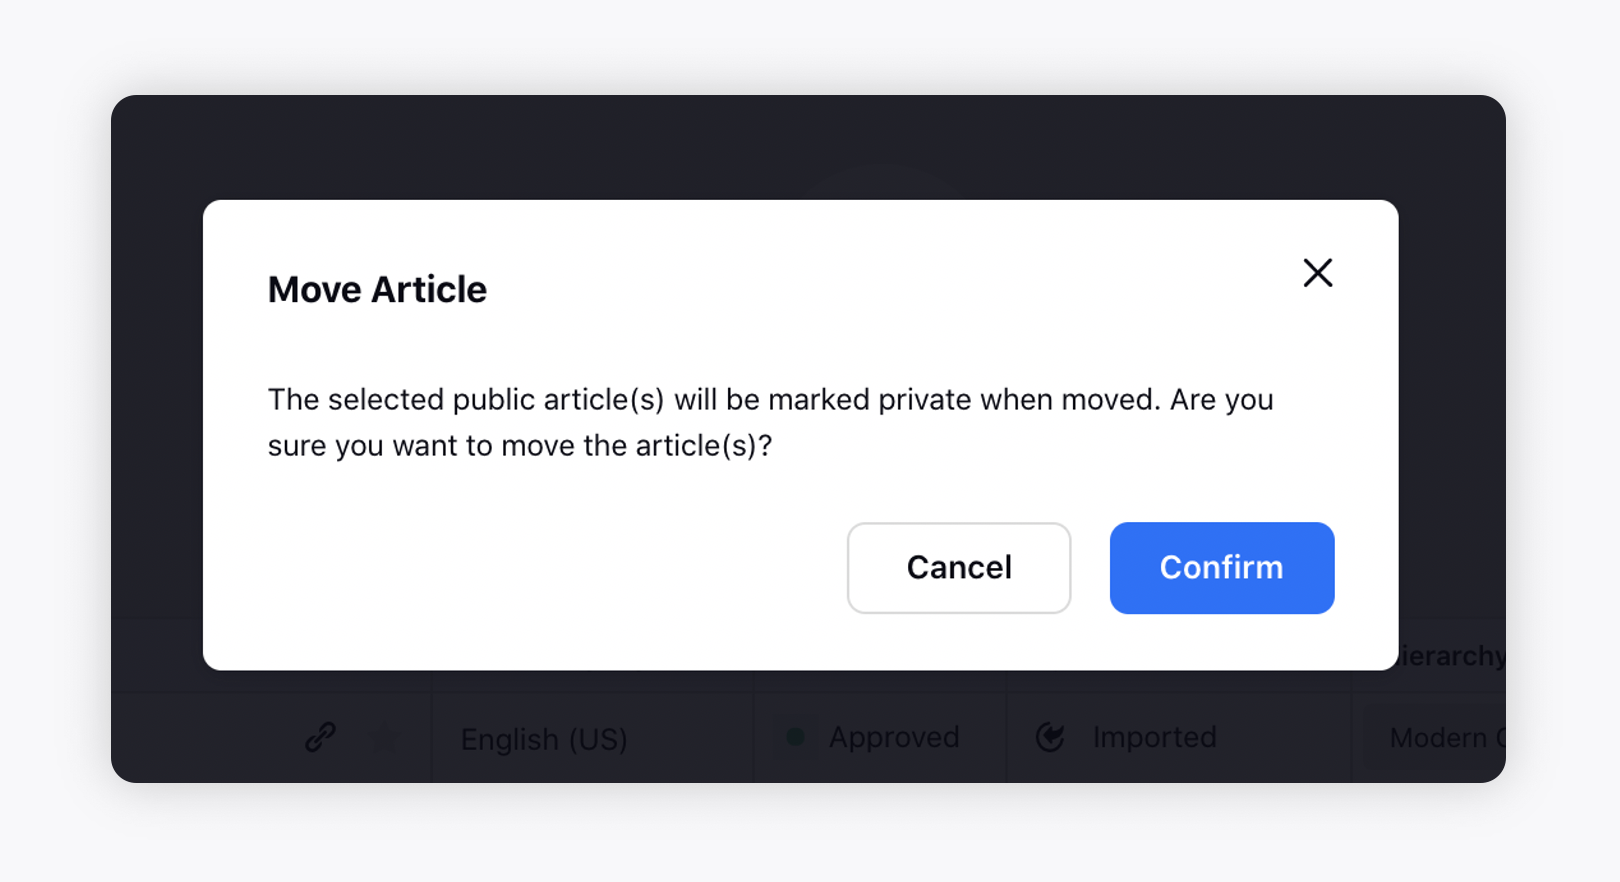
Move to Category
Move the article to any other category/sub-category. Moving the article to any private category will mark the article private. Note that language variants cannot be moved separately.
Clone Article
Make a copy of the article. Cloning a base article will result in the cloning of all its translations, while maintaining the same relationship. For partners with country variant enabled, the clone form will display the original article’s language settings, country, base language, and selected translations.
Unchanged Cloning: If a user clones an article without making any changes to the language settings or translations, all translations will be cloned, regardless of their translation status.
Selective Cloning: If a user adjusts the language settings or country during the cloning process, only the translations applicable to the selected country group will be cloned.
This enhancement simplifies the process of managing multi-language articles and ensures consistency across different language versions.
Delete Article
Delete the article. Deleting the base article will also delete all the translated articles.
Add Tag
To add/remove tags or modify existing tag label. Select the tags from the modal and click on Submit.
Map to Other Categories
Map the given article to multiple categories other than its parent category. Doing this will make the article appear wherever the category is being used, such as Community, Live Chat, or Smart Assist. You can access articles mapped to multiple Knowledge Base categories even if you lack access to the parent category, provided you have access to the mapped category.

![]() Note: Once you map an article to multiple categories, you need to mark the article Private and then Public again to make it appear in all the new categories.
Note: Once you map an article to multiple categories, you need to mark the article Private and then Public again to make it appear in all the new categories.
![]() Note: The language variants cannot be mapped to other categories separately.
Note: The language variants cannot be mapped to other categories separately.
Set Schedule
You can schedule publishing and unpublishing of an article in a draft (public/private) or approved (private) state at the specified date, time & timezone. For more information, click here.
Set Archive Date
The Set Archive Date option allows you to automatically change the status of articles and Content Blocks to Archived on the selected date. This helps you reduce manual follow‑ups, keep content fresh, and make it easier to distinguish between unpublished drafts and archived items.
![]() Prerequisites: View and Approve / Reject / Hold permissions under the Knowledge Base section of the Service Cloud module.
Prerequisites: View and Approve / Reject / Hold permissions under the Knowledge Base section of the Service Cloud module.
Follow these steps to configure automatic archiving of articles and Content Blocks:
Navigate to the Knowledge Base homepage or the relevant Knowledge Base Category in which the article or Content Block is stored.

Click the More Actions (⋮) button corresponding to the relevant article or Content Block.
Select Set Archive Date from the list of options.
Fill in the required fields in the Set Archive Schedule dialog box. Fields marked with a red star are mandatory. Below are the descriptions of the fields in this dialog box:

Name: Displays the title of the article you are scheduling for archiving. This field is read‑only, so you can confirm you are updating the correct article.
Language: Shows the language of the article. This field is read‑only and helps you verify the correct language version before scheduling the archive.
Timezone: Select the timezone you want the archive schedule to follow. The article will be archived based on the date and time you set in this timezone. (Required)
Archive Date and Time: Enter the exact date and time when the article should be archived. The system will automatically archive the article at this scheduled time. (Required)
Click the Schedule button.
This applies the archive schedule and the article will be archived automatically at the specified date and time.
![]() Note: If the article is public, it will be unpublished when it is auto‑archived.
Note: If the article is public, it will be unpublished when it is auto‑archived.
![]() Note: If an article is scheduled to be auto‑published after its auto‑archive date, the article will not be published because auto‑archiving takes precedence. Auto‑publishing will occur only if the article’s status changes to Ready to Publish or Approved. This behavior applies to both UI‑based and API‑based auto‑publishing configurations.
Note: If an article is scheduled to be auto‑published after its auto‑archive date, the article will not be published because auto‑archiving takes precedence. Auto‑publishing will occur only if the article’s status changes to Ready to Publish or Approved. This behavior applies to both UI‑based and API‑based auto‑publishing configurations.
Editing an Archive Schedule
After you set an auto‑archive date, you can update the schedule, whether you need the article to be archived earlier, later, or you want to remove the archive schedule entirely.

To edit the schedule, open the article in the Knowledge Base Builder and select Edit Archive Date from the options under the More Actions menu. This opens the Edit Archive Schedule window, where you can update the Timezone and Archive Date and Time fields as needed.
![]() Note: The Edit Archive Date is available only when an archive schedule is already configured for the selected article or Content Block.
Note: The Edit Archive Date is available only when an archive schedule is already configured for the selected article or Content Block.

When you submit your changes, the system updates the schedule and archives the article based on the new settings.
![]() Note: To remove the configured archive schedule, select Clear Auto Archive and Submit.
Note: To remove the configured archive schedule, select Clear Auto Archive and Submit.
Public/Private Toggle
You can also mark the article as public/private by sliding the toggle icon. An article can be marked public only if it is approved and its parent category is mapped to a community. Once marked public, click the Community icon alongside the article to view it on the mapped communities.
![]() Note: When you enable or disable the toggle, a confirmation box will appear to confirm your action.
Note: When you enable or disable the toggle, a confirmation box will appear to confirm your action.

For those utilizing the API to manage their own help center, the option to publish articles immediately upon approval is available, eliminating the need to map the knowledge base category to a community category.
![]() Note: Authors will receive a platform notification when their article is published, whether through single publishing, bulk publishing, or scheduled publishing. An author is the user who originally created the article, and each article can have only one author.
Note: Authors will receive a platform notification when their article is published, whether through single publishing, bulk publishing, or scheduled publishing. An author is the user who originally created the article, and each article can have only one author.

Enablement note: To learn more about getting this capability enabled, please work with your Success Manager. |
Bulk Actions
Bulk actions help you manage multiple Knowledge Base articles quickly and consistently. Instead of updating each article one by one, you can apply common changes, such as reorganizing categories, scheduling publication, updating authors, or applying tags, to many articles at once. This saves time, reduces manual work, and ensures that your content stays organized, accurate, and aligned with your publishing workflows.
Follow these steps to take action for multiple articles:
Navigate to the Knowledge Base homepage or the relevant Knowledge Base Category in which the articles are stored.

Select the articles you want to update by checking the box beside each article. To select all articles at once, use the checkbox at the top. Once selected, a toolbar will appear.
Select the option you want from the toolbar. The following sections describe each available bulk action.
Add Tags
Apply one or more tags to all selected articles to improve searchability and keep your content organized. Tags help authors find relevant content more easily.

Move to Category
Move multiple articles into a different Knowledge Base Category at the same time. Use this action to reorganize content or align articles with updated category structures.

Set Schedule
Schedule the selected articles to be published or unpublished at a specific time. This helps you plan content updates in advance and automate release cycles.

Delete Article
Remove multiple articles at once. Use this action when you need to retire outdated or redundant content. This action cannot be undone.

Update Author
Assign a new author to all selected articles. This is useful when ownership changes or when content needs to be attributed to the correct subject‑matter expert.

Map/Unmap Article to Other Categories
Add or remove category associations for multiple articles. This gives you flexibility in how articles appear across different sections of your Knowledge Base.

Archive Article
Move articles into an archived state, removing them from active use but keeping them available for reference or compliance.

Set Archive Date
Schedule when selected articles should be automatically archived. Use this to manage time‑sensitive or seasonal content.

Approve
Approve multiple articles in a single action as part of your Knowledge Base review workflow. This is helpful when you manage a large volume of content requiring final validation.

Apply Custom Field
Apply or update custom field values across selected articles. Use this to add structured metadata, support reporting needs, or apply workflow‑specific labels.

Translate
Bulk translation helps you quickly create multilingual versions of multiple Knowledge Base articles at once. Instead of translating each article individually, you can use the bulk translation tools to generate translated copies in the languages you need.
![]()
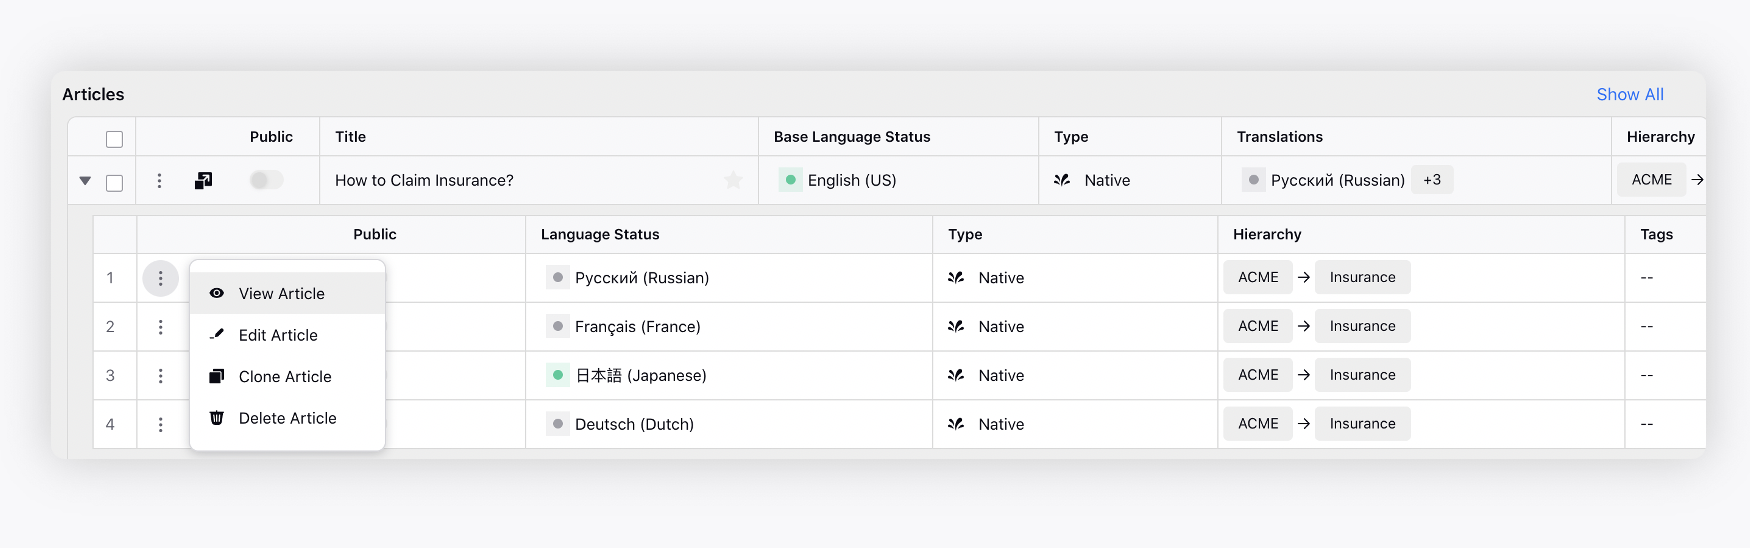
View Article Translations
Check Translation column to view available translations of an article. Click the Caret Right icon to expand the list of translations.
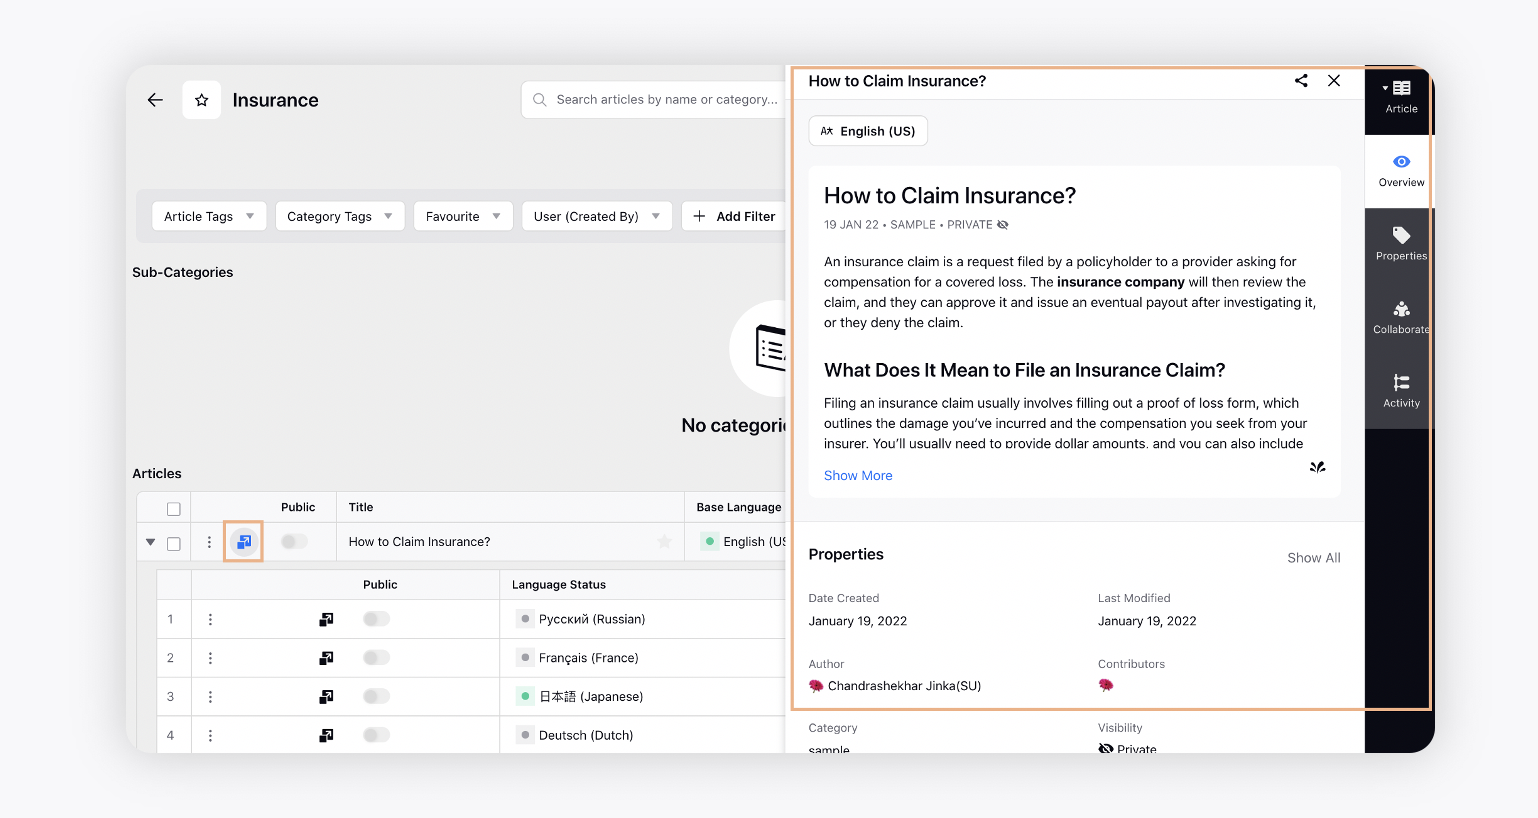
Third Pane View
You can check article overview, properties, collaborate, view audit trail and more in article third pane.