Send Case Details from Sprinklr to Salesforce
Updated
This guide provides step-by-step instructions on how to manually send case details from Sprinklr to Salesforce. By following these steps, users can ensure seamless case transfer for further handling in Salesforce.
Prerequisites
You must have the necessary permissions to access the Care Console in Sprinklr.
Ensure that the Salesforce integration is properly configured in Sprinklr.
The case you wish to send should be available in the Care Console.
You must have necessary Role level permissions required to access Salesforce integration.
You must have access to the Salesforce application to which the case is sent.
Steps to Send Case Details to Salesforce
Follow these steps to send case details to Salesforce:

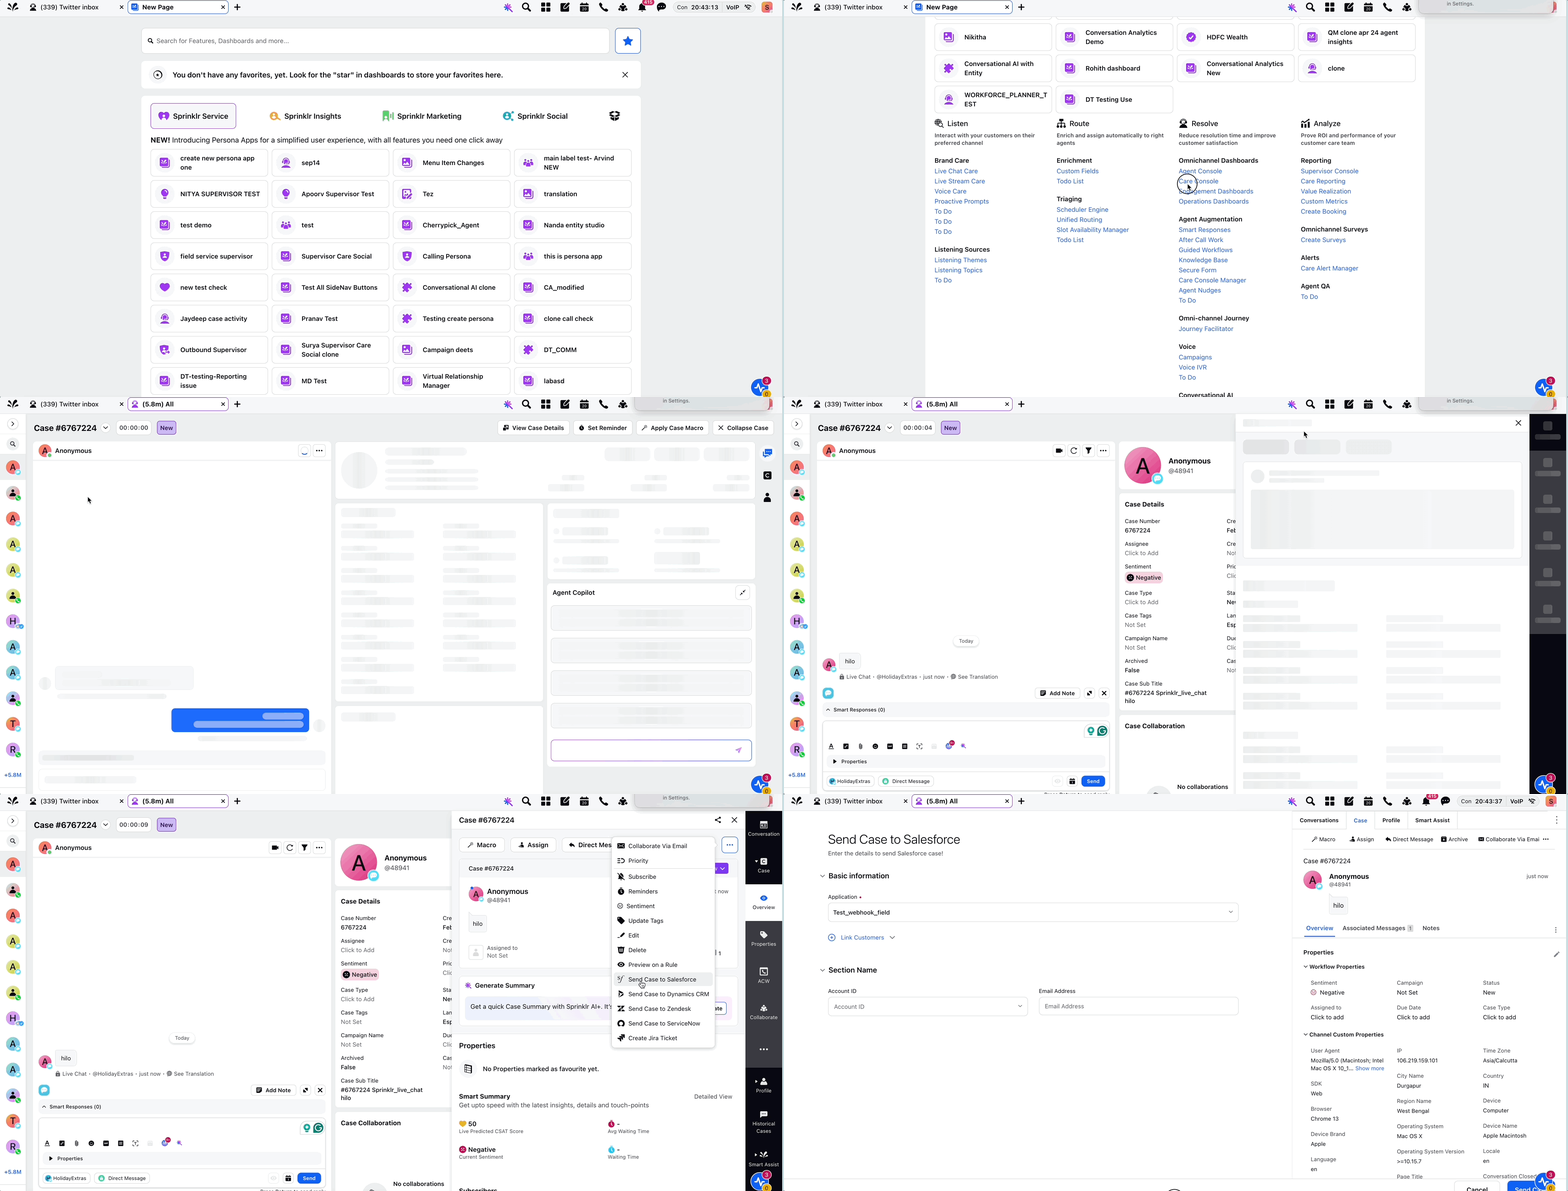
Step 1: Open Care Console
Log in to your Sprinklr account.
Open Care Console from Sprinklr Launchpad.
Step 2: Select the Case
Locate and select the Case that you want to send to Salesforce.
Click on the View Case Details button located at the top-right corner.
A third pane displaying detailed case information will open.
Step 3: Send the Case to Salesforce
Click the ellipsis button (three dots) in the top-right corner.
From the dropdown menu, select Send Case to Salesforce.
Step 4: Enter Case Details
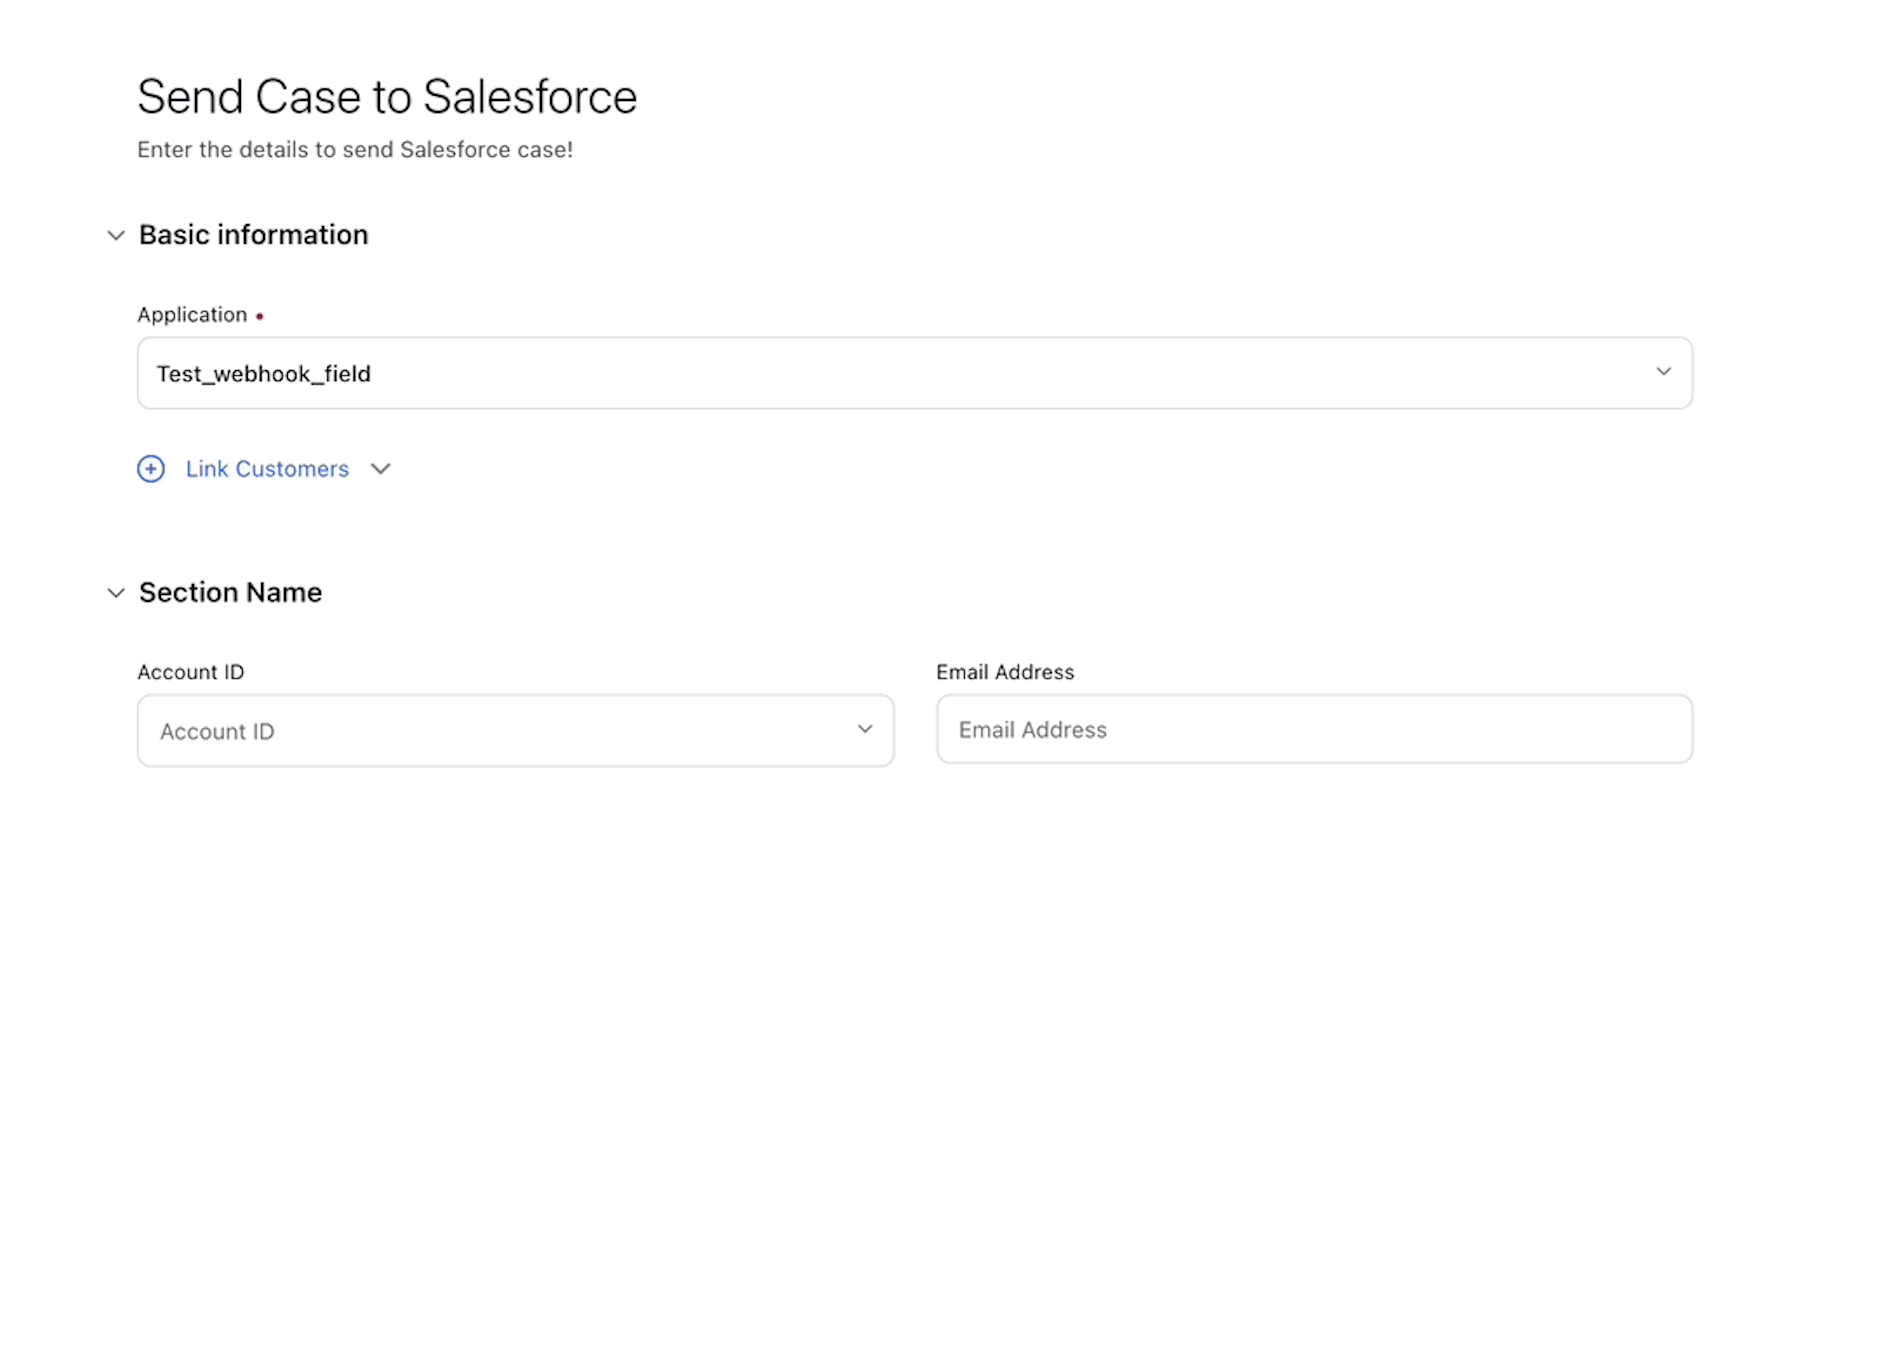
A new window will open where you can enter the required case details before sending.
Fill in the necessary fields as per your requirements.

In the Basic Information section, configure the following details:
Application
Select the Salesforce application from the dropdown to which you want to send the case. Each application may represent a different Salesforce environment (e.g., production, sandbox, or client-specific setup).
Link Customers
Click the 'Link Customer' button if you want to link the case to a customer entity in Salesforce. Choose between The customer can be associated to Account or Contact level entity in Salesforce.

Customer Type
This dropdown allows the agent to select the type of Salesforce persona object to associate with the case. Options typically include:
Account (Account) – The case will be linked to a Salesforce Account.
Contact (Contact) – The case will be linked to a Salesforce Contact.
Link Customer From
This setting allows the agent to choose how they want to associate the case with a customer record in Salesforce.
Options include:
Choose from Existing – Search and link to an existing customer record (Account or Contact) from Salesforce.
Create New – Create a new customer record (e.g., a new Account or Contact) in Salesforce if one doesn’t already exist.
Click Next to proceed.
Using 'Choose from Existing'
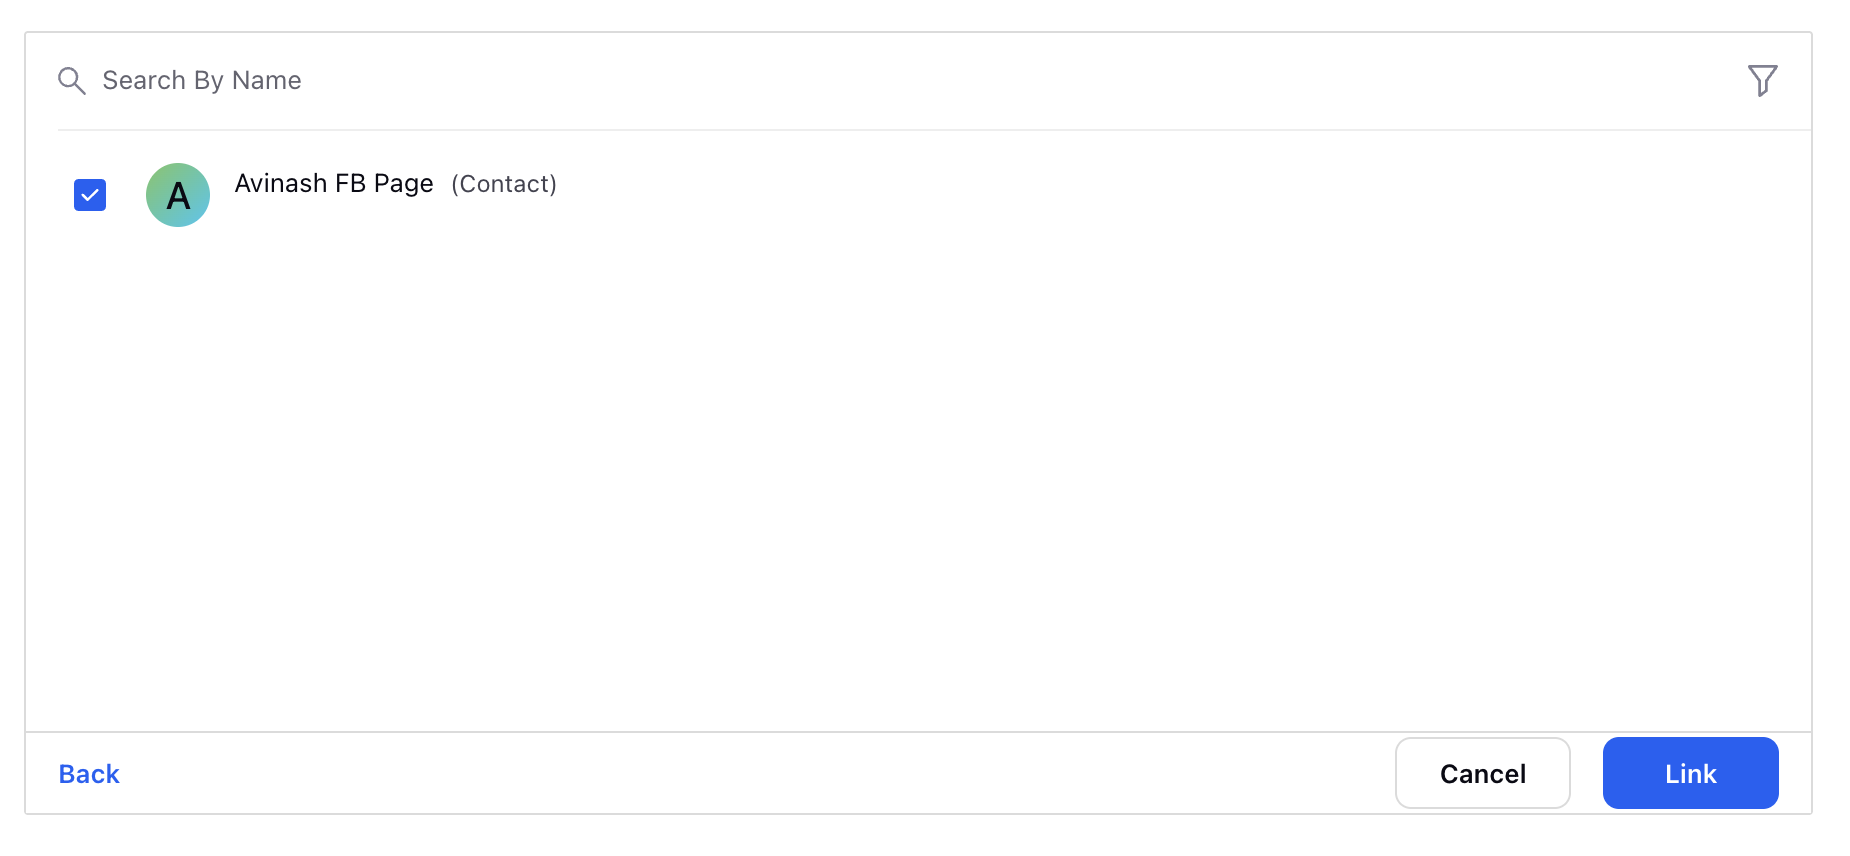
When you select Choose from Existing, a Search Panel opens.
The Searchable Fields you see are based on the configuration done during Salesforce connector setup in Sprinklr. These fields help narrow down your search (e.g., Name, Email, or Phone).

Once you enter search criteria and click Search, results are displayed using Search Result Fields, which are also preconfigured in the connector setup.

For example, if Email is a searchable field, entering an email address will fetch records displaying details like Name, Account ID, or Phone—depending on the search result fields configured.
To complete the process, click the Link button next to the appropriate customer record.
Using 'Create New'
If the required customer record does not exist in Salesforce, choose the Create New option.
This allows you to create a new Account or Contact directly from within Sprinklr, and it will automatically be linked to the case when it is sent to Salesforce.
Step 5: Confirm and Send
Click the Send button to transfer the case details to Salesforce.
A confirmation message will appear indicating the successful transfer.
Notes:
Ensure that all mandatory fields are filled before clicking the Send button.
If the case does not send successfully, verify your Salesforce integration settings.
For troubleshooting, contact your Sprinklr Success Manager or raise a ticket at support@sprinklr.com
By following these steps, you can efficiently send case details from Sprinklr to Salesforce, ensuring smooth customer support operations across platforms.