ACW Extract
Updated
The Extract Generation feature automates the creation, management, and scheduling of feedback files and inventory extracts. This enhancement provides an intuitive UI allowing voice admins to customize, schedule, and generate feedback files without manual backend interventions.
Creating an Export Connector
Perform the following steps to create the Export Connector.
Click the New Tab icon. Under the Sprinklr Service tab, select the Data Connector-V2 persona within Personal Apps.

On the Data Connectors screen, click Export.

Click on + Export Connector on the top right corner of the screen.

The Data Type Selection screen is displayed.
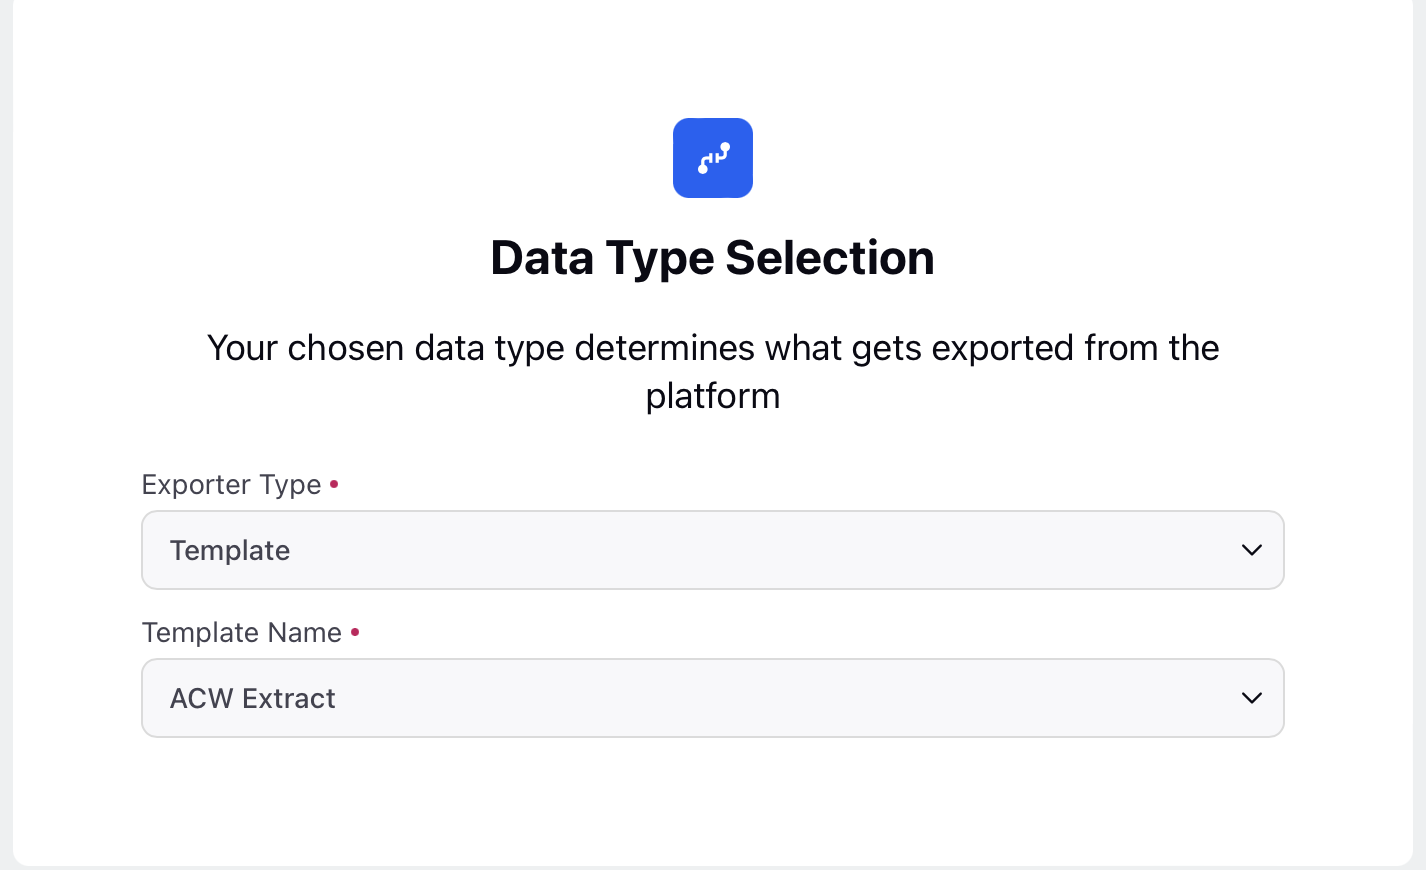
On the Data Type Selection screen, select Template from the Exporter Type drop down list.
Select the ACW Extract from the Template Name drop down list.
Click Next.
The Voice Inventory Extract Template screen is displayed.
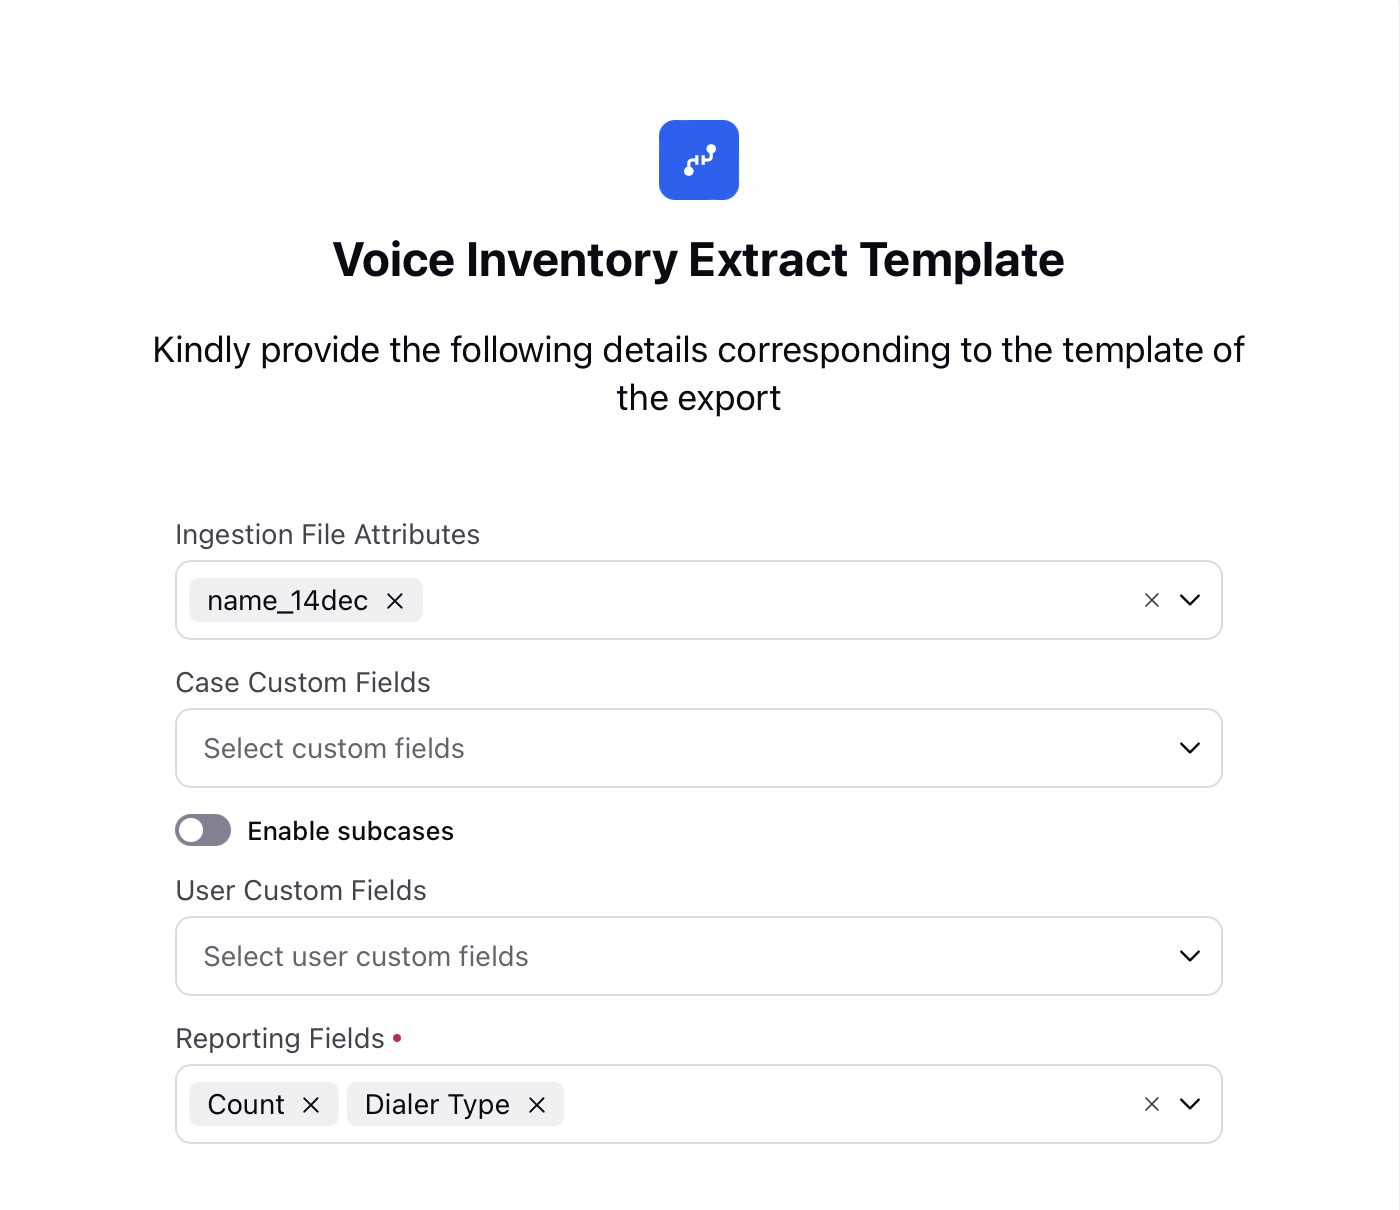
On the Voice Inventory Extract Template screen, select the Ingestion File Attributes from the drop down list.
Select the Case Custom Fields from the drop down list.
Select the User Custom Fields from the drop down list.
Select the Reporting Fields from the drop down list.
Click Next.
The Define Mapping screen is displayed.
Users can add Custom Columns via the + Custom Column button and select the Resource , Operator and Function from the drop down menu and click Save. This helps you to use the existing fields and define a custom operation and add it as a column.
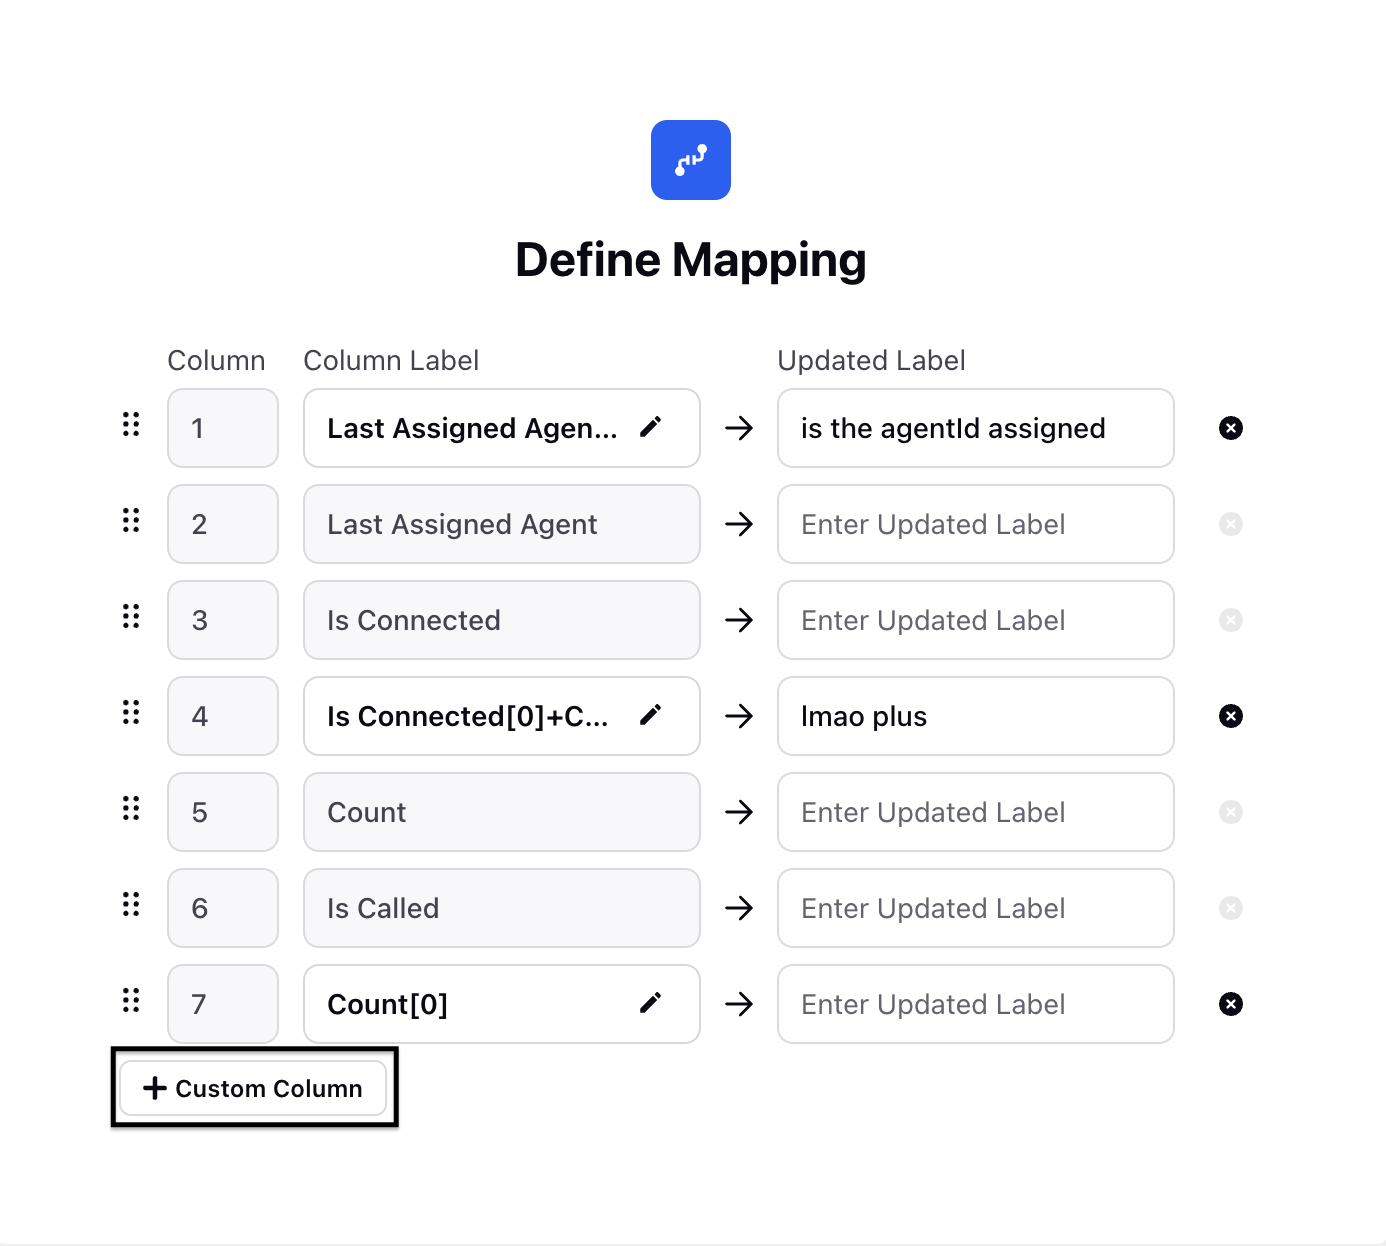
On the Define Mapping screen, users can update labels/names of columns selected in previous screen.
Click Next.
The Filter Configuration screen is displayed.
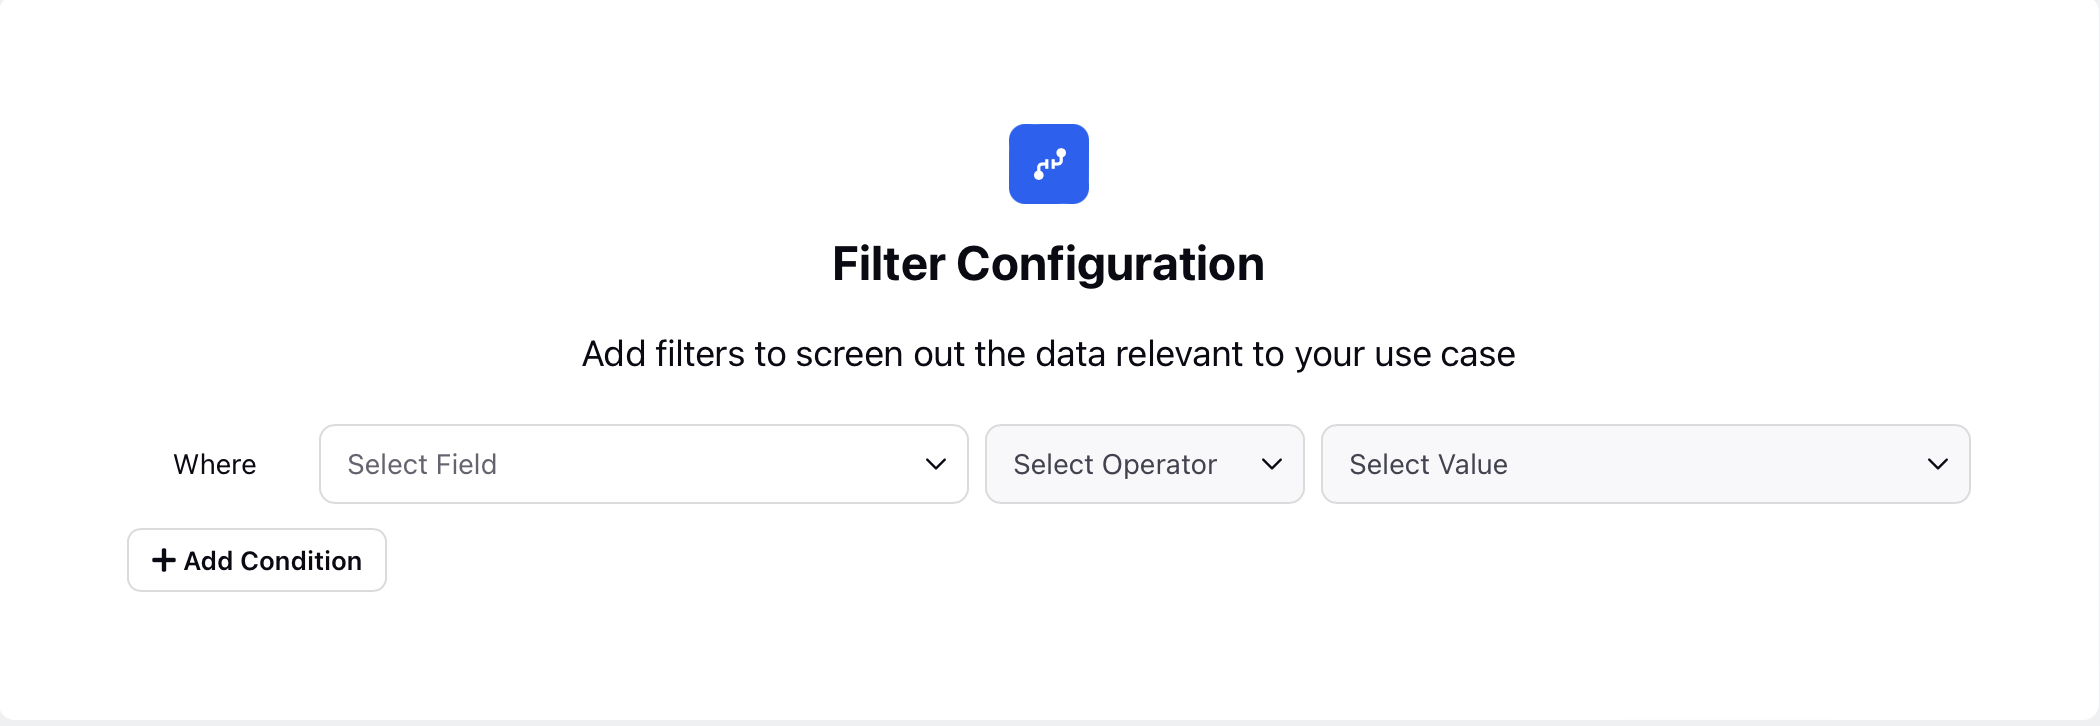
On the Filter Configuration screen, select the field from the Where drop down list.
Click +Add Condition if you want to add additional filter criterions.
Click Next.
The Destination Selection screen is displayed.
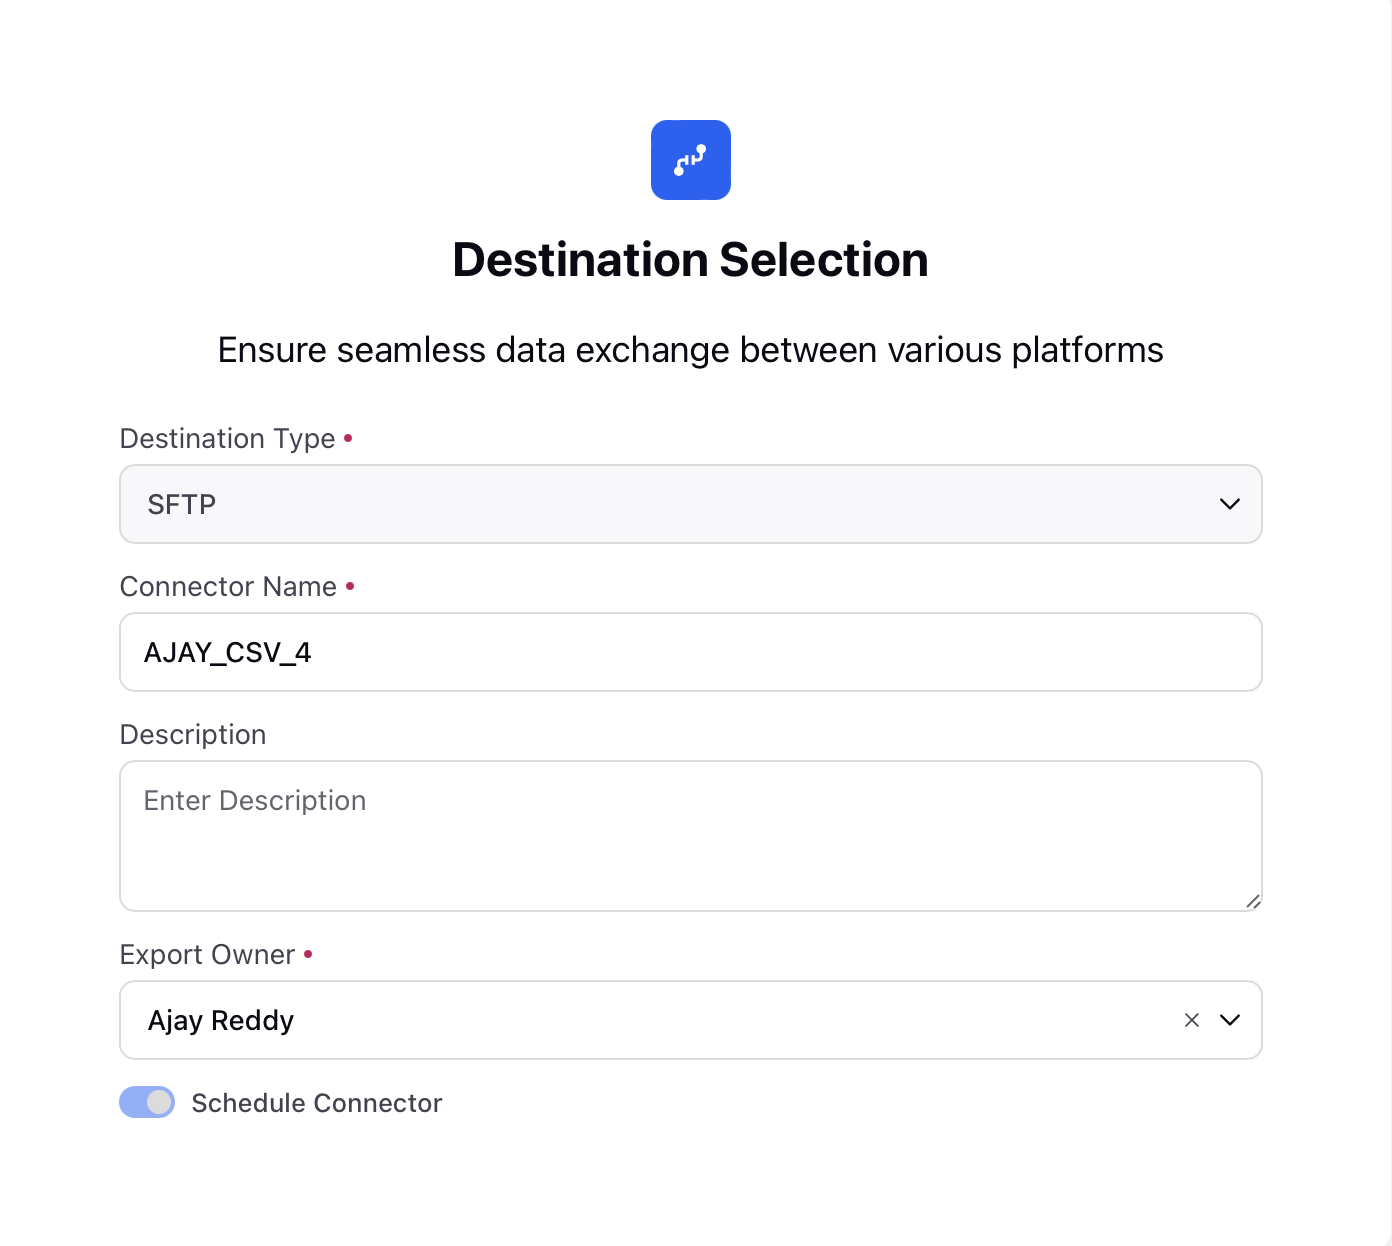
On the Destination Selection screen, select SFTP from the Destination Type drop down list.
Enter the Connector Name.
Enter Description.
Select the Export Owner from the drop down list.
Click the Schedule Connector toggle button if you want to schedule the connector. And for this you will enter details in the Schedule Exports screen.
Note: If you do not click the Schedule Connector toggle button, the Schedule Exports screen is not displayed.
Click Next.
The Destination Specific Settings screen is displayed.
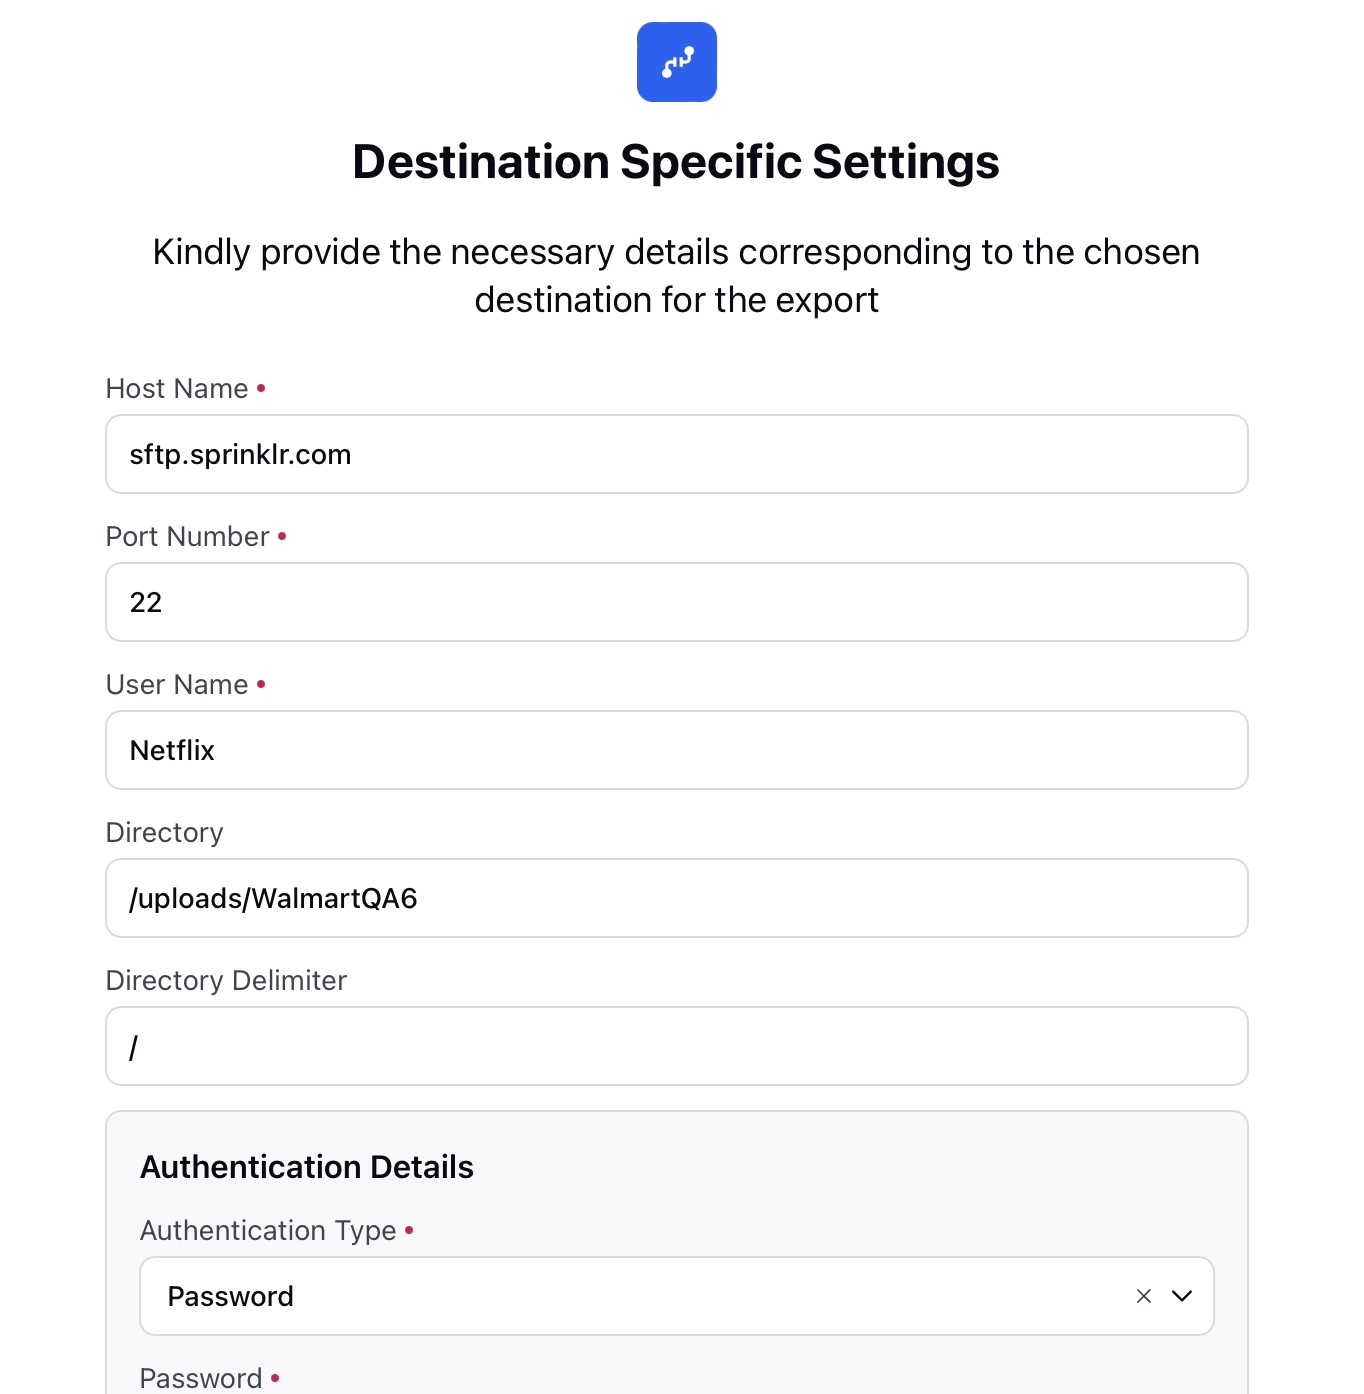
On the Destination Specific Settings screen, enter the Host Name.
Enter the Port Number.
Enter the User Name.
Enter the Directory.
Enter the Directory Delimiter.
Under the Authentication Details section, select the Authentication Type from the drop down list. Enter the further details that are displayed under this section based on the Authentication Type you have selected.
Click Next.
The Schedule Exports screen is displayed.
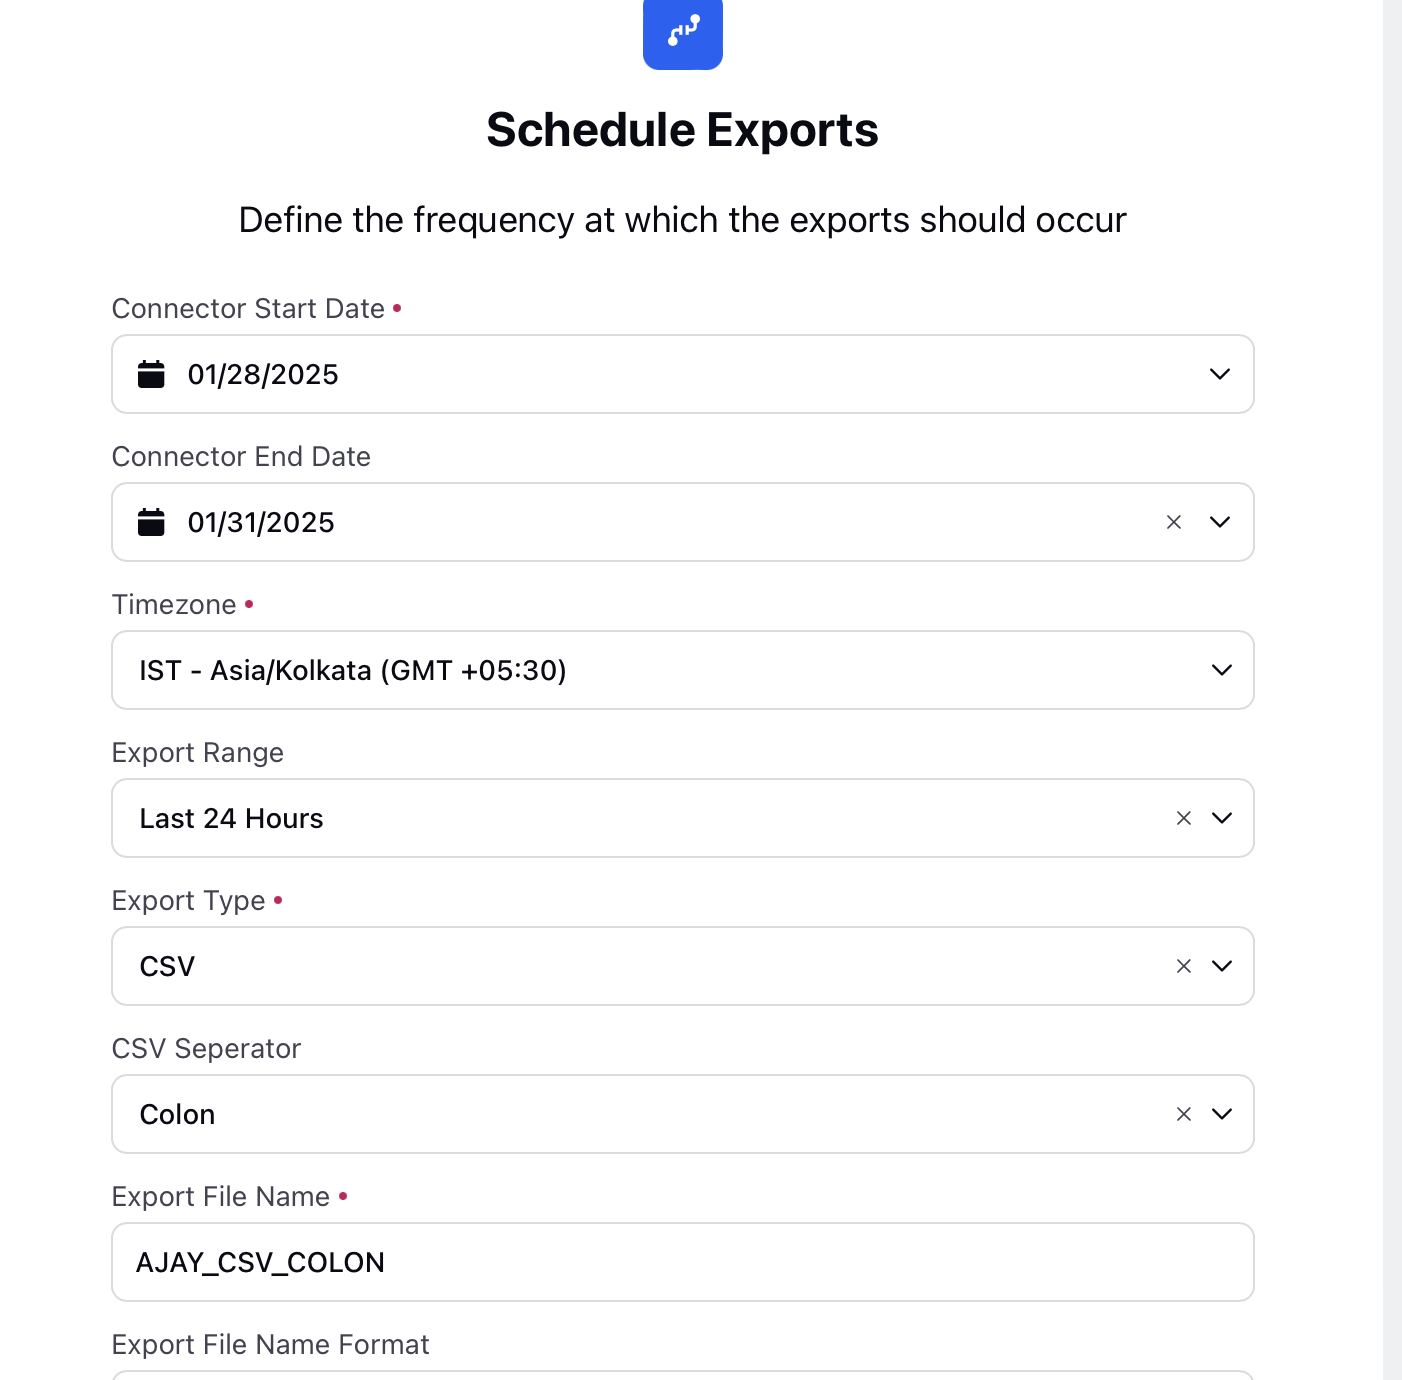
On the Schedule Exports screen, select the Connector Start Date from the drop down list.
Select the Connector End Date from the drop down list.
Select the Timezone from the drop down list.
Select the Export Range. You can define a custom time range by setting a start date and end date, along with a start time and end time. You can also configure a rolling date to specify the duration that should be exported or triggered. Once the custom range is saved a summary will be shown.
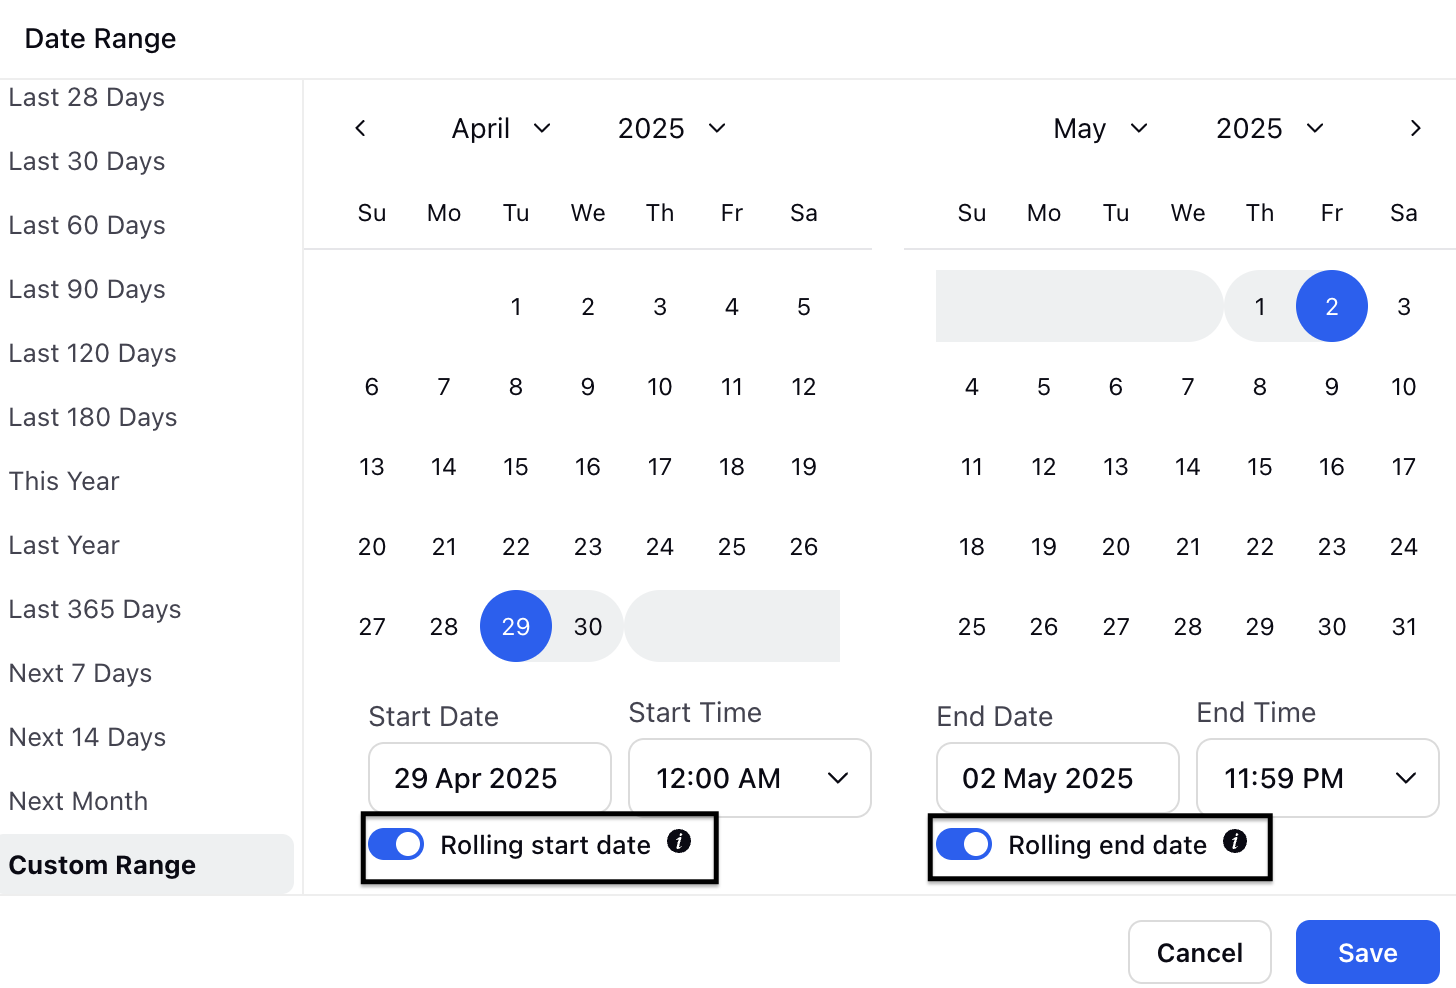
Rolling start date: Start date will update according to the chosen frequency.
Rolling end date: End date will update according to the chosen frequency
Select CSV from the Export Type drop down list.
Select CSV Seperator from the drop down list.
Enter the Export File Name.
Enter the Export File Name.
Enter the Schedule Frequency.
Select the Schedule Type from the drop down list.
Click Next.
The Share Settings screen is displayed.
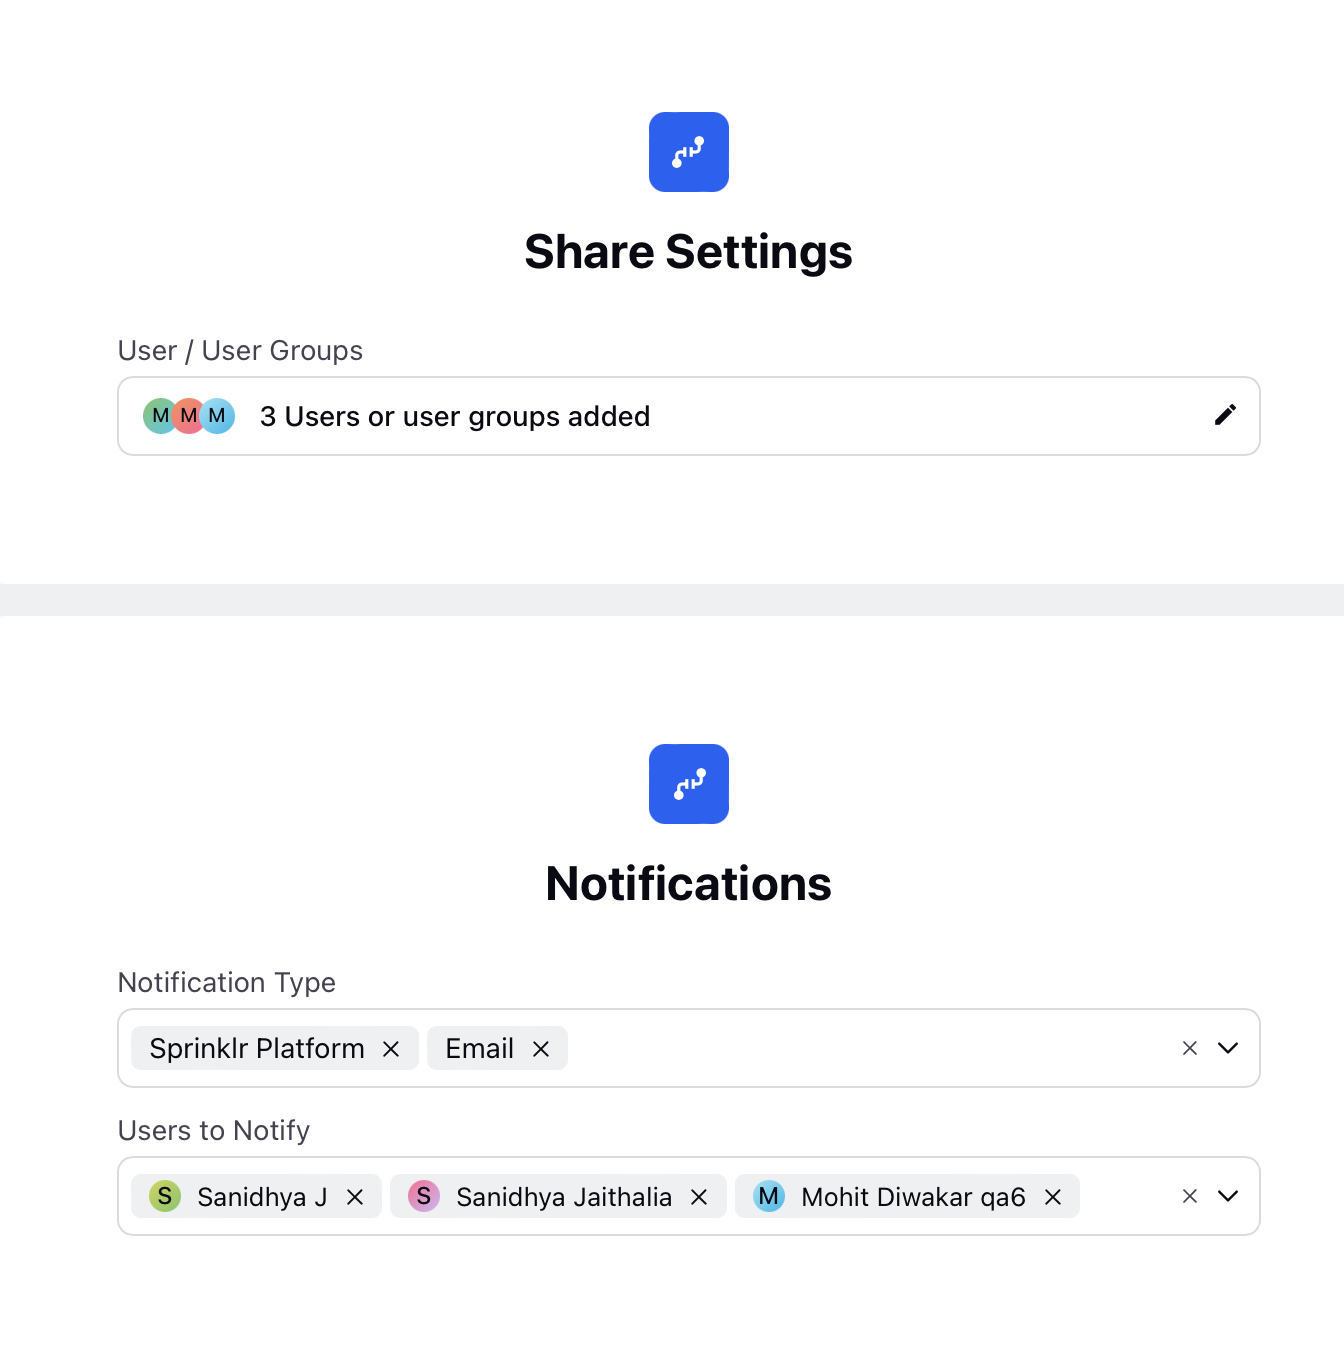
On the Share Settings screen, select the User/User Groups from the drop down list.
On the Notifications section, select the Notification Type from the drop down list.
Select the Users to Notify from the drop down list.
Click Save.
Parameter Description of Export Connector
Refer to the below table to view the parameter description of Exporting a Connector.
Parameter | Description |
Exporter Type | The selected data type determines the content of the exported file. The available exporter types include:
|
Template Name | The name of the Template. Enter ACW Extract for this procedure. |
Ingestion File Attributes | Required file attributes for the extract. |
Case Custom Fields | Specific custom fields related to cases. |
User Custom Fields | Profile custom fields. |
Reporting Fields | Relevant reporting metrics and dimensions. Custom metrics can't be added to this. |
Column | The actual field extracted from the system |
Column Label | The default name assigned to the column. |
Updated Label | A user-defined label that renames the column for better readability. |
Where | Defines the filtering condition. |
Select Field | Field to apply the filter (For example, Date, Agent ID, Case Status). |
Select Operator | Define how the filter applies (For example, Equals, Greater Than, Less Than, Between). |
Select Value | The actual value for the filter. |
Destination Type | The location where the data is sent (For example, SFTP, Cloud Storage, Email, Local System). |
Connector Name | Name for the export connection. |
Description | Details about the purpose of the extract. |
Export Owner | Name of the person responsible for managing the export. |
Host Name | The server or cloud storage address where the extract is sent. |
Port Number | The port used for data transfer. |
User Name | The authentication username for accessing the destination. |
Directory | The folder location where the file will be stored. |
Directory Delimiter | The character used to separate directory levels. |
Authentication Details | Credentials required for secure access (For example, password, API key, token). |
Connector Start Date | The date when the export should begin |
Connector End Date | The end date for the scheduled export. |
Timezone | The timezone in which the export should operate (For example, IST - Asia/Kolkata, GMT +05:30). |
Export Range | The data range to be extracted (For example, Last 24 Hours, Last 7 Days, Custom Date Range). |
Export Type | The format for the extracted file (For example, CSV, JSON, XML). |
CSV Separator | The separator used in the CSV file (For example, Colon, Comma, Pipe). |
Export File Name | The naming convention for the exported file. |
Export File Name Format | The format for including timestamps in the file name (For example, Date (dd), Month (MM), Year (YYYY), Hour (HH), Minutes (mm), and so on). |
Schedule Frequency | Specifies how often the export runs (For example, every 15 minutes, hourly, daily, weekly). |
Schedule Type | Specifies if the export should repeat at fixed intervals (For example, every X minutes/hours/days). |
User / User Groups | Users or groups who have access to the extract. |
Notifications | Enable notifications to receive alerts on extract status, errors, or completion. |
Notification Type | Destination where the notification needs to be sent. For example, Sprinklr Platform, Email and so on. |
Users to Notify | Name of the users who will receive the notification. |
The Unified Data Connector also supports the following:
Manual Run in Template Flow
This allows you to manually run the Connector for a specific time range, useful for backfilling & retreiving custom data needs. The user is provided ability to custom define a timerange & also infer how many records they will be generating.
Note: You can export up to 1,000 records in a single file at once. If the total number of records exceeds 1,000, multiple export files will be generated.
Let's look at the navigation steps:
After creating & saving a Connector, basis steps above.
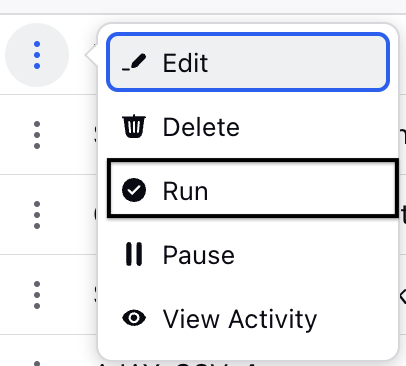
Click on the Vertical Ellipses (Three Dots) against the Template created.
Click on 'Run'.
In the Time Range Section select Start Date and End Date, being careful to select exact time & ranges.
User will be shown estimate of records in range on banner below.
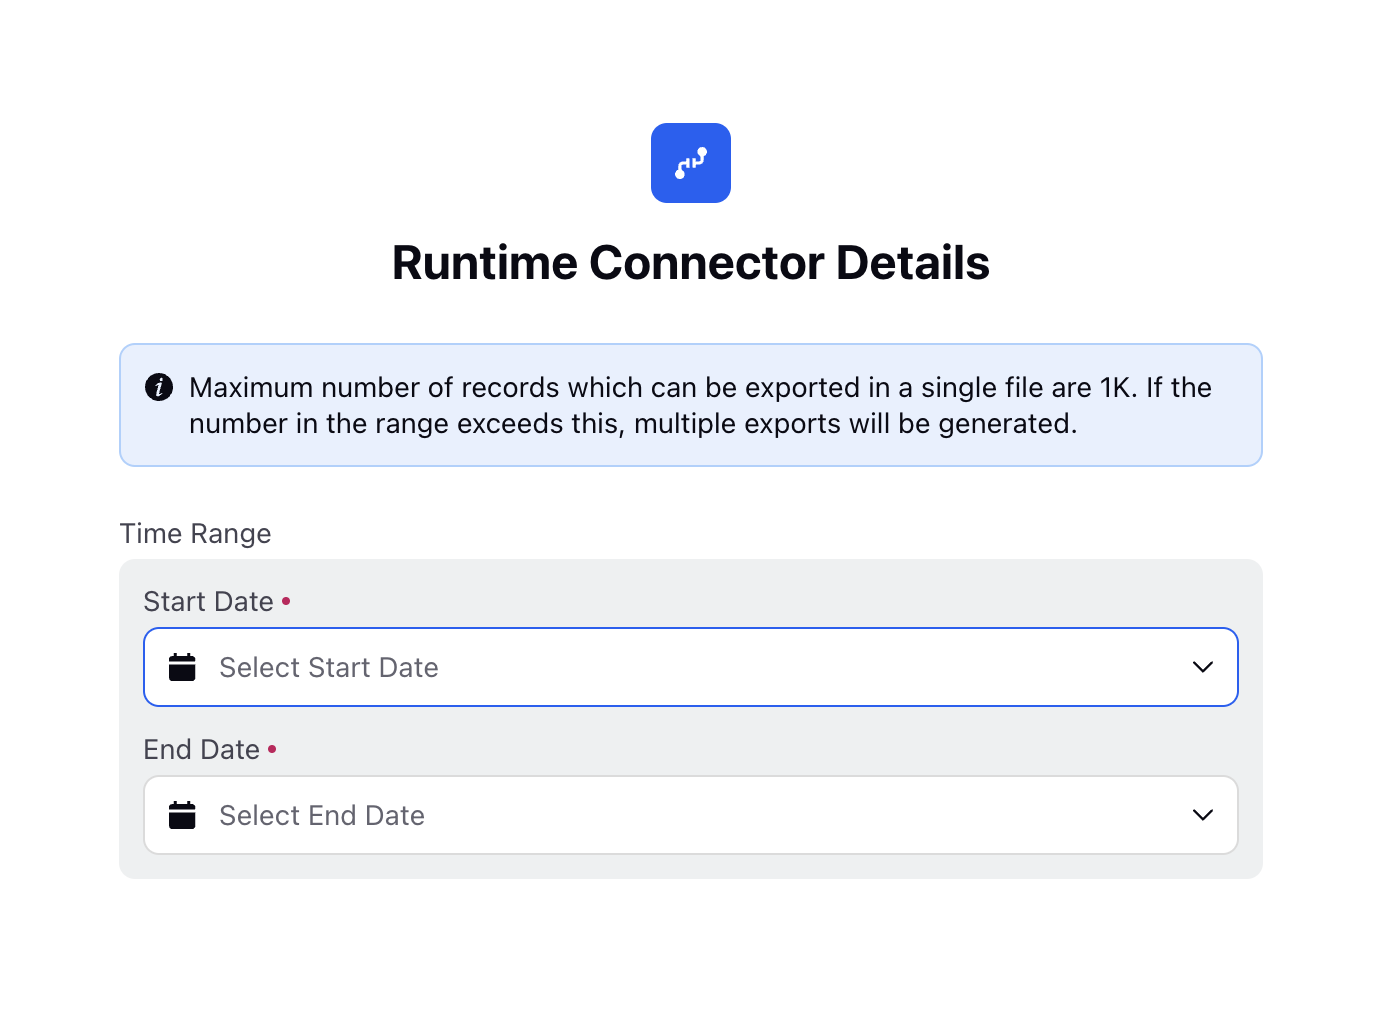
Click Run - User will get notification of succesful trigger.
Custom Columns
You can now add Custom Columns, supported via Groovy Script - they can define the resouce, operator and functions in the groovy & add a columns according to their need.
With the help of custom columns, Users can use the existing columns and define a custom operation and add it directly to extracts.
Inorder to access Custom Columns following the following steps(refer from step 12 of Creating and Export Connector):
Click + Custom Column in the Define Mapping Section.
Select the Resource , Operator and Function from the drop down menu and click Save. The custom column can be added to mapping. This helps you to use the existing fields and define a custom operation and add it as a column.
Click Next.
