Adding Customers to Suppression Lists
Updated
Suppression list contains contact information for those who do not want to be contacted. Many companies need to maintain a Do Not Disturb list (DND) which can be selected here so that customers who have requested not to be called are not called. This list can be updated by filling ACWs.
Business Use case
During the conversation, the customer expressed their unwillingness to be contacted again. Brands want their agents to mark such customers so that they are not contacted again.
Solution
The agent can fill this in the ACW and add the customer to a suppression list so the customer is not contacted again.
Configuration
![]() Pre-requisite for configuring this in ACW: Sprinklr Voice should be enabled for the environment and your user should have ACW View, Edit or Create permission
Pre-requisite for configuring this in ACW: Sprinklr Voice should be enabled for the environment and your user should have ACW View, Edit or Create permission
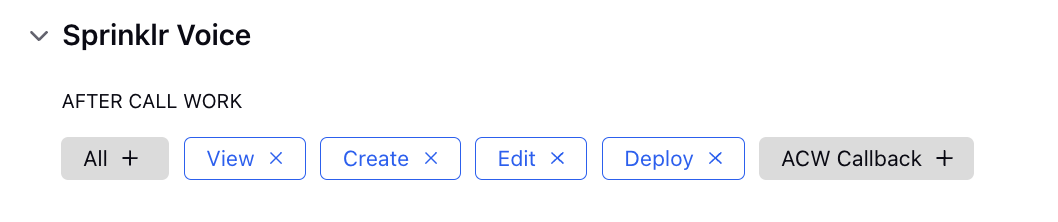
Step 1: Add a field in the disposition plan that the agent will fill to add the customer to a suppression list.
Step 2: In the ACW builder, add a decision box within a loop to check whether the field exists
Step 3: Add another decision box to check what was filled in the field. For the branch in which the agent has selected the customer to be added to a suppression list, add a “Add to suppression list” node.

The suppression node sample config is as the following-

The component of the node-
Suppression List- Here you can define the suppression list where this customer will be put.
Name- You can define the name of the node
Contact Number: Number that will be added into suppression list
Evergreen checkbox: If enabled, this number will always remain in suppression list, if not you can define expiry time.
Expiry time: If Evergreen checbox is disabled, then you can define Expiry time post which this number will be remove from the suppression list
How to create a suppression List?
Under Moder Care -> Listen, select Voice care
Then select Suppression List icon present in left hand side of the window as shown below-
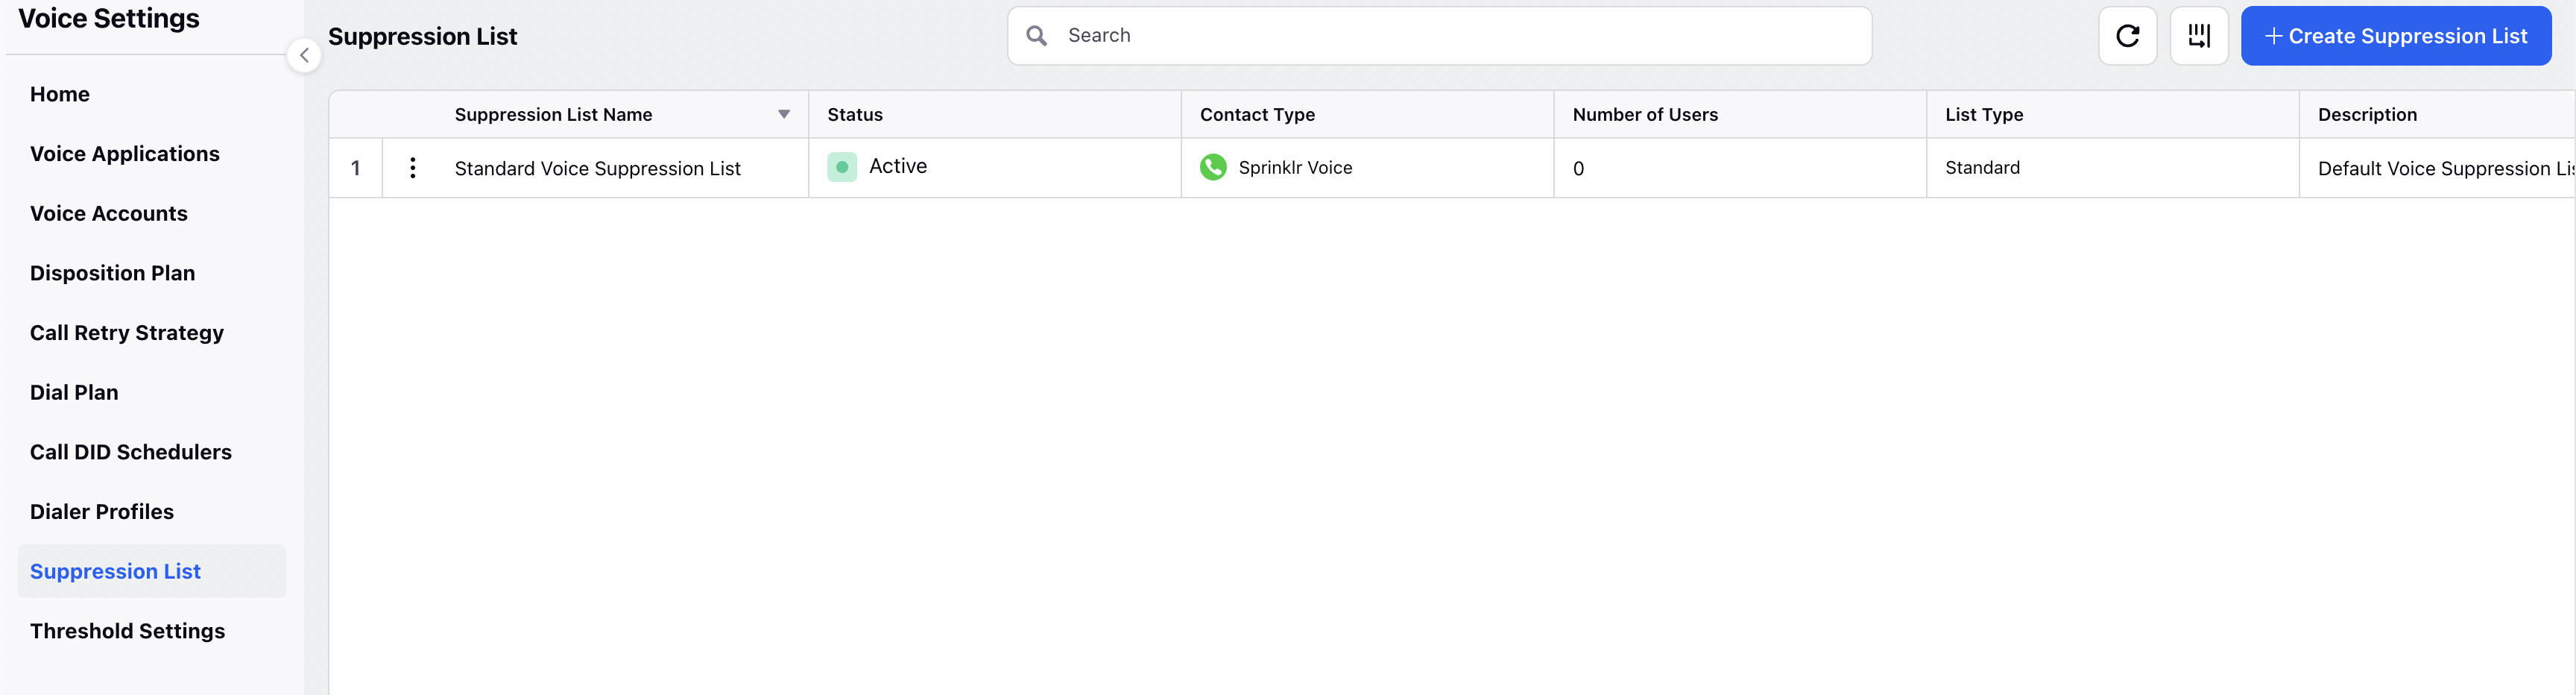
Click on the Create Suppression List button given on the top right corner, a form will appear to define suppression List-
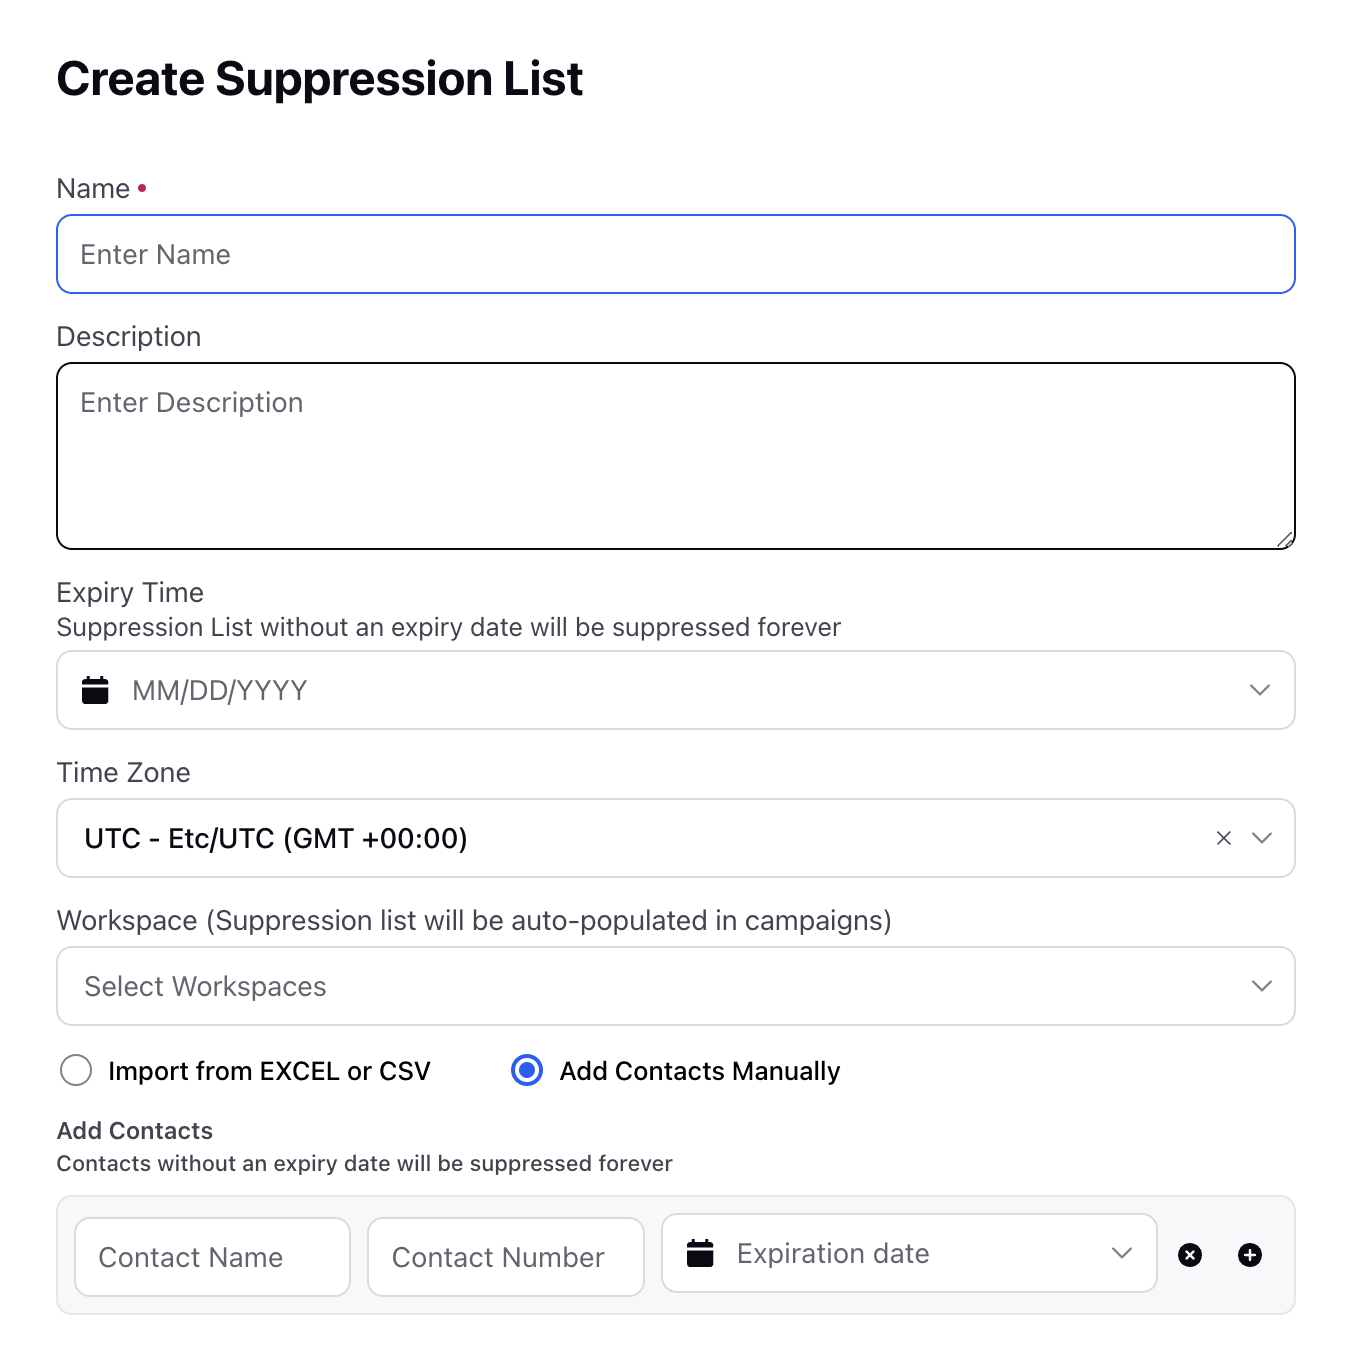
Fill the form with the relevant information -
Name - Name the Suppression List by which you want this to appear
Expiry Time - Define the expiry time for the list, if it will be blank this suppression list will always be suppressed.
Timezone- Expiry time defined in workflow / through is governed in this time zone.
Add contacts- You can add contact while creating suppression list by either uploading excel or manually adding number