Audience Profile
Updated
Audience Profiles serve as a unified, platform-wide database for each user interacting with the Sprinklr platform, preventing duplicate or conflicting records. They also support threaded conversations, ensuring seamless interaction tracking.
The Audience Profiles module facilitates efficient contact management within CFM, providing a comprehensive Record Manager view. It allows easy searching, filtering, adding, and organising of profiles for streamlined data management.
Note: When interacting with the same user through Sprinklr on a single channel—whether via other Product Suites like Sprinklr Social or through surveys sent using CFM—you can access all related conversations, including social interactions and survey responses, in one unified location.
Steps to Access Audience Profile
Click + New Page > Launchpad > Sprinklr Insights > Customer Feedback Management.
Go to Audience Management in the left pane.
Select Profile Lists.
Manage Audience Profile
Search: Profiles can be located using Name, Email, Phone Number, or Social Handle.
Filter: Filter profiles by any column values within the Record Manager to refine your view and quickly find relevant data. The Audience Profiles Record Manager includes the following columns for each profile:
Name
Bio
Tags
Profile Lists
Profiles
Reach
Following
Created By
Export Profiles: Download profile data in Excel or CSV format. The export includes any applied filters and excludes empty columns.
Click Vertical Ellipse(3 dots) to access Export.
Import Profiles: Add profiles in bulk using the Import option for efficient data management. The provided Excel template includes:
Columns for standard profile fields.
Any custom fields (Asset Type = Profile) available in the system.
Note: The fields Social Network and User ID are mandatory. Non-essential columns (except mandatory ones) can be removed from the template as needed. Custom fields in the system can be re-added using the header format CF_Custom Field Name. The data will automatically map to the corresponding fields.
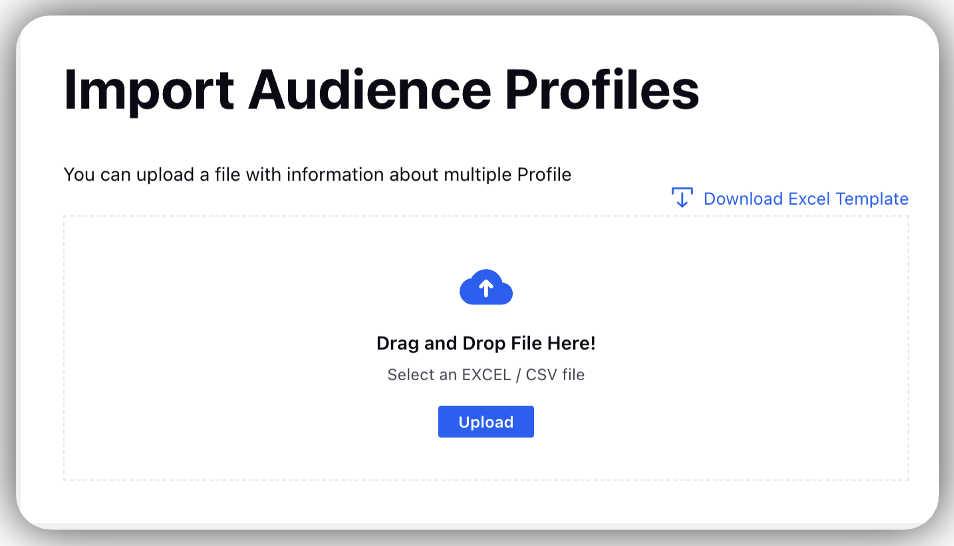

Note: In addition to importing profiles via Excel or CSV files, there are capabilities to dynamically create profiles in real-time based on external triggers. These features will be explored in detail within the Workflows Module.
Utilization Process
Import Audience Profile: Upload contacts or profiles via Excel or CSV files, tag them for easy management, and use them to trigger survey distributions.
Profile Segments and Samples: Use existing profiles to create Segments by grouping them based on custom properties, or generate Profile Samples to select a specific percentage or number of profiles as needed.
Trigger Ad Hoc Survey Distributions: Use Profiles, Profile Lists, Segments, or Samples as recipients for survey distributions via Email, WhatsApp, SMS, or Personalized Link channels.
Trigger Website Distribution: Use Profile Custom Properties as intercept conditions for Website Distributions. This feature is covered in a separate section.
Custom Reporting: Survey responses are automatically linked to the profiles they were triggered from. Custom dashboards can be created to include relevant profile details, offering deeper insights.
Profile Lists
The Profile Lists section under Audience Management allows you to create predefined lists for organizing audience profiles, helping to build an organized Record Manager for efficiently managing and categorizing profile groups.
Navigation Steps
Click + New Page > Launchpad > Sprinklr Insights > Customer Feedback Management.
Select Profile Lists.
Creating Profile Lists
Let's access how to access New Profile List:
Click + Add Profile List.

Go to New Profile Lists section and fill details:
Name: Add title of each profile list (Mandatory).
List Owner: Assign the Sprinklr user responsible for owning or managing the profile list (Mandatory).
Description: Provide a brief overview of the list’s purpose or contents.
Flavour: Select between Contact List or Profile List, depending on the type of data you're organizing.
Tags: Add relevant tags to group and quickly filter multiple lists
Visibility: Set visibility options to share the list with specific users, granting them access to view the profiles within the list.
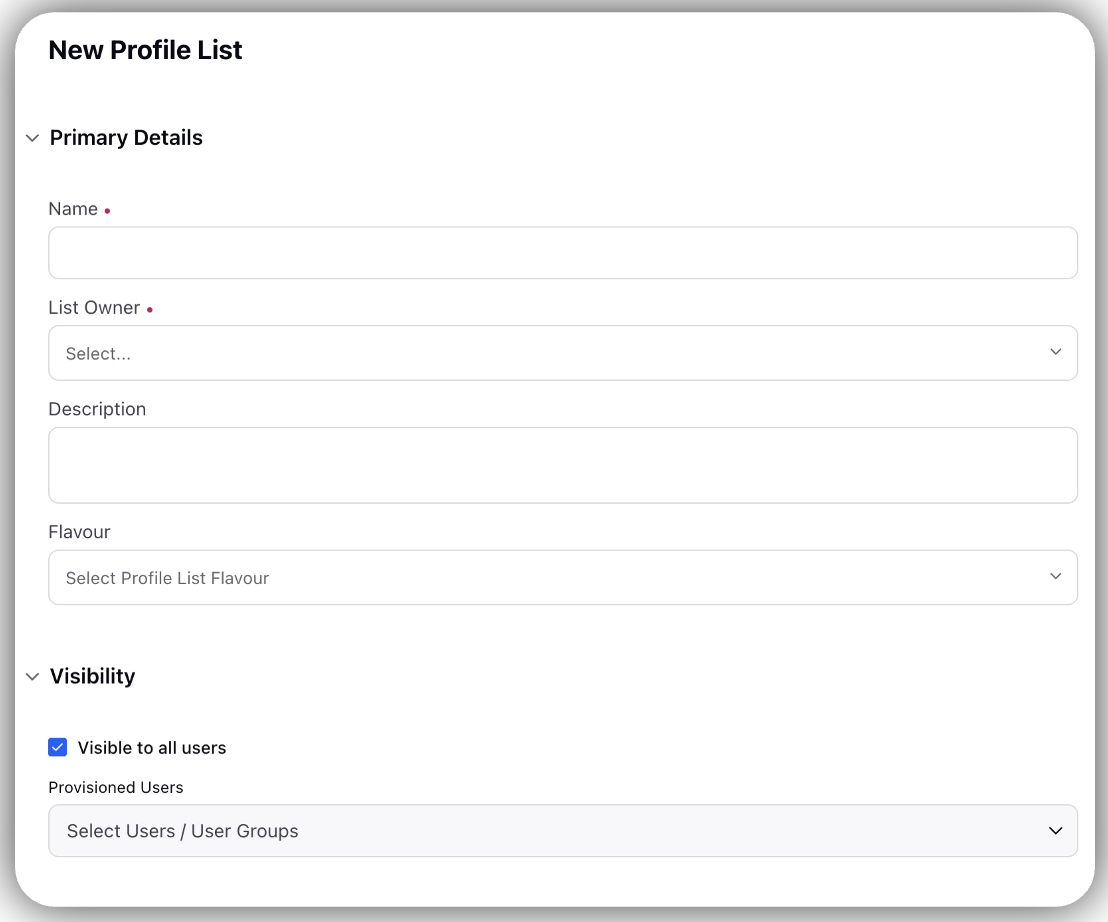
Click Save.
Managing Profile Lists
Click Vertical Ellipses (3 dots) against each Profile Lists:
Edit: Edit the Profile Lists.
Delete: Helps to delete profile list.
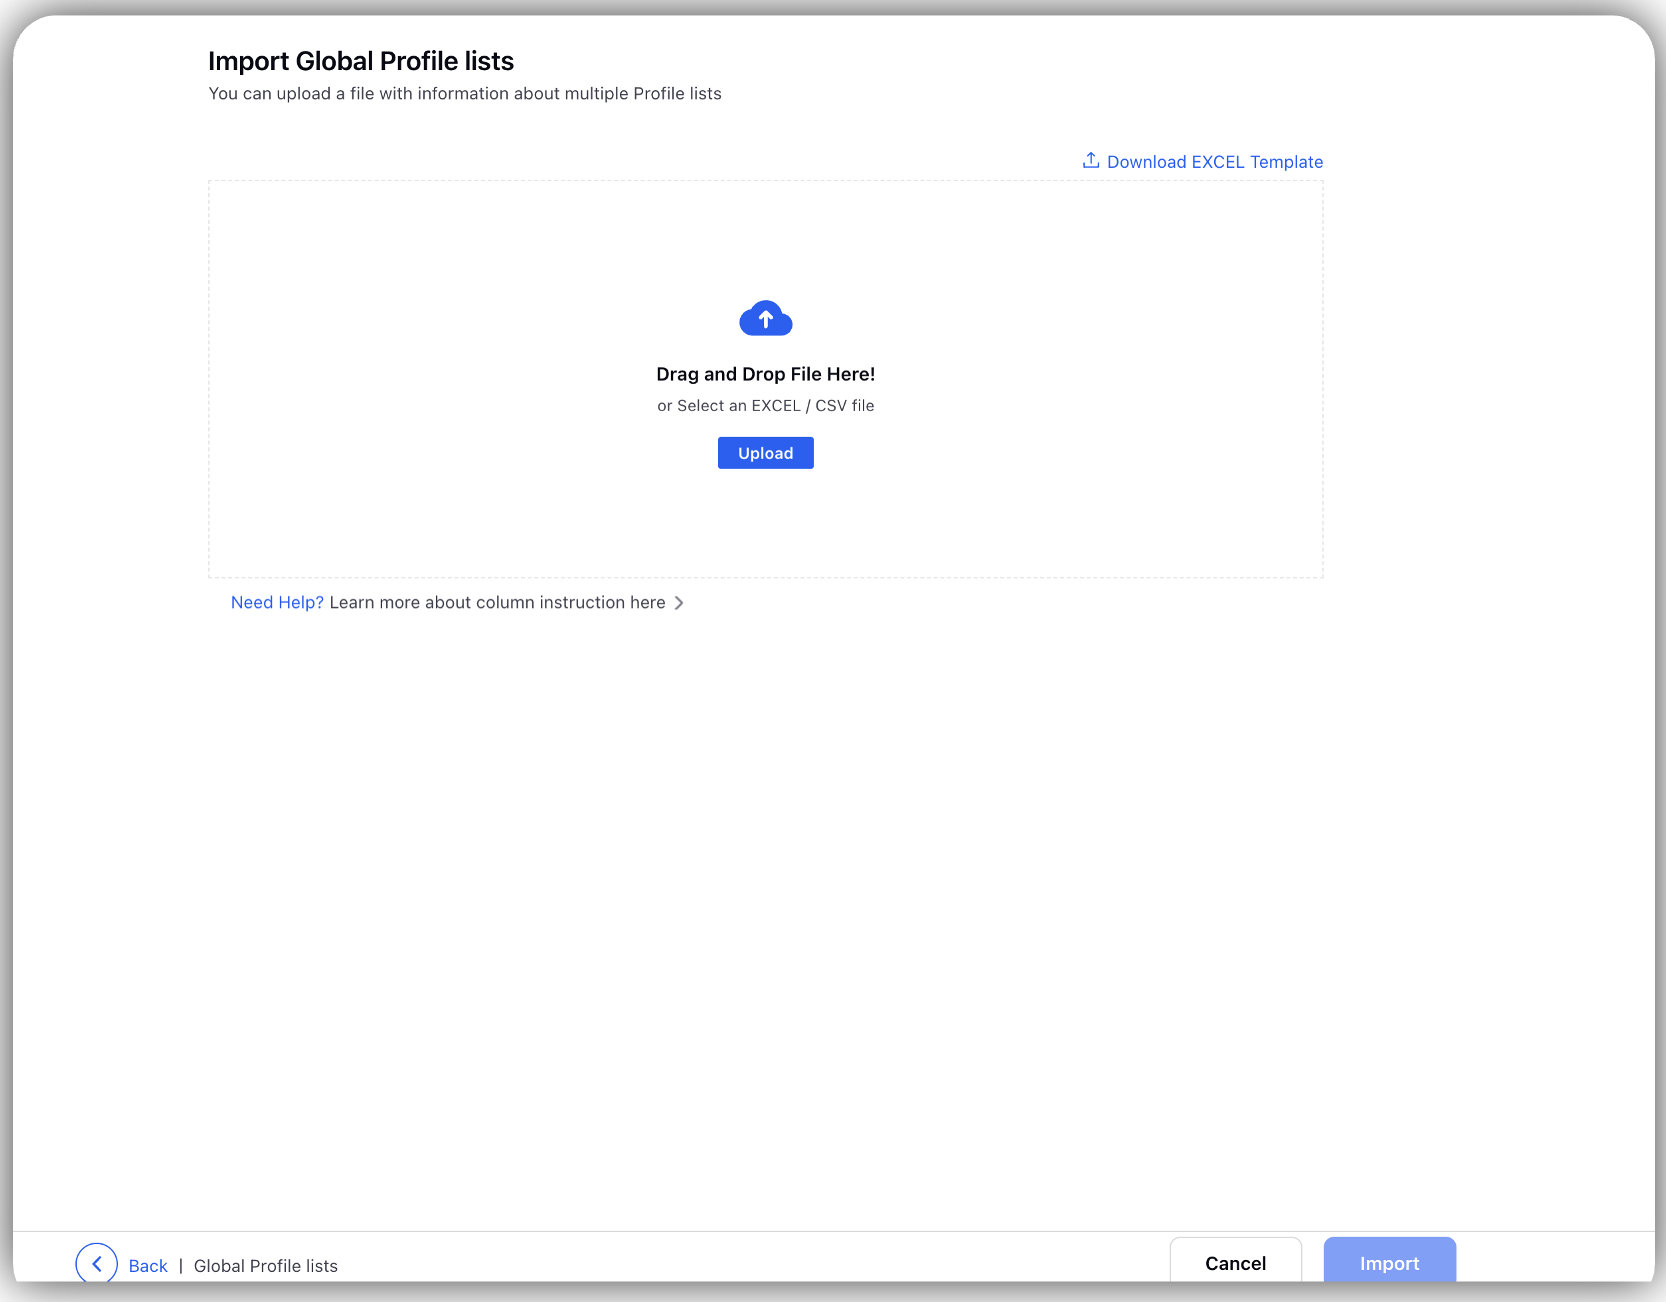
Import Global Profile Lists:
Click Vertical Ellipses (3 dots).
Click Download Excel Template and fill details and save.
Choose File to upload to upload the file.
Click Import.
Once uploaded, the system confirms the number of profile lists successfully added.
Export Global Profile Lists: Download a file that lists all Profile Lists within the environment for easy reference and management.
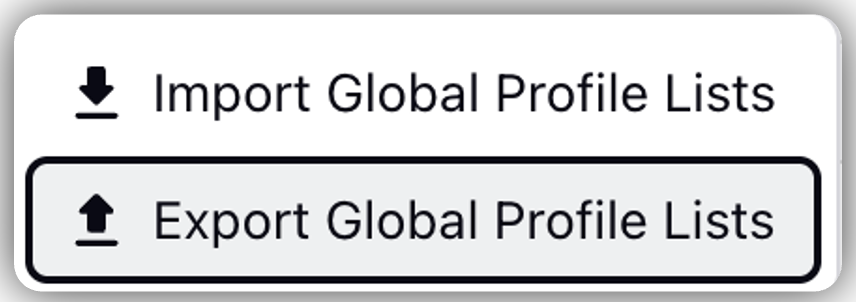
Record Manager Columns and Controls
Name: The title of each profile list.
Description: A brief overview of the list’s purpose.
Owner: The Sprinklr user responsible for managing the list.
Created By: The user who originally created the profile list.
Created On: The date the profile list was created.
Profile Segements
The Segment Manager in Audience Management allows you to create, view, and manage audience segments based on specific criteria. Segments help you organize profiles dynamically, enabling you to build targeted audience groups based on profile attributes or behaviors.
Let's learn how to navigate to profile segments, manage profile segments.
Navigation Steps
Click + New Page > Launchpad > Sprinklr Insights > Customer Feedback Management.
Select Segment Manager.
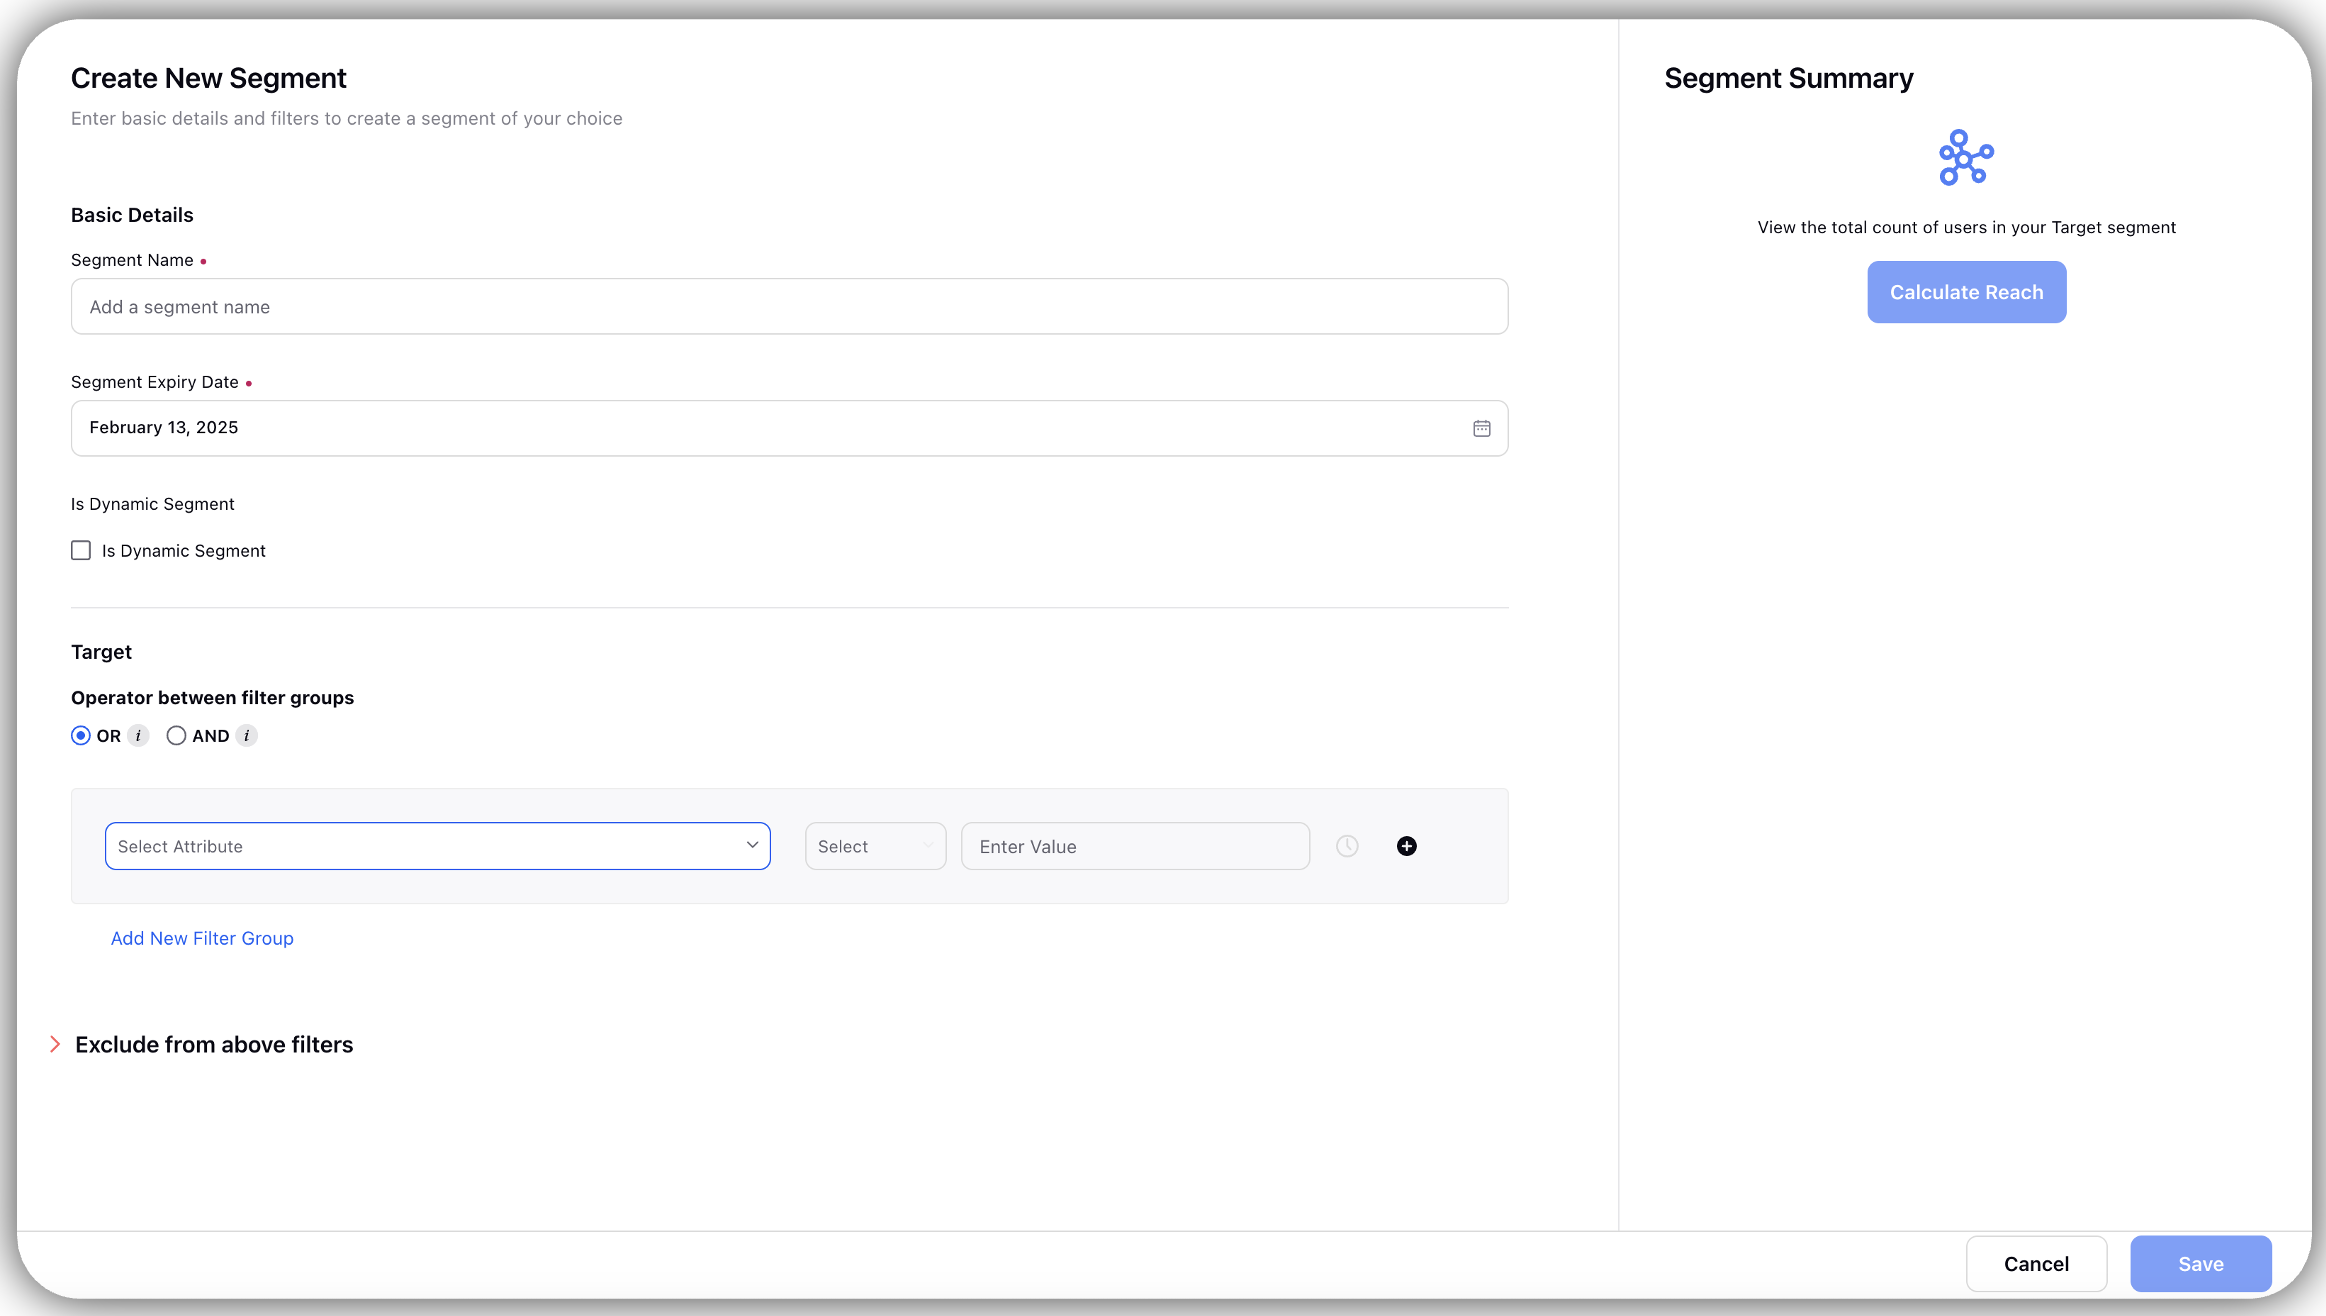
Create New Segements
Click + Create Segment.
Go to Create New Segment and fill details:
Segment Name: Add segment name.
Segment Expiry Date: Select Expiry date.
Check Is Dynamic Segment.
Define the segment by selecting a survey question and profile custom field
Go to Target section, select OR and AND operator.
Use AND/OR operators to define complex filtering conditions across multiple fields, allowing for more precise audience segmentation.
Select Attributes and enter the Value to target.
Go to Exclude from above filters.
Select AND/OR operators to exclude filters.
Click Save.
Note: In the right pane you will be able to calculate the Segment Summary.
Manage Segments
Click Vertical Ellipses(3 dots) against each segement:
View Details: View the segment’s current setup, including all applied filters and conditions, for easy reference and adjustments.
Edit: Modify existing conditions or add new filters to refine the segment and meet specific targeting criteria.
Activate Segment: Helps to activate a smart segment on your social accounts.
It works by creating a custom audience that is automatically excluded from all Active and Paused Ad sets within the Ad account. This exclusion also applies to any future Ad sets published. To remove the exclusion later, simply deactivate the segment in the segment activation screen. Lets look at the steps:
Select Segment: Select Segment (Mandatory).
Select Activation Channel: Select a Social Channel (Mandatory).
Account: Select account of the specific channel.
Source: Select source (User, Partners or both)
Toggle Stop Showing Ads in this Audience.
Click Save.
Export: Download an export of all profiles currently in the segment, including only the columns with values for those profiles.
Recompute: Refresh the segment to update it with the latest number of profiles that meet the defined criteria.
Delete: Permanently remove the segment to delete it from the system.
Share: To make it accessible to workspace and visibility in workspace, users and user groups.
Export Screen
Generate an export that lists all segments, providing details for easy reference and management.
Filters
Apply filters based on column values.
Search
Search for segments by using keywords in the Name field to quickly locate specific segments.

Record Manager Columns and Controls
The Segment Manager Record Manager includes the following fields:
Name: Name of the segment.
Status
Source type
Reach
Created by
Created on
Last updated on
Expiration date