Callback Settings
Updated
The Callback Settings module is available under Voice Care. Previously, users had to create separate callback campaigns and go through multiple steps to set up callback-related configurations. With this, callback settings are a standalone module within the Voice Care section, offering a much easier and more intuitive setup experience.
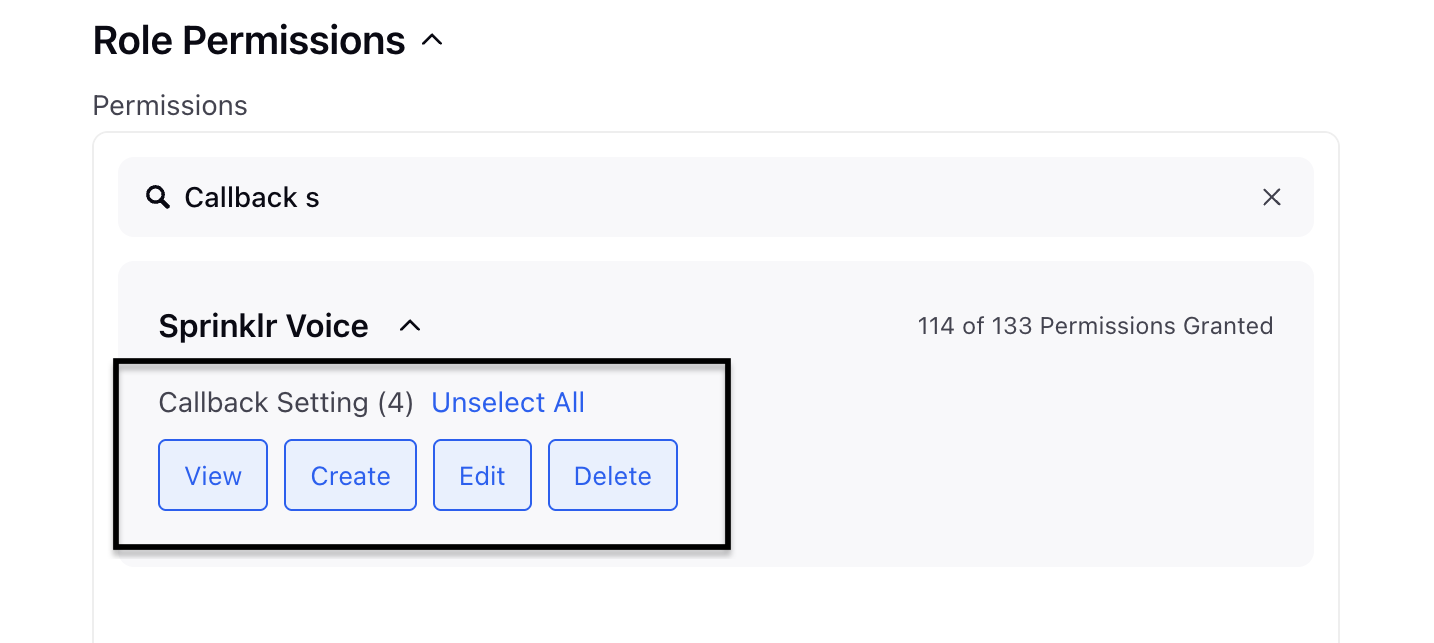
Note: This feature is permission controlled and the permission for this feature is present under the Callback Setting of the Sprinklr Voice - View, Create, Edit and Delete.

Enablement Note: Access to this feature is controlled by DP - VOICE_CALLBACK_SETTING_ENABLED dynamic property. To enable this feature in your environment, reach out to your Success Manager. Alternatively, you can submit a request at tickets@sprinklr.com.
Creating Callback Settings
To create the callback settings, perform the following steps:
Click the New Tab icon. Under the Sprinklr Service tab, click Voice Care within Listen.
On the left pane, under Voice Settings, click Callback Settings.
The Callback Settings screen is displayed.

Click +Create Callback Setting.
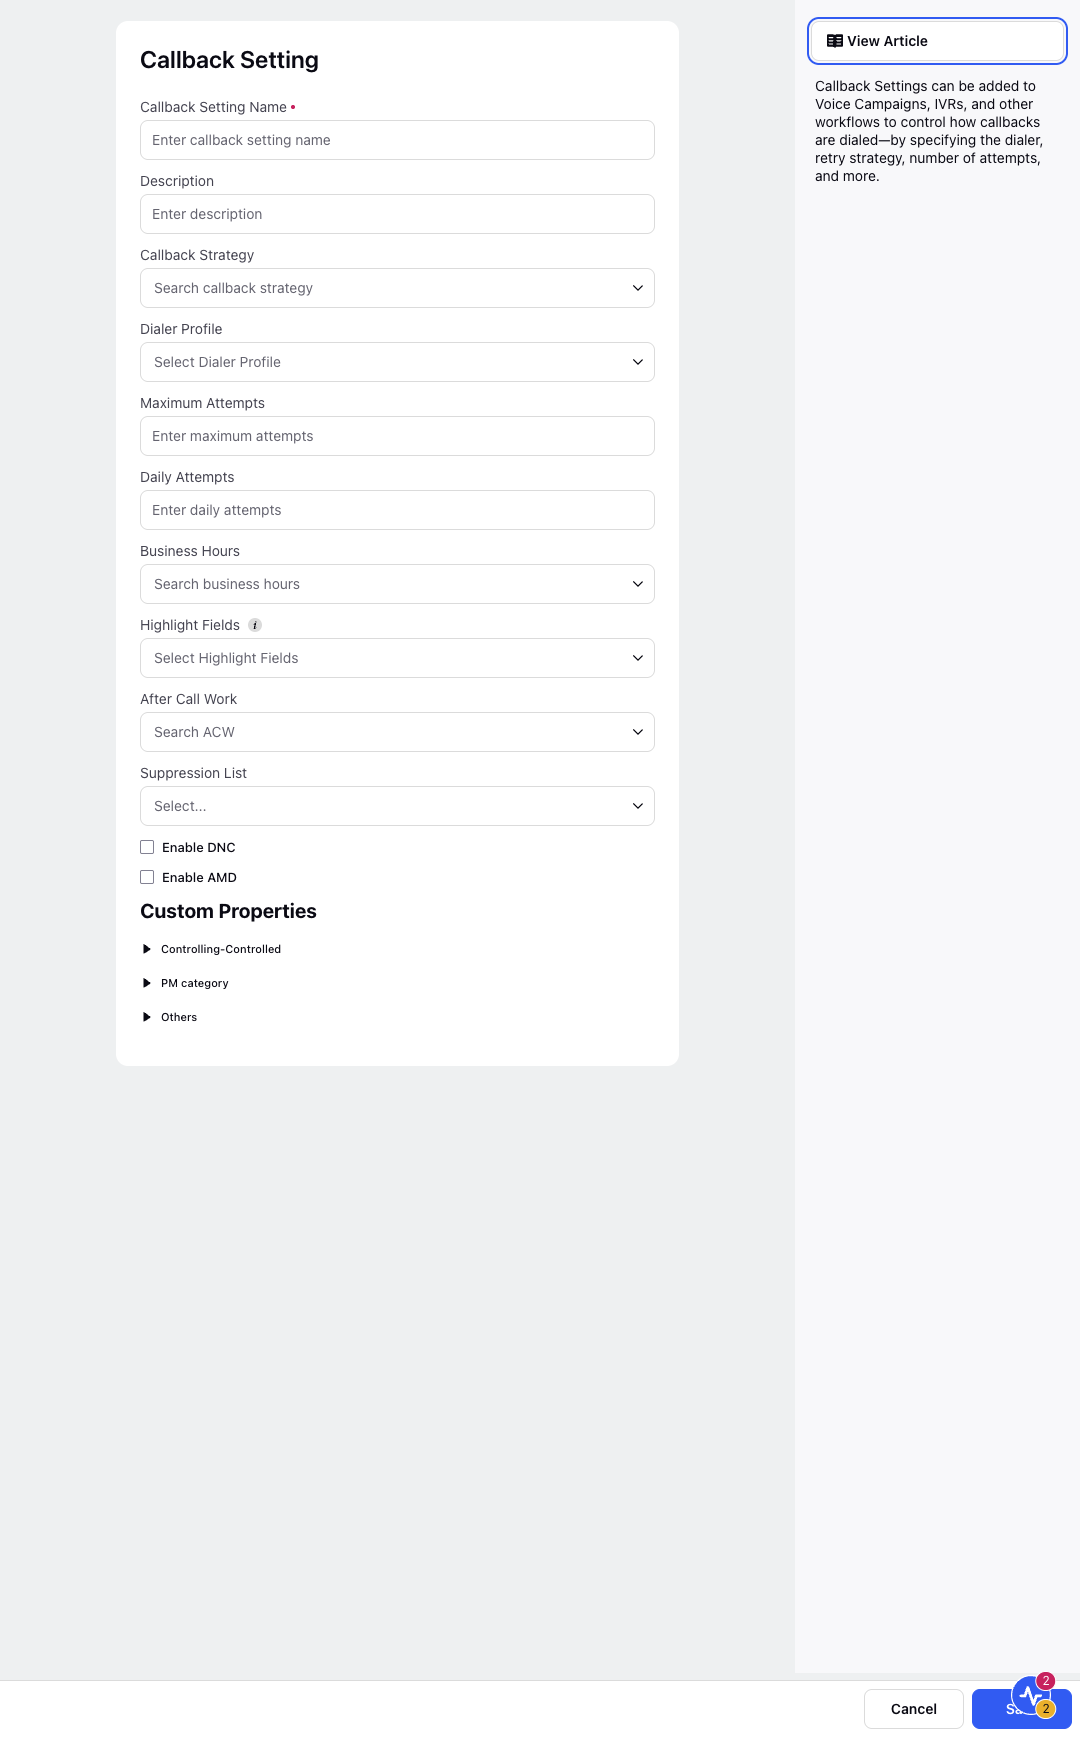
The Callback Setting screen is displayed.

Enter the Callback Setting Name and Description.
Select the Callback Strategy from the drop down menu.
Select the Dialer Profile from the drop down menu.
Enter the Maximum Attempts and Daily Attempts.
Select the Business Hours from the drop down menu.
Select the Highlight Fields from the drop down menu.
Select the After Call Work from the drop down menu.
Select the Suppression List from the drop down menu.
Click Enable DNC if you want the system to check the number against the Do Not Call (DNC) list before making a callback.
Click Enable AMD if you want the system to detect whether a person or an answering machine (voicemail) picked up the call.
Enter the Custom Properties based on your business needs or reporting requirements. These are extra fields that you want to use in your callback setting, such as tags, source info, or partner-specific fields.
Click Save.
Refer to the following table for the parameter description for the Callback Setting screen.
Parameter | Description |
Callback Setting Name | Name of the callback configuration. It should be easy to understand and related to its purpose. Helps you identify the setting when selecting it in workflows or callback nodes. |
Description | Purpose or details of the callback setting. |
Callback Strategy | Defines the retry behavior, how and when the system attempts to redial the customer if the first attempt fails. You can:
|
Dialer Profile | This links the callback setting with a specific callback dialer, which controls how the callbacks are dialed (Agent first, IVR first or customer first callbacks). |
Maximum Attempts | The total number of times the system tries to make a callback for a single customer. |
Daily Attempts | Defines how many times the system can call a customer in one day from this callback setting. |
Business Hours | Determines the time window during which callback attempts can happen. Example: If the business hours are 9:00 AM to 6:00 PM, the system won’t try calling outside this time. The working of this functionality depends on a DP: You can search and apply pre-configured business hours or create custom ones if needed. |
Highlight Fields | The key fields you want agents to see highlighted on the callback preview screen. Example: You may want to highlight fields like Customer Name, RM Code, or Last Call Reason. |
After Call Work | The ACW setting that applies once the call is completed. |
Suppression List | It ensures the system does not attempt callbacks to numbers that should not be dialed, like DND numbers or blacklisted leads. |
Schedule Callback Node
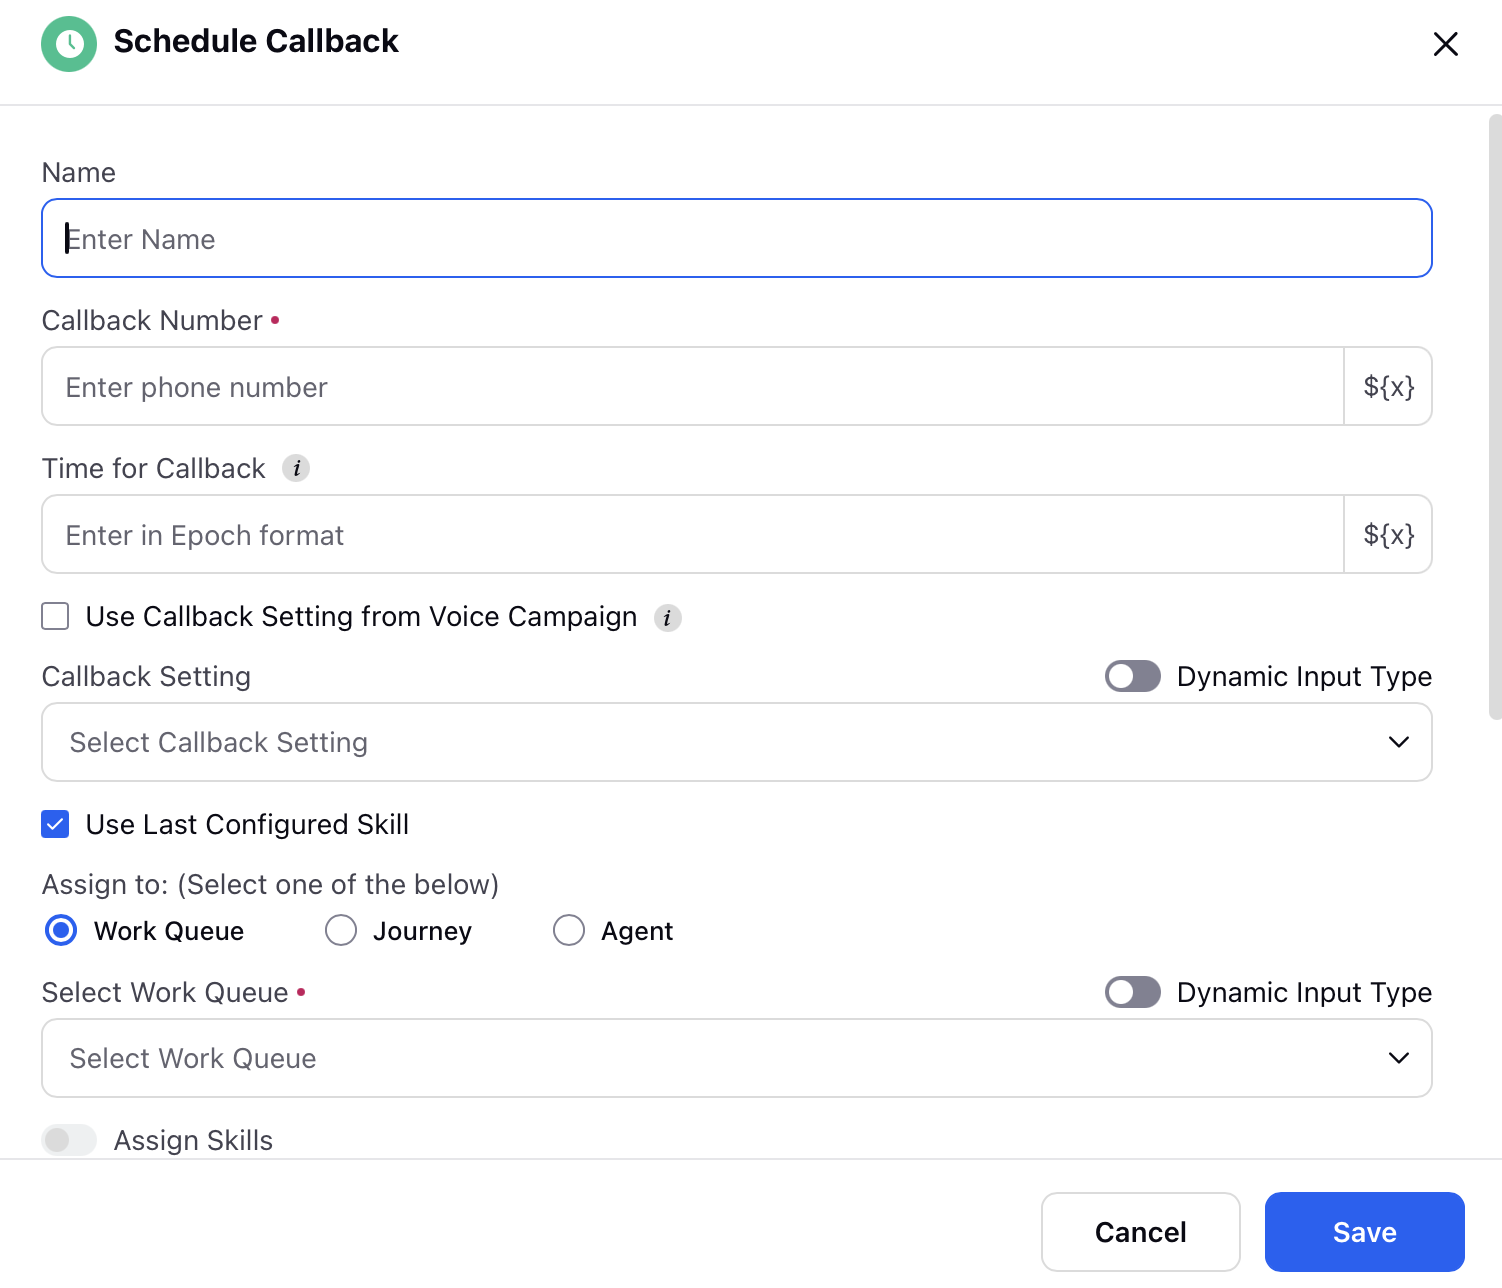
Now we can create a callback setting inline in the schedule callback node or just select an existing callback setting in the schedule callback node.
In any workflow (Journey, GP, IVR, Dialogue Trees, ACW), add the Schedule Callback node.
In the node, either select an existing callback setting or create one inline.
Choose options such as:
Use Callback Settings from Voice Campaign.
Use Last Call Skill (auto-maps skill from the previous conversation to the callback).

Note: You can migrate from the older campaign-based callback setup using the Migrate option in Voice Campaigns. This does not impact existing workflows. However, we recommend updating the Schedule Callback node to use the new Callback Settings. For further details on this, refer to To create a Callback Campaign.
Post-migration, the Callback Setting dimension gets available for reporting.