Configuration Steps
Updated
The live team monitoring screen is available to Supervisors by default. Supervisor can create new dashboards and can add agent monitoring metrics of their choice.
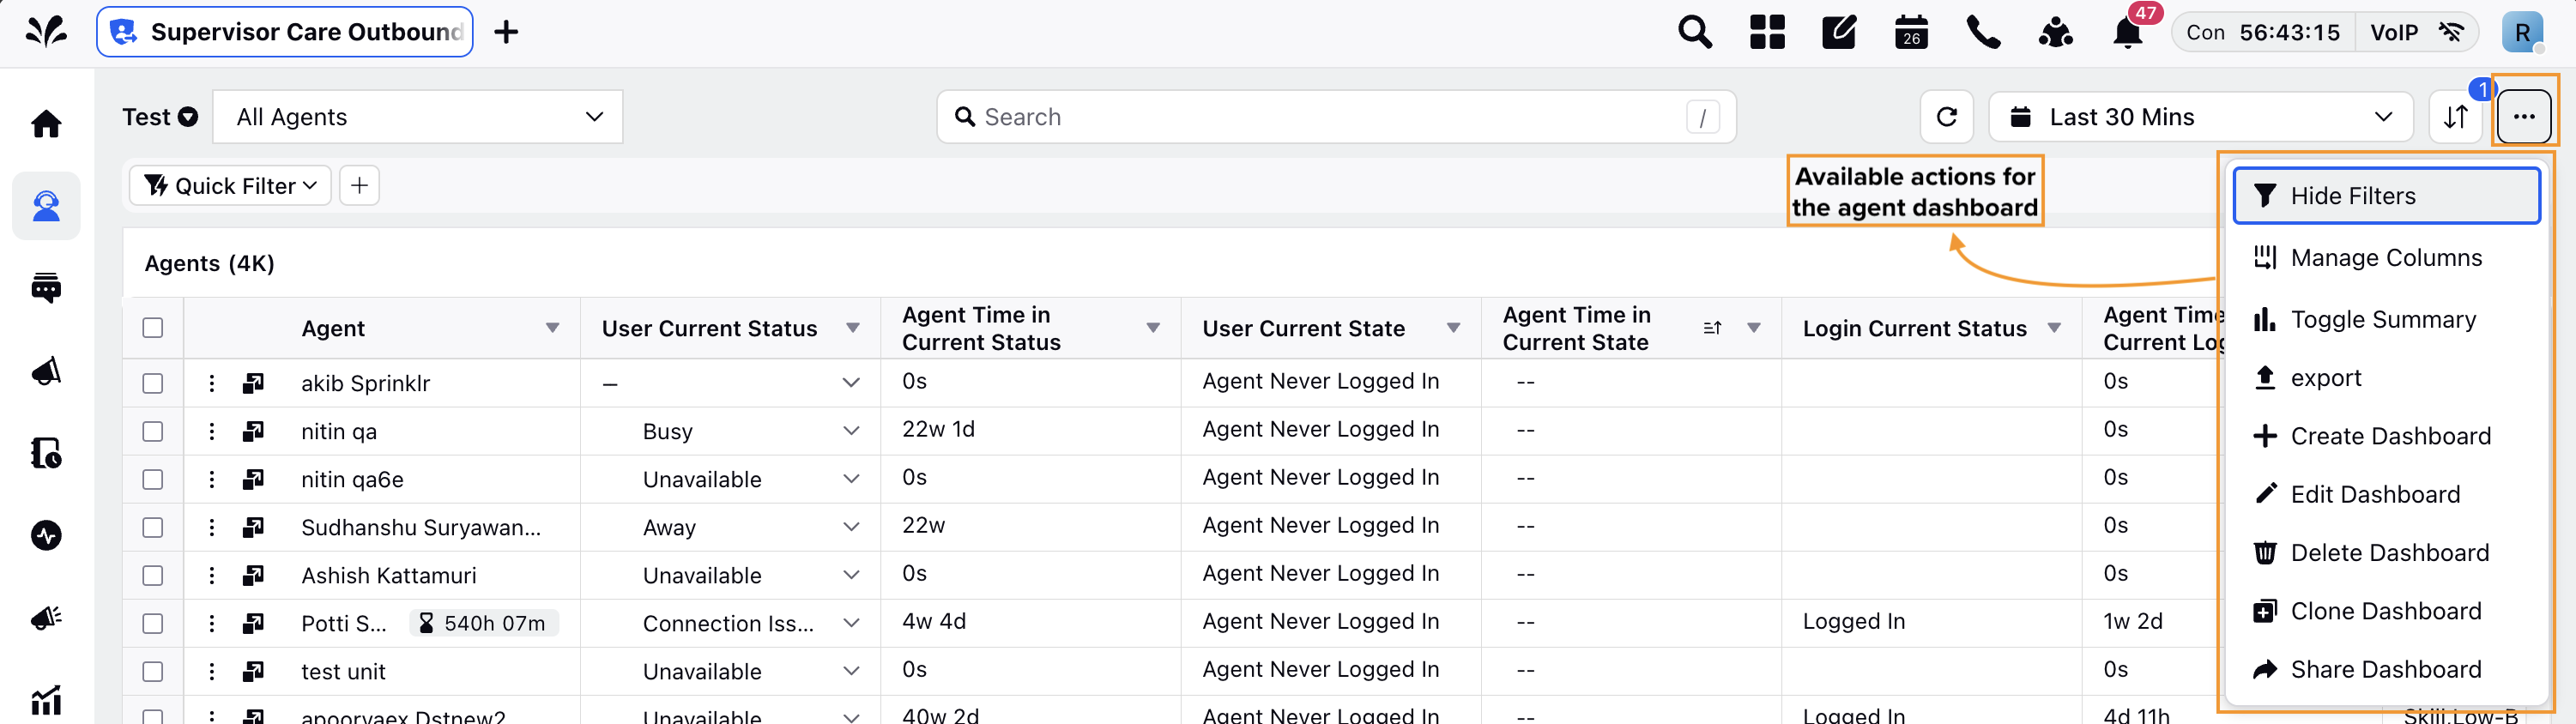
Dashboard actions
Here you can apply various actions on the new or existing dashboard.
S. no. | Fields | Descriptions |
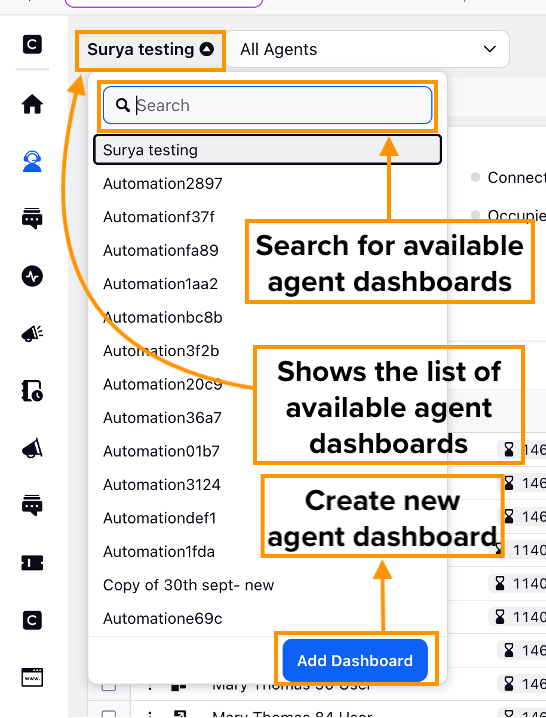
1 | Create Dashboard | 1. Create a new dashboard. On the Add Dashboard window, add a Name, Tags, and Starter Dashboard. 2. After entering the above details, a standard dashboard will be generated. 3. More columns can be added by clicking the Manage Columns.
The dashboards can be switched by selecting the desired dashboard from the list that comes after clicking the chevron icon on the top left. |
2 | Edit Dashboard | Edit the name and tags of the dashboard. |
3 | Delete Dashboard | Delete the dashboard. |
Clone Dashboard | Create a copy of the dashboard. | |
Share Dashboard | Share the dashboard by selecting the workspaces and users/users groups. |
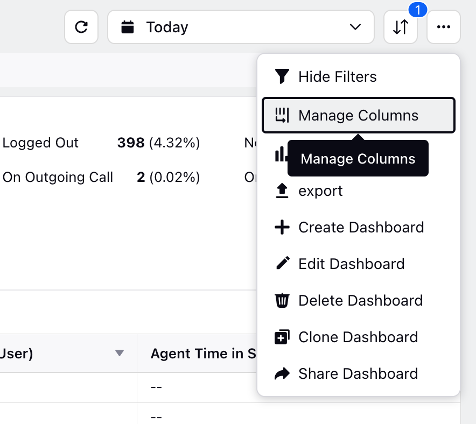
Manage Columns
From the Manage Columns option present in the top right corner of the Team Monitoring Screen supervisor can add agent monitoring metrics and attributes to customize the dashboard.
Call Mode Column
The supervisor can see whether the agent is taking calls through PSTN Mode or WebRTC Mode. This helps the supervisor track whether the agent is making the call through phone or via the web. To learn more about getting this column enabled in your environment, please work with your Success Manager.
![]() Note: This can be enabled only for those clients that have Ozonetel as a Telephony Provider.
Note: This can be enabled only for those clients that have Ozonetel as a Telephony Provider.

User Accessibility Filters
The user accessibility filters are applied based on the user type logged into the persona. With these filters, you will be able to see the filtered view of agents based on the workspace they are in.
Internal note:
Use this DP: FILTER_INACCESSIBLE_USERS_ENABLED
REPORTING_INCLUDE_INACTIVE_USER_FILTER_DISABLED
After enabling this capability
Global Admin (GA) can access all users of all clients.
Global User (GU) can access WA, WU, GU of that particular client.
Workspace Admin (WA) can access WA, WU of that particular client.
Workspace User (WU) can access WU of that particular client.
Supervisor Console Metric Adjustments
Hover over the Dropdown icon alongside the column name to get a list of metric adjustments using which you can adjust the value of the columns accordingly.

Metric Adjustments | Description |
Sort ascending | It will arrange the data from the least time spent by an agent to the highest time spent in a particular status. |
Sort descending | It will arrange the data from the highest time spent by an agent to the lowest time spent in a particular status. |
Aggregate by Sum | By selecting this, you get the collective amount of time that agent has spent in a particular status. |
Aggregate by Average | This will give the central/average value of the time spent by the agent in the status. |
Aggregate by Minimum | This will give the value of the minimum amount of time spent by the agent in the particular status. |
Aggregate by Max | This will give the value of the maximum amount of time spent by the agent in the particular status. |
Aggregate by % | This will sort by taking the value of one user with all other users to calculate the time of status. For example: There are a total of 5 users and each user spent 1 hour in their respective current status. So by taking the value of one user against the remaining 4 users you would get the aggregate value in percentage ⅕ = 20% |
Aggregate by % change | This will give you the aggregate value in % by taking up the status value of the current time range with the previous time range. |
Aggregate by change | This is the same as above but it will give you the aggregate value in number and not in percentage. |
Pivot Column | It means the primary column and all details in other columns will be dependent on the primary column. |
Freeze Column | You can freeze the column to pin it in the same place and see it when you scroll. |
Further admin can decide the governance of features that can be enabled for the supervisor. Apart from this supervisor can create quick filters and visual alerts with the help of color tagging settings. The detailed configuration steps are added here.