Deep Dive into the Queue Monitoring Screen
Updated
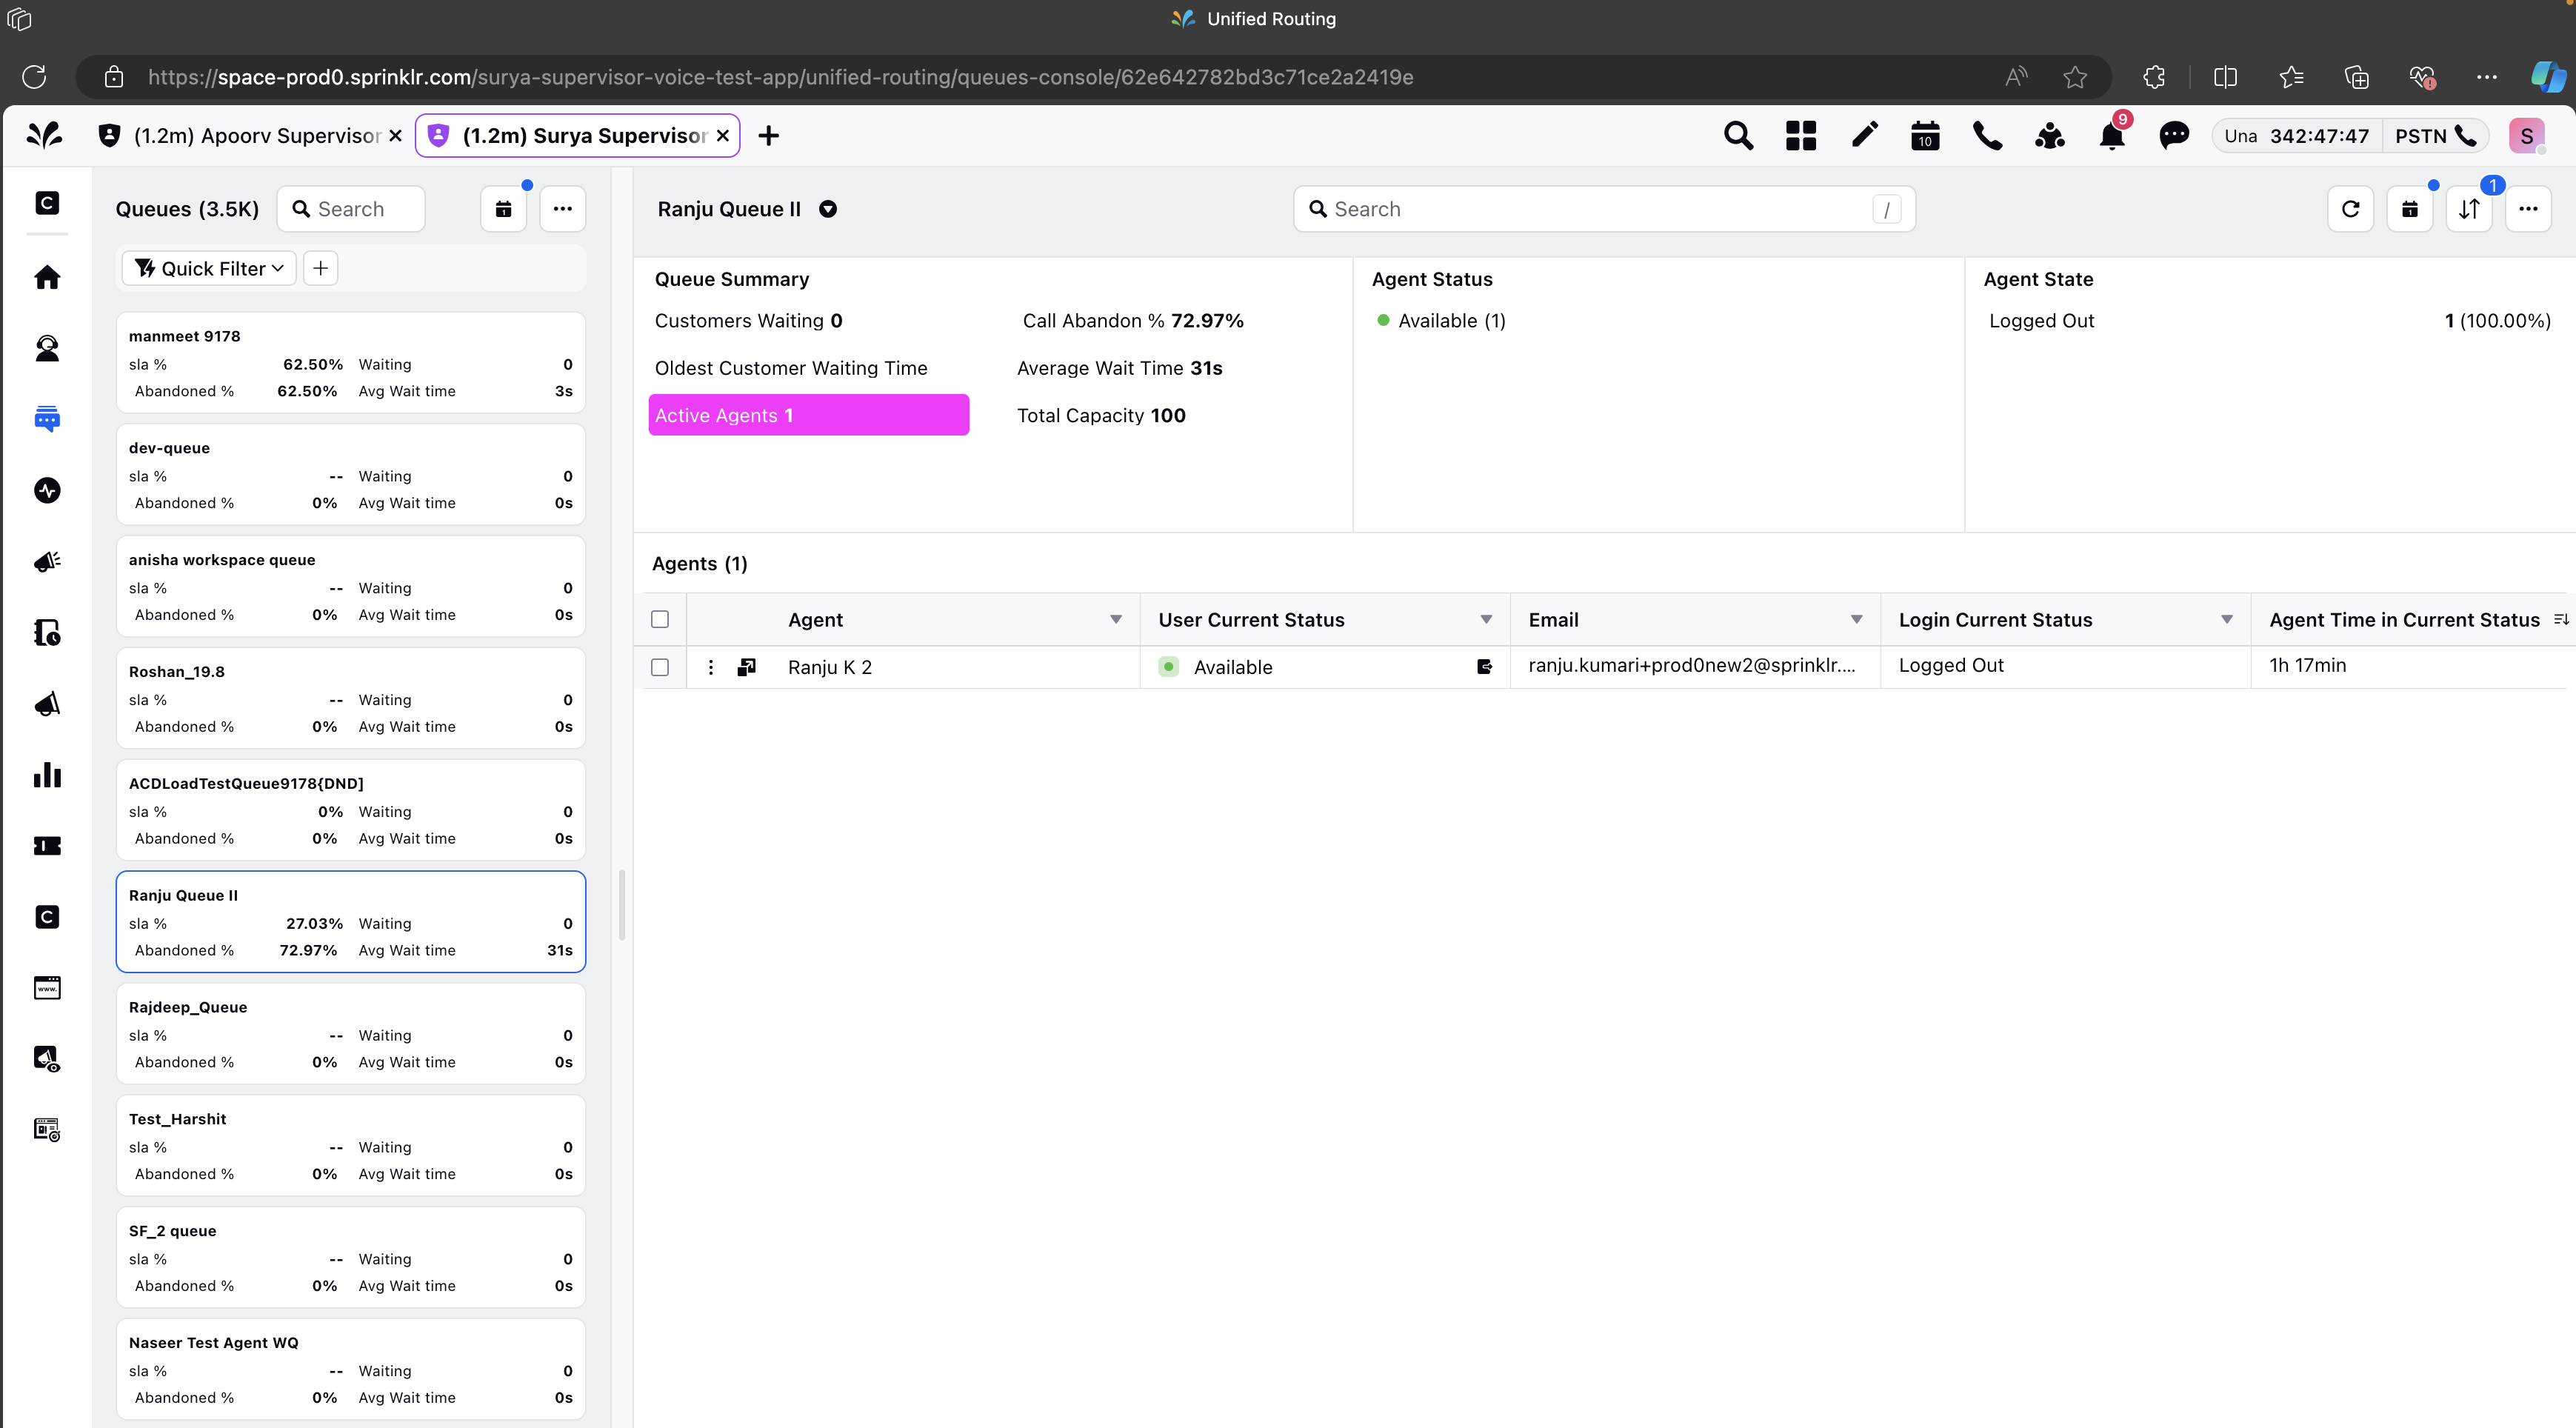
The Queue Monitoring screen is a centralized, real-time dashboard that allows supervisors to monitor work queues, view the agents assigned to those queues, and track their current statuses and states.
All the queues shared with the supervisor are accessible from the left of the screen. Supervisors can view a quick snapshot of the queue from the card. They can also click on the queue card to view the agents working in that queue and monitor the overall health of the queue by tracking various KPIs. The Supervisor can monitor multiple queues at once - the queue cards present on the left allow supervisors to have a comprehensive view of all queues even while drilling down on any specific queues.
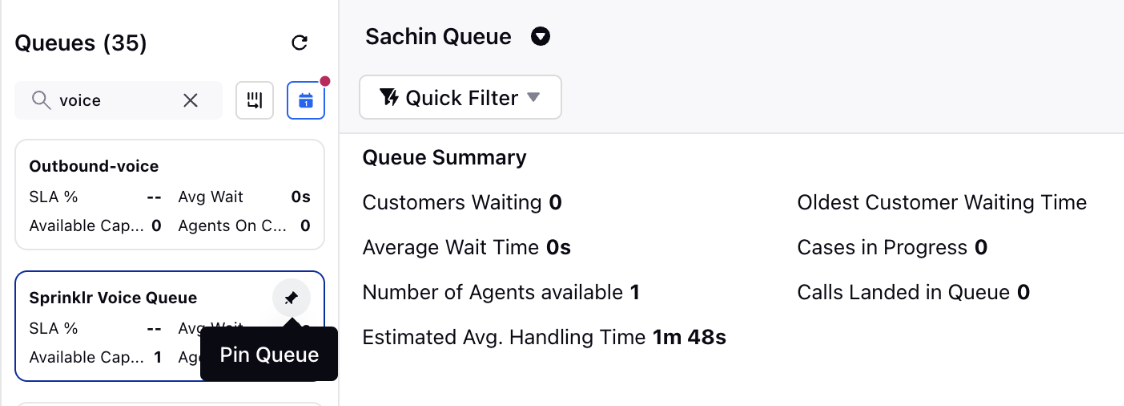
You can expand the first pane by clicking and holding the slider, dragging it to the right, and then releasing it. The Queues page serves as the landing page for Unified Routing, providing supervisors with an overview of all the work queues created in the workspace.
![]() Note: To enable drag-and-drop functionality on the Queue Monitoring page, ensure the checkbox "Expand Queue Cards into a Queue Table for Enhanced Visibility" is selected for the relevant Persona App in the Persona App Manager.
Note: To enable drag-and-drop functionality on the Queue Monitoring page, ensure the checkbox "Expand Queue Cards into a Queue Table for Enhanced Visibility" is selected for the relevant Persona App in the Persona App Manager.

These work queues are channel agnostic, meaning customer cases from any channel can be routed to any of the work queues for assignment to agents.
![]() Note: To enable this capability, please raise a support ticket by contacting tickets@sprinklr.com.
Note: To enable this capability, please raise a support ticket by contacting tickets@sprinklr.com.
.png "image (2).png")
Additionally, you can pin queus to appear at the top. Pinned queues in the card view will also be pinned in the table view, and vice versa, providing consistent visibility across different views.
Aggregate View
After having the overall idea about queues health, the supervisor can further drill down by clicking the Queue card on the left. For a selected queue, the summary of queue metrics, agent status and agent states are provided on the top.
Queue Summary
The Queue Summary widget shows the following metrics:
Customer Waiting
Call Abandon %
SLA %
Oldest Customer Waiting Time
Average Wait Time
You can create Lenses, which are dashboard-based overlays, and map them to the queue summary metrics. These lenses allow you to drilldown into metric data for a more in-depth analysis.

Agent Status
Shows the aggregate summary of the agent's availability status, such as Available, Unavailable, Lunch, Tea break, Connection issue, etc. This value comes based on the defined values of the User Availability Status Custom Field.

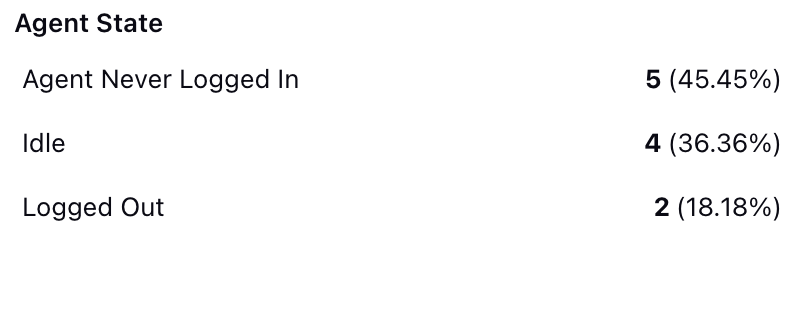
Agent State
Shows the aggregate summary of agents' current states such as On Outbound Call, On Inbound Call, Call Ringing, Idle, Working on a Case, etc. It helps you understand the live activity performed by the agent.
Clicking the desired status will show the corresponding states in the state widget and the table will be filtered based on the selection. Further, on clicking the state, an additional filter will be applied which will show data based on the selection of agent status and state. This helps the supervisors to effectively monitor the team members with just one click.
Generate Case Summary
![]() Note: Supervisors can view a smart summary of active cases agents are handling, generated by Sprinklr AI+. This option appears when an agent is in the Working on case state and provides key context details before supervisors join the live interaction.
Note: Supervisors can view a smart summary of active cases agents are handling, generated by Sprinklr AI+. This option appears when an agent is in the Working on case state and provides key context details before supervisors join the live interaction.
This feature requires backend configuration. To enable this feature in your environment, contact Sprinklr Support at tickets@sprinklr.com.
.png)
The Smart Summary includes details such as case number, customer predicted CSAT, case duration, reason for contact, and agent actions taken. By having this information upfront, supervisors can make faster, more informed interventions, leading to improved resolution times and more effective case management.
Detailed View
Supervisors have the option to monitor at an individual agent level. The agent's current state is located in front of the agent name. It helps Supervisors to understand the live activity performed by the agent. These columns can also be plotted via the Manage Columns tab. The name of the columns is User Current State and Agent Time in Current State.

Agent States
Following are the agent states that are shown along with the timer to monitor live agent activities:
Agent State | Description |
On Outbound Call | Agent on an outbound call |
On Inbound Call | Agent on an inbound call |
Call Ringing | Call is ringing |
On ACW | Agent filling ACW (After Call Work) A new version of On ACW has been introduced to accurately reflect agent availability when ACW is assigned but not actively open in front of the agent (for example, if they have navigated back to the homepage while ACW capacity is still consumed).
|
Working on a Case | Agent working on a social case |
Call on Hold | Customer call on hold |
Idle | Agent idle. In this state, a user can be inactive, unavailable, on lunch, on break, etc. To change the 'idle' state to 'not available', work with your Success Manager. |
Logged In Agents | Represents the number of agents who are logged in to Sprinklr and are activated in the Work Queue. |
Idle Agents | Agents with Consumed Capacity = 0. They can be assigned any type of case based on queue routing configuration, skills, availability status, and other criteria. |
Agent initiating video call | Agent initiating a video call to customer |
Video call in progress | Agent in video call with customer |
Incoming user video call | Inbound video call to agent |
Setting up video call | Setting up video call for participants |
Case/Call Actions
When you click user current state such as on-call, the case number will pop up on a case as shown below:

The pop-up will show the case number on which the agent is working. After clicking on this case number, a third pane view will appear showing the detailed view of that case.
Third pane view of current working case
The third pane of the current working case consists of tabs like Case, Properties, Collaborate, Tasks, Historical Cases, Smart Assist, etc. From here Supervisor can see the conversation, collaborate with agent to give guidance and can see case properties like channel, custom priority, customer sentiment and other critical case related metrics.

Listen
Listen helps the supervisor to get the contextual clarity about the conversation between the agent and the customer. Listening on a call means that neither the agent nor the customer is aware of the supervisor listening in on the call. Listening in a non-voice case means opening the case conversation view and from there, the supervisor can add notes (whisper) or barge in (reply).

Whisper
For Voice - When an agent is on a call, the supervisor can whisper to the agent. Whispering entails speaking to the agent where only the agent can hear that and not the customer. The supervisor can give suggestions while listening to the call or the supervisor can whisper without listening to the call and let the agent know about something that is not related to the current call, like “You are lagging behind your quota for today”.
For Digital - Whispering in digital is the same as adding notes in case collaboration widget.

Barge In
The supervisor can directly barge in on a call, which means that the supervisor joins the “conference call” with the customer and the agent. Supervisor does this action to take control of the conversation when the agent is not able to clarify the customer query.
Agent Actions
Change Agents Current Status and Login Current Status - The Supervisor has the autonomy to change the User Current Status and Login Current Status.

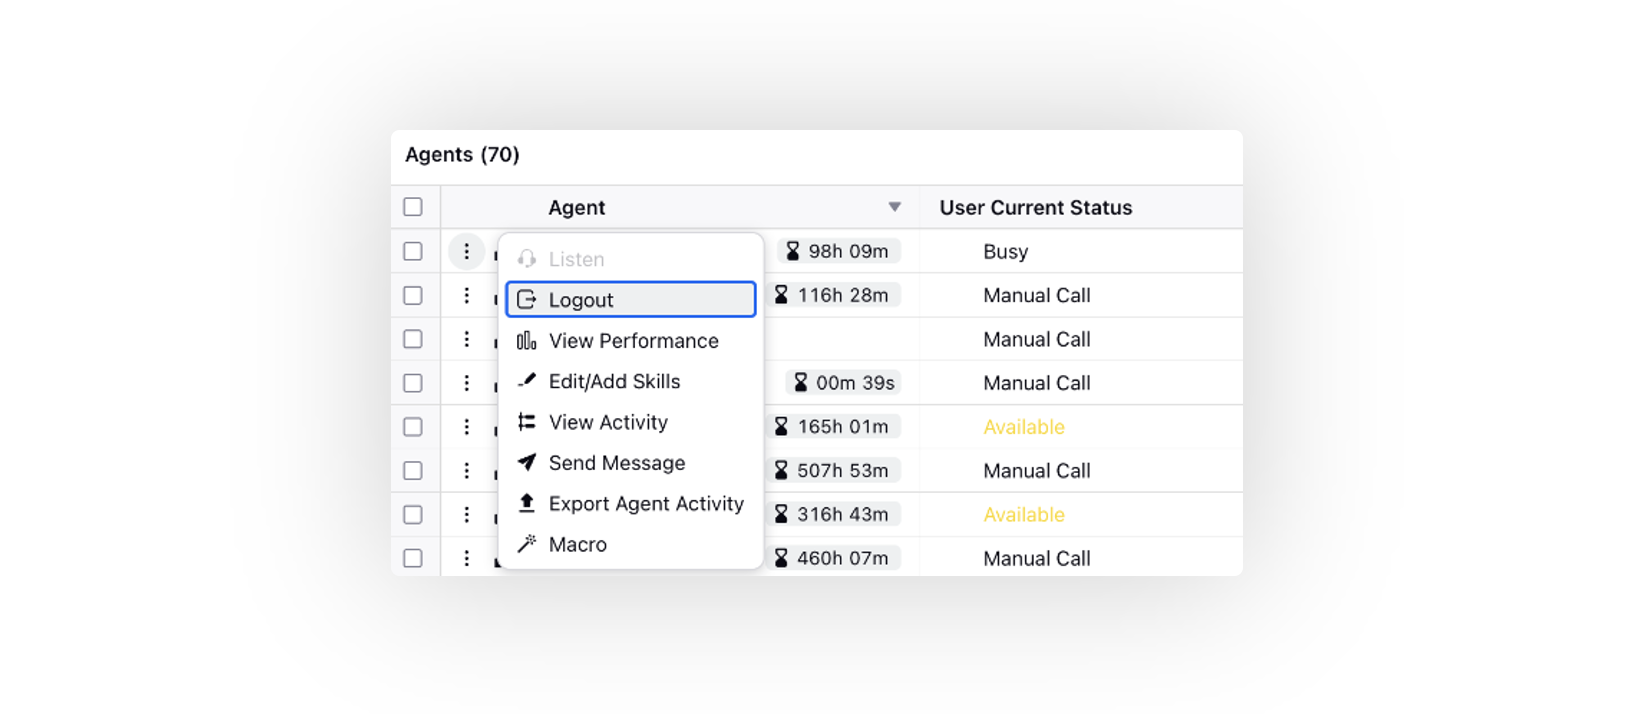
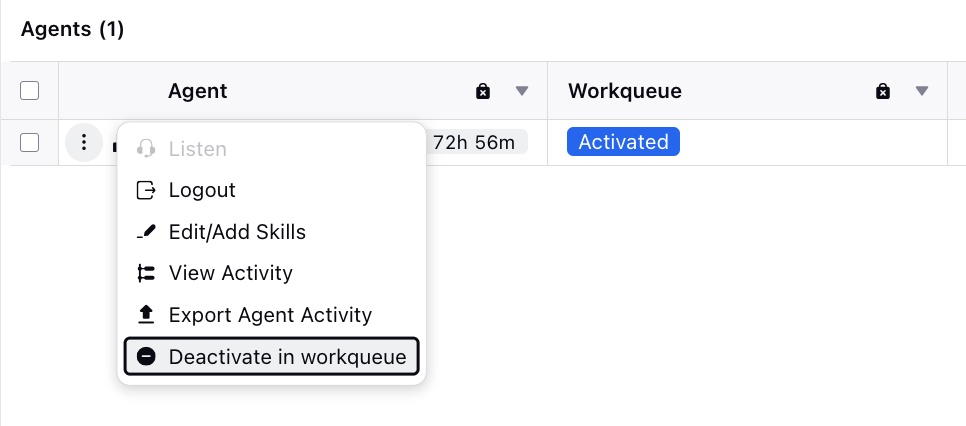
Logout - Select to logout the agent.

View Performance - Supervisor can click on View Performance to monitor the customized monitoring dashboard for the agent.
View Agent Activity - Click the Options icon against the agent name and select View Activity option to view the agent activities on the case.
This helps the supervisor to view and monitor the agents’ activity stream within Supervisor Console which includes:
Logged In
Logged Out
Answered/Declined call
Receiving warm/blind transfer call
Connect back
Attended/Initiated conference
Scheduled Call back
Call back happened
Filled ACW
ACW Timer reached
Macro applied by
Case assigned to / unassigned from
Notes added by the user on cases/messages
Macro run on cases/messages
Likes on cases/messages
Profile Comments (Enhance Add comment)
Assignment and un-assignment of cases/messages
Agent Status Change Trails
Switch to User Settings Audit from the top left to see the trail of all the changes made to the user's properties by other users like changes in User-level Custom Fields, User Groups, Assigned Roles, Skills, Capacity Configuration and Voice Settings.

You can export the Agent Activity report by clicking the Export icon in the top right corner of the Activity pane and download the export report in Excel or CSV format. You need to choose the desired timeline to view the Agent activity. The Supervisor will receive a notification once the agent activity report has been exported in Excel or CSV format. Besides that, the case numbers for all the activities related to cases will be displayed in export.

Edit/Add Skills - The supervisor can add a skill, increase or decrease the proficiency level of the skill or delete the skill of the agent. Based on the supervisor’s action, only the cases which map to agents skills will be assigned to the agent.

Deactivate in workqueue - Supervisors have the ability to activate or deactivate agents within a work queue. The Workqueue column will display their status, indicating whether the agent is currently active or deactivated. This ensures that supervisors can easily manage and monitor the status of all agents in the work queue.
Enablement note: To learn more about getting this capability enabled in your environment, please work with your Success Manager. |
Macro - Apply the desired macro. Additionally, you can choose multiple agents and apply the macro action at the bottom to execute it in bulk. To get this capability enabled, please reach out to our support team at tickets@sprinklr.com.
Agent Third Pane - Click the View Details icon to open the Agent third pane customized for each agent. The Supervisors can switch between Overview, Properties, Activity and Quality Analytics tabs. Quality Analytics tab enables them analyze different metrics such as Total AI Evaluations, Average Quality Score, Average Predicted CSAT Score, etc.
To edit properties, supervisors must have the Edit (User) permission under Setup.

View Assignment Wait Reasons
Supervisors can view assignment wait reasons for pending cases directly from the Queue Monitoring screen. An icon in the Customers Waiting column provides quick access to this information, helping supervisors understand why cases remain unassigned.
To view assignment wait reasons:
1. In the Queue Monitoring screen, locate the Customers Waiting metric in either the Detailed View or Aggregate View.
2. Hover over the icon (![]() ) in the Customers Waiting column.
) in the Customers Waiting column.
3. In the pop-up, click Show Wait Reasons.
Detailed View:

Summary View:

The Assignment Wait Reasons pane opens, displaying the list of unassigned cases along with their corresponding wait reasons.

Dashboard Actions
Export the Queue dashboard in Excel/CSV - Click the Export icon in the top right corner of the Queue's page to export the data of the dashboard to excel or CSV format.

Enter the desired details on the Export window such as the Format - Excel File or CSV File, or date range for which the queue dashboard report should be exported. The file name is filled by default. Click Export after providing all the details.

Filters
Supervisor can add the desired custom filters on any queue dashboard based on Login Current Status, User Current Status, User Current State, or User Skill (lookup), Work Queue Custom Properties, etc.
![]() Note: The Queue Monitoring screen allows you to apply different filters to each open tab. Filters applied in one tab do not affect the others, making it easier to compare different sets of data side by side.
Note: The Queue Monitoring screen allows you to apply different filters to each open tab. Filters applied in one tab do not affect the others, making it easier to compare different sets of data side by side.
This filtering behavior requires activation. To enable it in your environment, reach out to Sprinklr Support at tickets@sprinklr.com.
Some of the supported filters include:
User Group
Skill
Capacity Profile
Call Handling Enabled
Assignment Settings Schedule Start Date
Assignment Settings Schedule End Date
Scheduled Capacity Configuration
Scheduled Skill
User Custom Property

Team Filters
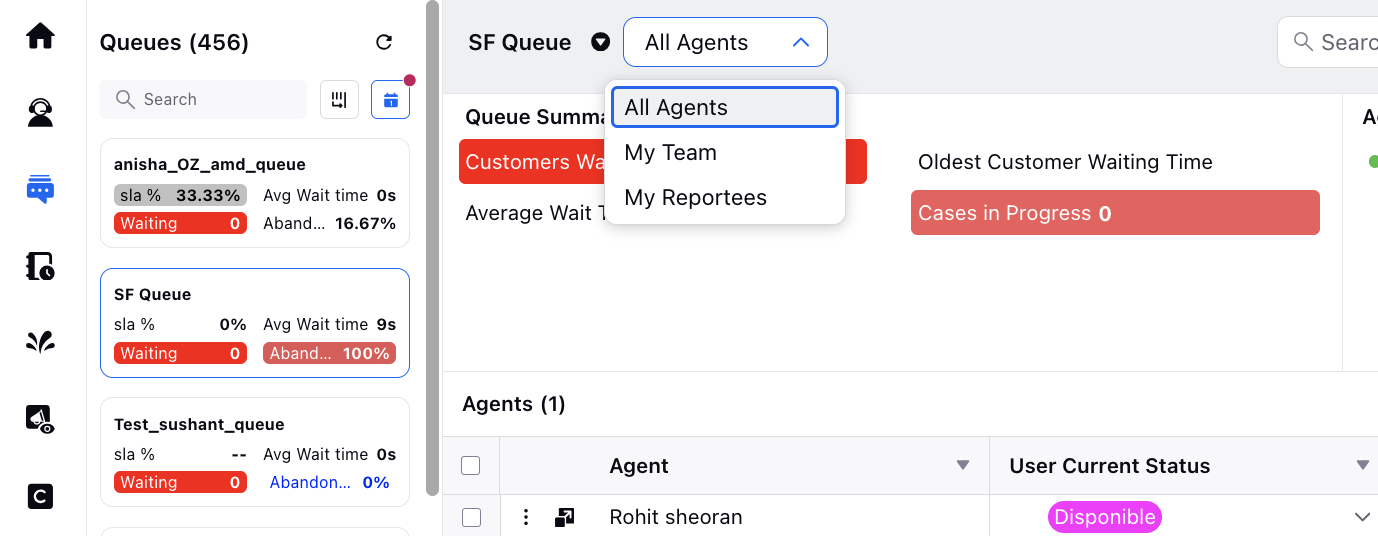
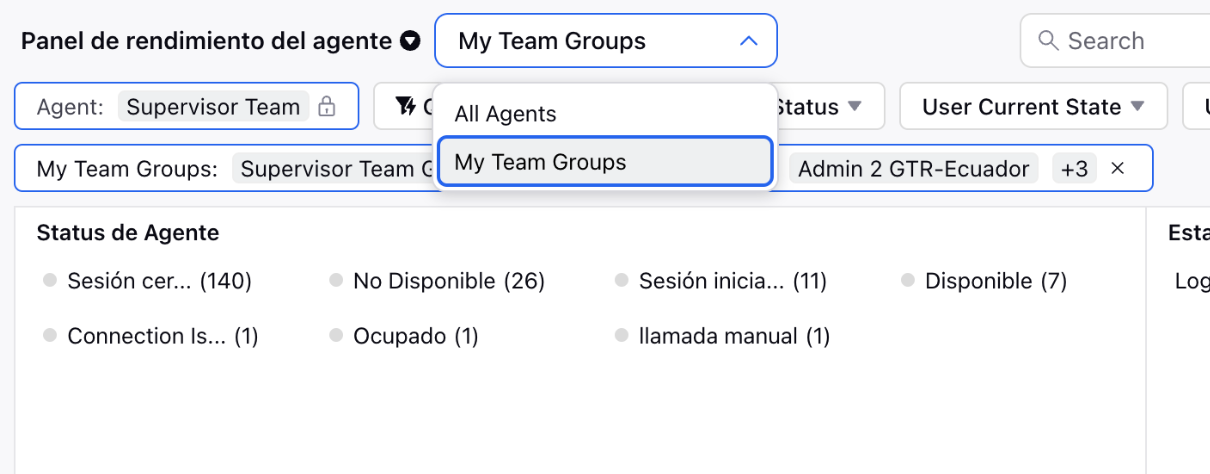
Click the User Filter dropdown in the top left corner of the Queues page to change the team filter. To get this filter enabled, please raise a support ticket at tickets@sprinklr.com.
Fields | Description | |
All Agents | By applying this filter, the supervisor will be able to see all the agents. Please note that it is permission controlled. | |
My Team | You can view all the direct and indirect reportees, which includes the reportees of reportees and so forth. This mapping of agents with their managers can be done via the user creation page. On the user creation page, there is a standard field by the name of Manager which can be updated to achieve this mapping. | |
My Reportees | View all the agents that directly report to the supervisor. This mapping of agents with their managers can be done via the user creation page. On the user creation page, there is a standard field by the name of Manager which can be updated to achieve this mapping. | |
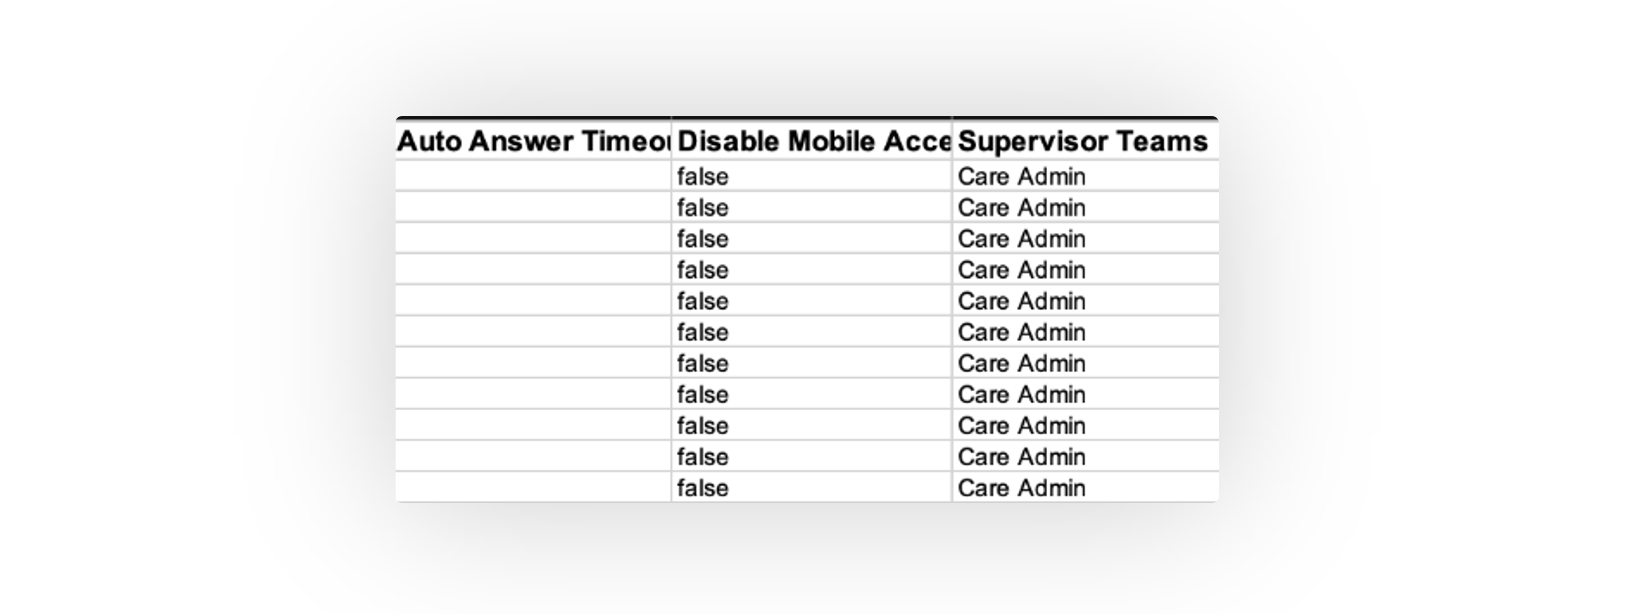
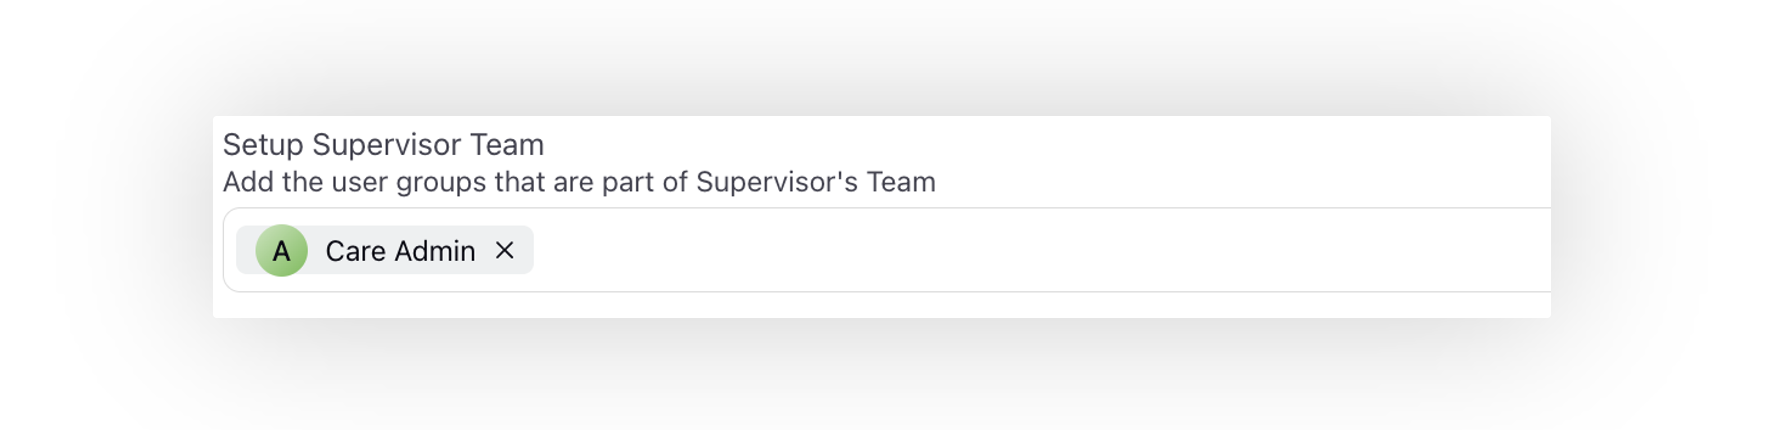
My Team Groups | View all agent groups linked to the Supervisor Team field in the user creation window. You can also add the supervisor team user groups to the users in bulk using the export/import feature. Export the users' file and specify the desired supervisor user groups, separated by commas, in the designated column of the export file. Upon importing this file, the user groups will be seamlessly added to the users in the Setup Supervisor Team field.
These groups can be categorized by various factors, such as agents' skills. As part of this change, the fields "My Team" and "My Reportees" will be removed.
|
Refresh
Click the Refresh icon in the top right corner to view the new changes on the Queues page, if any.

Sort By
Click the Sort By icon in the top right corner to sort the dashboard by a specific column, in ascending or descending order.

Time Range and Time Zone Filter
Select the Time Zone and the Time Range from the top right to view the data insights for that duration.


The supervisor can provide the desired Start Date and End Date for which they want the Queue dashboard data to be populated. Click Save at the bottom after selecting the time zone and the time range.
Actionability on Calls Waiting in Queue (Take Call / Transfer Call)
Supervisors can take action on calls waiting in the queue by either taking the call themselves or transferring it to another agent or Work Queue. This helps reduce customer wait times and improve overall team efficiency.
![]() Note: To enable this feature, reach out to your Success Manager or submit a request at tickets@sprinklr.com.
Note: To enable this feature, reach out to your Success Manager or submit a request at tickets@sprinklr.com.
Supervisors can take the following actions on calls waiting in the queue:
Take a call
Transfer a call
![]() Note: The take and transfer a call actions are only applicable for cases associated with Voice Call channel.
Note: The take and transfer a call actions are only applicable for cases associated with Voice Call channel.
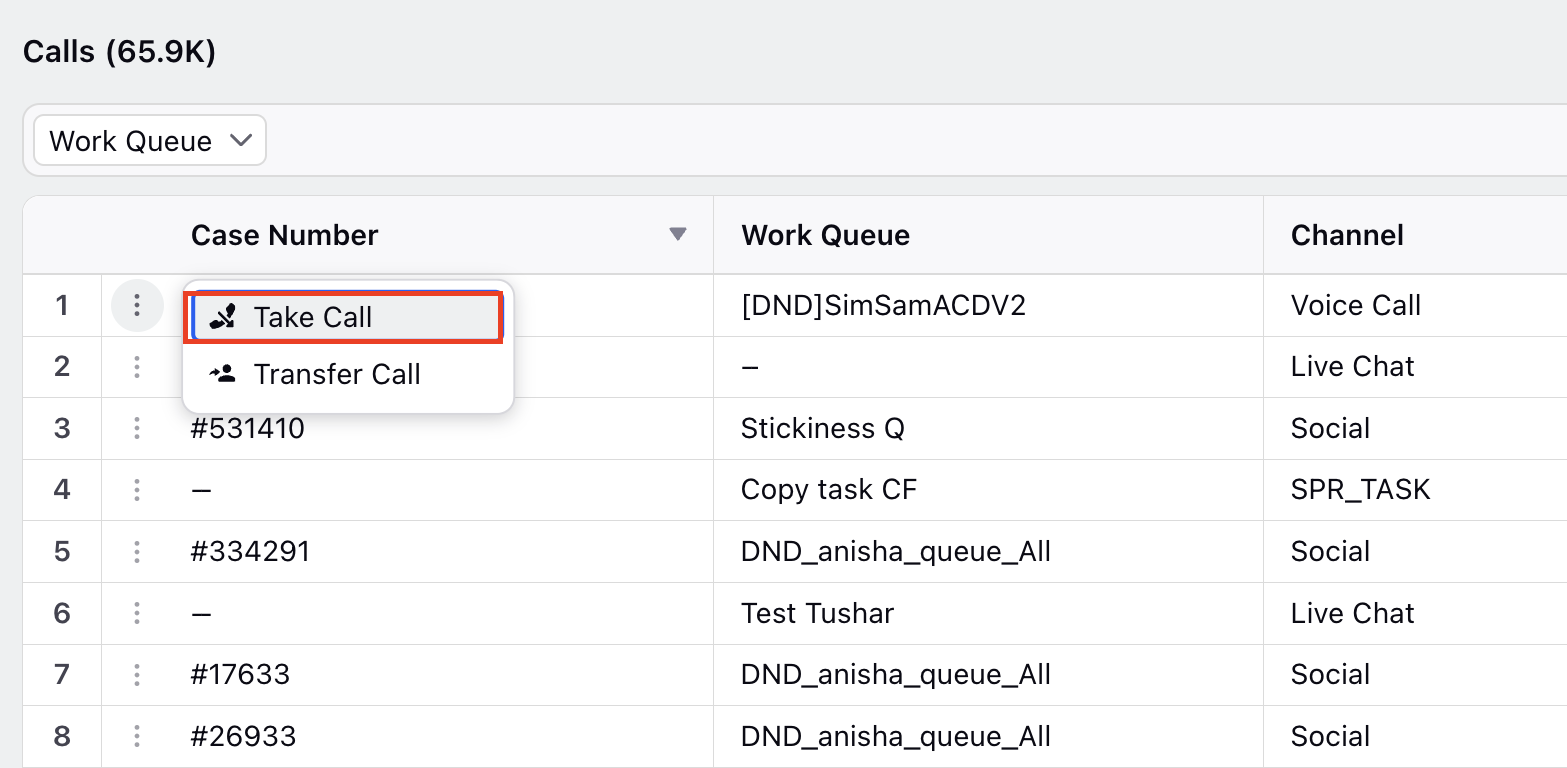
Take a call
To take a call, follow these steps:
1. Open the relevant Supervisor Console persona app from the Launchpad.
2. In the left pane, click Queues.
3. For a voice call, click the three-dot icon beside the case number.
4. Click Take Call.
Transfer a call
To transfer a call, follow these steps:
![]() Note: To transfer a call to IVR, you must have the Transfer to IVR permission enabled.
Note: To transfer a call to IVR, you must have the Transfer to IVR permission enabled.
![]()
1. Open the Supervisor Console persona app from the Launchpad.
2. In the left pane, click Queues.
3. Locate the case number and click the three-dot icon next to it.
4. Select Transfer Call.
5. In the pop-up window, choose where to transfer the call:
From the Transfer To drop-down, select Queue, Agent, or IVR.
![]()
Depending on your selection, the corresponding drop-down list (queue, agent, or IVR) is displayed.
6. Select the desired queue, agent, or IVR.
7. Click Transfer Call.
The call is then transferred to the selected destination.