Publishing Facebook and Instagram Partnership Ads
Updated
Facebook and Instagram Partnership ads allow advertisers to collaborate with creators, influencers, or other businesses, by running ads using co-branded assets or shared posts. These ads display both your brand and your partner's handle, helping you reach a wider audience with more impactful content.
In this article, we will cover how to create and boost partnership ads directly from Sprinklr using different features.
Before you Begin
Publishing partnership ads on Facebook and Instagram requires you to obtain permission from the partner whose handle will appear on the ad. For more information, see Facebook and Instagram Partnership Ads Overview.
Eligible Ad Formats and Objectives for Partnership Ads
You can only use partnership ads with specific ad formats and campaign objectives supported by Facebook and Instagram. For more details, refer to:
Publish Partnership Ads from Sprinklr
Using Ads Composer
Open a new tab and navigate to Sprinklr Marketing > Advertising > Ads Composer.
On the Create new Paid Initiative window, select a verified Facebook Ad Account.
Set the Paid Initiative Details, Target Audience, and Budget & Scheduling for your ad. For more information, see Compose Facebook and Instagram Ads.
In the Creatives tab, click +Add another creative.
Click + Add New Creative in the top right to build a new creative and add your creative details.
Scroll down to the Facebook Partnership Ads and Instagram Partnership Ads fields.
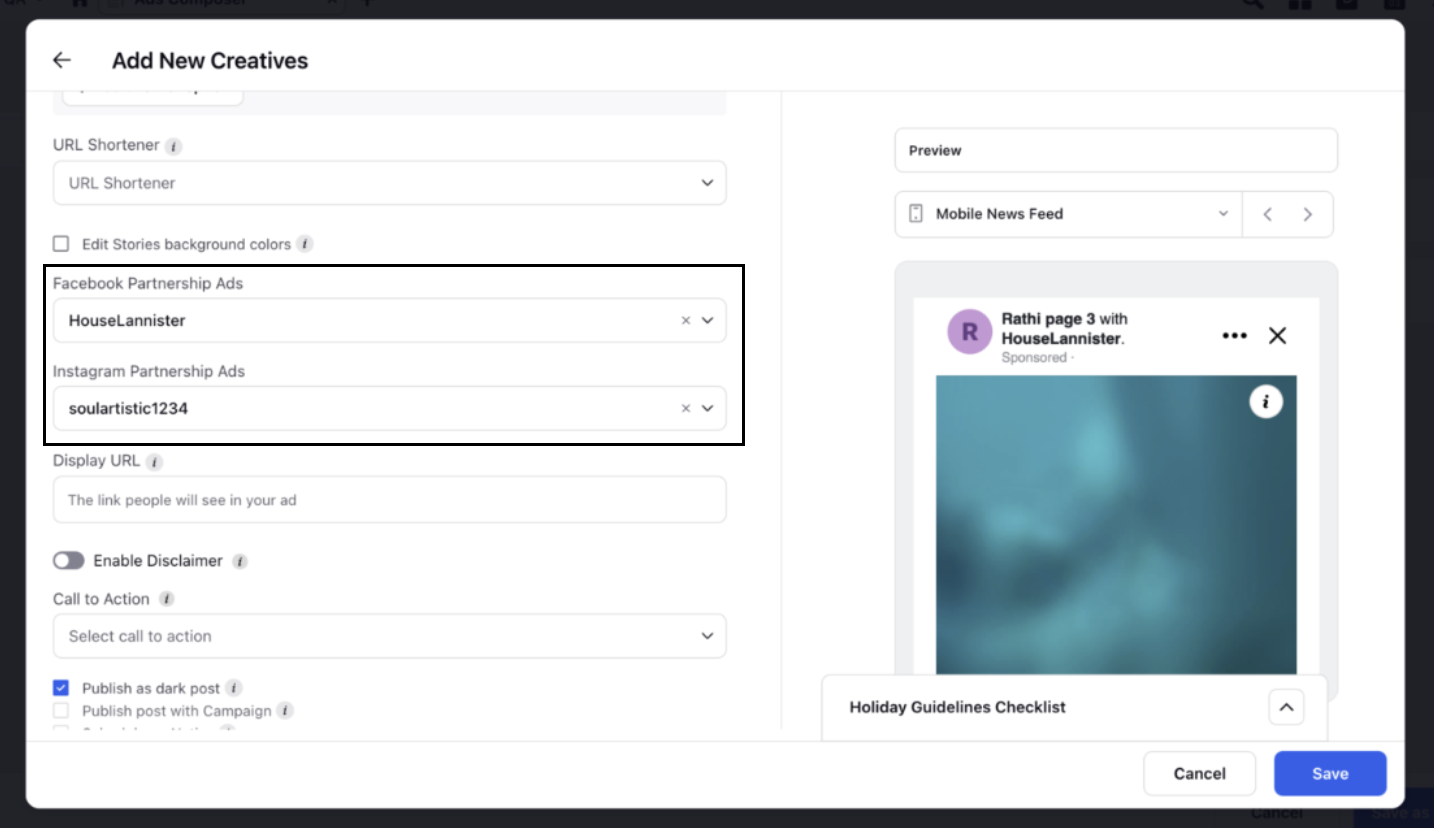
Click on the fields to select a verified Facebook and Instagram page from the drop-down.
In the Testimonial field, add partner testimonials. Testimonials appear as quick, text-only endorsements in the ad’s comments, helping build trust and authenticity for your brand.

Note:
In the Facebook and Instagram Partnership Ads fields, you can select only those partners who have accepted your request to collaborate on the partnership ads.
You can view your partnership status by navigating to the Partnership Ads Hub. The status will display one of the following:
Active – The partner has accepted your request to run Partnership Ads.
Request Sent – You have sent a request, and it is awaiting the partner's response.
Declined – The partner has declined your request.
Inactive – The partner has revoked the ad partnership.
Using Ads Manager
Open a new tab and navigate to Sprinklr Marketing > Advertising > Ads Manager.
Click
 next to the desired paid initiative and select an ad to view the creative details.
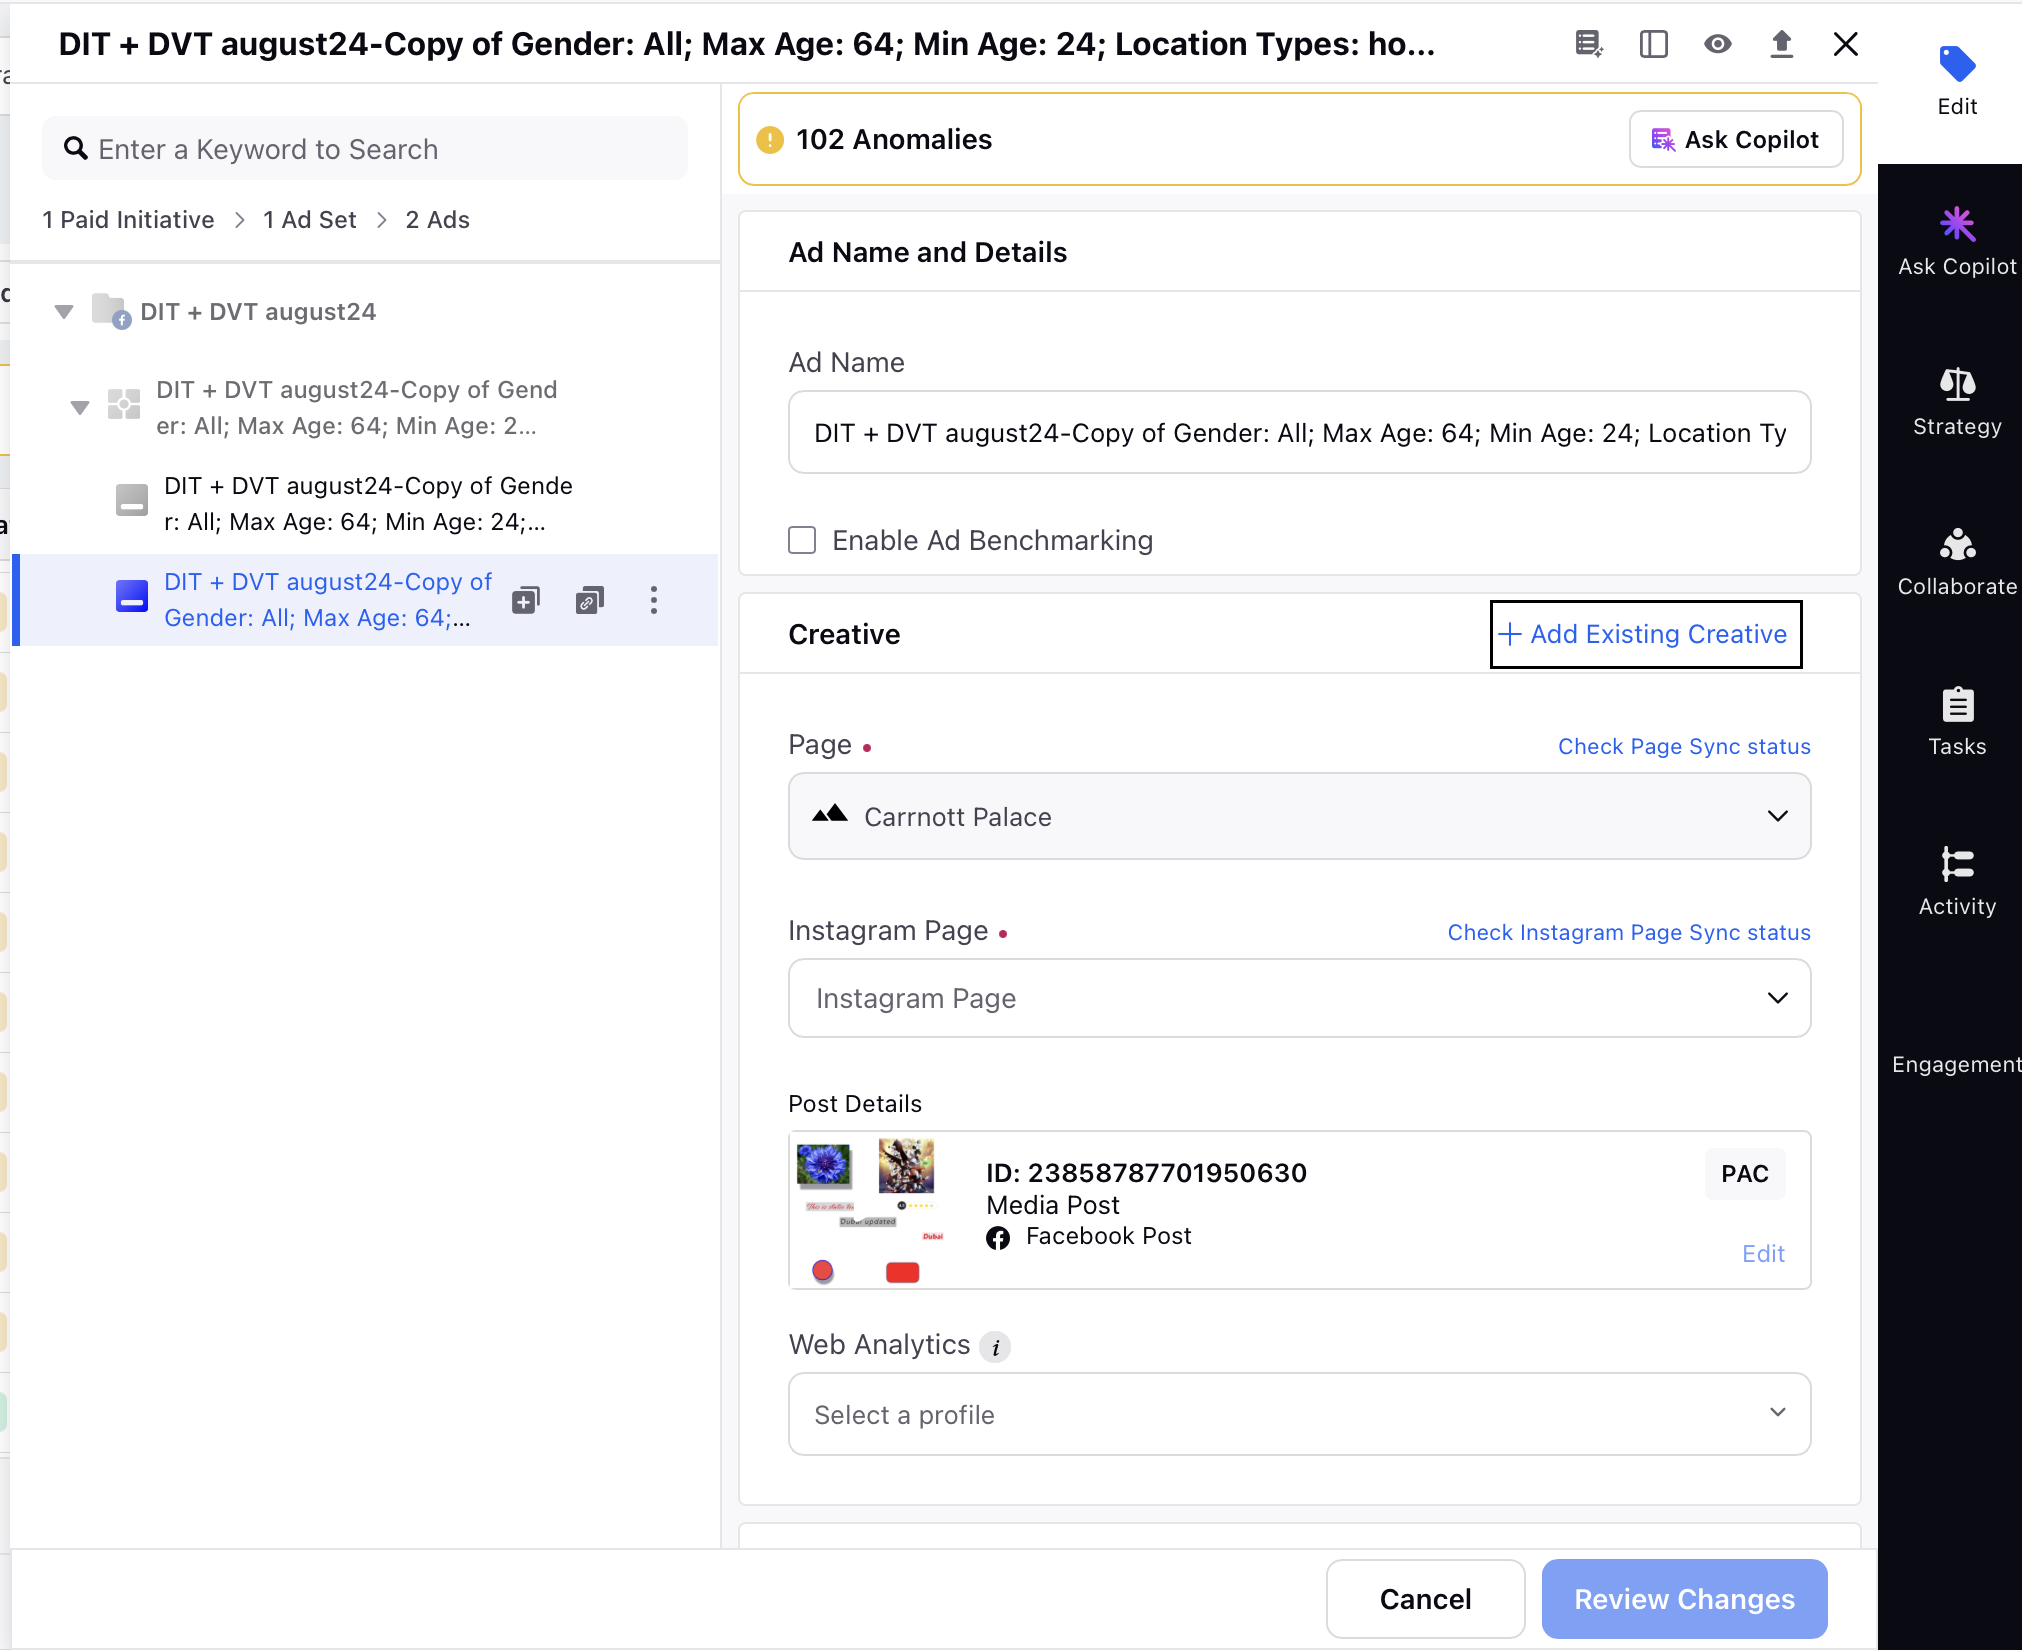
Click + Add Existing Creative to open the Select Creative window.
Click the Brand Content filter and select Yes to filter out the partnership ads creatives.
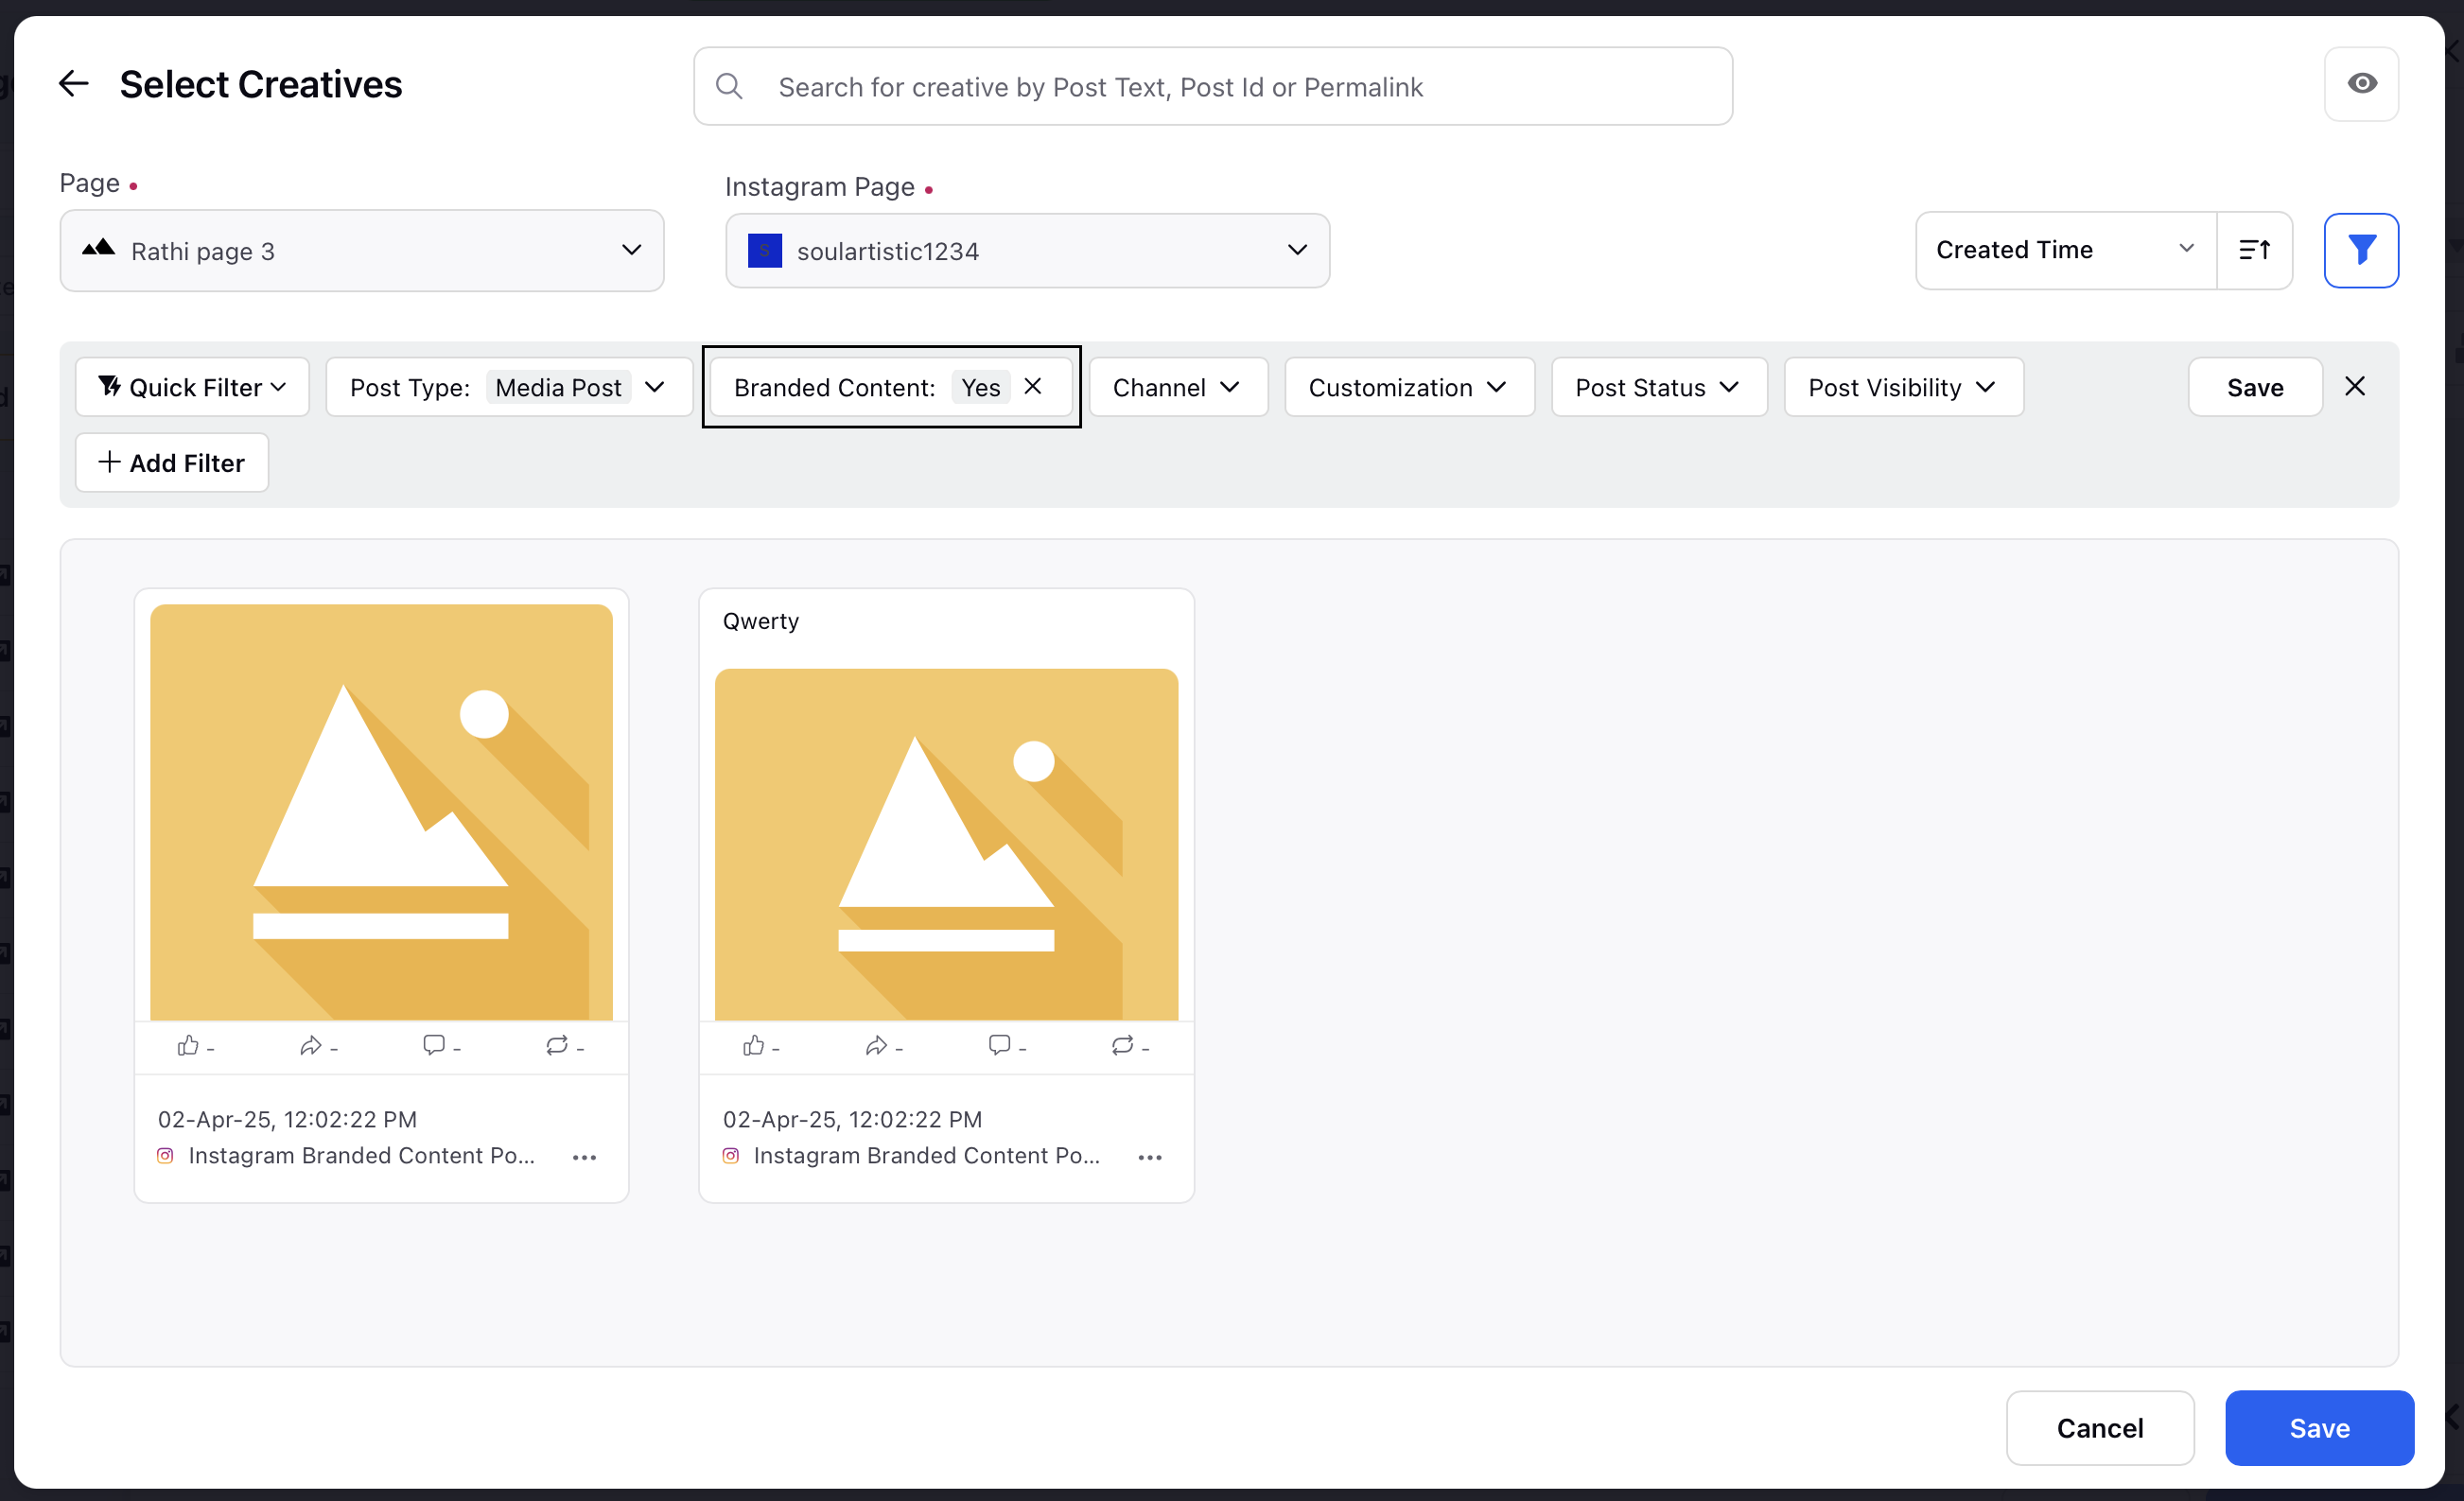
Select the desired partnership post to boost and click Save to add the creative to your campaign.
Boost Partnership Posts Through Sprinklr
Using Editorial Calendar
Click the Editorial Calendar icon at the top right to open the Editorial Calendar.
In the Editorial Calendar, click + Add Filter to access the available filters.
Search for and select the Is Branded filter.
Select True to view all branded content in the Editorial Calendar.
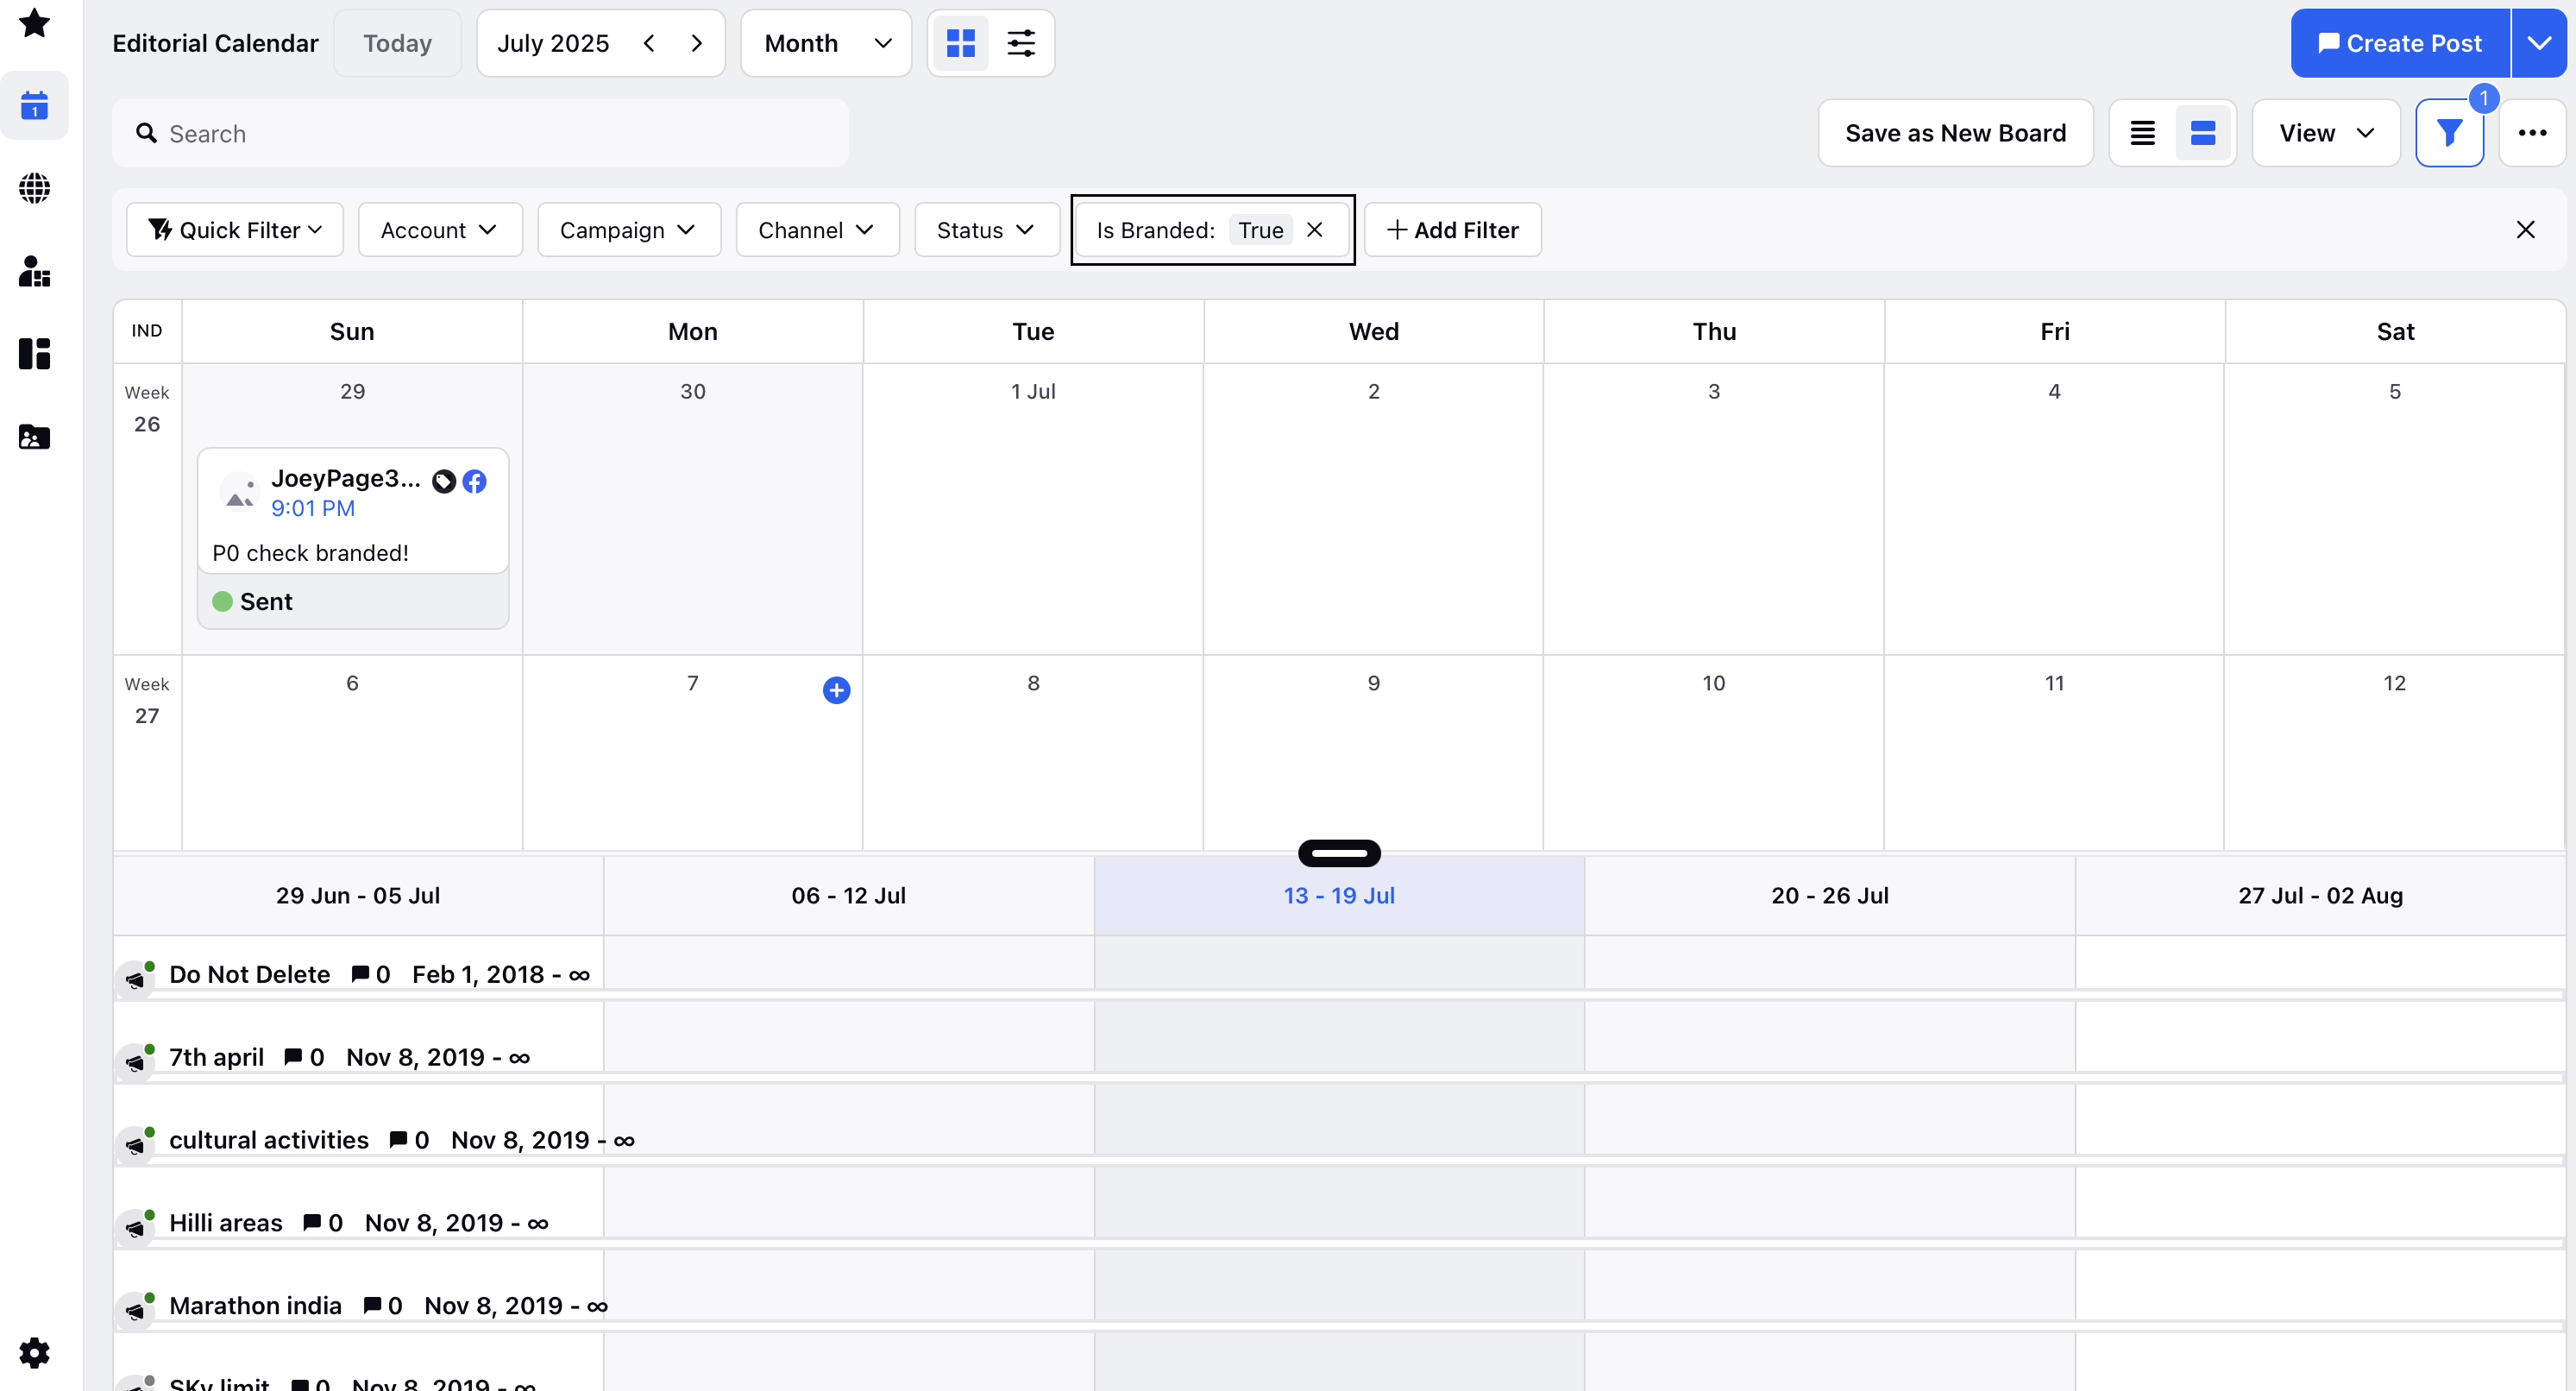
Hover over the desired post and click the ellipsis (...) to access the post options.
Select Boost Post from the menu to open the Boost post window.

Fill the necessary details and click Boost to launch the ad.
Using Engagement Dashboard
Open a new tab and navigate to Sprinklr Social > Engagement dashboards.
Search for and select the desired engagement dashboard in the All Dashboards screen. You can also create a new Engagement dashboard.
To view all published organic posts, create an outbound column for sent messages. Follow these steps to view branded content in the outbound column:
Click +Add Column in the top right corner of the dashboard. Search for and select Outbound on the Add New Column screen.
Select Sent from the left menu and enter the column name and details.
Scroll down and click on the Branded Content field.
Select Yes to view all branded content in the column.
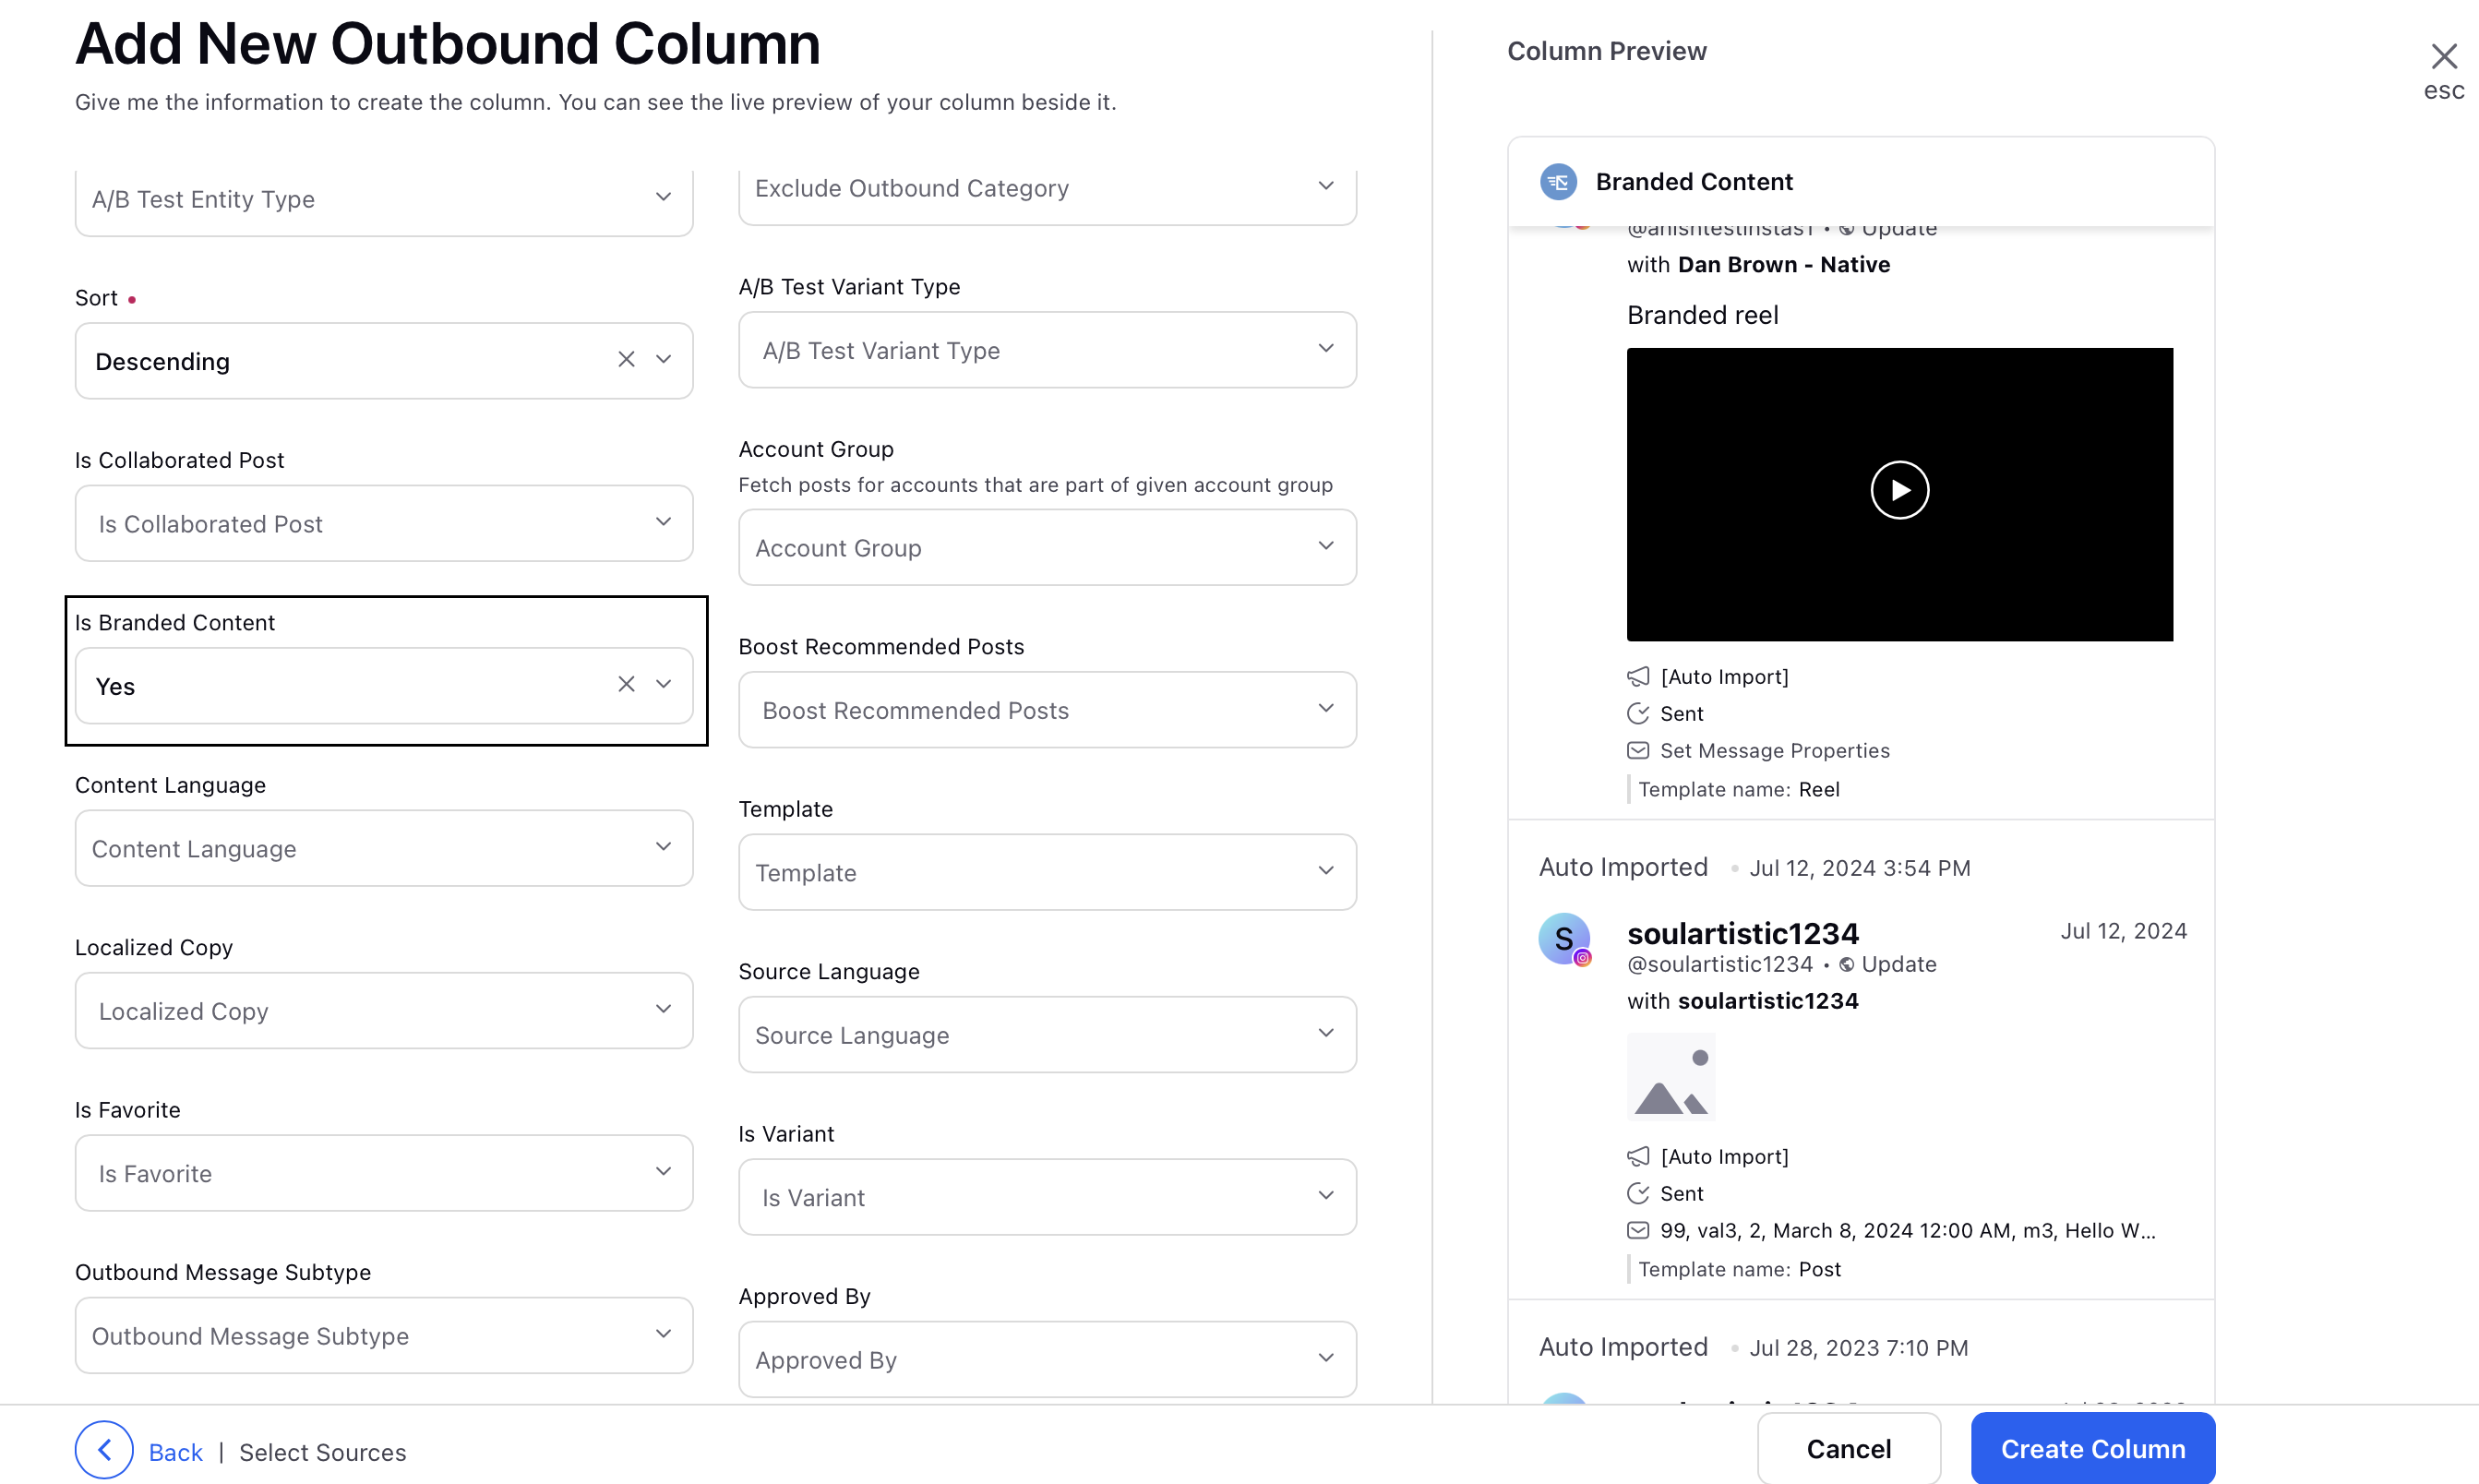
Click Create Column in the bottom right corner to add the column in the dashboard.
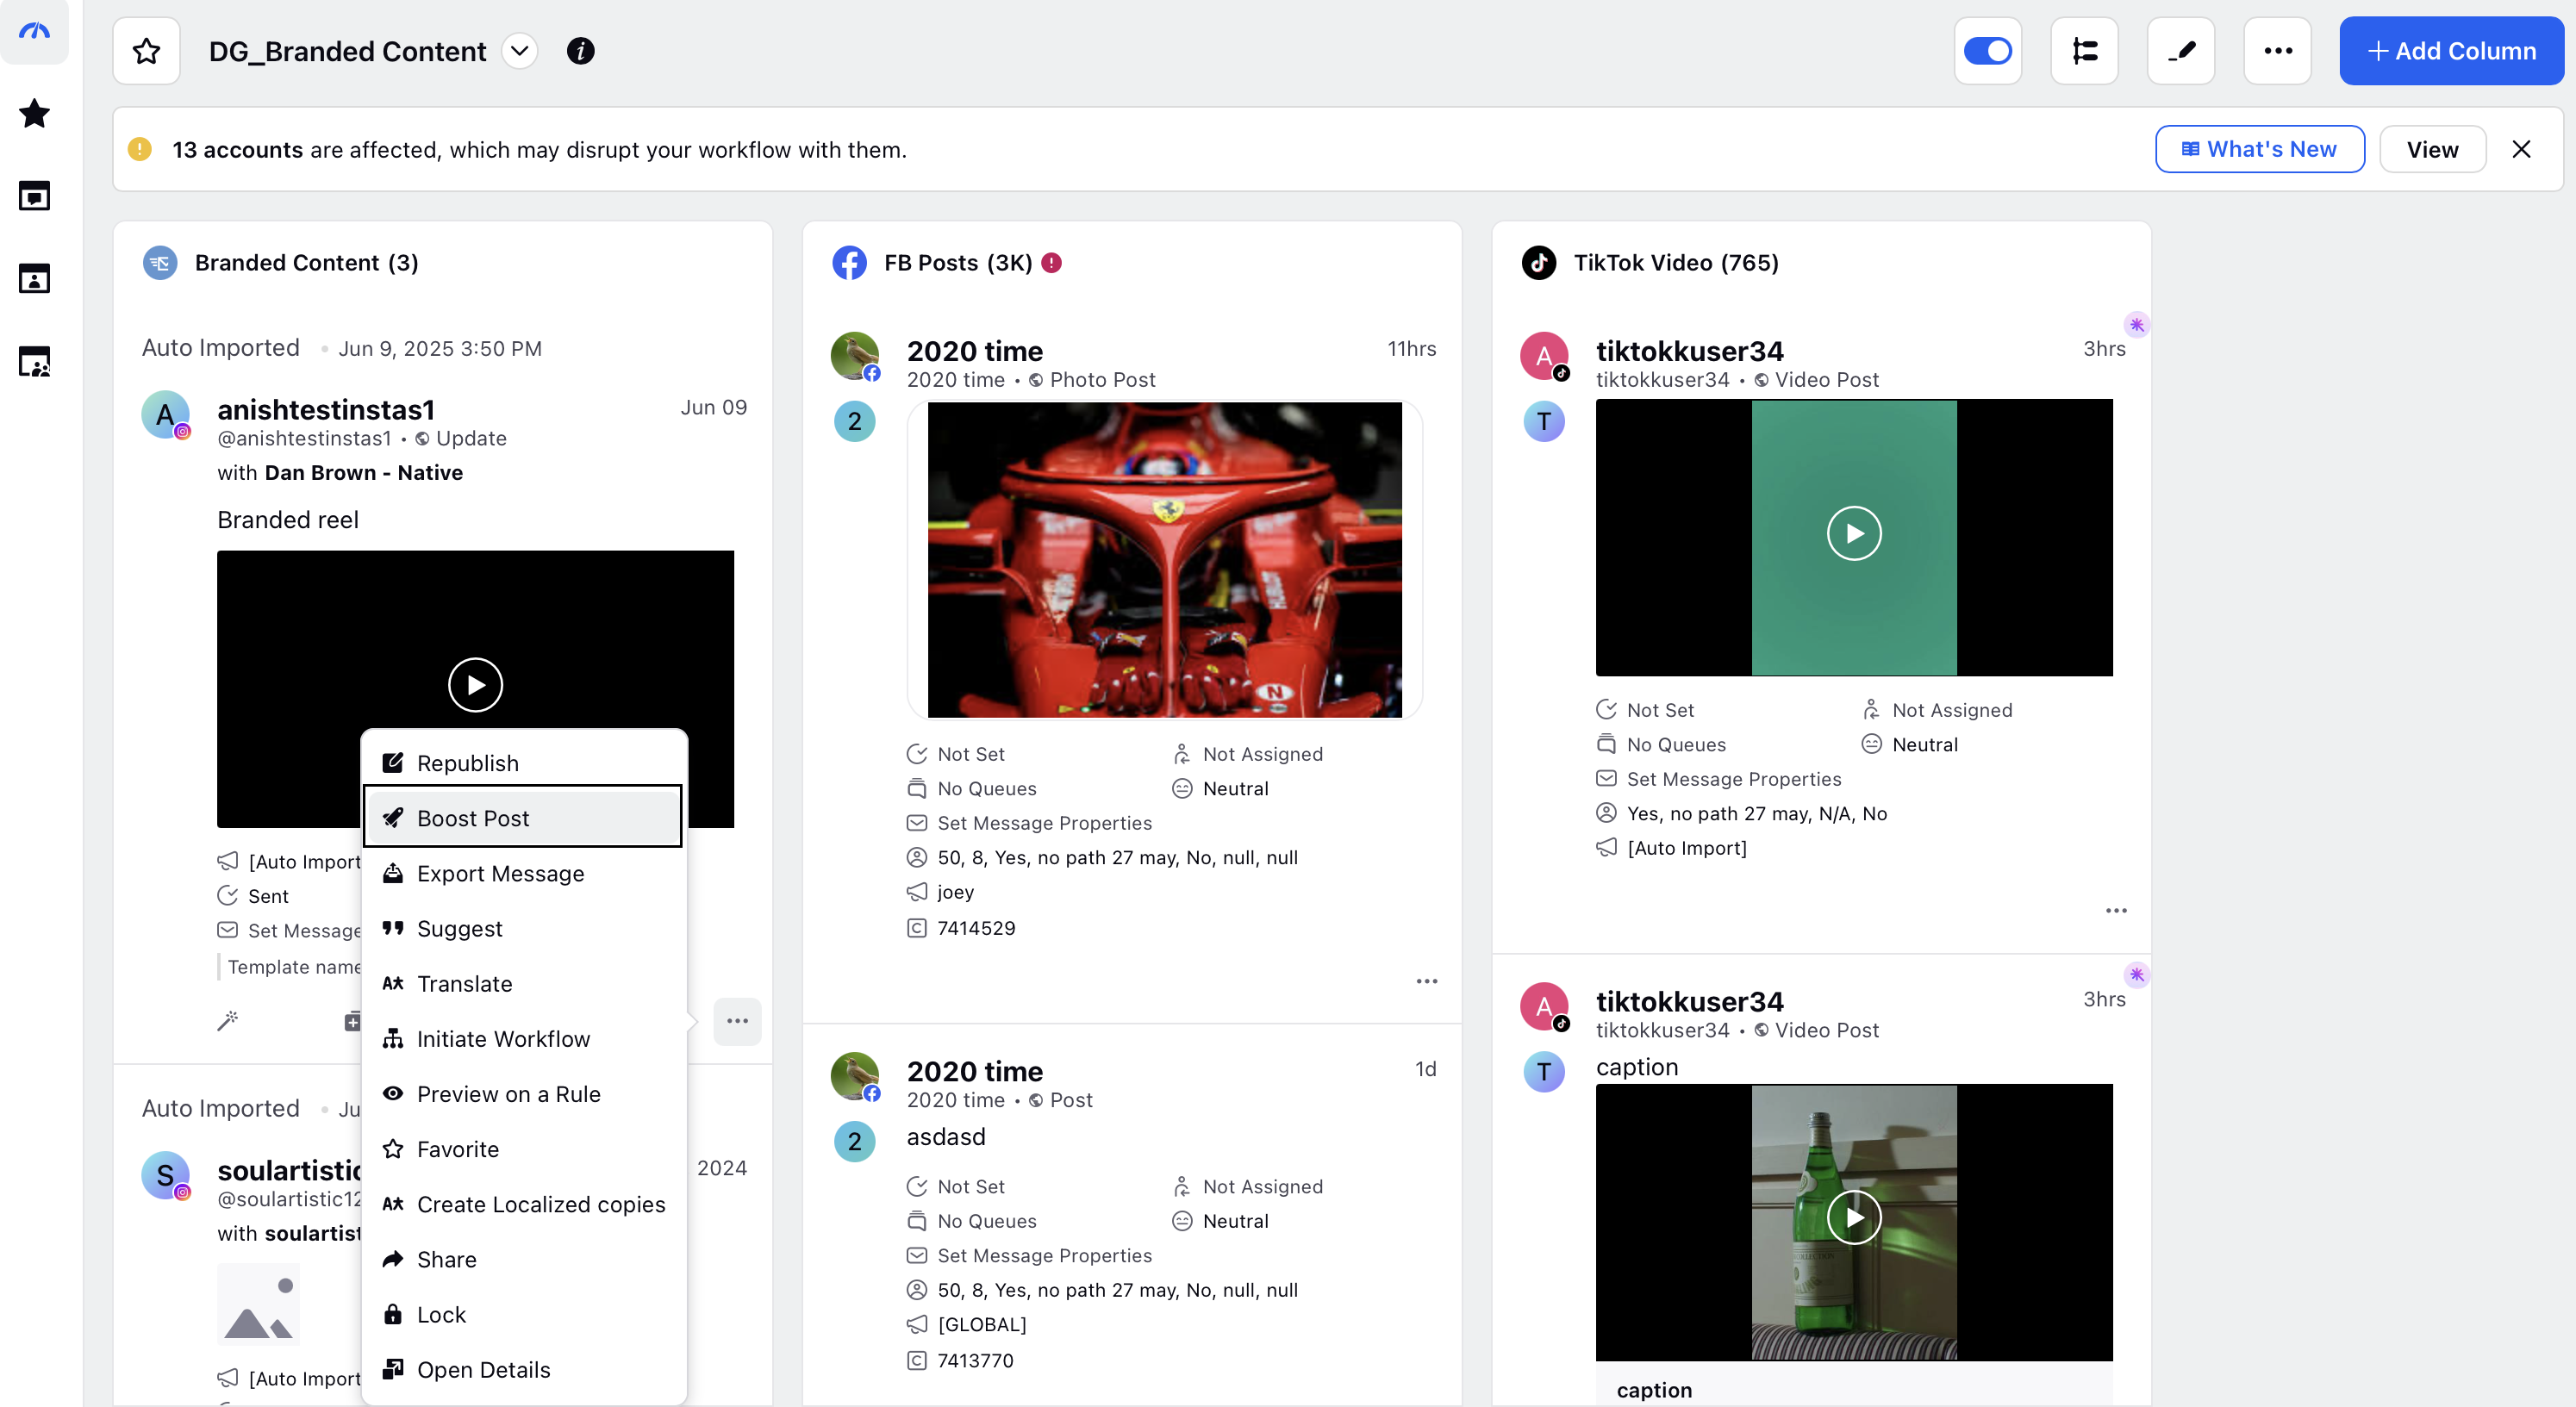
Hover over the desired post in the column and click the ellipsis (...) to access the post options.
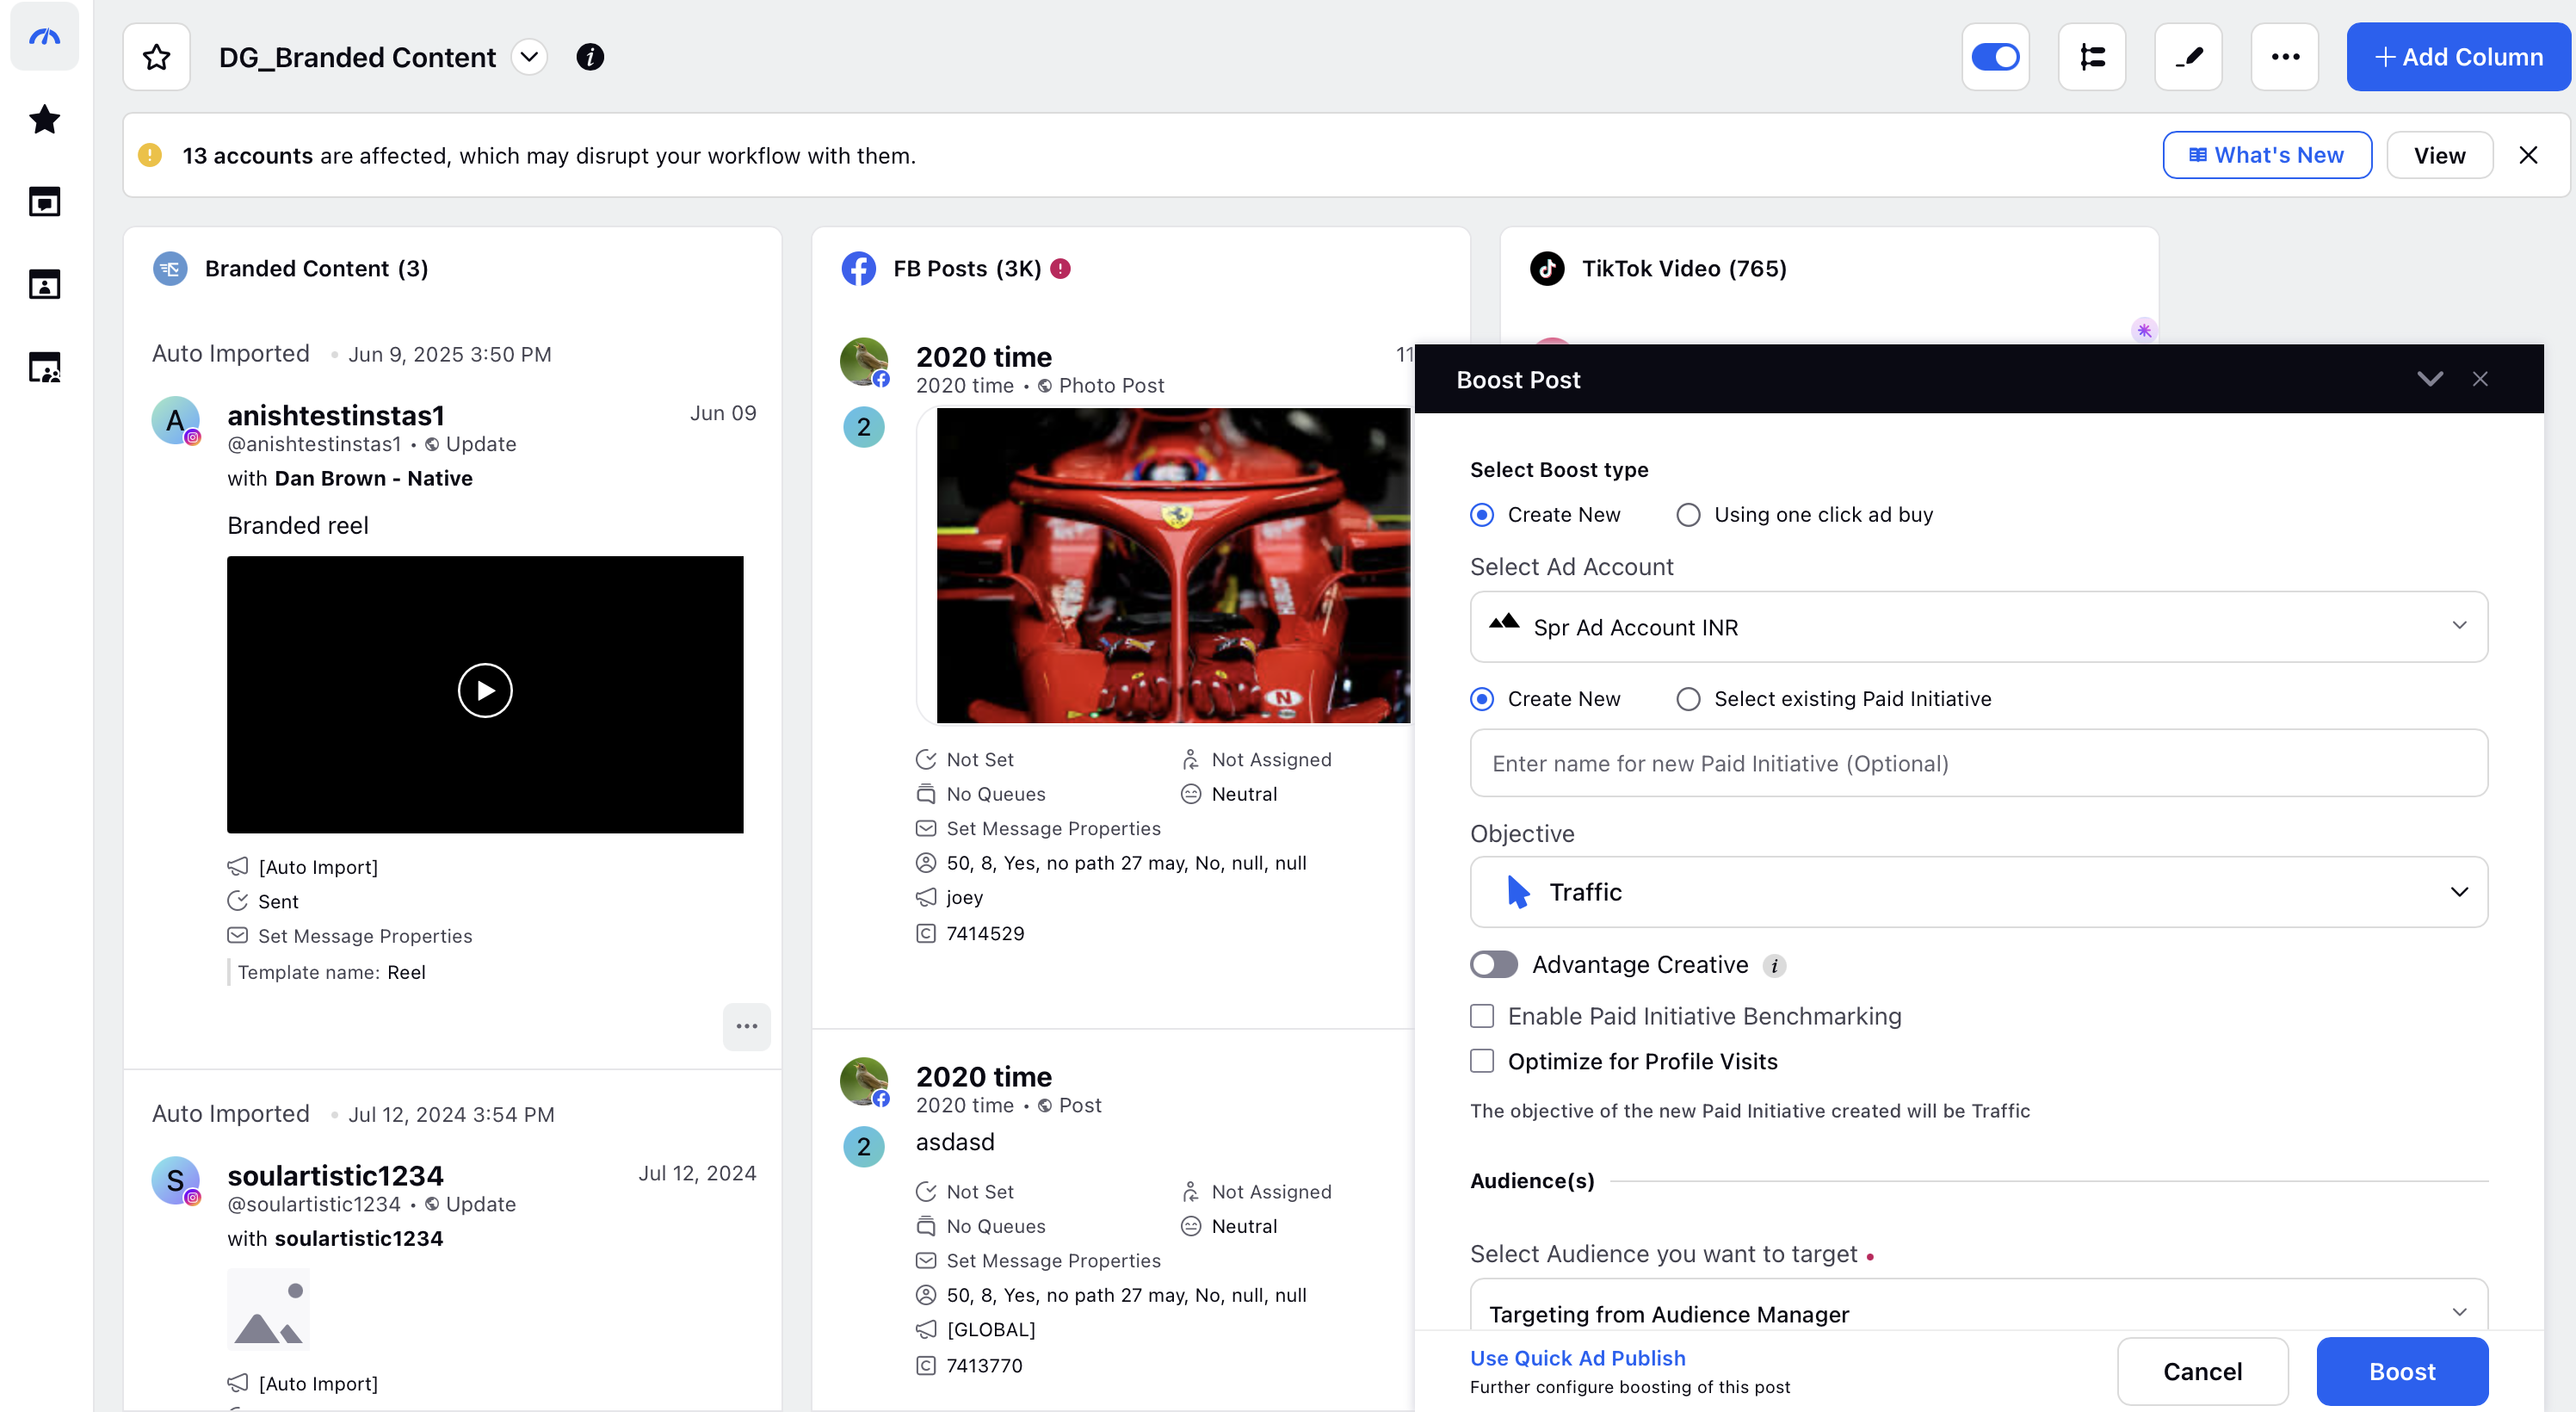
Select Boost Post from the menu to open the Boost Post window.
Fill out the necessary details and click Boost to complete the process.
Using Auto Boost Rules
Open a new tab and scroll to the Automate your workflows section at the bottom of the launchpad.
Click Rule Engine to create/access existing rules in your environment.
Click +Create New Rule in the top right corner and enter the rule details. For more details on creating an auto boost rule, see Configure Auto Boost Rule.
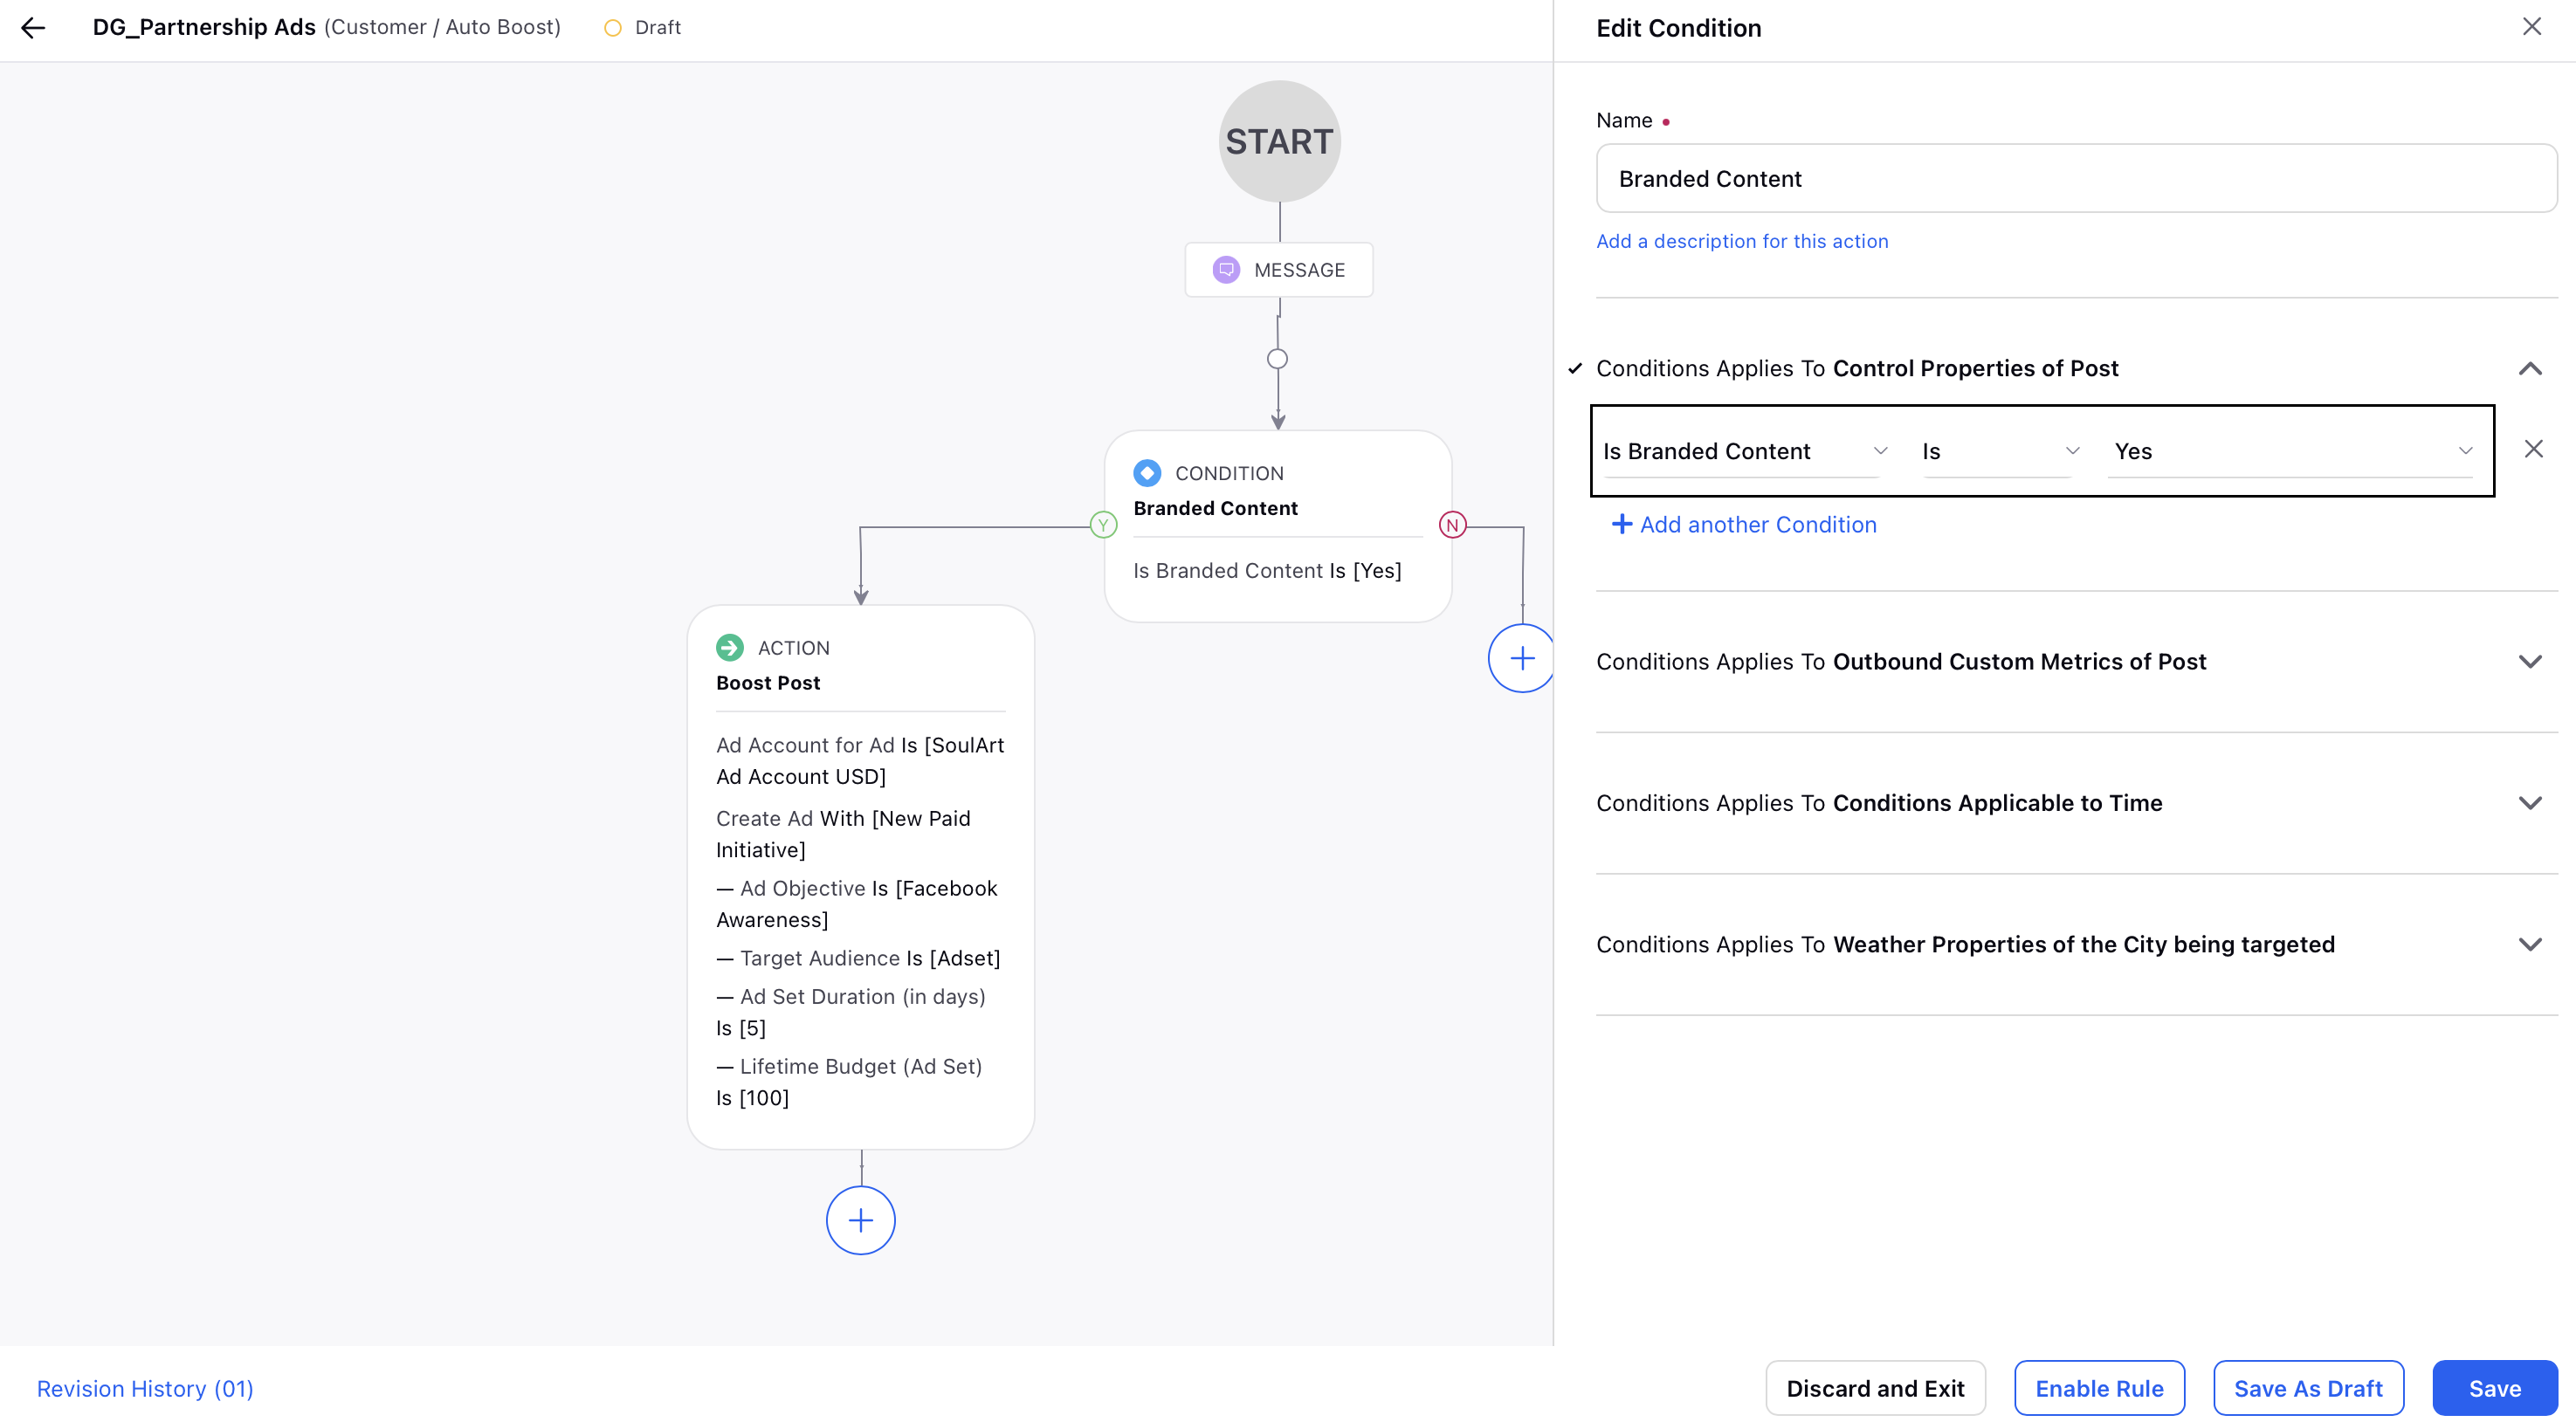
Add a condition in your rule and go to Control Properties of Post.
In the Condition field, select Is Branded Content.
Set the condition value to Yes.
For more details on the available Auto Boost Rule Conditions and Actions, click here.
Limitations of Partnership Ads
While Partnership Ads offer powerful collaboration capabilities, there are some platform and API-related limitations to keep in mind when using them:
Currently, you cannot filter partnership ads separately in ads reporting.
On Instagram, archiving your content does not remove the advertiser's ability to boost it, as long as the Allow brand partner to boost toggle remains enabled. However, archived Facebook posts cannot be boosted as partnership ads.