Filter the Reporting Dashboard in Sprinklr Mobile App
Updated
In the Reporting Dashboard in the Sprinklr Mobile App, using filters can help you zero in on the information that you need to see by allowing you to select specific criteria that content meets in order to be displayed. For example, you can filter the Dashboard by Account Group, and see only data associated with a specific account group.
The toolbar in any Reporting Dashboard will allow you to update Filters, Date Range, or Time Zone.
To Filter the Reporting Dashboard
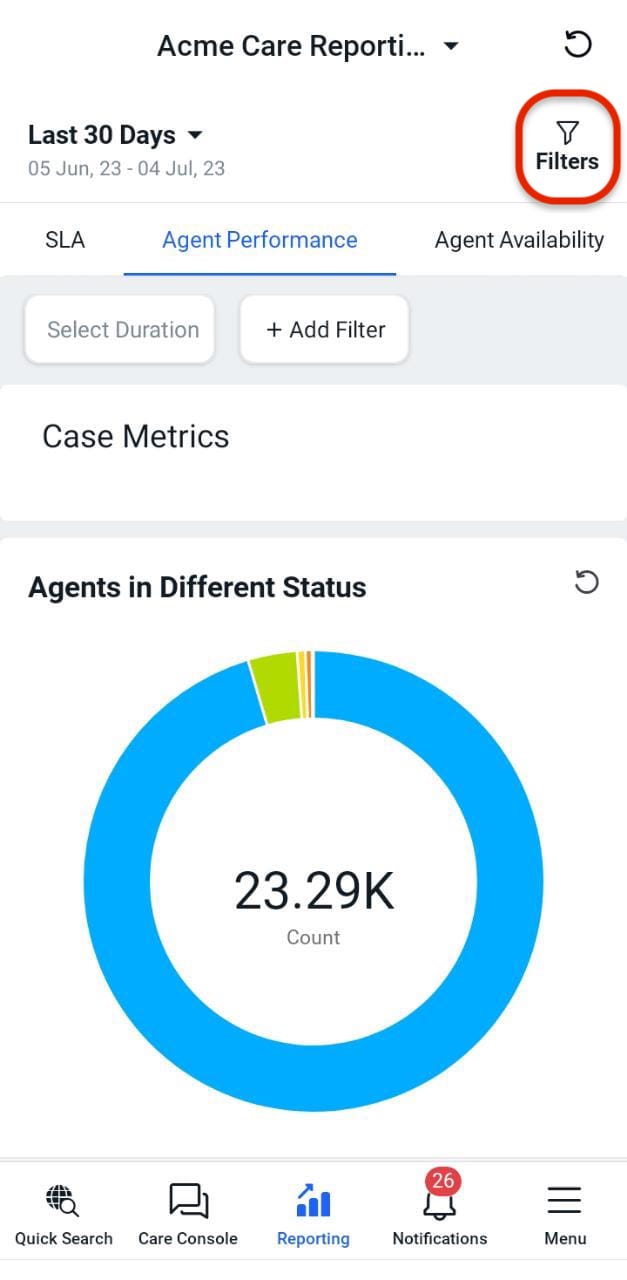
1. Log into the mobile app and tap the Menu icon in the bottom right corner. Then tap Reporting to open the Dashboards.
2. If you wish, in the top of the screen tap dashboard drop-down icon to switch to the desired dashboards. Next, In the Switch Dashboards pop-up screen, search and select the desired dashboard.
in the top right corner.
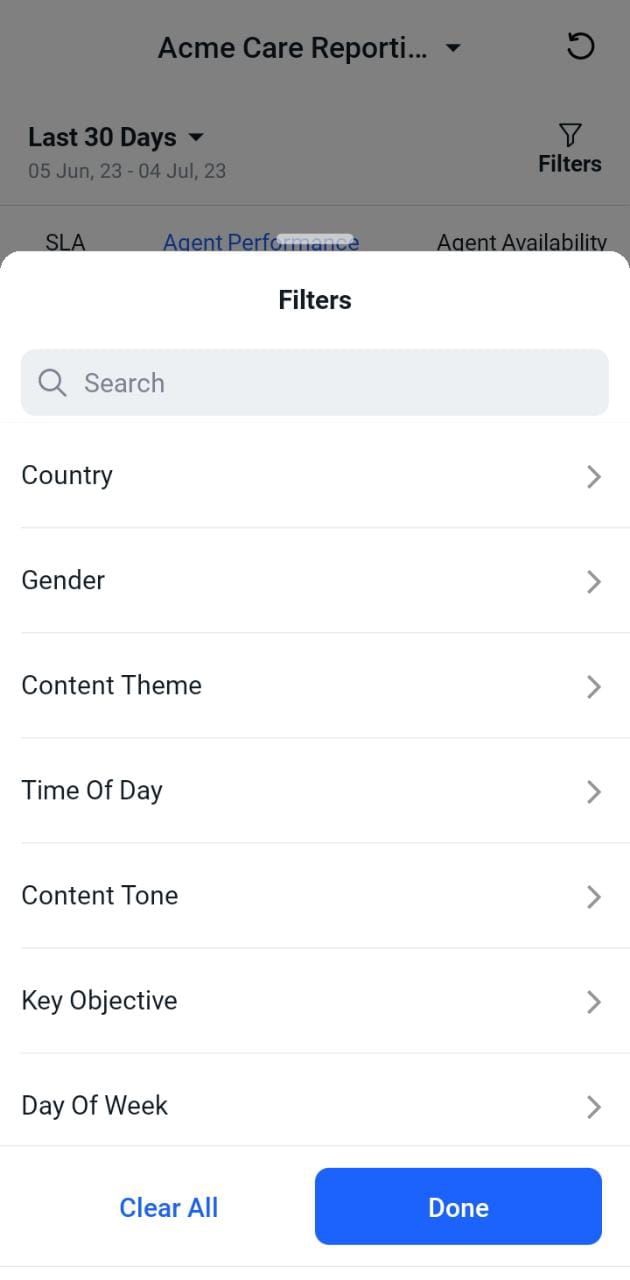
3.In the Filters pop-up screen, tap the desired filter type. Next, tap your filtering preferences.
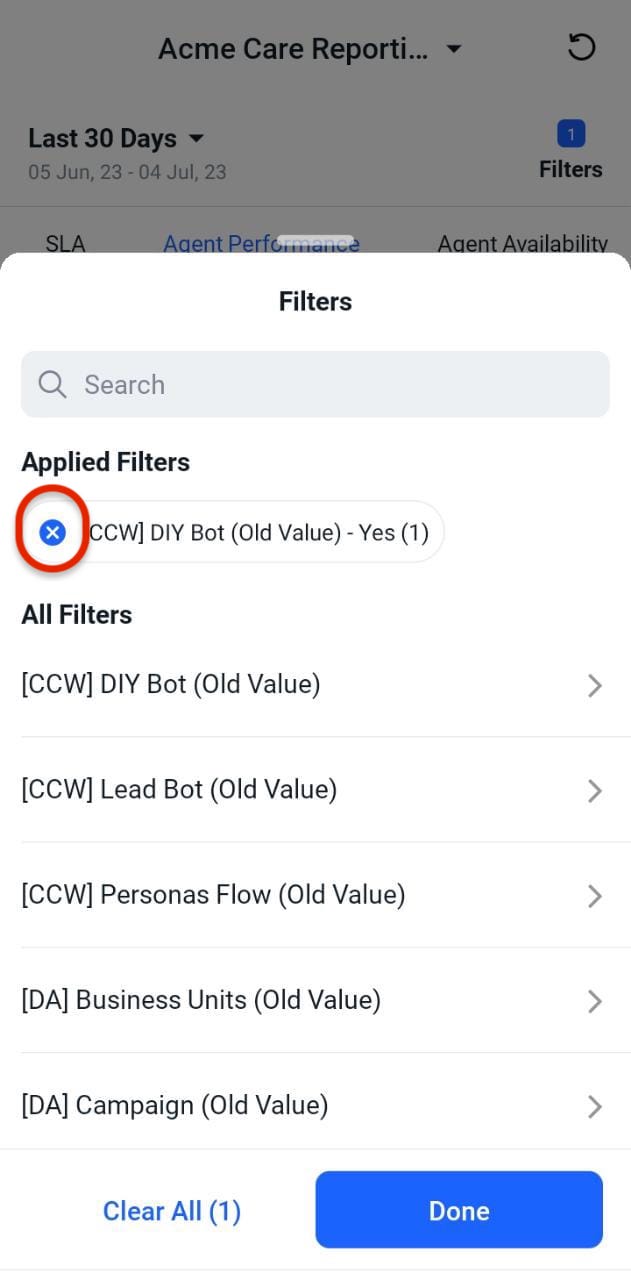
4.Tap Done in the bottom right corner of the Filters pop-up screen and results will filter dynamically with a filtered view indicator .
5. If you wish to exclude a particular value of any filtering parameter, tap the minus icon on the top in the Filters pop-up screen. The reporting dashboard will be automatically filtered excluding the selected value.
6. To Remove the Filtered Reporting View, in the Filters pop-up screen, tap Clear All in the bottom left corner of the Filters pop-up screen.
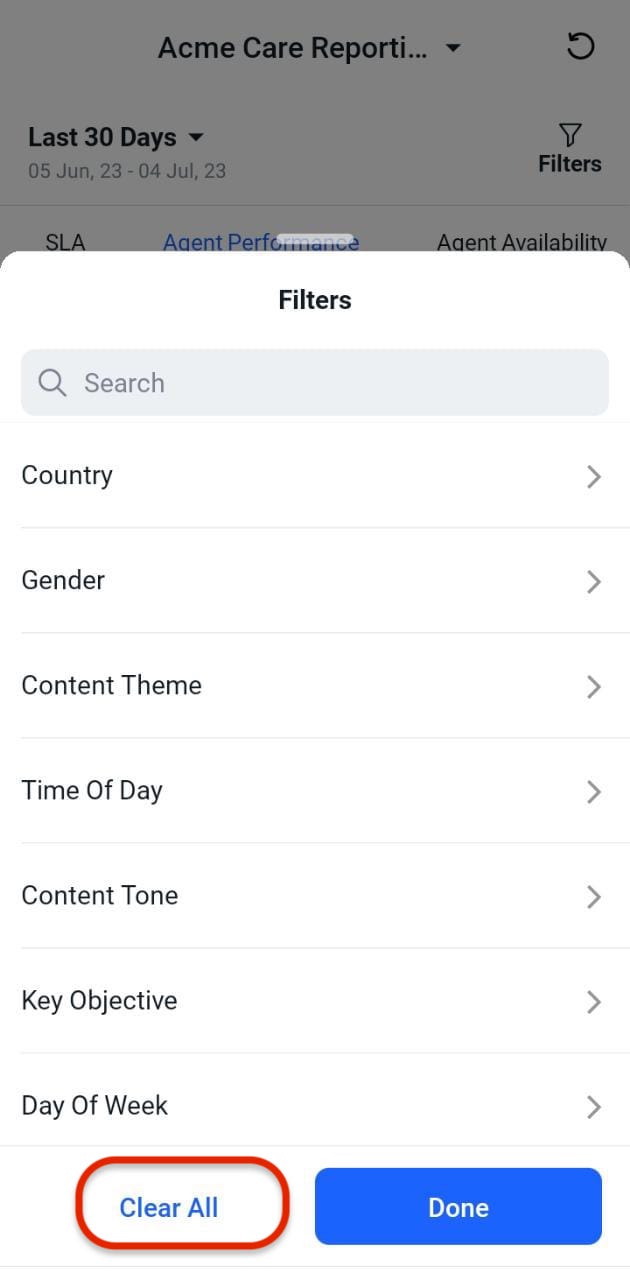
7. Tap Done in the bottom right corner of the Filters pop-up screen.
To set Date Range for the Reporting Dashboards
1. In the reporting dashboards screen, tap on the date range drop-down icon in the top left corner.

2. In the Date Range and Timezone pop-up screen, either set the Start Date and End Date or select the desired options you would like to view your result by.
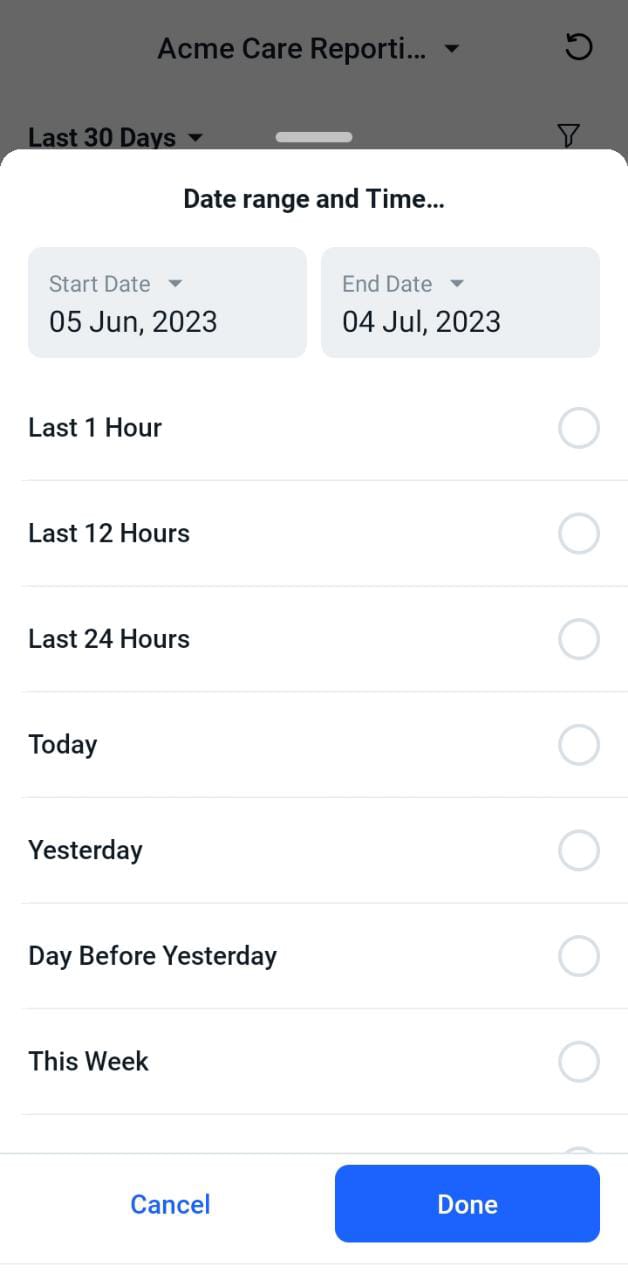
Tap Done in the bottom right corner of the Date Range and Timezone pop-up screen.
To Adjust Timezone for the Reporting Dashboards
1. In the reporting dashboards screen, tap on the date range drop-down icon in the top left corner.
2. In the Date Range and Timezone pop-up screen, scroll down and tap Timezone.
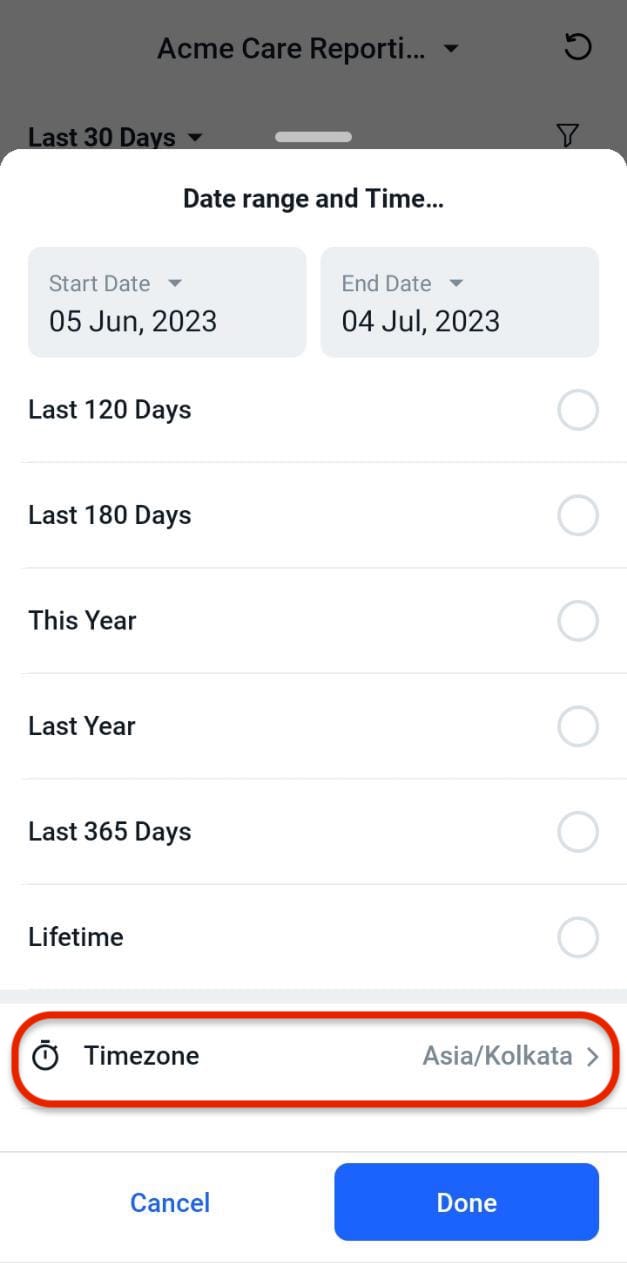
3. In the Timezone pop-up screen, search and select the desired time-zone and tap Done in the bottom corner of the Timezone pop-up screen.

4.Next, tap Done in the bottom right corner of the Date Range and Timezone pop-up screen.