Rule Engine support for AI Studio's Text Classification models
Updated
Sometimes, messages need to be classified before additional configuration can take place. For example, in care configurations, the AI Model must classify messages before the case is created and tags are copied to the case level. This is important to make sure that the correct tags are applied to the message level before they are copied to the case level.
Sprinklr’s Rule Engine provides you with on-demand Model processing support through dedicated actions. You can simply create a rule in the relevant message enrichment bucket to ensure that the messages are being classified by the AI Model at the needed time for your configuration workflow.
![]() Note: To create rules via Rule Engine, you must have the Rule Set-up permission. For more information, read – Rule Engine Permission.
Note: To create rules via Rule Engine, you must have the Rule Set-up permission. For more information, read – Rule Engine Permission.
Rule types of support
AI Studio is supported across different types of rules to cover all owned, earned, and queue configuration scenarios.
To create an AI Text Classification model via Rule Engine
The Rule Engine functions like an If-Then statement, whereby a specific action is executed on an asset (e.g. message or profile) if it satisfies a pre-set condition.
By defining the Yes and No branches, various actions can be customized based on whether a given condition is met or not. For instance, in the example below, we will create a rule that applies a certain action based on a language condition (e.g., English) and classifications determined by the model.
The rule will apply actions based on the classification of the text.
To create the rule
Click the New Tab icon. Click on Rule Engine within Collaborate.
On the Rule Engine window, click the Create New Rule button in the top right corner.
On the New Rule creation form, enter the name of your rule and write a description (optional).
Select other details as applicable. For more information, refer to New Rule – Fields & Description.
 Note: For Inbound and Queue, select the rule scope as Workspace/Customer. For Listening, select the rule scope as Customer.
 Click Next, and you will be taken to the Rule Builder where you need to add a condition(s) and an action(s) for the rule.
Click the Addition icon and select Condition.

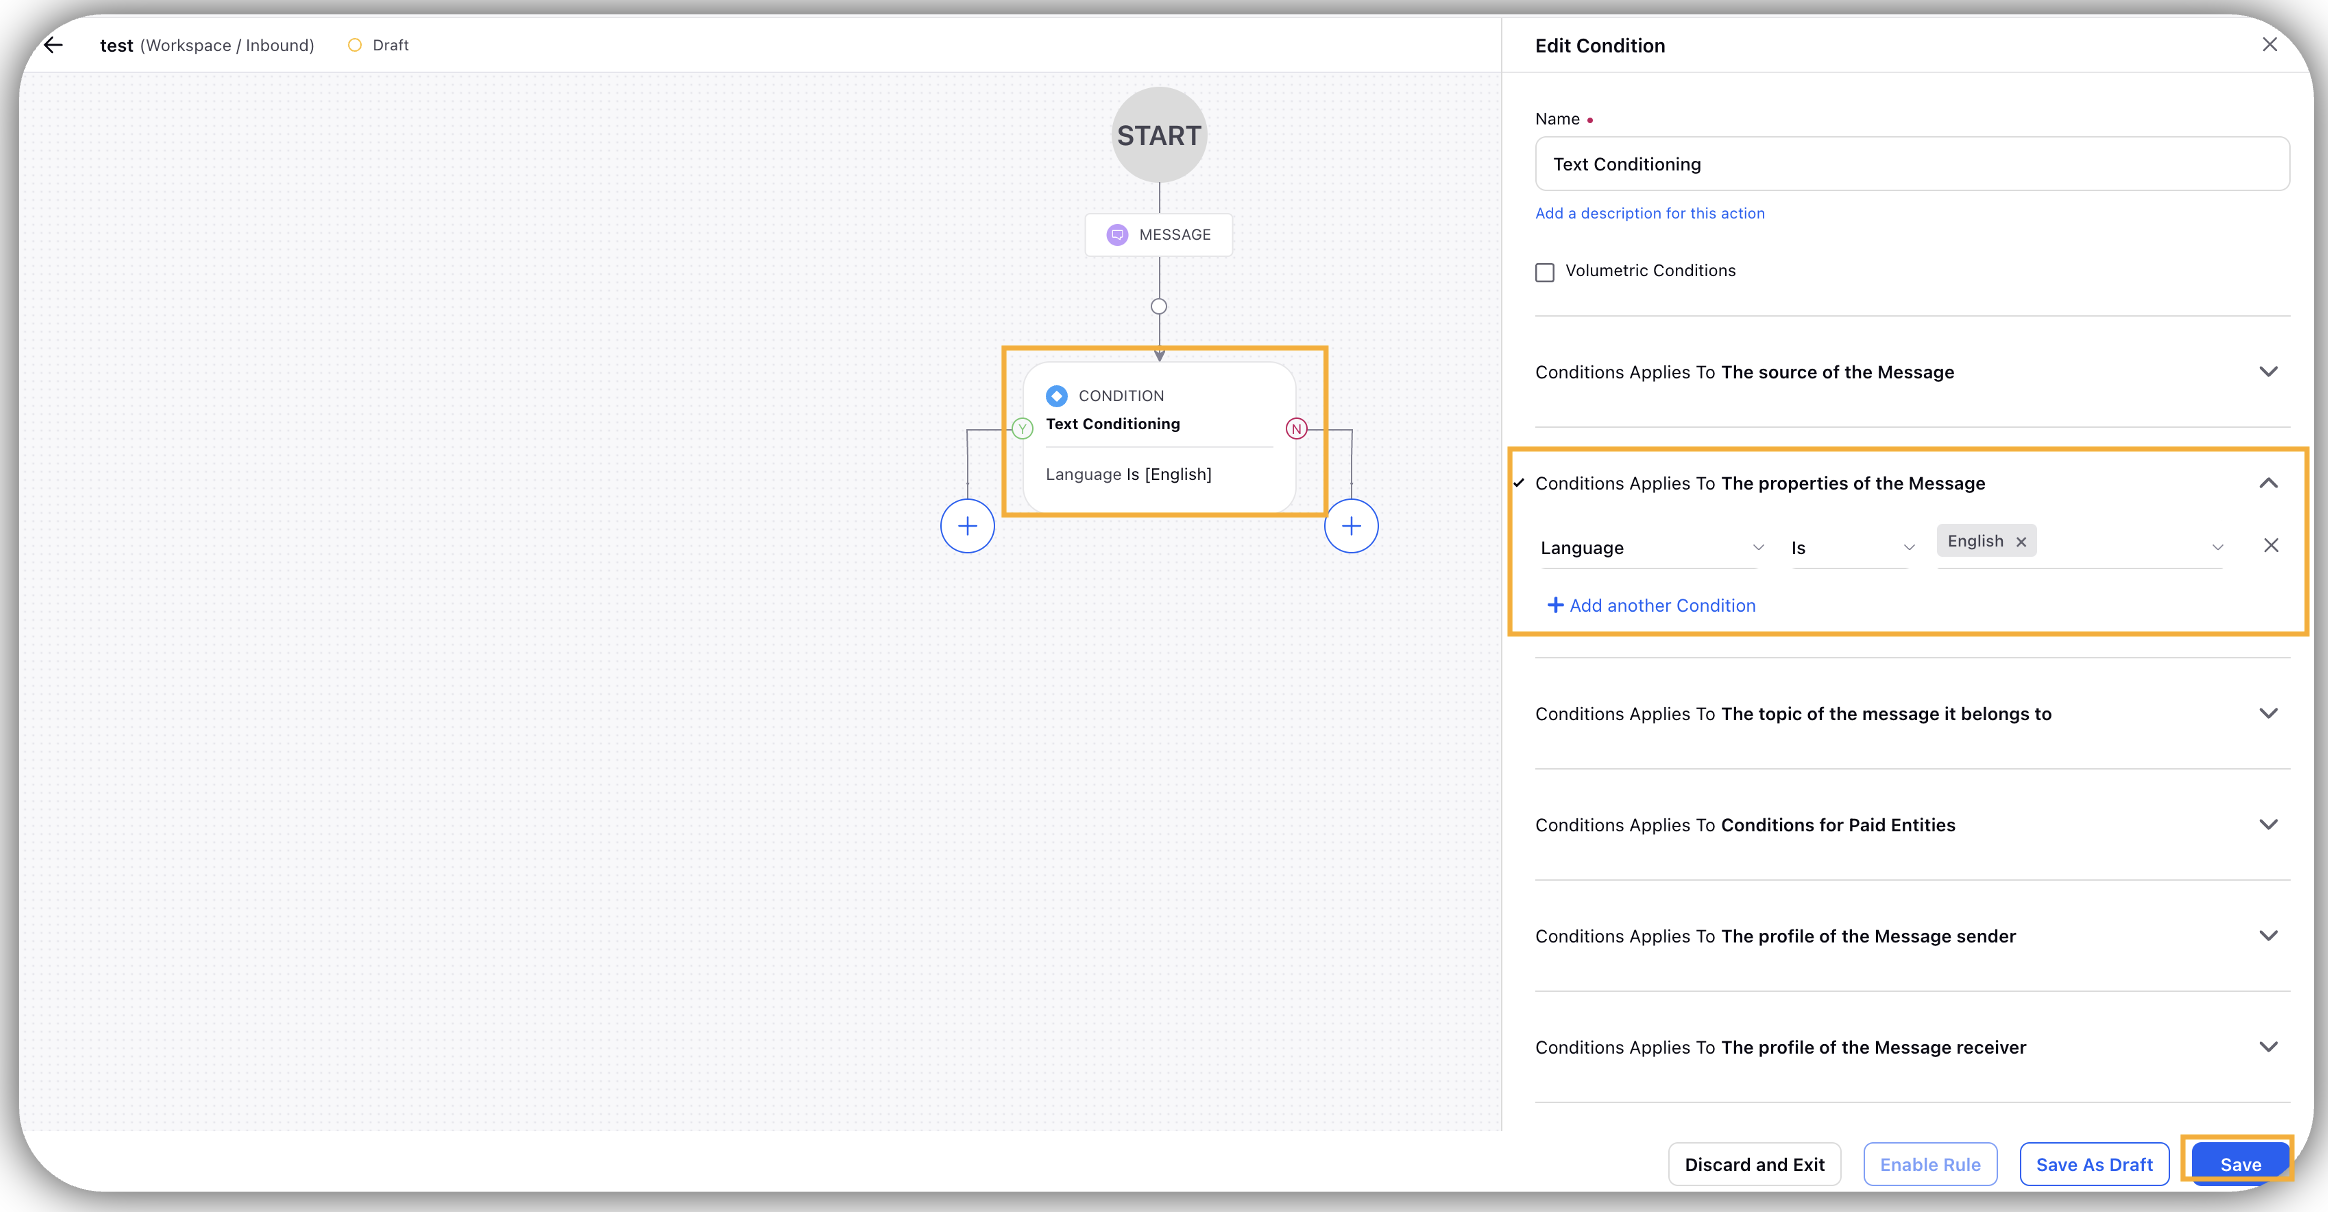
Enter a name for your Condition. Then, under the Condition Applies To "The properties of the Message" section, select Language as a condition, and select the desired language. Then click Save.
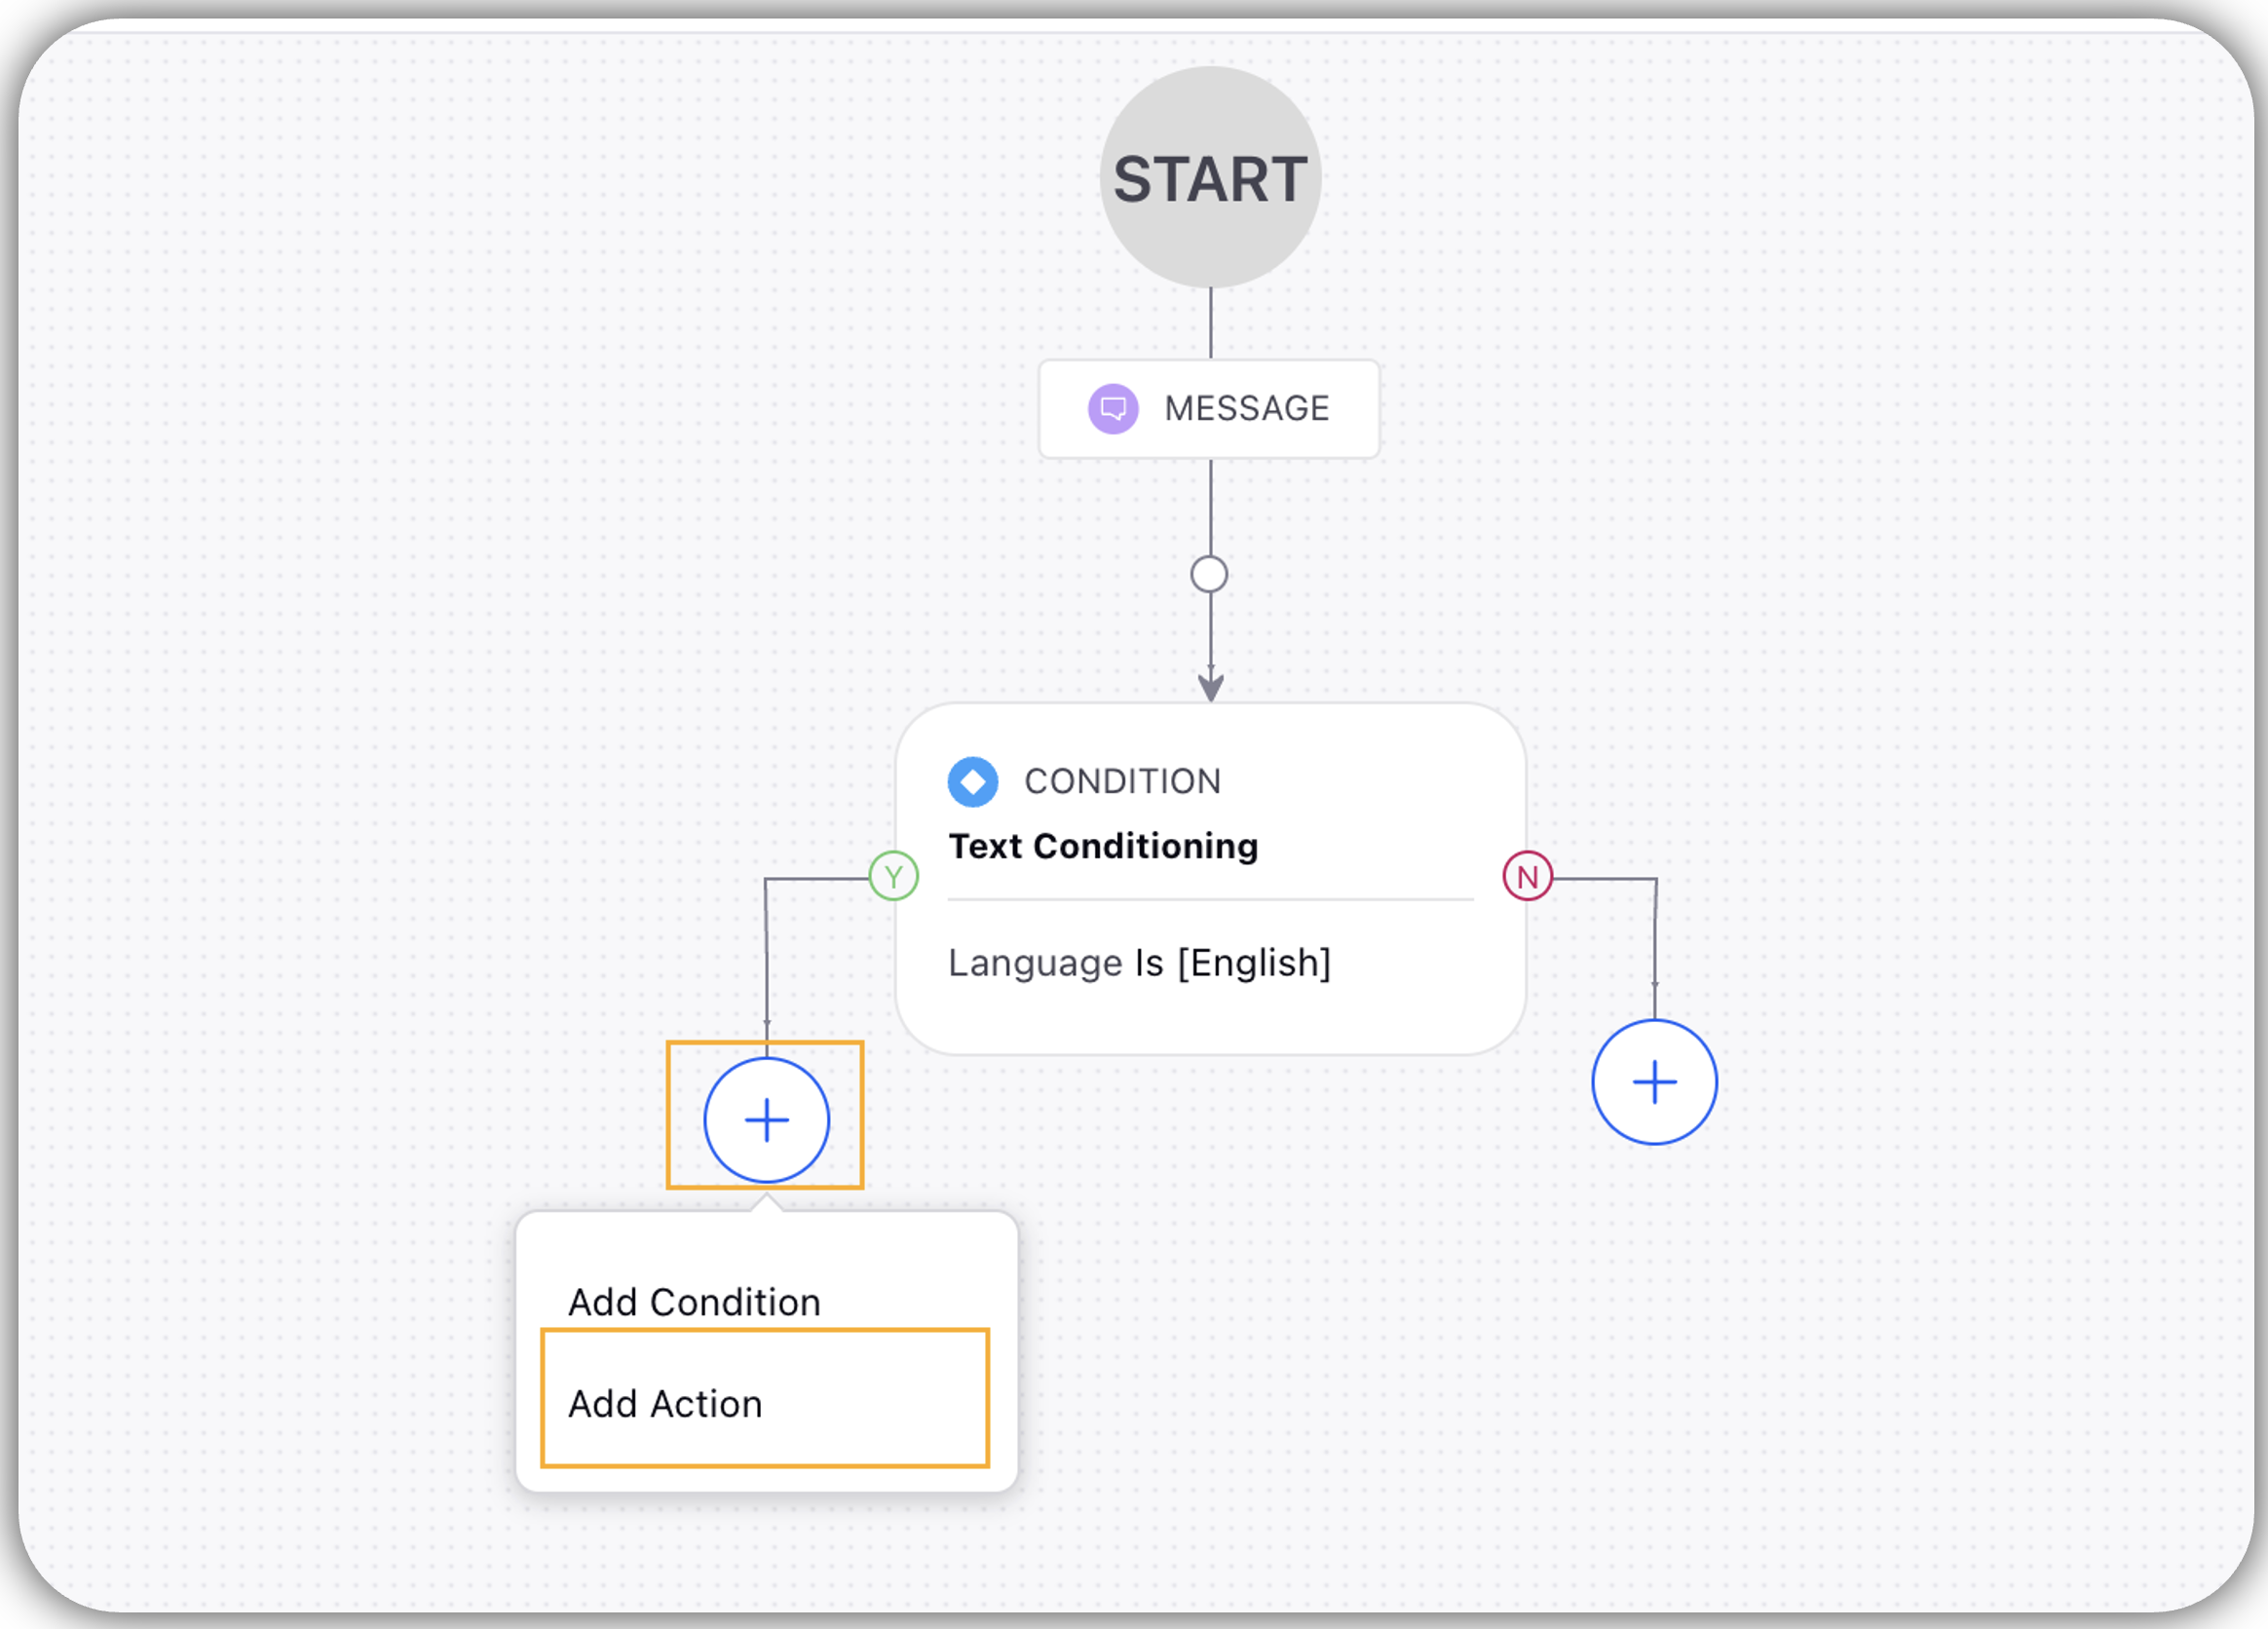
Click the Addition icon again, and then select Action.
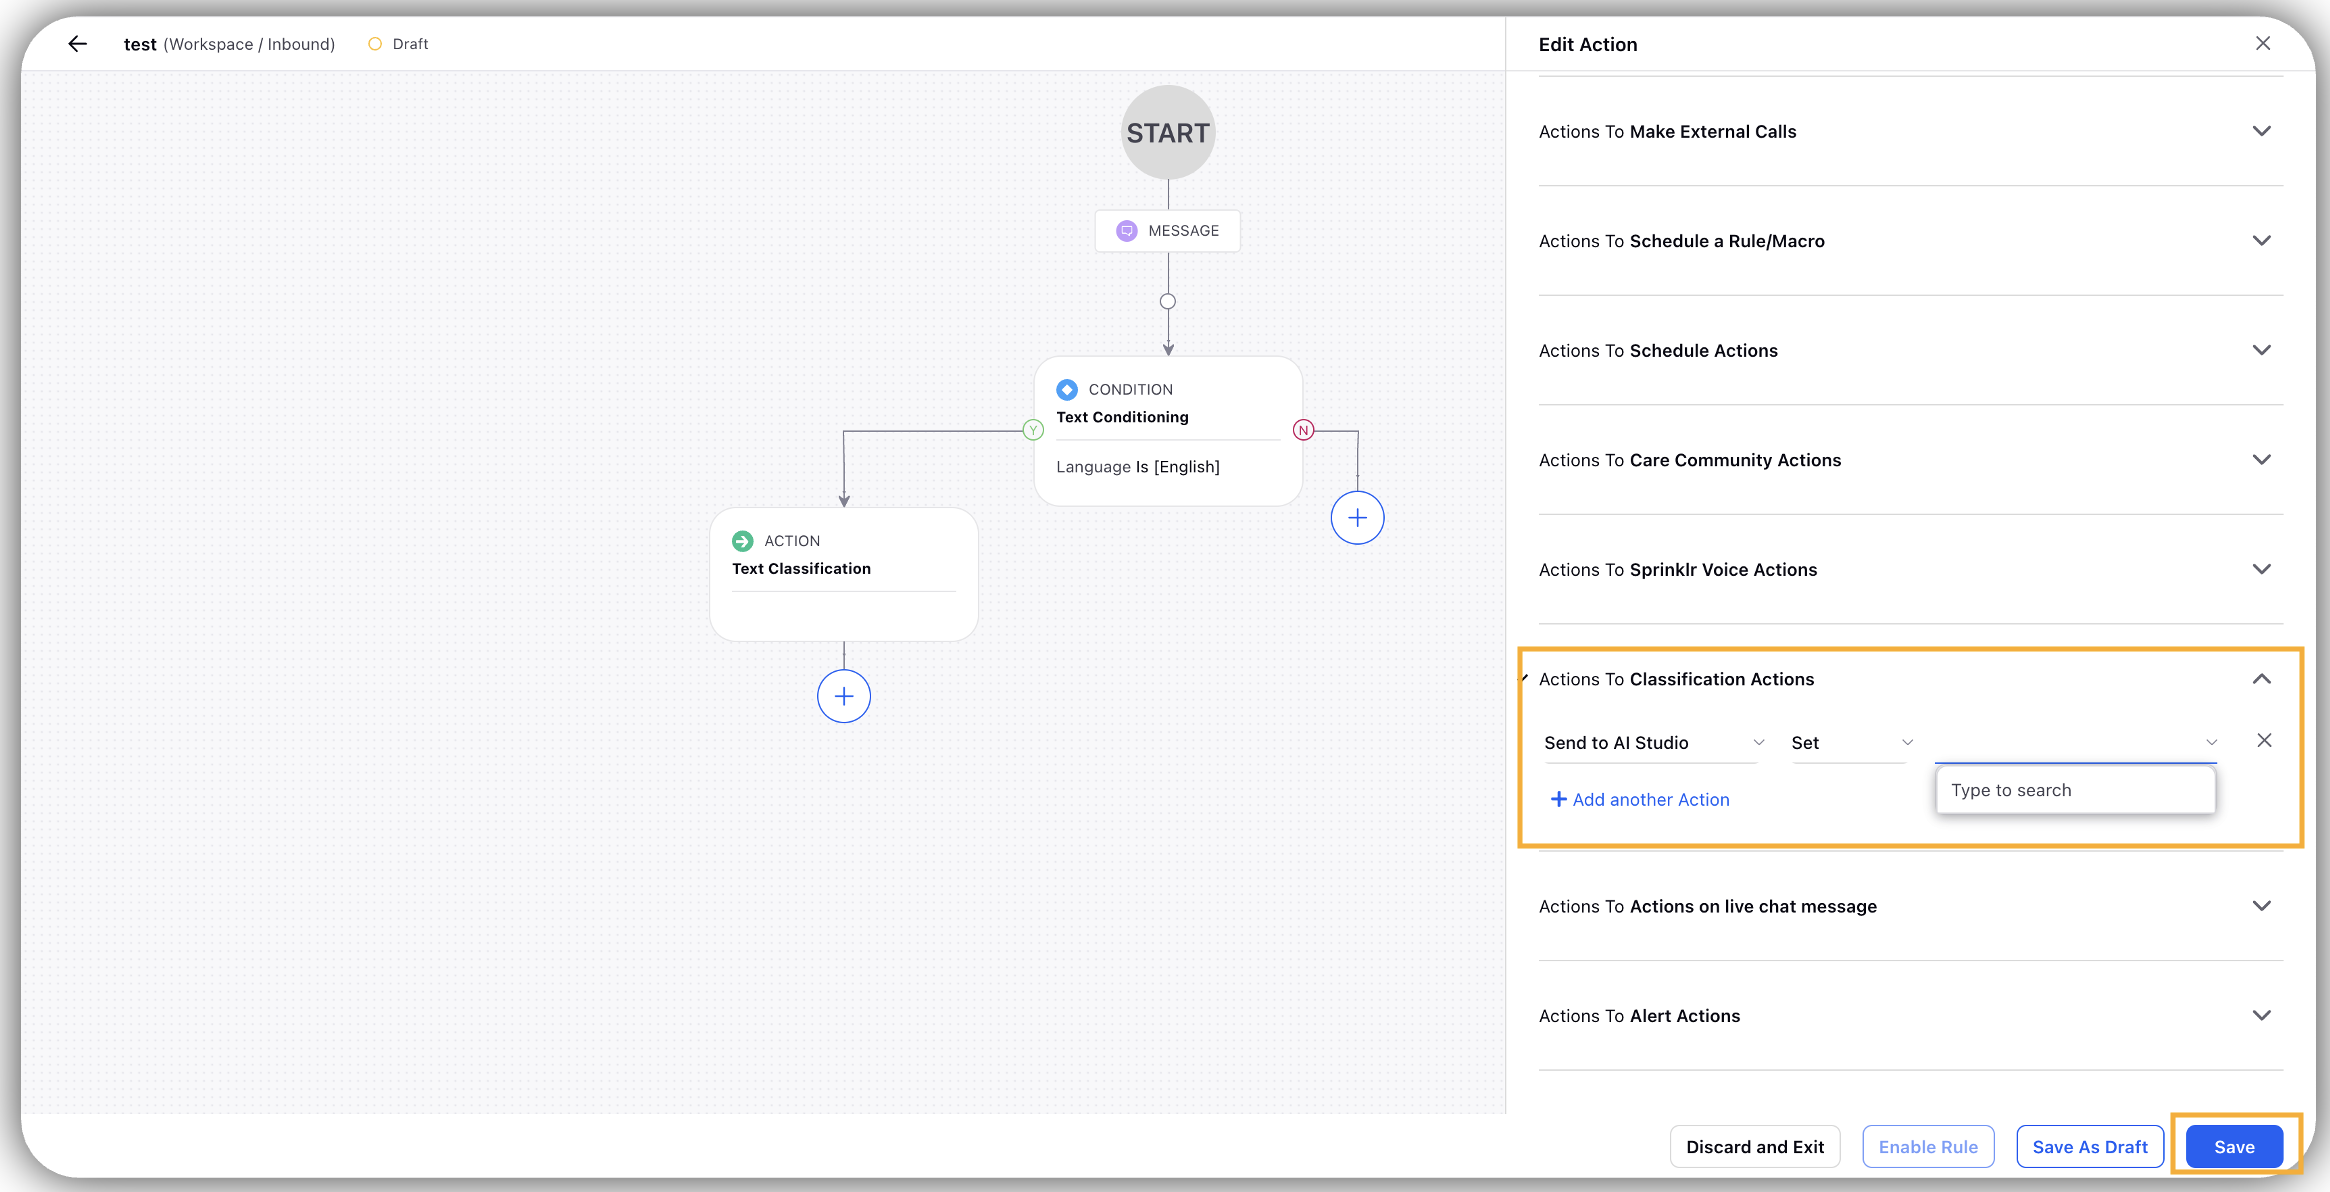
Enter a name for your Action. Then, under the Actions To "Classification Actions" section, select Send to AI Studio as action, and select the desired model. Then click Save.
The defined condition and action will be shown in the rule builder. Click Save to create the rule.
Once the rule is created and saved successfully, you need to enable it by simply toggling the button to right.
![]() Note: Only the deployed models will be shown in the drop-down options within the Action (step #8). You will need to deploy the model from the Accept and Deploy screen for the relevant project in the AI Studio product.
Note: Only the deployed models will be shown in the drop-down options within the Action (step #8). You will need to deploy the model from the Accept and Deploy screen for the relevant project in the AI Studio product.
The steps for creating a new rule will be the same as above, whether you are creating an Inbound, Queue, or Listening rule. You can add additional options in Condition to address your use case.
New Rule – Fields & Descriptions
Field | Description |
Name | Enter a name for your rule. |
Description | Enter a description for your rule (optional). |
Rule Scope | Select either Customer or Workspace. |
Context | Select any of these – Inbound, Queue, or Listening. |
Activation Date | By default, this will be your current date & time. If you want to activate the rule in the future, you can define the data & time accordingly. |
Rule Execution Batch | It contains the rules for specific entities and shows the flow of how the rules get executed. Rules execution in columns will be from top to bottom and column will execute in left to right order.
|
Rule Type | Select the rule type –
|