Set Case-Level Skills and Proficiency Using Macros
Updated
You can use a macro to set the required skills for a single case or in bulk for selected cases directly from the Care Console. To enable this functionality, configure the Manage Required Skills action within the macro's Manual Actions section. This allows supervisors or agents to quickly update skill requirements for cases without relying solely on the Rule Engine.
Prerequisites
Before you begin, ensure the following prerequisites are met:
Skills and proficiency levels are already defined in Unified Routing > Skills. For steps to create skills, see Creating and assigning Skills to Agents.
You have access to create and apply macros.
Update Case Skills and Proficiency
This involves the following high-level steps:
1. Create the Macro
2. Apply the Macro
Create a Macro to Manage Required Skills
To create a macro, follow these steps:
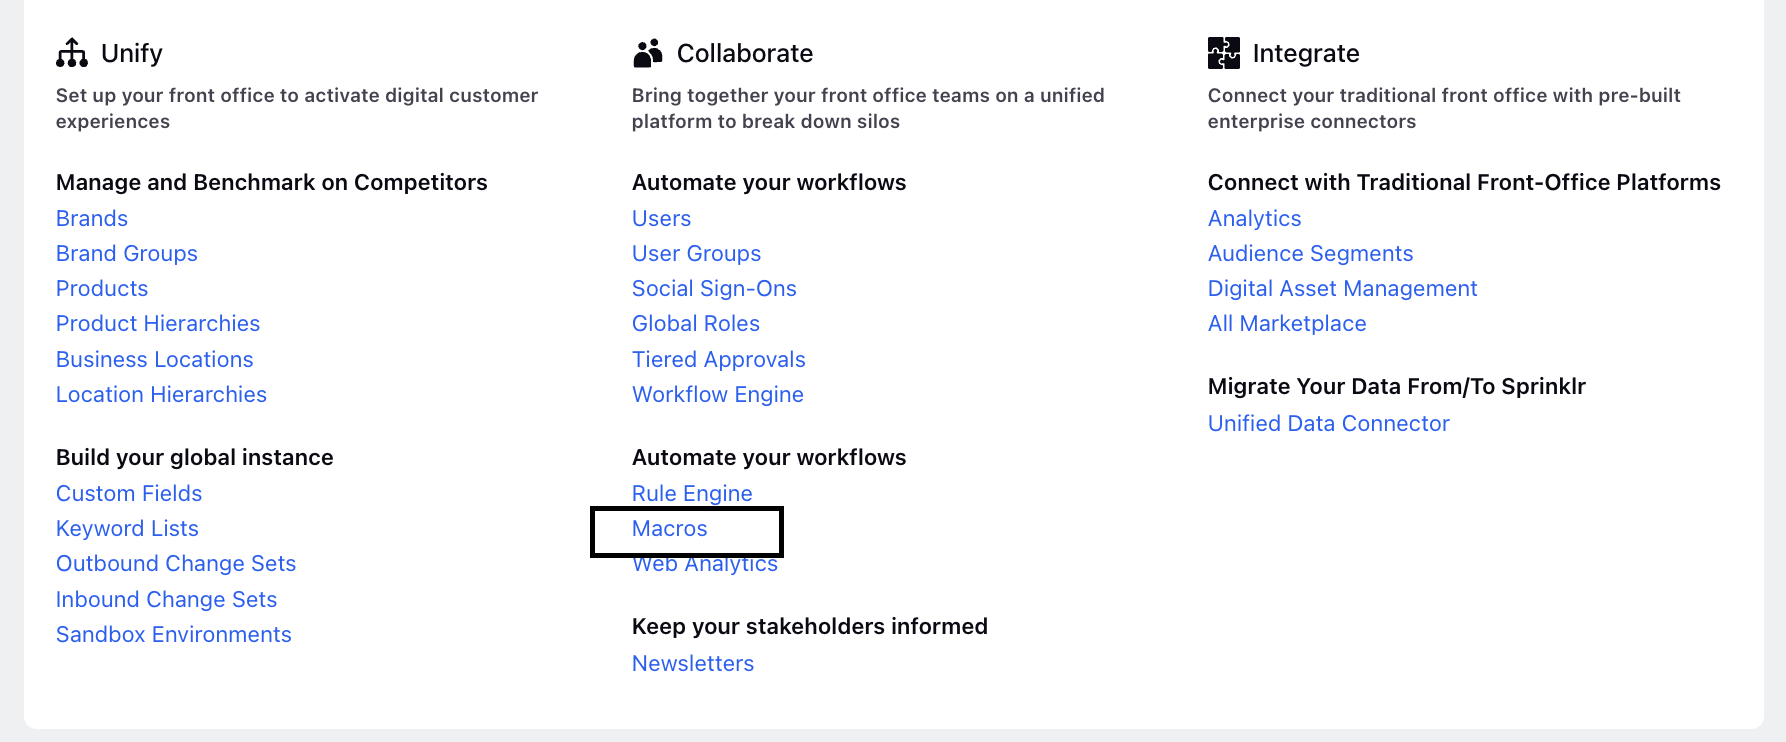
1. Click the New Page (+) icon to open the Launchpad.
2. In Platform Modules, under Collaborate > Automate your workflows, click Macros.
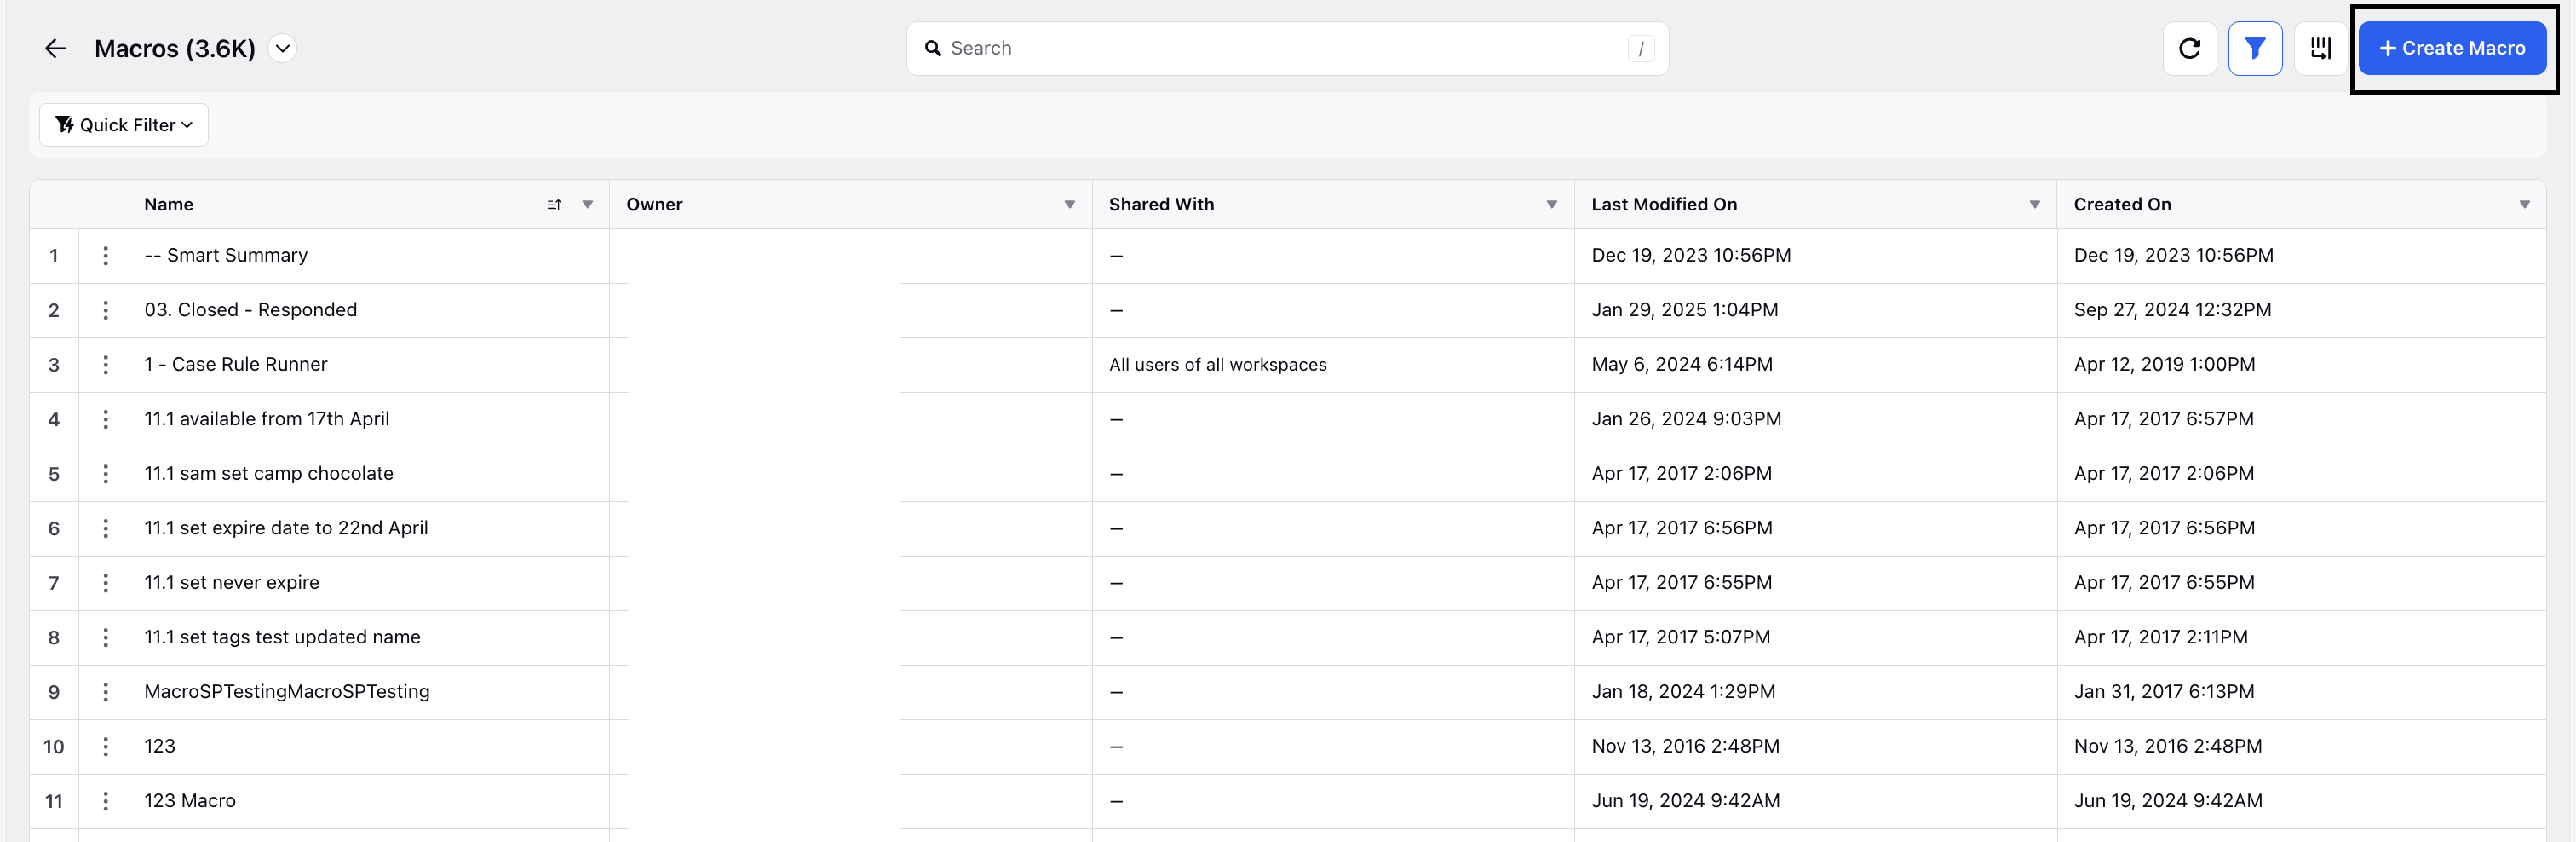
3. On the Macros screen, at the top-right corner, click Create Macro.
4. In the Basic Information section, enter the required details:
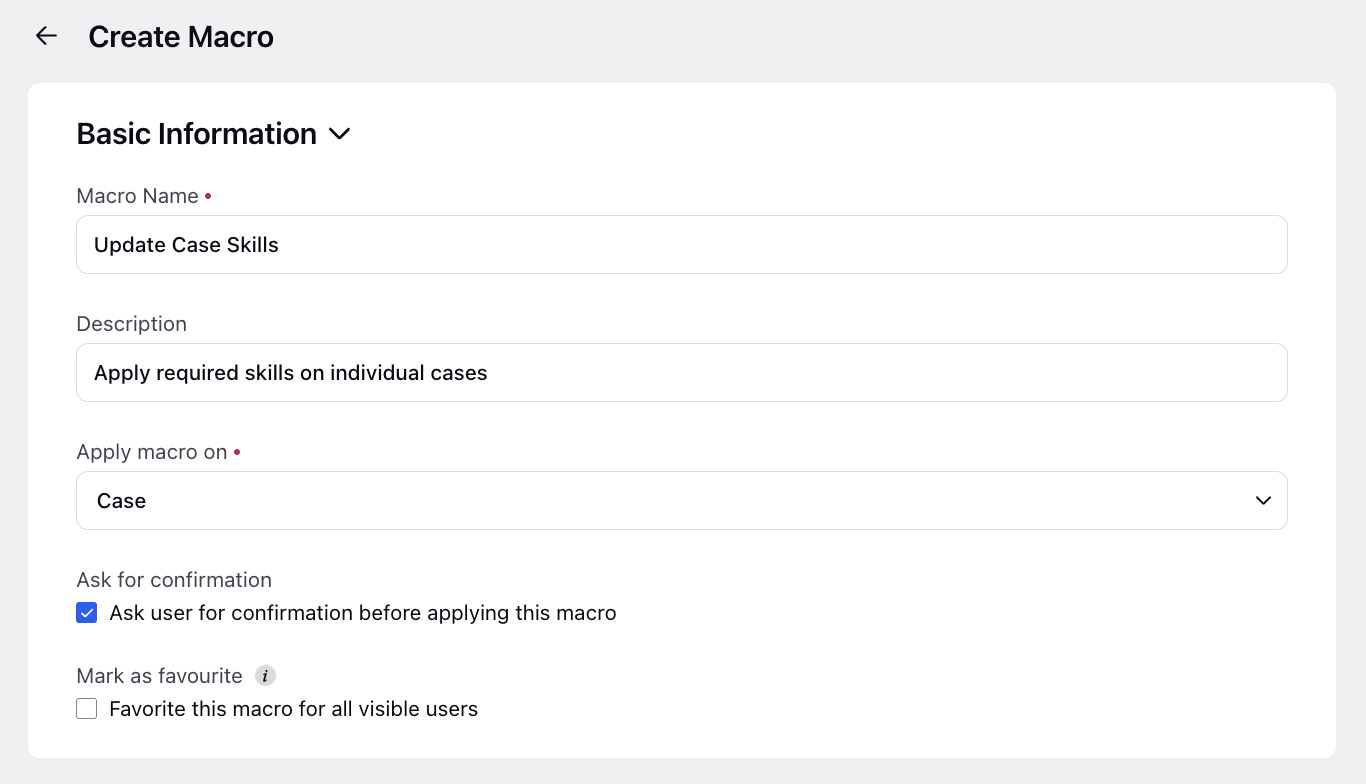
The following table provides a description of each field:
Field | Description |
Name | Enter a unique name for your macro. For example, Update Case Skills. |
Description | Describe the purpose of this macro. |
Apply Macro On | Select Case from the dropdown. |
Ask for Confirmation | Enable this if you want confirmation before applying the macro. |
Mark as Favorite | Optional, this makes it easier to find frequently used macros. |
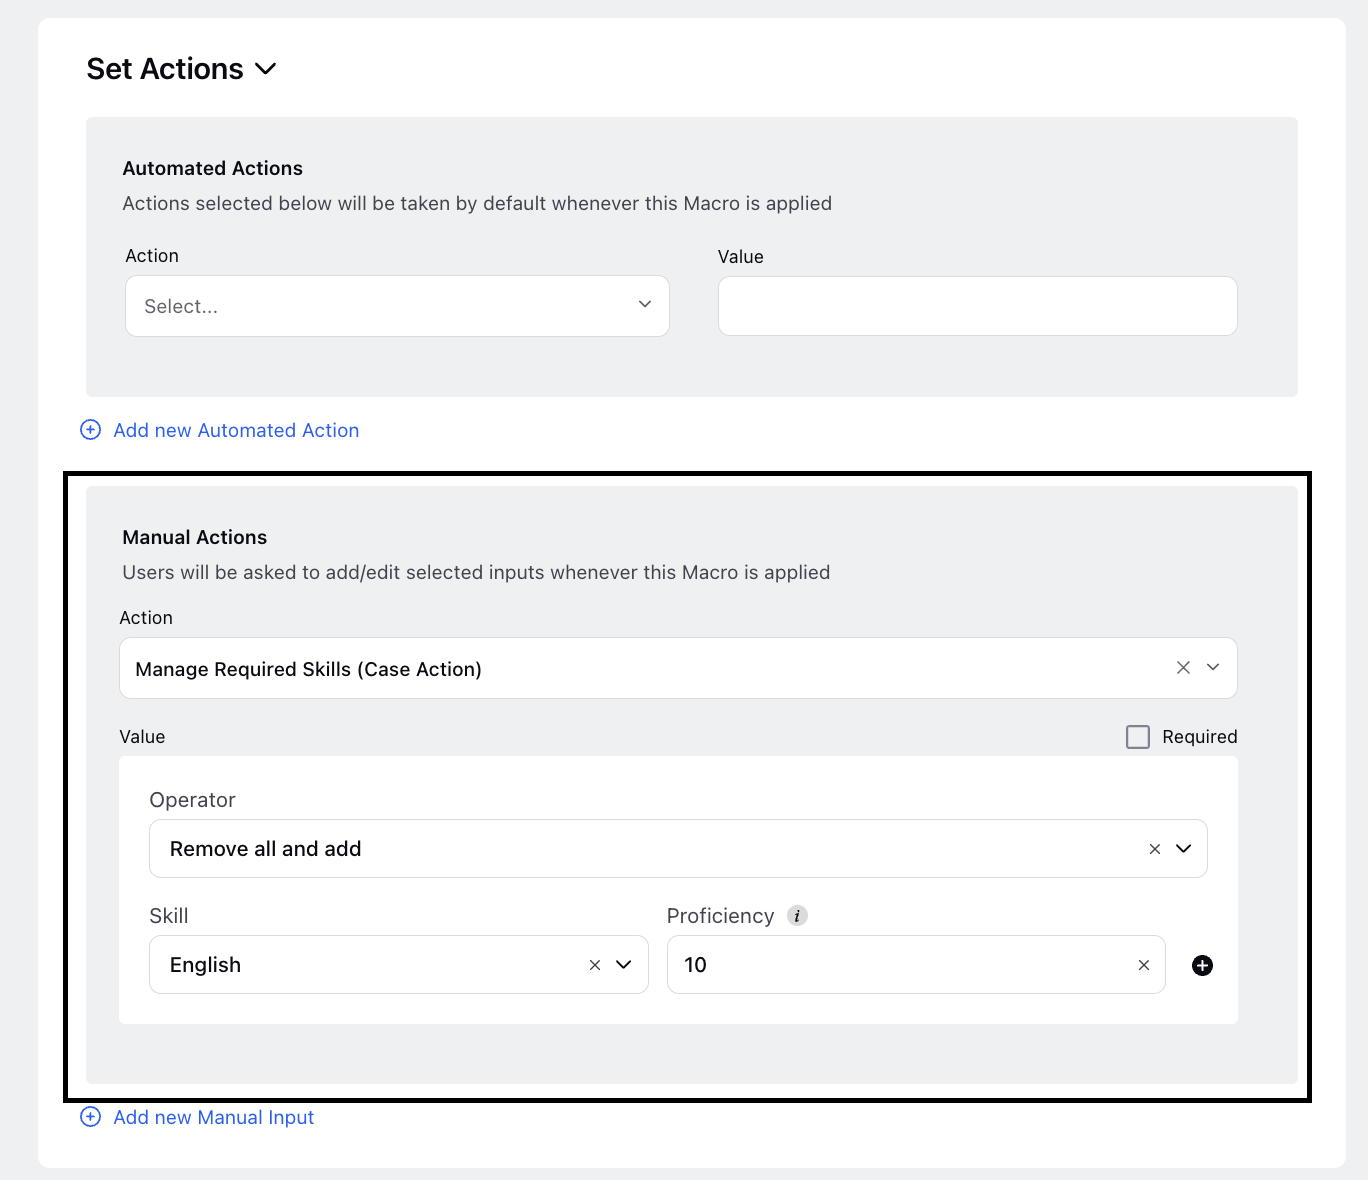
5. In the Set Actions section, you need to add a manual action. To do this, follow these steps:
In the Manual Actions card, from the Actions drop-down, select Manage Required Skills.
In the Operator drop-down, select the operator you want to display by default.
When this macro is opened in Care Console, it will show this operator by default.
Operator | Description |
Remove all and add | Clears existing skills and adds new ones. |
Add to existing | Adds new skills without removing existing ones. |
Remove from existing | Removes only selected skills. |
Select the skills and its proficiency on which you want to apply this action.
6. In Share this macro across workspaces, select the workspaces, users, and user groups who will access to this macro.
7. In the Advanced Visibility Filters section, define case filters to control when this macro appears as an option.
8. Once done, click Save.
Apply the Macro to a Case in the Care Console
Once you've created the macro, follow these steps to apply it to a case:
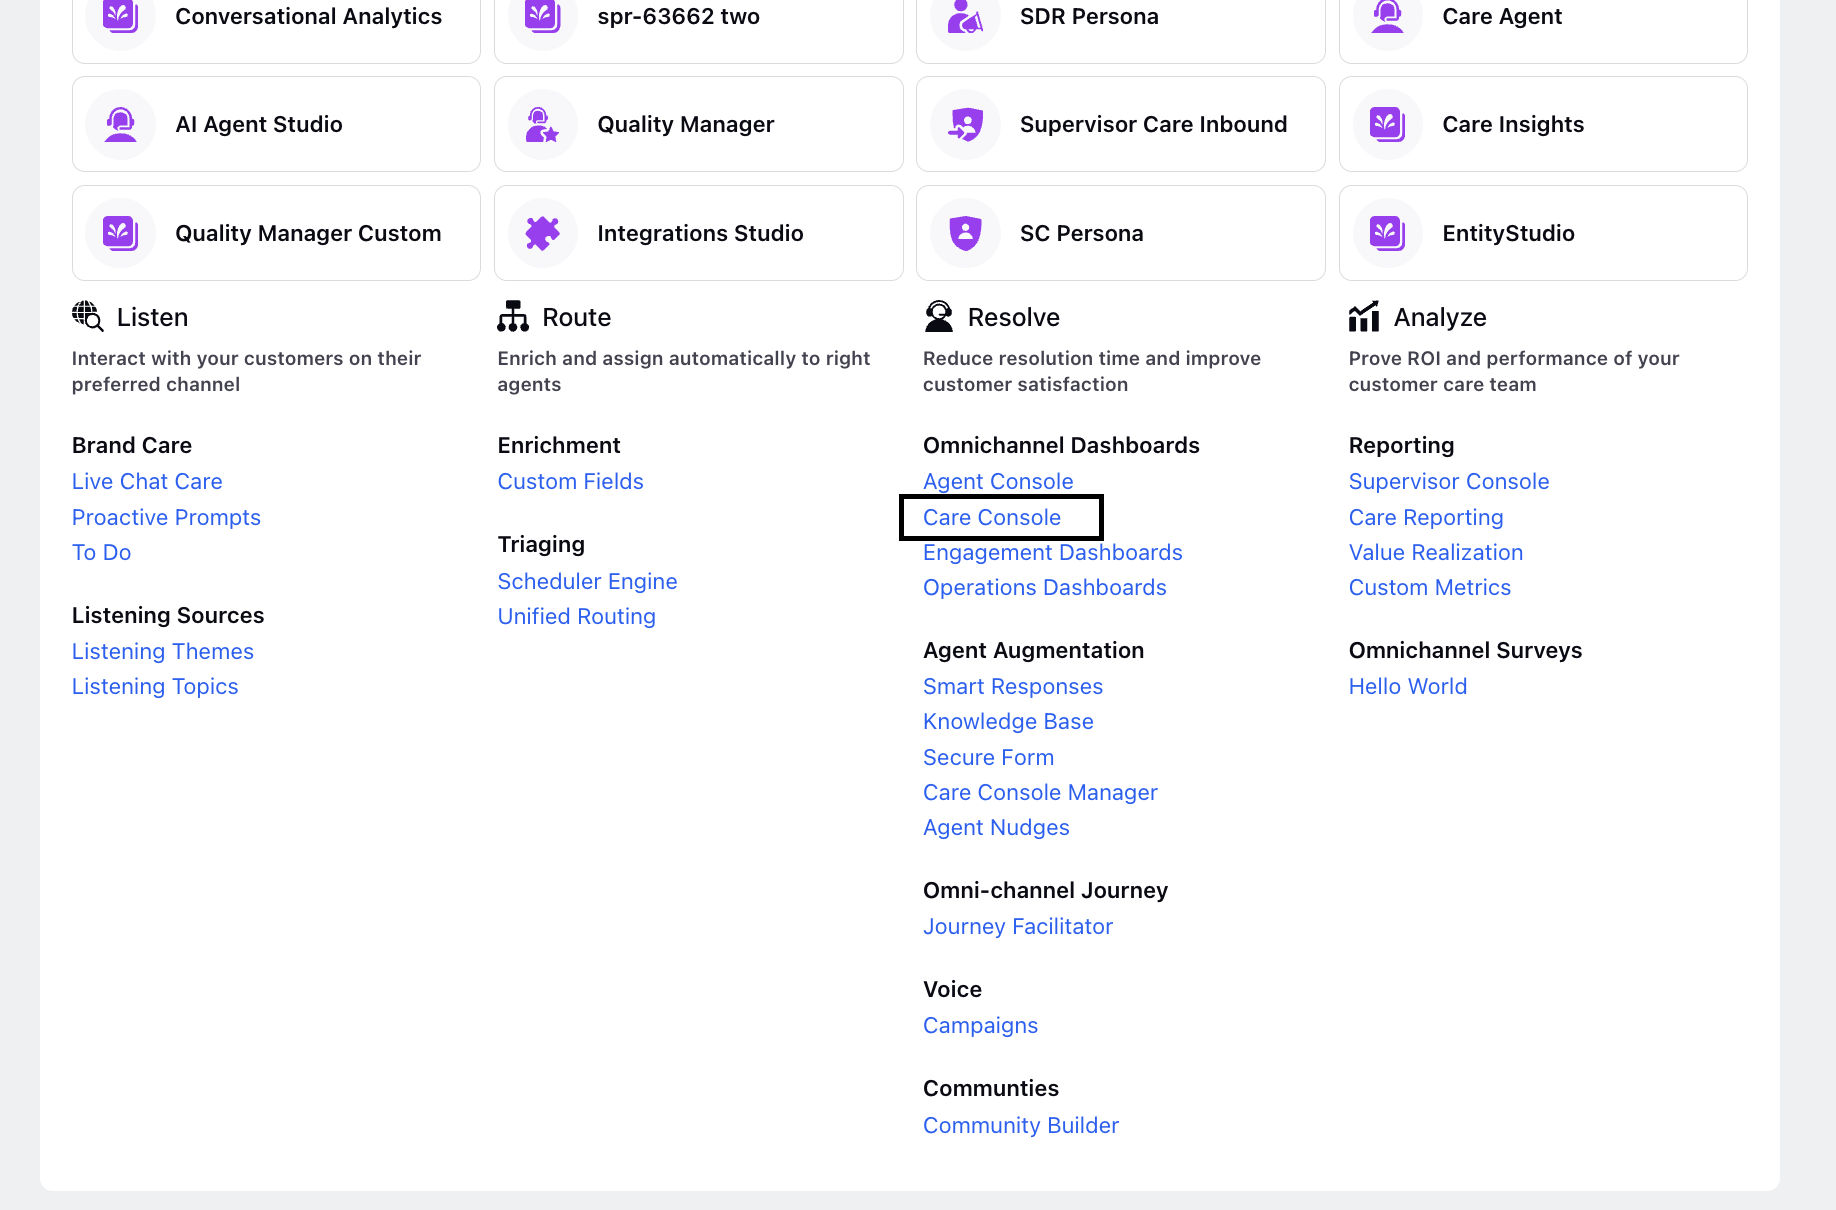
1. Click the New Page (+) icon to open the Launchpad.
2. Navigate to Resolve > Omnichannel Dashboards and click Care Console.
3. Locate the case you want to update and open it.
4. Click Apply Macro from the case's top-level options.
Alternatively, you can use the Apply Case Macro button in the top-right corner.
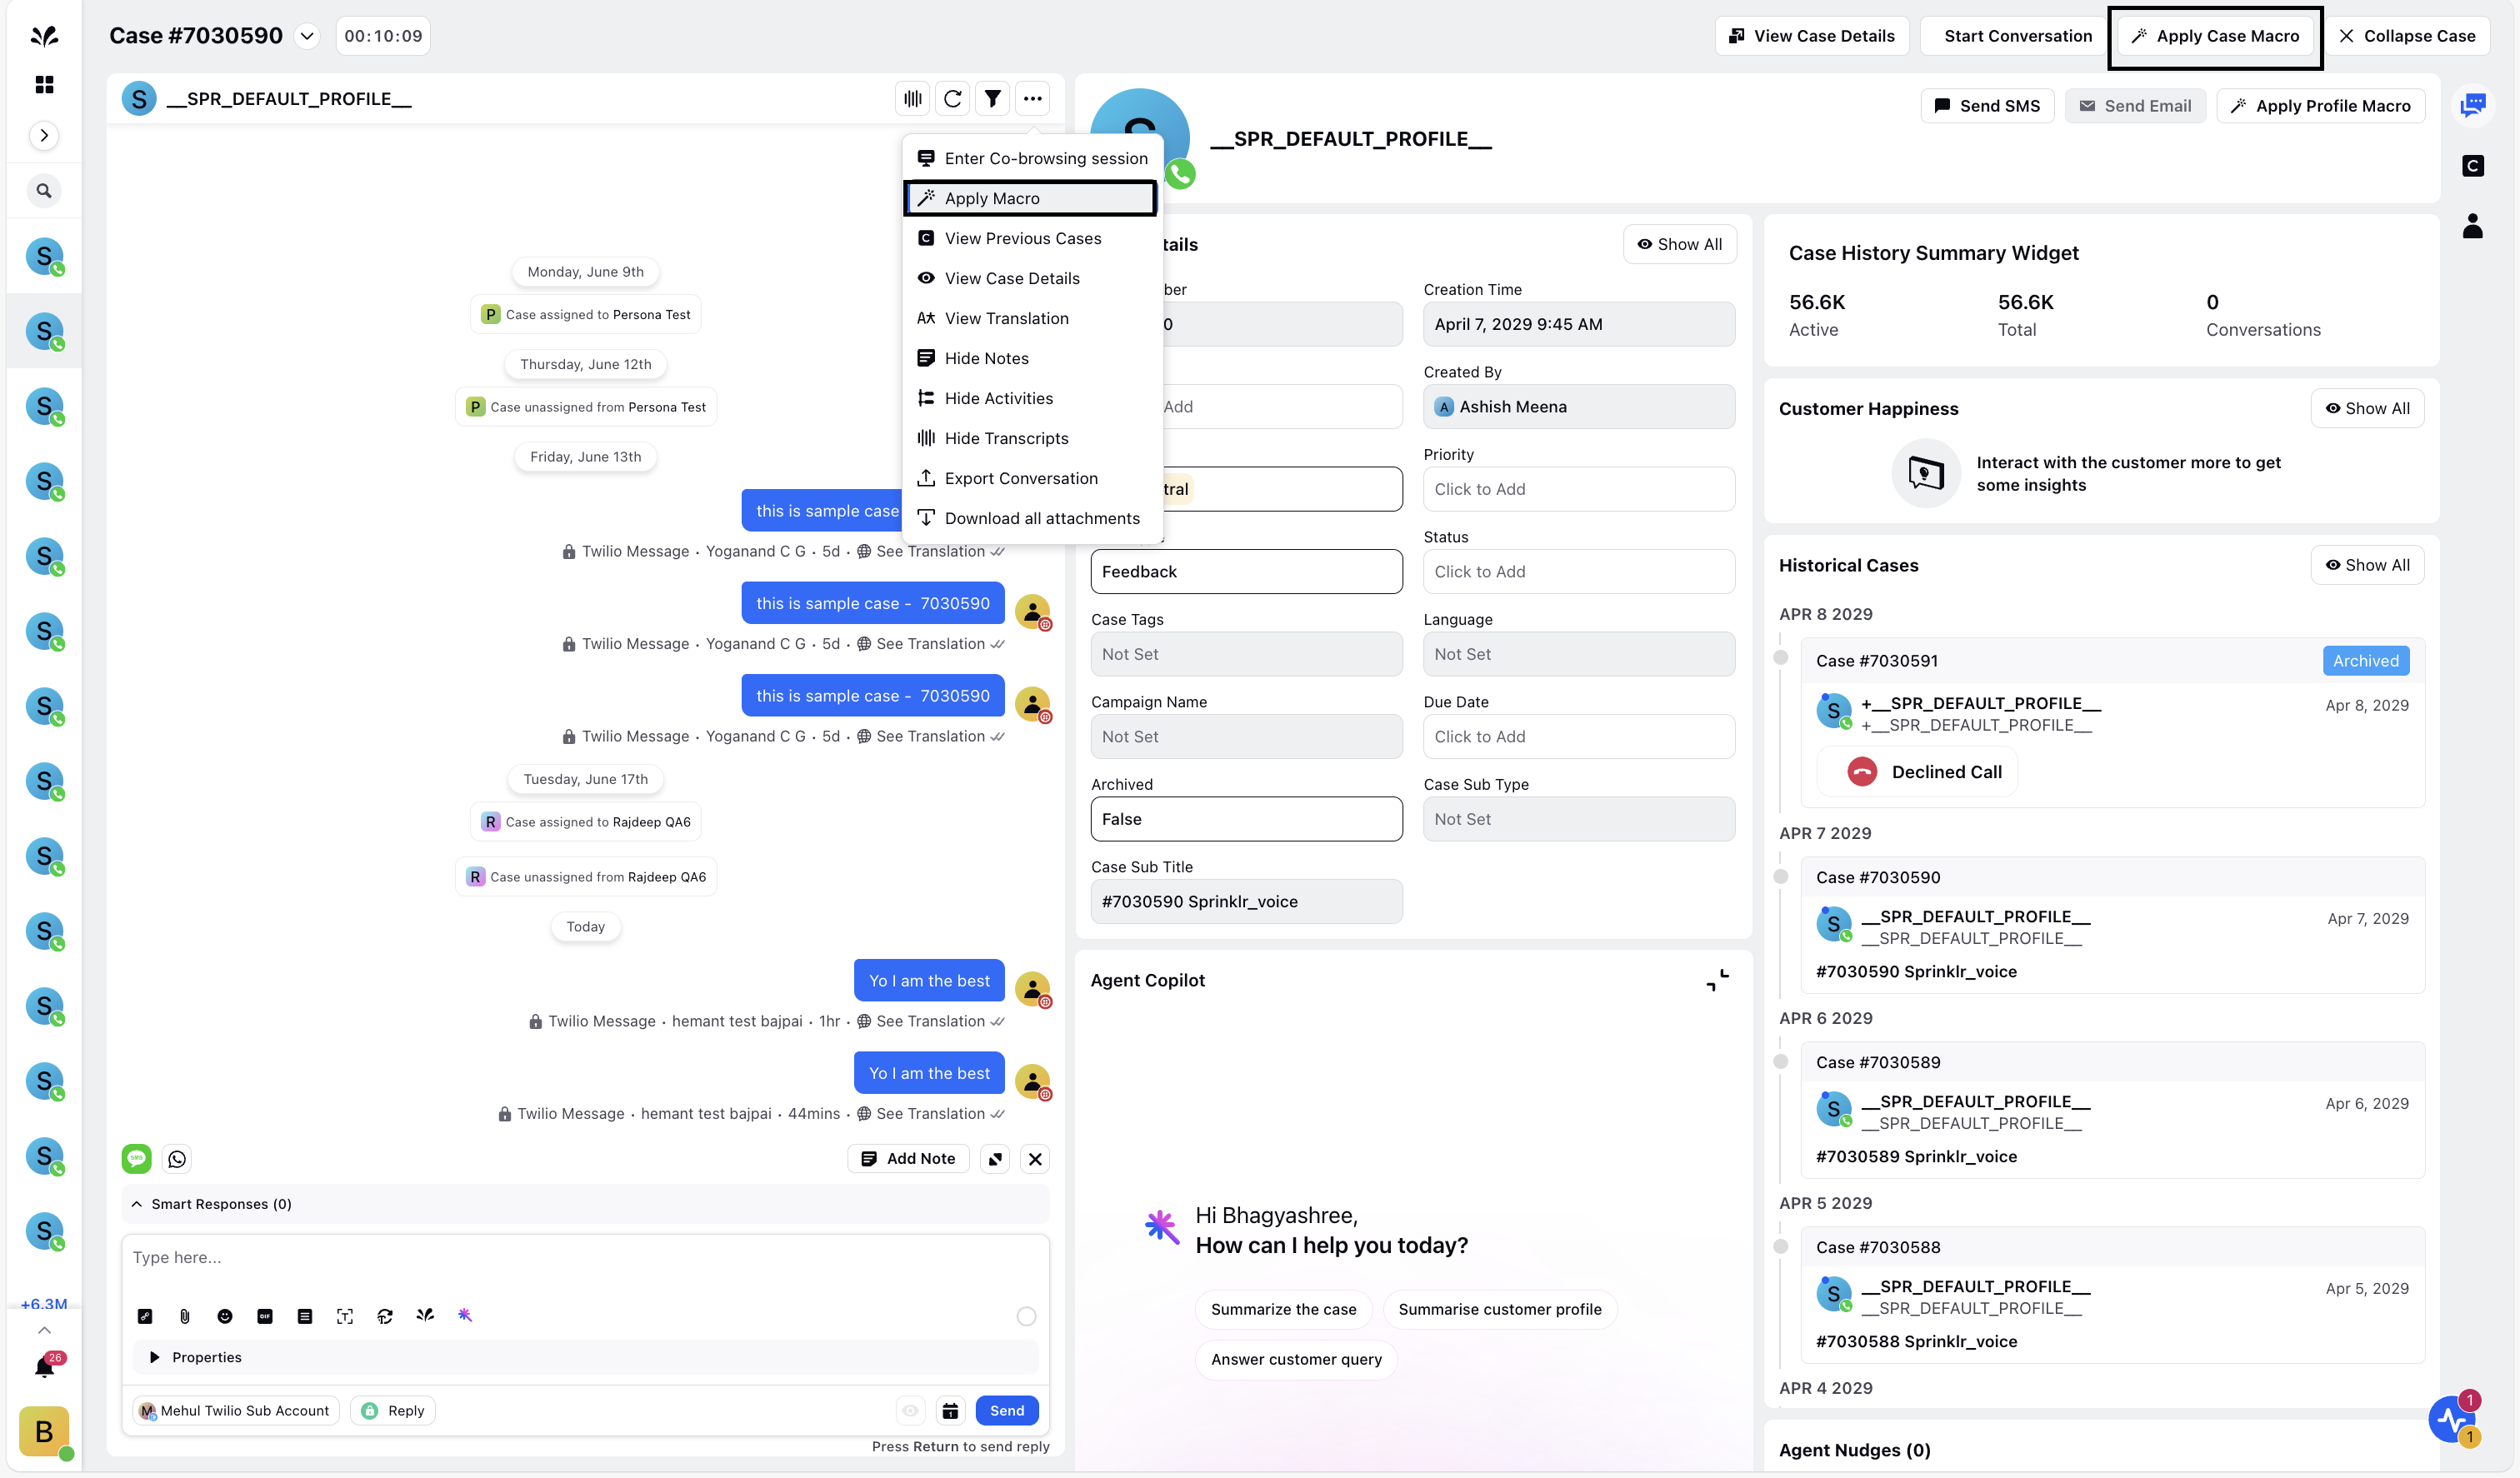
5. Search for and select the macro you created. The macro pop-up screen is displayed.
If a default operator was set earlier, it will be pre-selected. Otherwise, choose an operator from the dropdown. Select the required skill(s) and specify the proficiency level(s).
Operator | Description |
Remove all and add | Clears existing skills and adds new ones. |
Add to existing | Adds new skills without removing existing ones. |
Remove from existing | Removes only selected skills. |
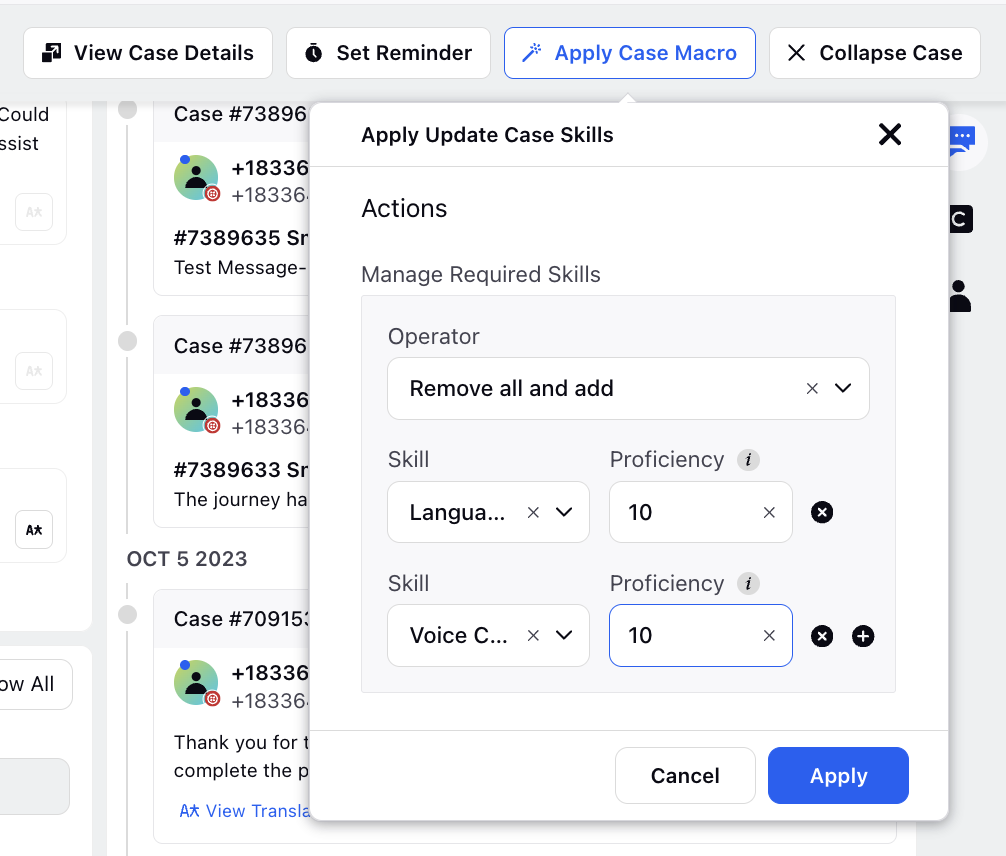
6. Click Apply.
This action assigns the defined skills and proficiency levels to the selected case.
Once the macro is applied, the system will evaluate available agents and route the case to those who match the required skills and proficiency. Only agents with the appropriate capabilities will be eligible to receive or engage with the case.