Snapchat Pixel Eligibility and Conversion Windows
Updated
Snapchat has introduced an eligibility check for the usage of tracking pixels and conversion windows based on the selected app and optimization goals. This eligibility check is implemented to ensure your ads are not disrupted due to the selection of an optimization goal or conversion window that is not available to a specific app or pixel.
In this article, you’ll learn which optimization goals are subject to conversion window and pixel eligibility checks.
Conversion Windows
The available conversion window options vary based on the selected app and optimization goal. This change applies to the following Snapchat optimization goals:
App Install
Pay for Impressions
Add to Cart
App Purchase
App Sign Up
App Re-engagement (Open)
App Re-engagement (Purchase)
To view the eligible conversion windows:
Go to Ads Composer and select your Snapchat account.
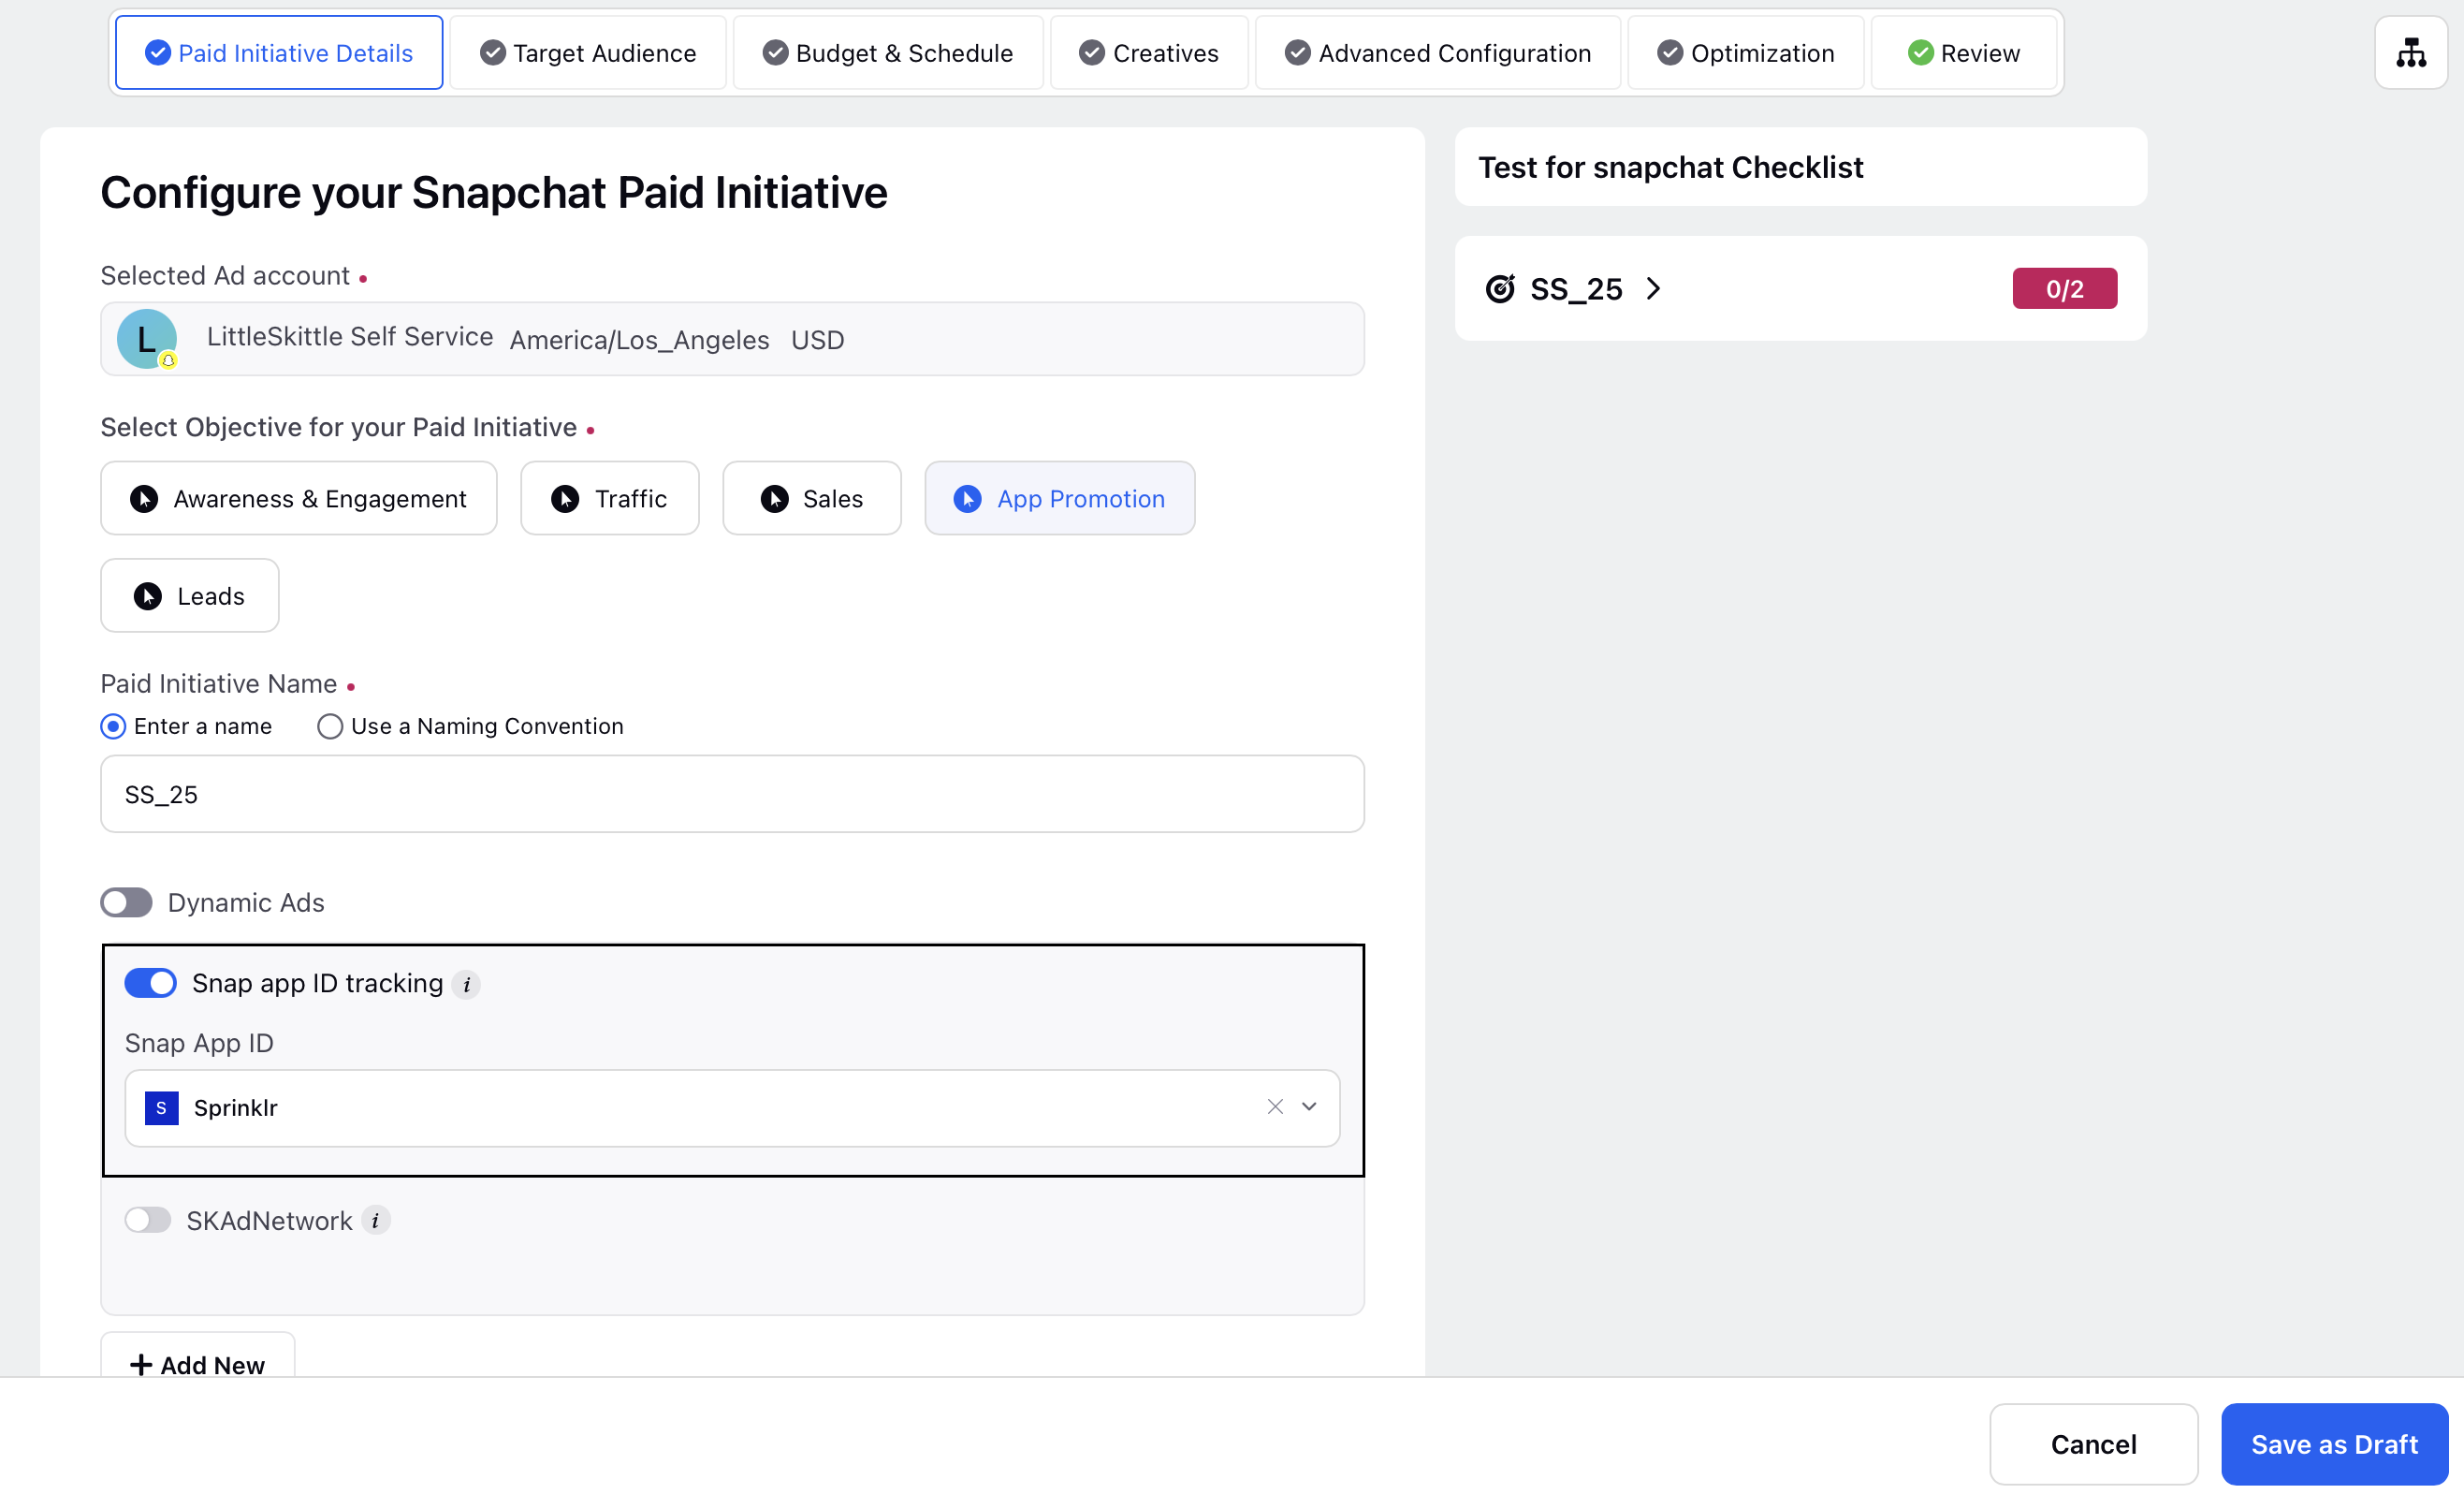
Enter a Paid Initiative name and choose an objective in the Paid Initiative Details tab.
Toggle on Snap App ID tracking and select the appropriate Snap App ID.

Define your target audience, then enter your budget, schedule, and placement in the Budget & Schedule tab.
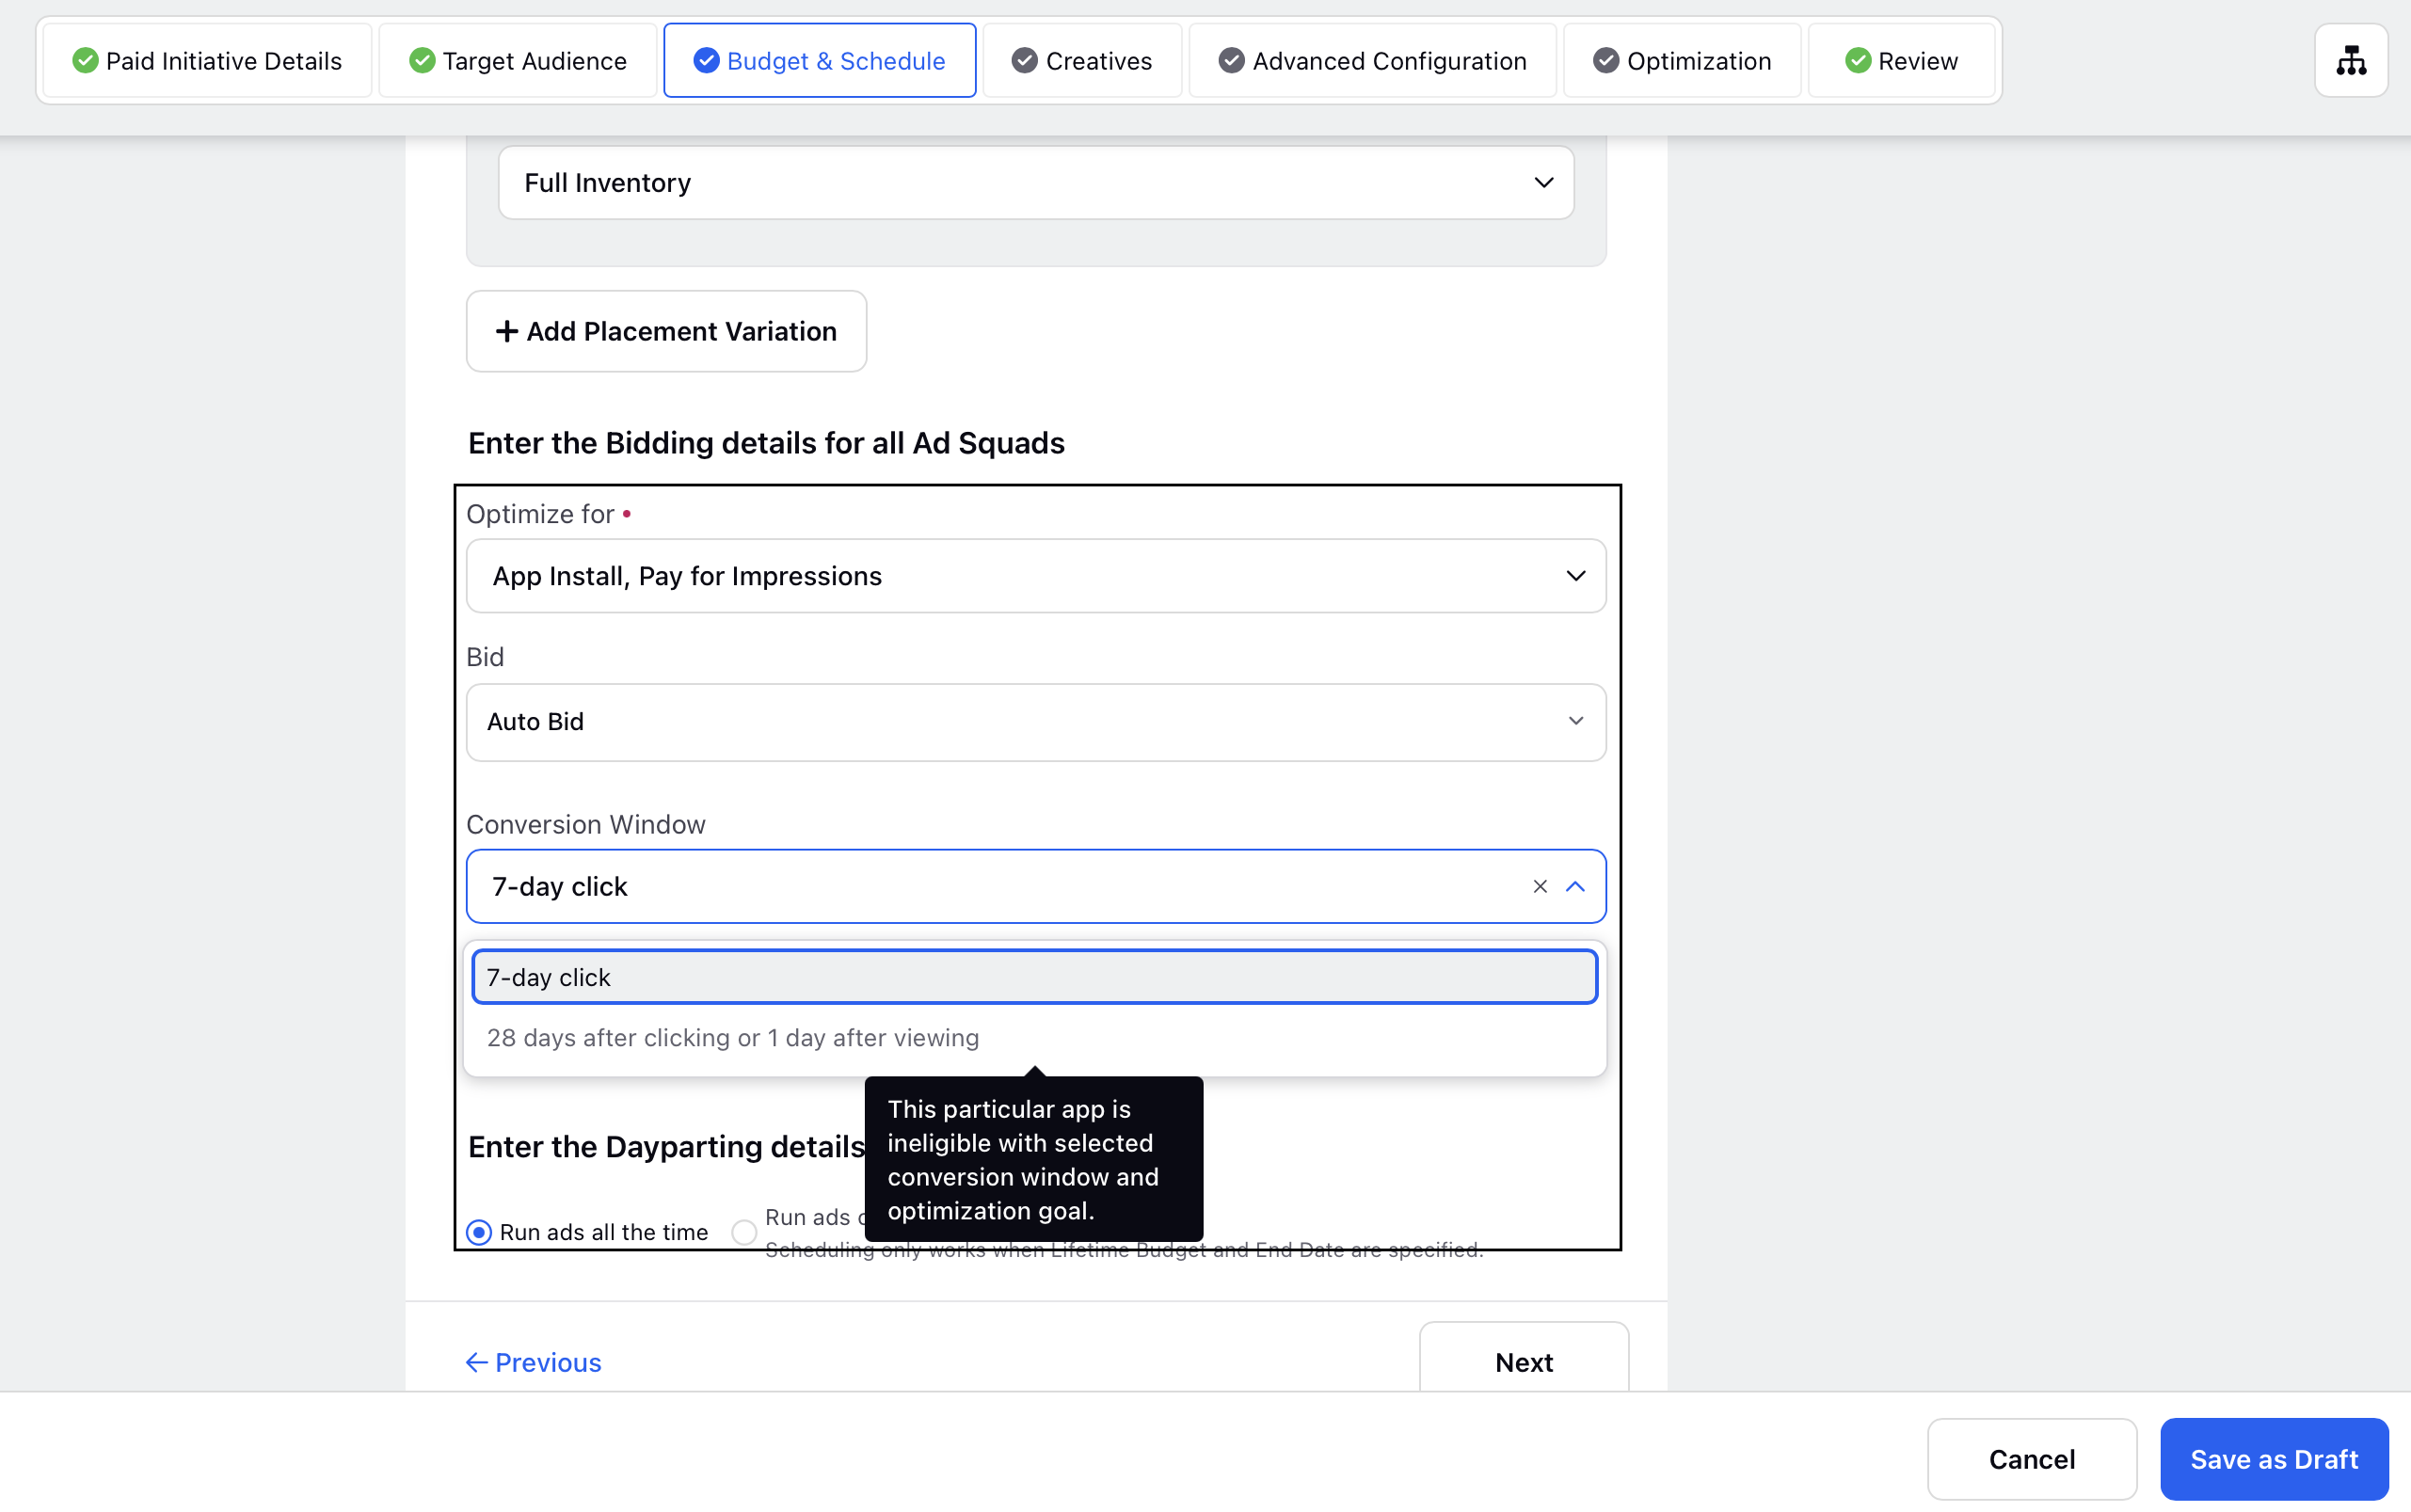
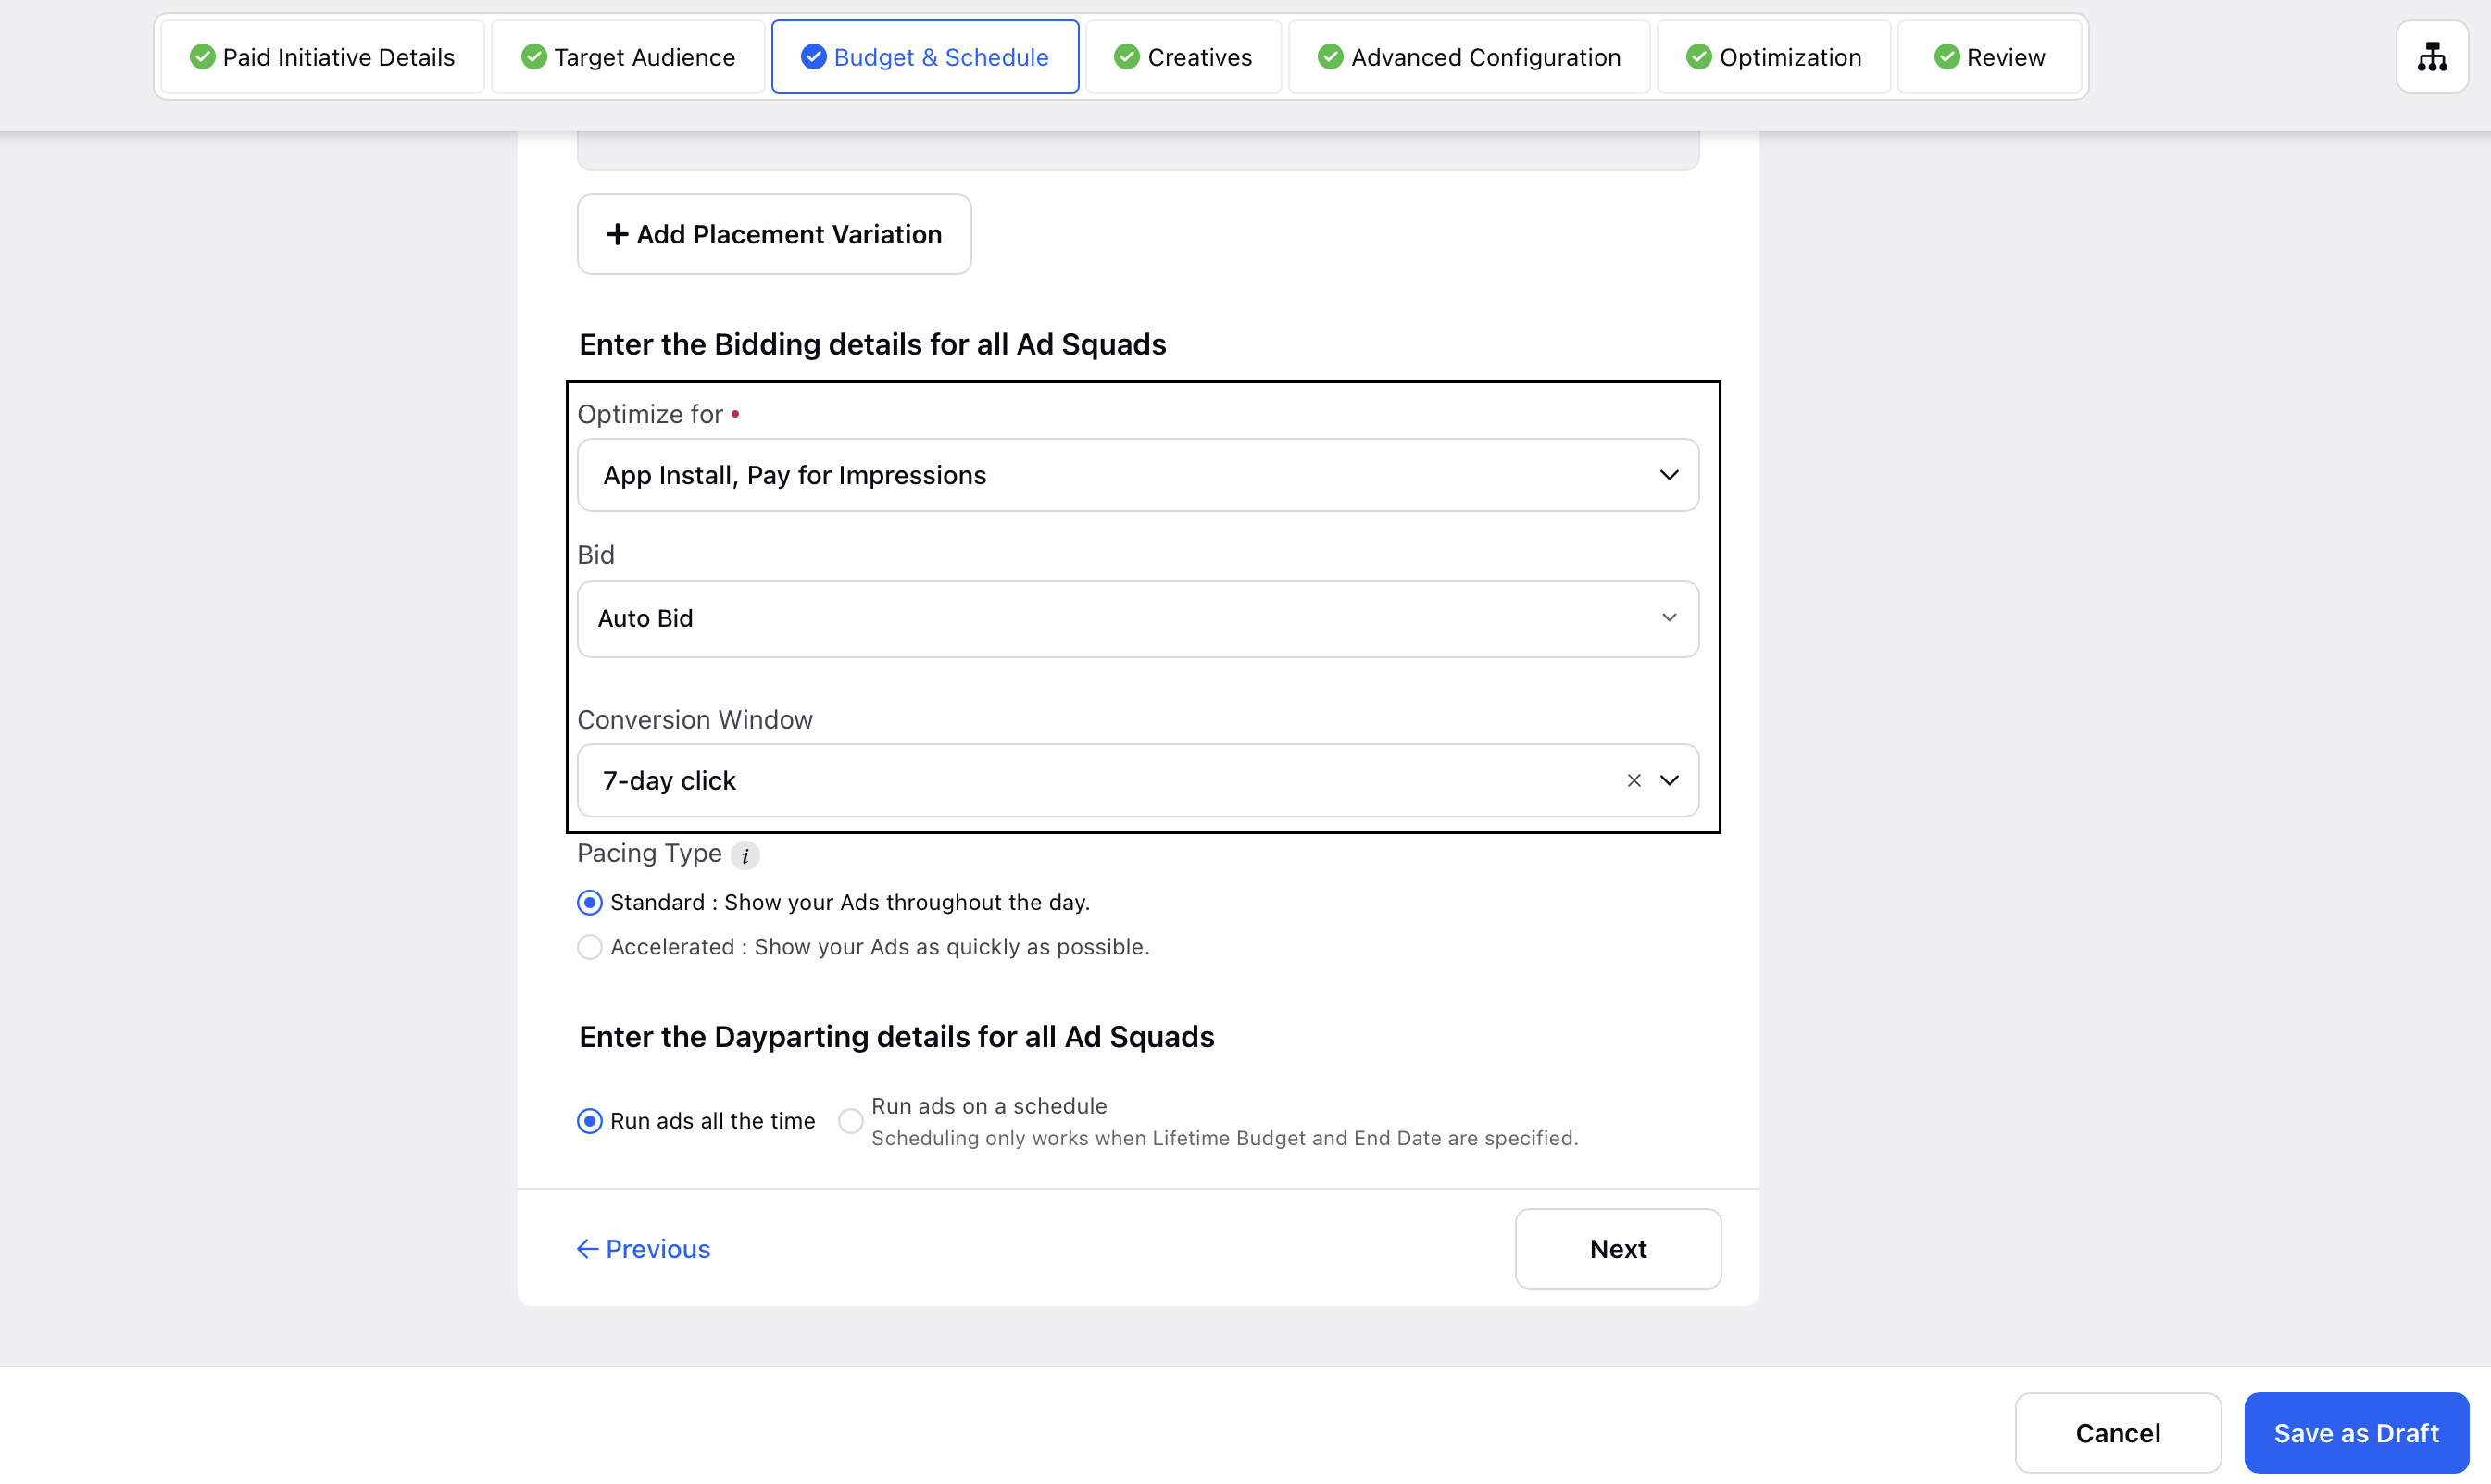
Scroll to the Enter the Bidding details for all Ad Squads section and choose an optimization goal in the Optimize for field.
Click on the Conversion Window field to select the required conversion window. Any ineligible conversion window will be greyed out.

Pixel Eligibility
Snapchat also filters eligible tracking pixels based on the optimization goal and selected conversion window. This update applies to the following Snapchat optimization goals:
Maximize Landing Page Views
Pixel Add to Cart
Pixel Sign Up
Pixel Purchase
To view eligible pixels:
In Ads Composer, select your Snapchat account.
Enter your Paid Initiative name and select an objective in the Paid Initiative Details tab.
Set your target audience, then enter your budget, schedule, and placement in the Budget & Schedule tab.
Scroll to the Enter the Bidding details for all Ad Squads section and select an optimization goal.
Select a Conversion Window. Based on the conversion window you choose, the eligible tracking pixels will vary.

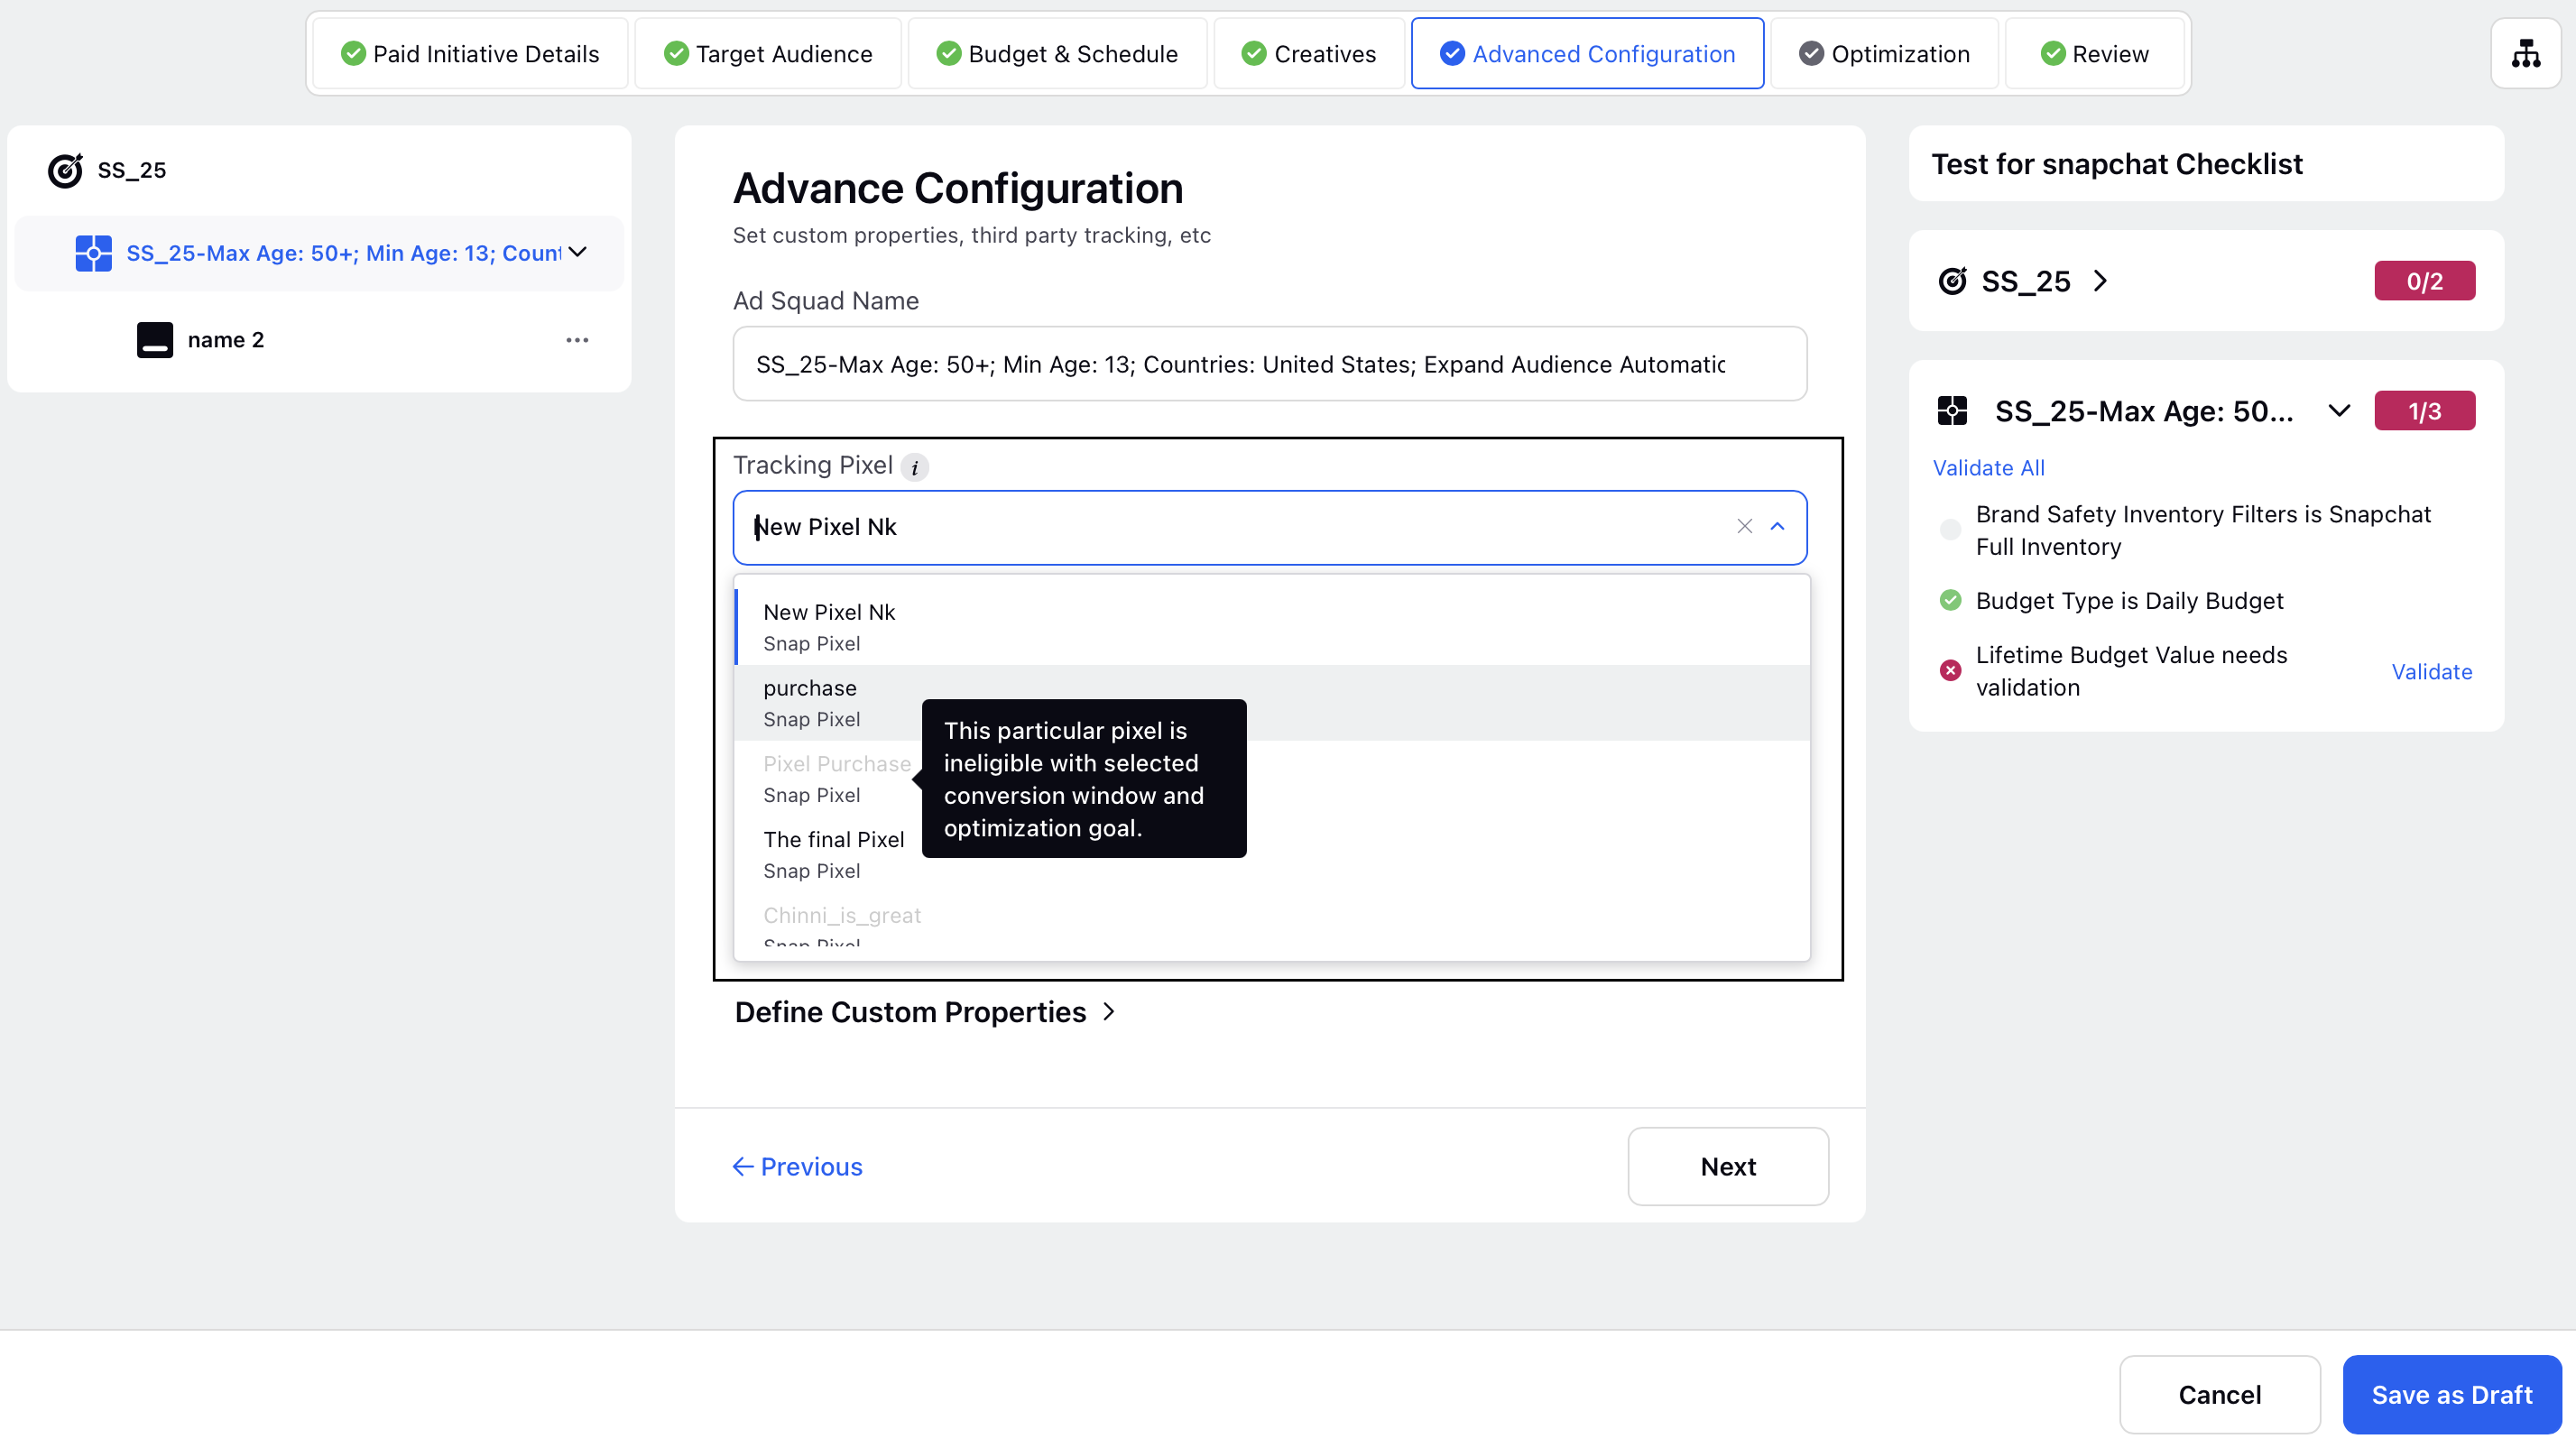
Next, select a creative and go to the Advanced Configuration tab.
Select the ad set where you want to apply tracking pixel.
Click on the Tracking Pixel field to access and select the eligible pixels. Any ineligible pixel will be greyed out.
