Configure Agent Copilot Widget in Sprinklr Care Console
Updated
After completing the configuration of Agent Copilot in AI+ Studio, you must add the Agent Copilot widget in the Sprinklr Care Console. This ensures agents can interact with Copilot directly from their case-handling interface.
Follow the steps below to configure the Agent Copilot widget:
1. Open Care Console Manager
In the Sprinklr platform, click the New Tab icon.
Navigate to Sprinklr Service > Resolve > Care Console Manager.
2. Create or Edit a Record Page
Choose to either create a new record page or edit an existing one, depending on your requirements.
3. Add the Agent Copilot Widget
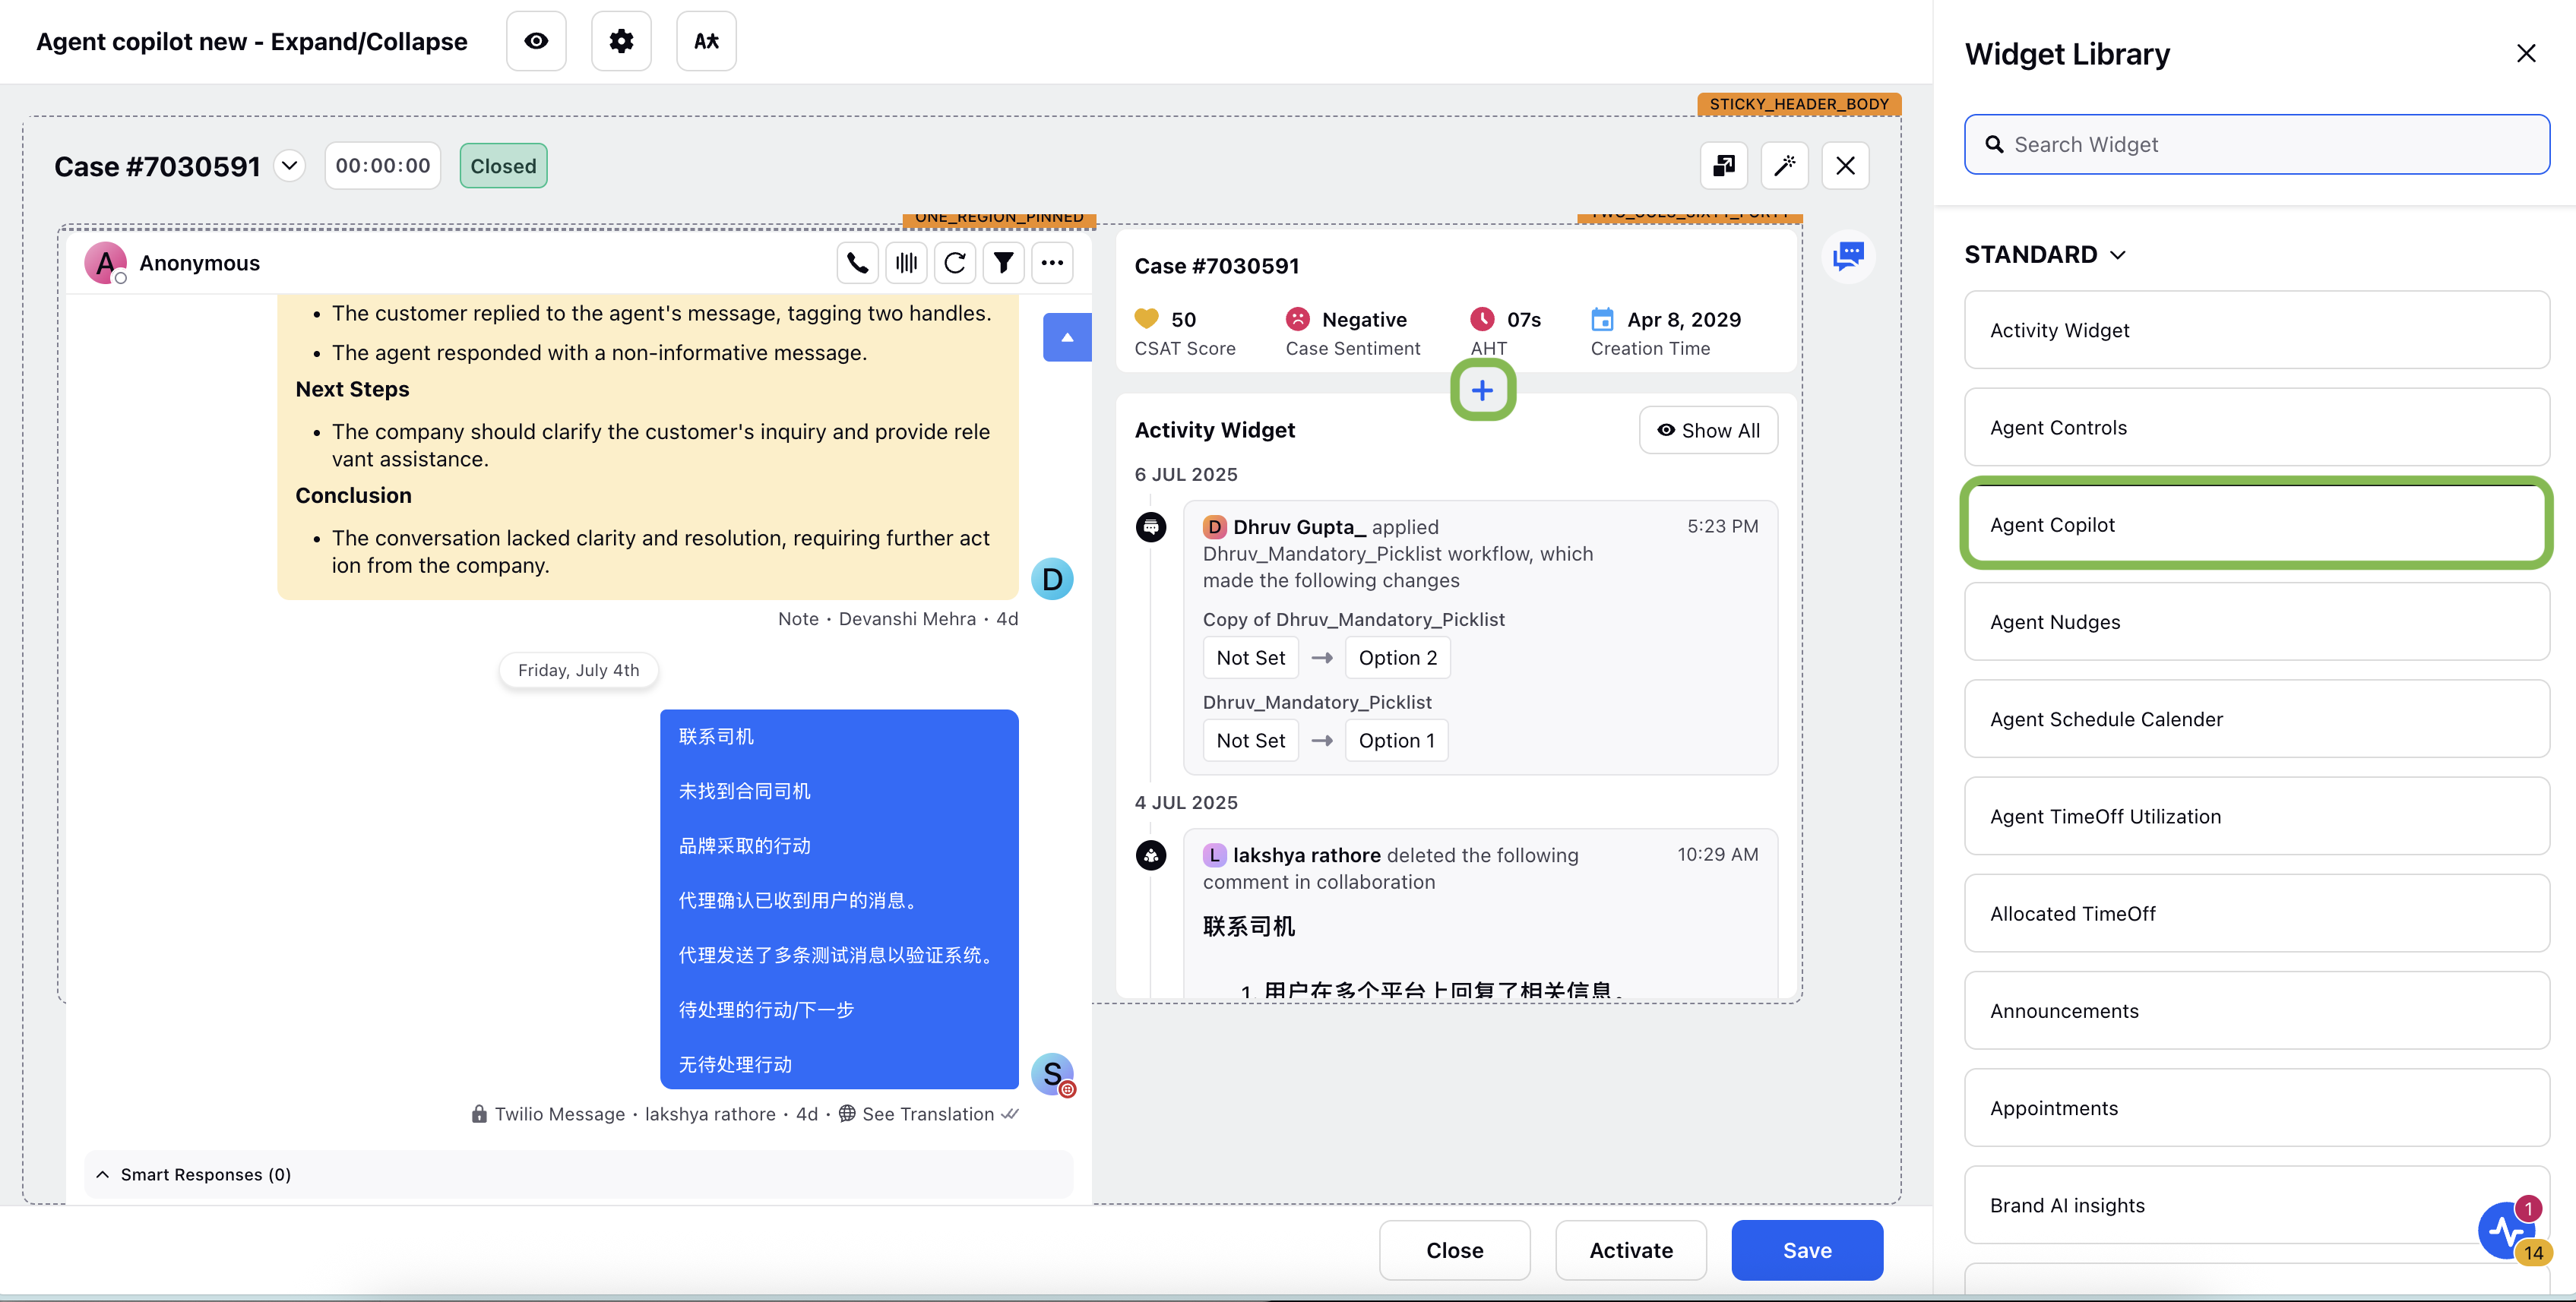
On the selected record page layout, click the Add [+] button.
From the component list in the right pane, select the Agent Copilot widget.

4. Configure Widget Settings
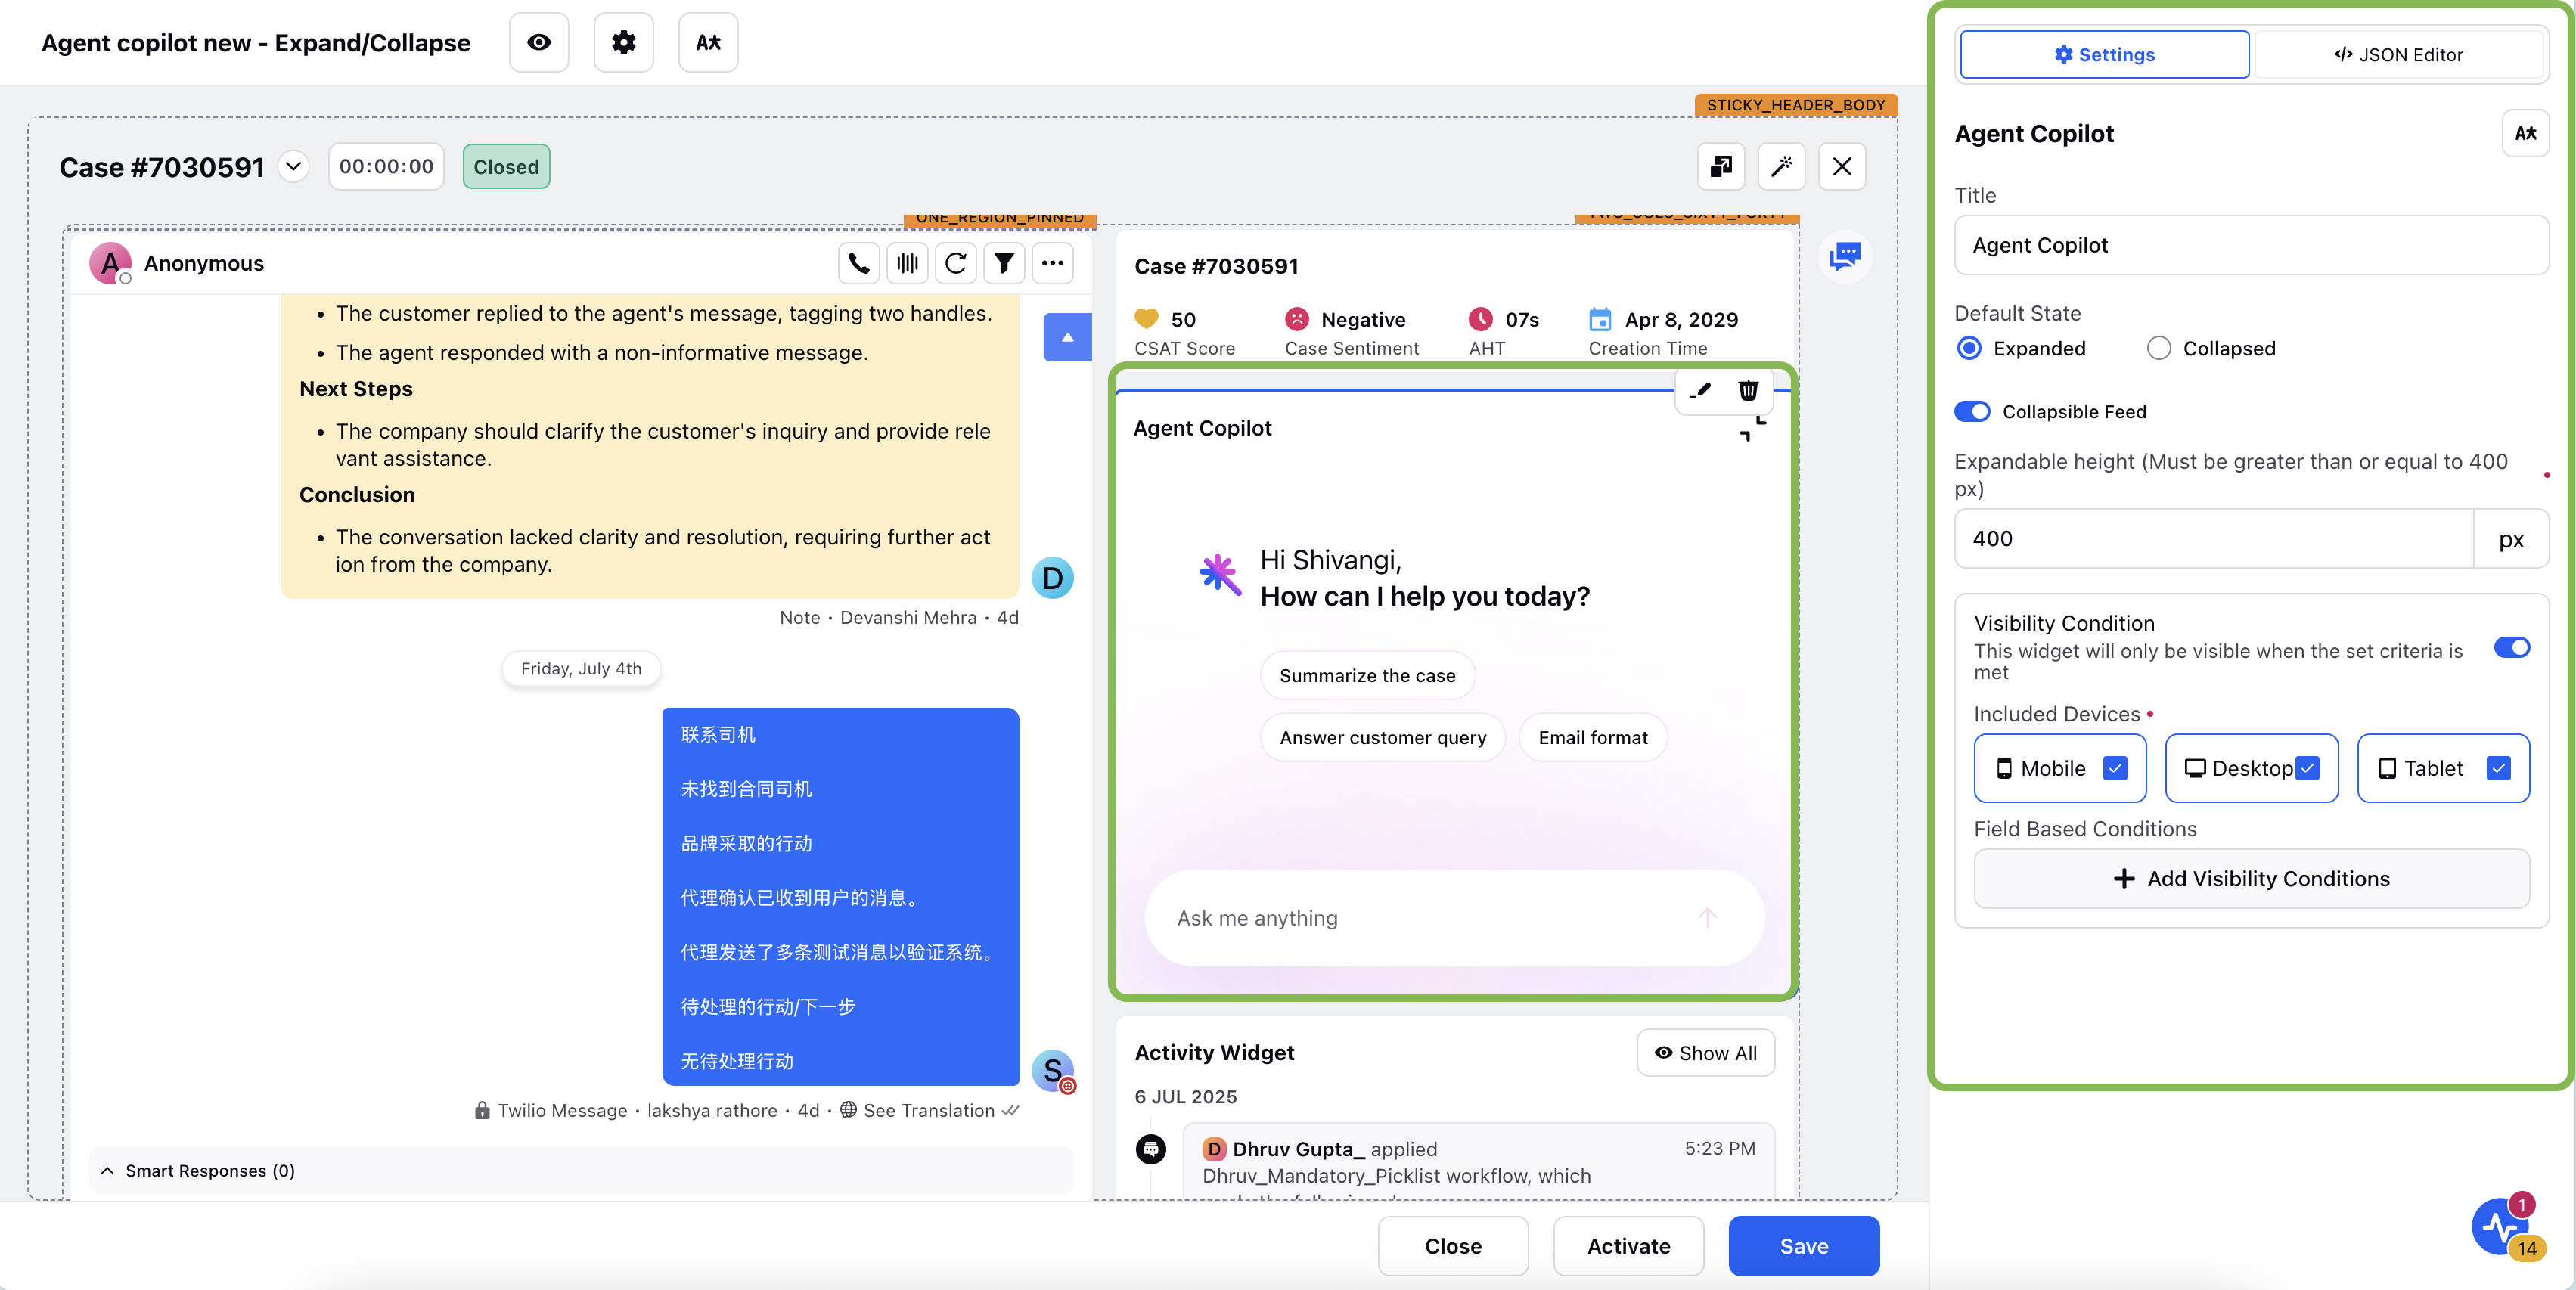
Once the widget is added, the widget settings panel opens. In the Settings tab, configure the following options:

Field | Description |
Title | Enter the display title for the widget. |
Default State | Choose the initial widget state: Expanded or Collapsed. |
Configure Widget Height | Set the widget's expandable height in pixels (minimum 400 px). |
5. Configure Visibility Condition (Optional)
You can choose to display the Agent Copilot widget only under specific conditions. This step is optional and helps tailor the widget’s visibility based on device type or other field-based filters.

To configure visibility settings:
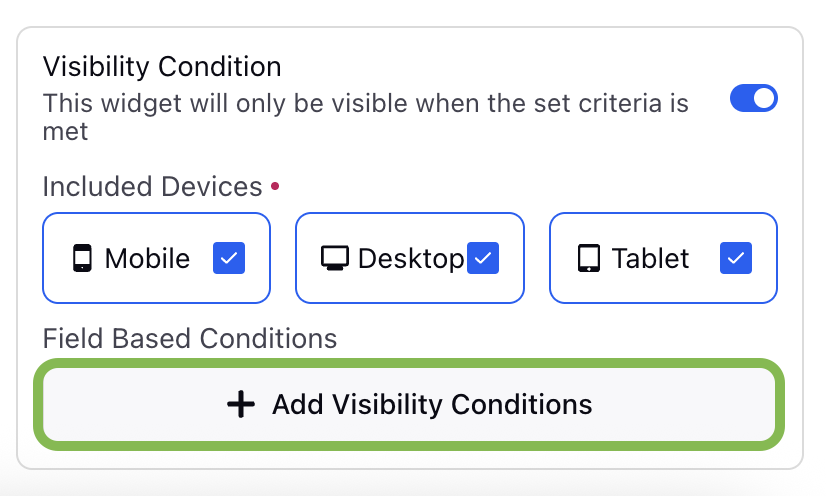
1. Enable the Visibility Condition toggle.
This option is available in the widget settings panel. Enabling it allows you to define the conditions under which the widget should be shown to users.
2. Set device-specific visibility.
Under Included Devices, select one or more device types for which the widget should be visible:
Desktop
Tablet
Mobile
3. Add filter-based conditions.
Click the Add Visibility Condition button to define filters based on fields and values.
The Filters window will open, where you can configure conditions using the following options:
Field: Select the field on which you want to apply the condition.
Operator: Choose the condition operator (e.g., equals, contains).
Value: Specify the value that the field should match.
To add more filters, click + Add Filter button.
To group multiple filters, use Add Filter Group button.
Click the ‘Apply’ button to apply your field based filters.

Note: The widget will only be displayed when the configured visibility criteria are met.
6. Manage Access
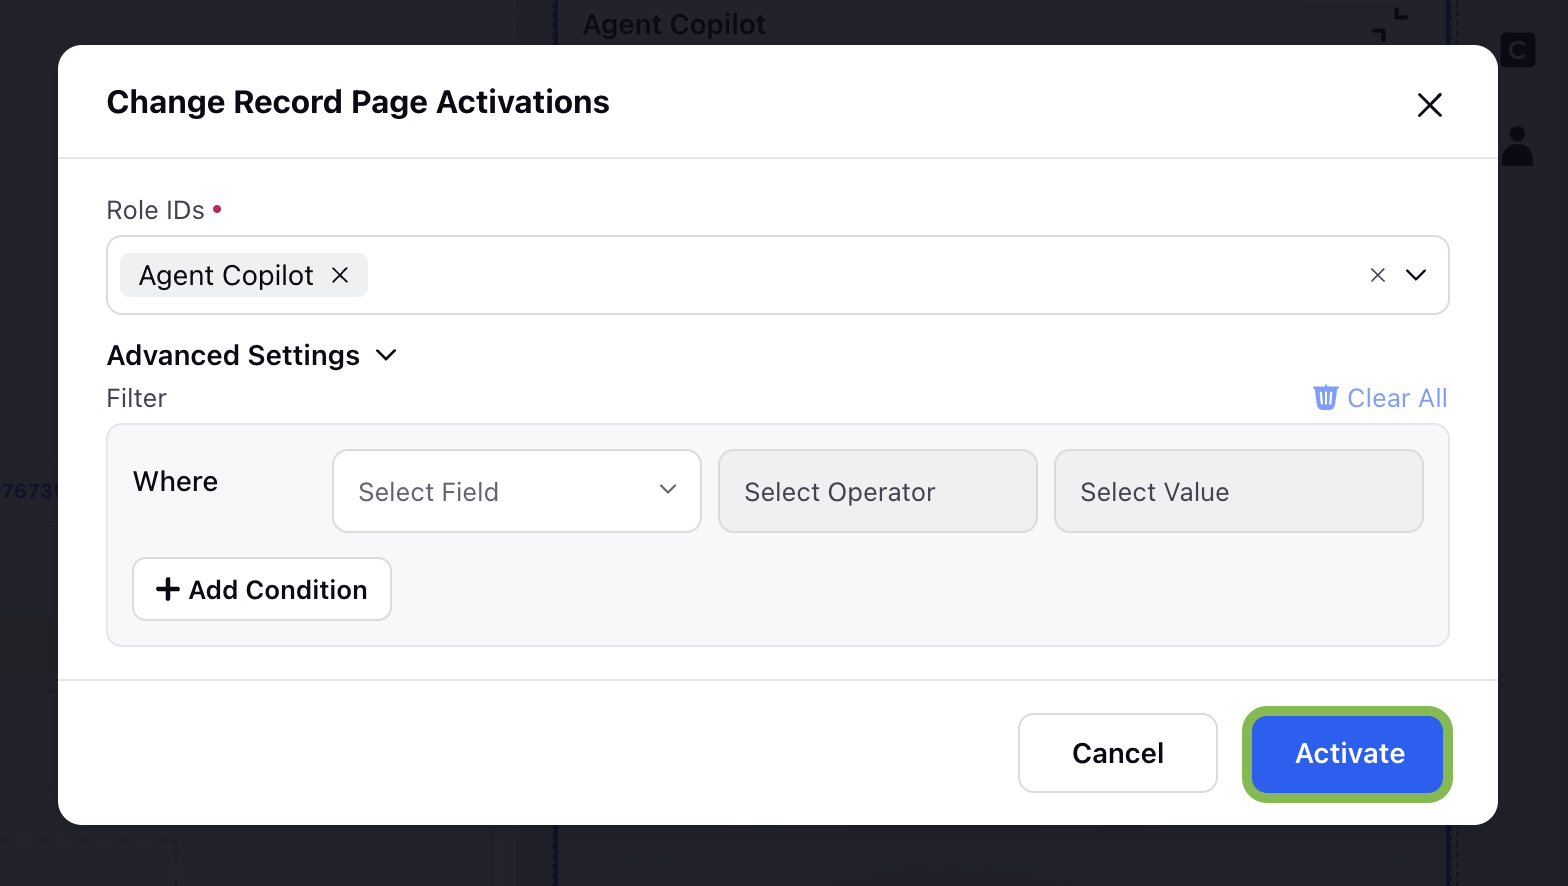
Click Change Activations button to assign the record page to the appropriate roles. This controls visibility for different users. Change Record Page Activations screen will popup where you can configure who can access the Agent Copilot record page and under what conditions. This step ensures that only the intended user roles can view and interact with the Agent Copilot widget in the Care Console.

This screen includes the following elements:
Role IDs
Use this section to specify which user roles should have access to the record page containing the Agent Copilot widget.
You can assign one or more Role IDs.
Only users assigned to the selected roles will be able to access the widget once the record page is published.
Advanced Settings
Use filters to apply additional conditions to limit access based on specific case or user attributes.
Where: Defines the context in which the filter is applied.
Select Field: Choose a field (such as case priority, channel, or status) to filter on.
Select Operator: Choose an operator (e.g., equals, contains, greater than).
Select Value: Provide the value that should be matched for the filter condition.
You can configure multiple filters to ensure precise control over who sees the Agent Copilot widget. These filters are especially useful when you want to limit visibility based on case characteristics or agent-specific data.
Once you have defined the roles and filters, click the Activate button to save your changes.
7. Save and Publish
Click the Save and Publish button to make the record page live for the selected users.
After publishing, go to the Care Console to verify the Agent Copilot widget is available and functioning. Perform quality assurance (QA) testing to validate the configured use cases.
This completes the widget setup process. Your agents can now begin leveraging Agent Copilot to enhance case resolution workflows.