Setting up Customer Authentication
Updated
You can configure Customer Authentication on the Sprinklr platform by following 3 steps:
Creating a custom field to indicate if the profile is authenticated
Creating a tag (badge) that is tied to the state of the new custom field
Creating a canned response to send to customers to start the authentication process
(Optional) Creating a rule that resets the authentication state after a period of time
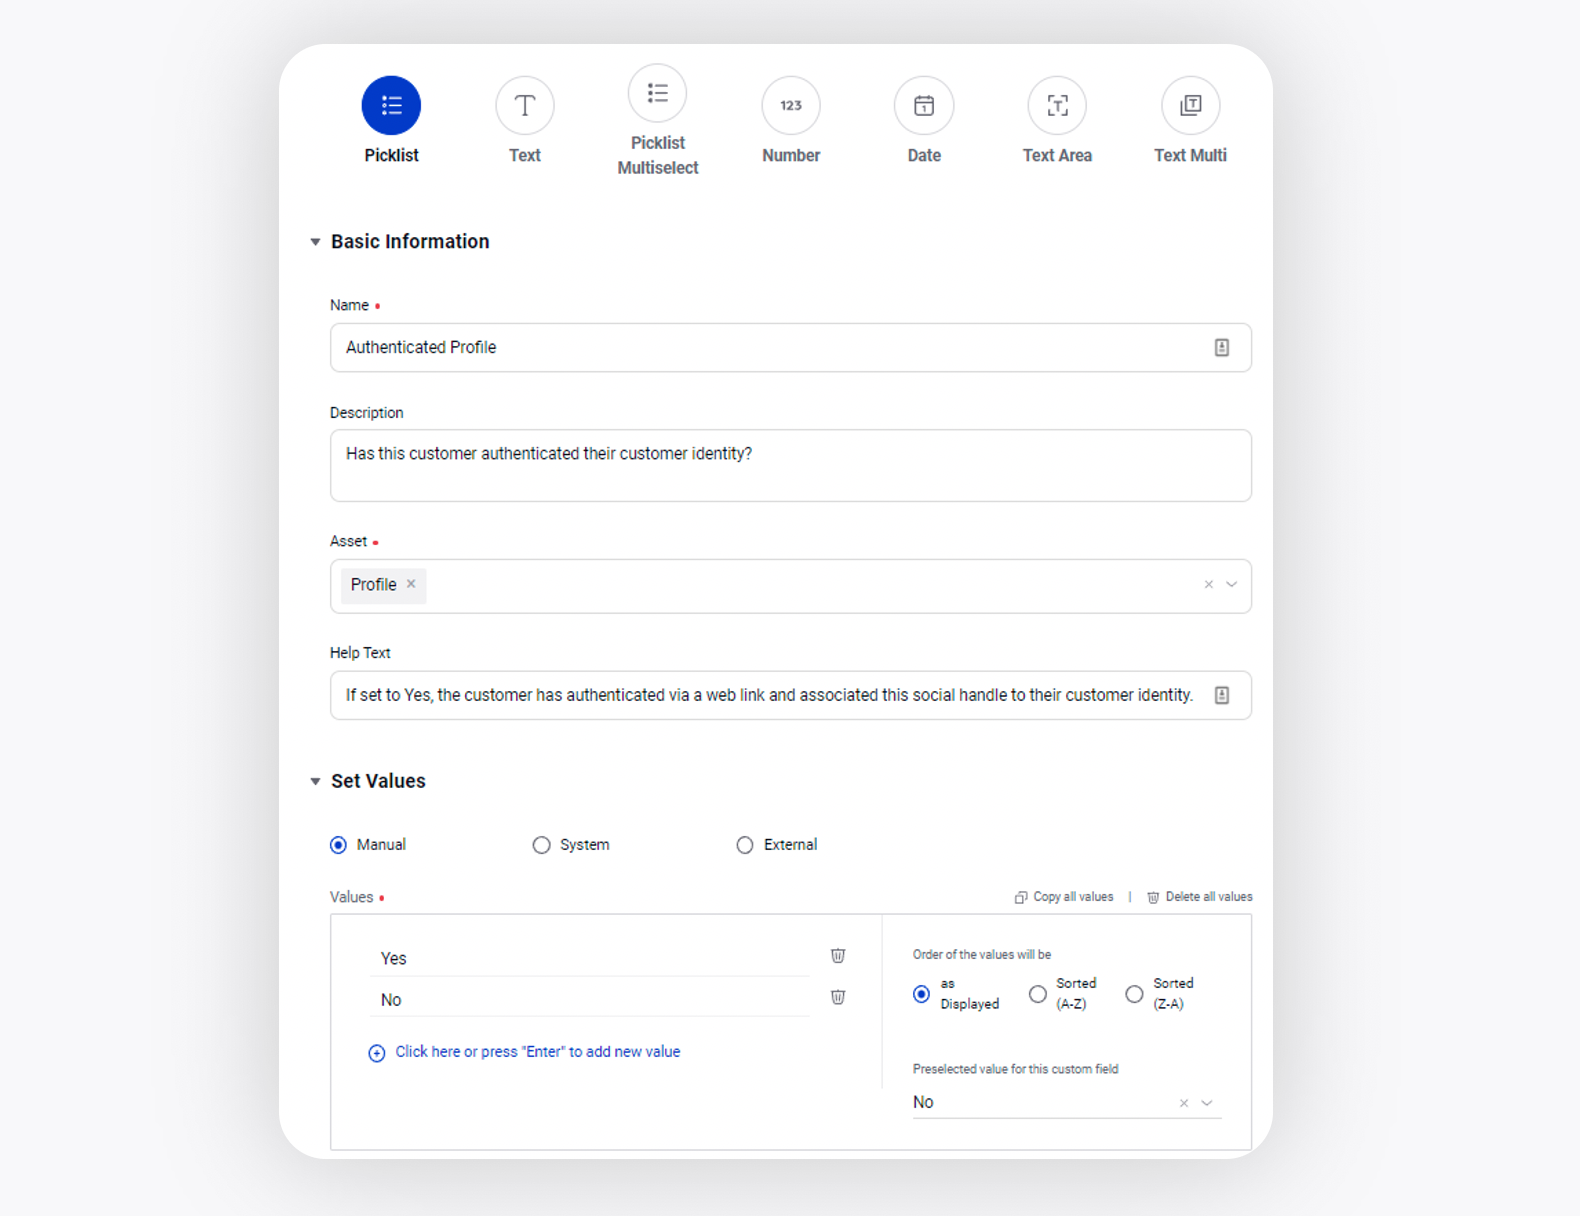
To create a Custom Field indicate if the profile is authenticated
Click the New Tab icon. Scroll down to Platform Modules, and click Custom Fields within Unify.
In the top right corner of the Custom Fields window, click Add Custom Field.
On the New Custom Field window, add details to create a Picklist custom field. Select Profile as the asset
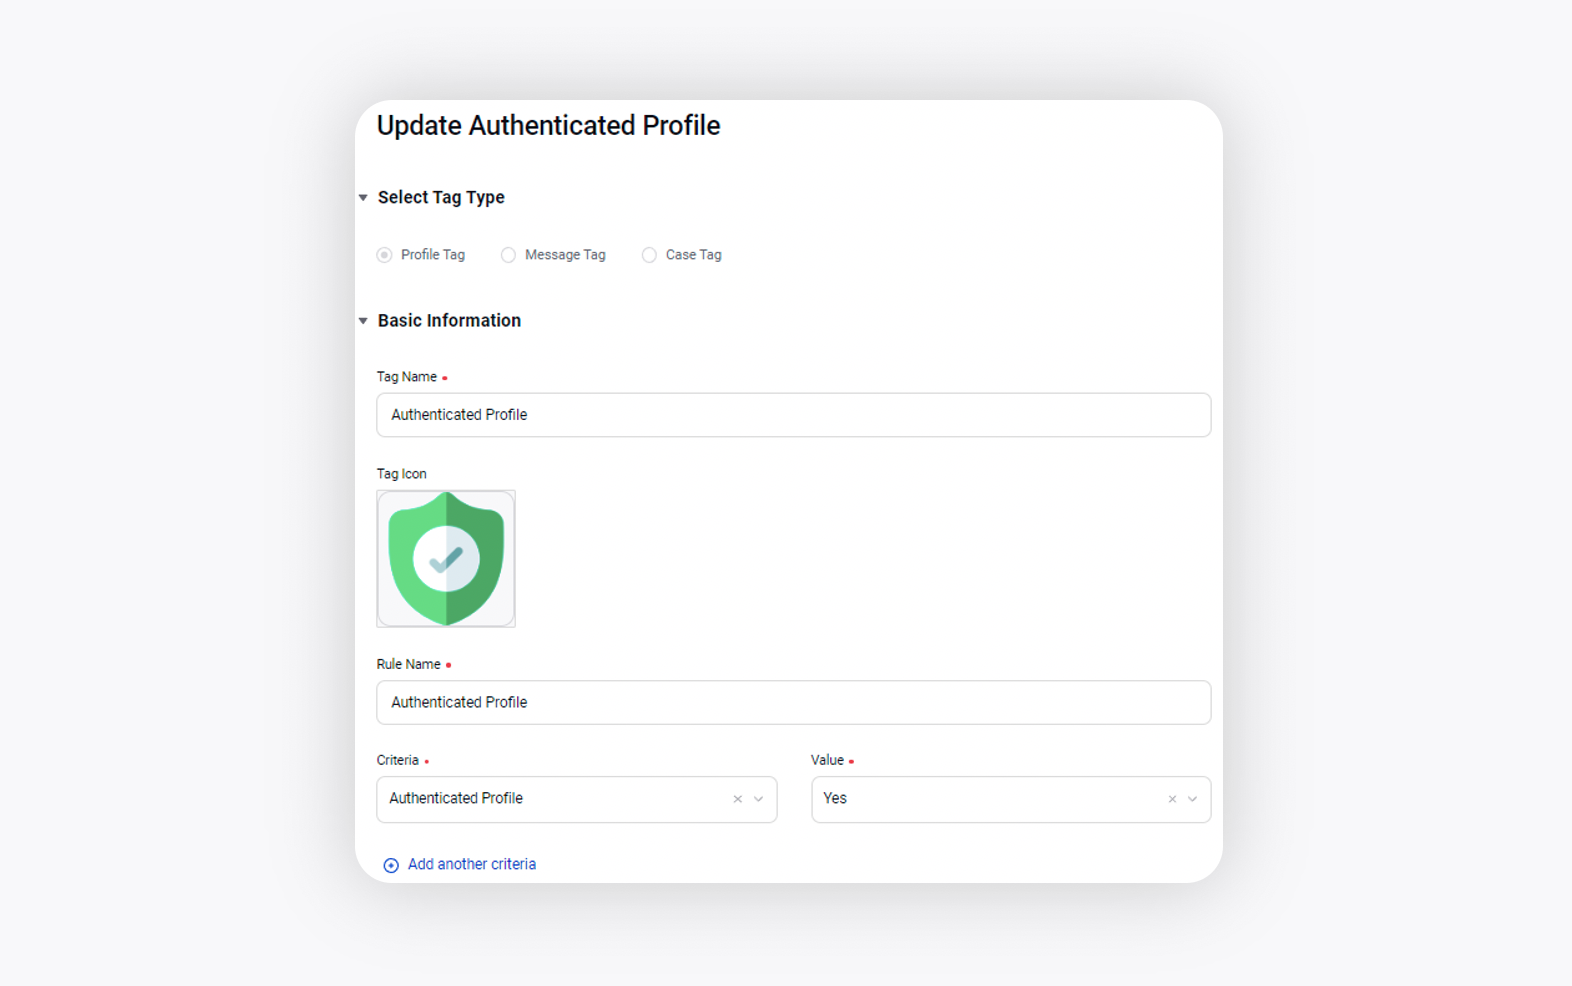
To create a tag (badge) that is tied to the state of the new Custom Field
Click the New Tab icon. Under Platform Modules, click All Settings within Listen.
On the Platform Settings window, click Manage Customer in the left pane and select Tagging from the right pane.

If necessary, create a new Profile Tag and provide the necessary details. Here you can upload the icon and also the condition under which the tag/icon should be visible.
The criteria here is the value of the custom field you had created in the previous step being 'Yes'.
Note: This technique can be used to indicate other profile attributes visually as well (like customer tier level, status, if they are mean to agents, have contributed user-generated-content, etc.)
To create a Canned message to send to customers to start the authentication process
The next step is to create a Canned Response that the agent can send to the customer to initiate the customer authentication process.
Click the New Tab icon. Under the Sprinklr Social tab, click Assets within Engage.
On the Asset Management window, click Create Asset in the top-right corner.
Select Text from the dropdown list and then select Simple Text.

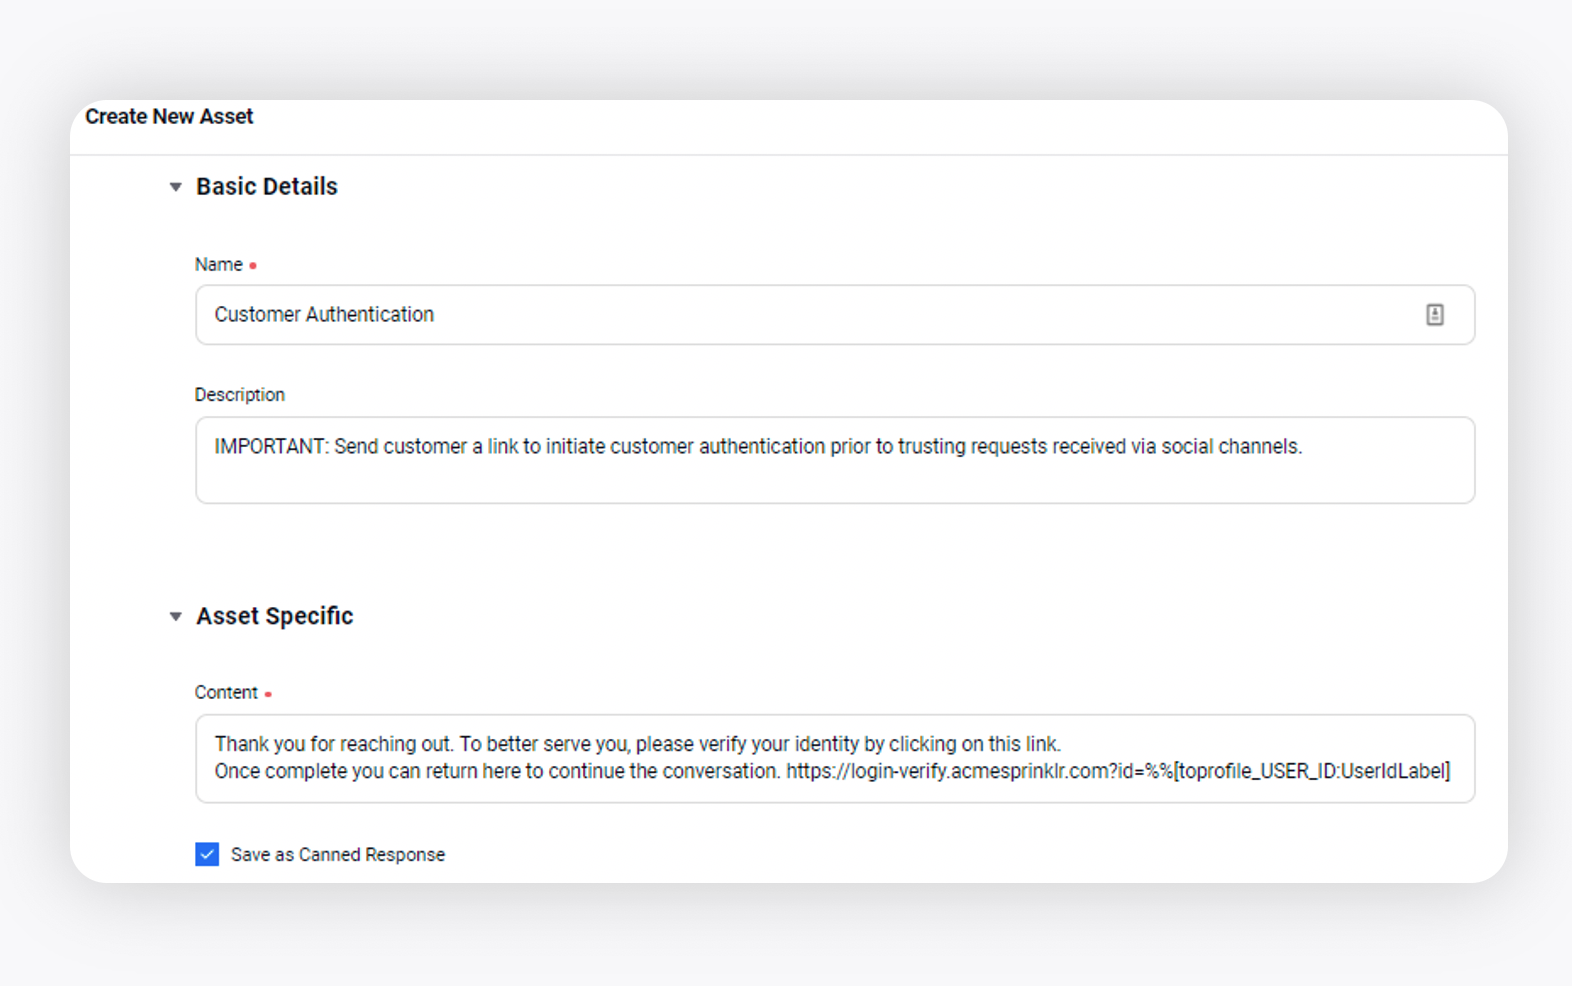
On the Create New Asset window, enter the Name and Description of the new asset.
Under the Asset Specific section, enter your desired message within the Content field that you want to use as a canned response.
You can make this canned response non-editable by checking the box alongside 'Mark as non editable canned response' option.
Check the Save as Canned Response checkbox to save your template as a canned response.
Fill in the other asset details and properties as required. Click Save in the bottom-right corner to save the text asset.
Note: The Sprinklr User Id is passed as a parameter to the login platform. This will be necessary for the authentication platform to use in the next step.
Note: This canned response can also be used as an auto-response for new cases via rules or within Guided Workflows to automate customer interactions.
Configuration of an external platform that is customer accessible to support authentication
Validate the login using whatever method is appropriate
Making an API call into Sprinklr to update the customer’s profile
Note: For information on using Sprinklr APIs, please see the Developer Portal' Getting Started guide.
On the external verification system, once the customer is authenticated, a call can be made to Sprinklr to update the profile.
To do so, the fieldname (a unique identifier) - not the id - of the custom field will be needed. This can be obtained via Custom Field Search or a Bootstrap call to retrieve Profile Custom Fields.
Here is a sample custom field result object:
{"id": "5f0f1fc008fc737ba4185e92","createdTime": 1594826688207,"modifiedTime": 1595057660362,"fieldName": "5f0f1fc008fc737ba4185e90","globalAsset": true,"assetClassList": ["PROFILE"],"fieldType": "PICKLIST","name": "Authenticated Profile","options": ["Yes","No"],"facetEnabled": false,"adhocSearchEnabled": false,"enabled": true,"contentReplacementEnabled": false,"preferred": false,"required": false,"isHidden": false,"isHiddenFromMonitoring": false,"order": 0,"customFieldControllerById": {}}- Using that as a reference, you can now form a JSON request object to post to Profile Custom Fields Replace API:
{"ids": "5ca7e497e4b00b238b9b9403","partnerCustomProperties": {"5f0f1fc008fc737ba4185e90": ["Yes"]}}"ids" ← This was the User Id, typically passed in via the URL parameterof the customer authentication link["Yes"] ← This is the custom fieldName for Authenticated Profile

- If the Customer Authentication should be revoked, a timer based rule can be created (X number of minutes after the 1st message of a case being created as the normal trigger), that will reset the custom field.