Data Connector Export Module
Updated
In a Data Connector Export Module, you can export Raw Entity data, Entity Reports, and Template to S3 and an SFTP location, at specified intervals. By extending your data capabilities to include export processes, you can benefit from a comprehensive data management solution that ensures seamless data movement both into and out of the Sprinklr ecosystem. The Export module:
Provides real-time data export capabilities.
Provides user-friendly interface for configuring, managing, and scheduling export settings.
Enable users to manage and monitor their export configurations efficiently.
Note: Ensure the DP EXPORT_DATA_CONNECTOR_V2_ENABLED is enabled. To get this capability enabled in your environment, work with your Success Manager.
Accessing the Data Connector Export Module
To access a Data Connector Export Module, follow these steps:
Go to the Sprinklr Launchpad.
Click Unified Data Connector under Migrate Your Data From/To Sprinklr.
Click Export on the left navigation menu in the Routing and Record Manager screen to arrive at the Data Connector Export Module.

4. In the Record Manager screen, you can sort the connectors based on various criteria like:
Name
Status
Entity Type
Connector
Exporter Type
Description
Created By
Last Modified By
Last Modified Time
Created At
5. Click + Install Connector to create an Export Connector.
Navigating the Data Type Selection Screen
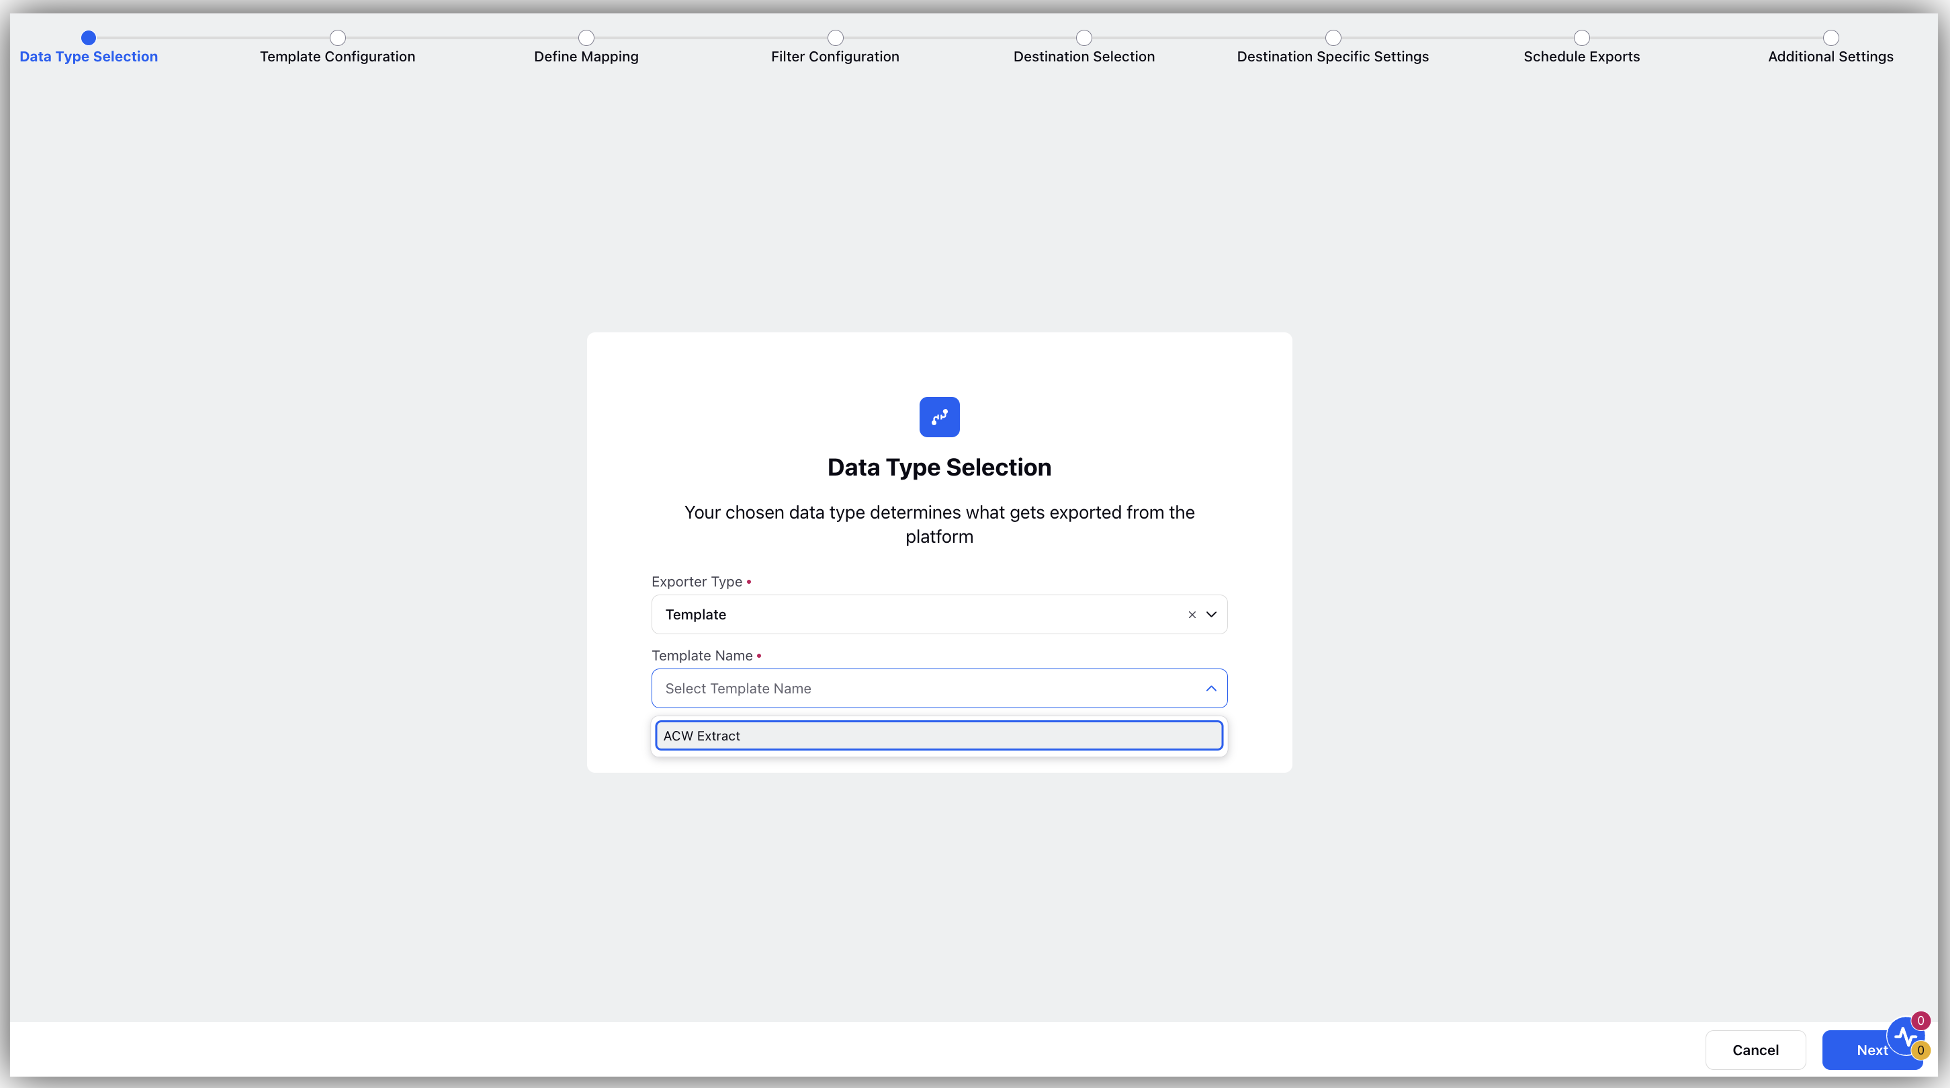
Clicking on Install Connector brings you to the Data Type Selection screen. Using this screen you can select the following fields under Exporter Type dropdown:
Raw Entity
Entity Reports
Template

Raw Entity
You can choose the entity for which the export is needed by selecting Raw entity from a single choose option.

Different Raw Entities that Sprinklr supports are Case, Profile, and Task. Using the Data Type Selection Screen, you can select an entity for your Exporter Type.

Filter Configuration Screen
Click Next after selecting Raw Entity in the Exporter Type dropdown, and Case from the Entity dropdown, to view the Filter Configuration screen.

There are multiple rows that can be exported using the Filter Configuration screen. As a user you have the capabilities to do the following:
Restrict the number of rows getting exported as per your requirement. For example, if we choose the filter to be Channel having only Commerce, only the rows that contain Commerce gets filtered and then exported.
Add additional conditions, by clicking on Add Condition, to refine your filter using this screen.
Destination Selection Screen
To guarantee that the data reaches the appropriate external system or storage location, you can specify the export destination and provide information such as the Connector Name, Description, and Export Owner on the Destination Selection Screen. You must fill out the following fields:
Destination Type: This dropdown menu allows you to choose where Sprinklr data will be exported to. S3 is currently the only destination type provided.
Connector Name: Enter the name of your connector.
Description: Provides a textual description of the data that is getting exported using a connector.
Export Owner: It is the export owner who initiates the export. There is an export owner connected to each export. During editing, this field can be changed.
Schedule Connector: If the Schedule Connector toggle is enabled, you can schedule a connector at regular intervals to generate exports. In case Schedule Connector toggle is disabled, you will be required to manually trigger the export.
Note: The Connector Name, Export Destination, and the Export Owner fields are mandatory fields.

Destination Specific Settings Screen
Using the Destination Specific Settings screen, you can configure detailed settings for your export destination ensuring that the entity is exported to the correct S3 location with appropriate settings.

Fields and definitions
Parameter | Definition |
Bucket | Name of S3 Bucket |
Enter Access Key ID | A unique alphanumeric identifier to authenticate and authorize programmatic access to cloud services or APIs. It works in combination with Access Key Secret. |
Access key Secret | A confidential alphanumeric string used to authenticate and authorize programmatic access to cloud services and APIs. It works in conjunction with an Access Key ID. |
Directory | Directory path for the S3 bucket for which the details have been entered. |
Directory Delimiter | Choose the export format with the destination-specific settings. The only format allowed here is CSV. The CSV delimiter type is shown by this Directory Delimiter. |
Schedule Exports Screen
Filling the Destination Specific Settings form and clicking on Next brings you to the Schedule Exports screen where you can schedule and configure the export process.

Here is a description of various paramaters found in the Schedule Reports screen.
Parameters | Descriptions |
Start Date | This is a Date-Picker that specifies the Start Date when the export process should begin. |
End Date | A Date-Picker to define the End Date after which no further exports will be generated. |
Timezone | Specifies the Timezone in which you are operating. |
Schedule Frequency | You can plan how frequently your exports will be transmitted to the S3 location using this parameter. The exports can be sent every minute, every hour, or every day. For instance, the export will be delivered every 24 hours if the frequency is set to daily.
|
Share Settings and Notifications Screen
Share Settings: You can choose which users or user groups to provide connection level rights to, and share connector configuration settings using the Share Settings page.

The following permissions can be provided to the user or user groups.
Permissions | Description |
View Only | The 3-dot menu in the Record Page Manager have a View option instead of Edit. All the fields in the connector config in case of view are non-editable and Save Button is disabled. The user cannot delete or share the config. |
Modify | The user has the permission to edit the connector. The 3-dot menu has the Edit option. The user does not have the option to delete or share the config. |
Delete | The user can view and delete the config but not edit it. |
Admin | The user has the option to edit, share, and delete the config.
Note: For running/enabling and disabling a connector, a user must have the edit or admin permission. |
Notifications: When a connector is Run, you can notify users either through email, by using the Sprinklr Platform, or using both.
Entity Reports
Reports that are specific to a Sprinklr object are called Entity Reports. You can select the report related to the selected entity when you choose Entity Reports from the Exporter Type selection.

From the Entity dropdown, you can select any one of the following entities:
Ad Set
Profile
Task

Associated Reports highlight several reports that are unique to the chosen entity. For instance, Universal profile appears under Associated Reports when the entity selected is Profile. Clicking Next takes you to Filter Configuration screen.
Refer to the following sections for details on how to navigate from the Data Type Selection Screen to subsequent screens:
Template
Template is a collection of reports and entity attributes. Selecting Template in the Exporter Type dropdown will display available templates.

Template Configuration
Clicking on Next on the Data Type Selection screen displays the Template Configuration screen. In this screen you can choose the following fields:
Ingestion File Attributes
Case Custom Fields
Reporting Fields
Filling out these fields is mandatory to create your template, that is sent for the export process.

The values in these fields vary from template to template. If the Enable subcases toggle is on, you can attach subcases specific to Case Custom Fields.

Mapping Screen
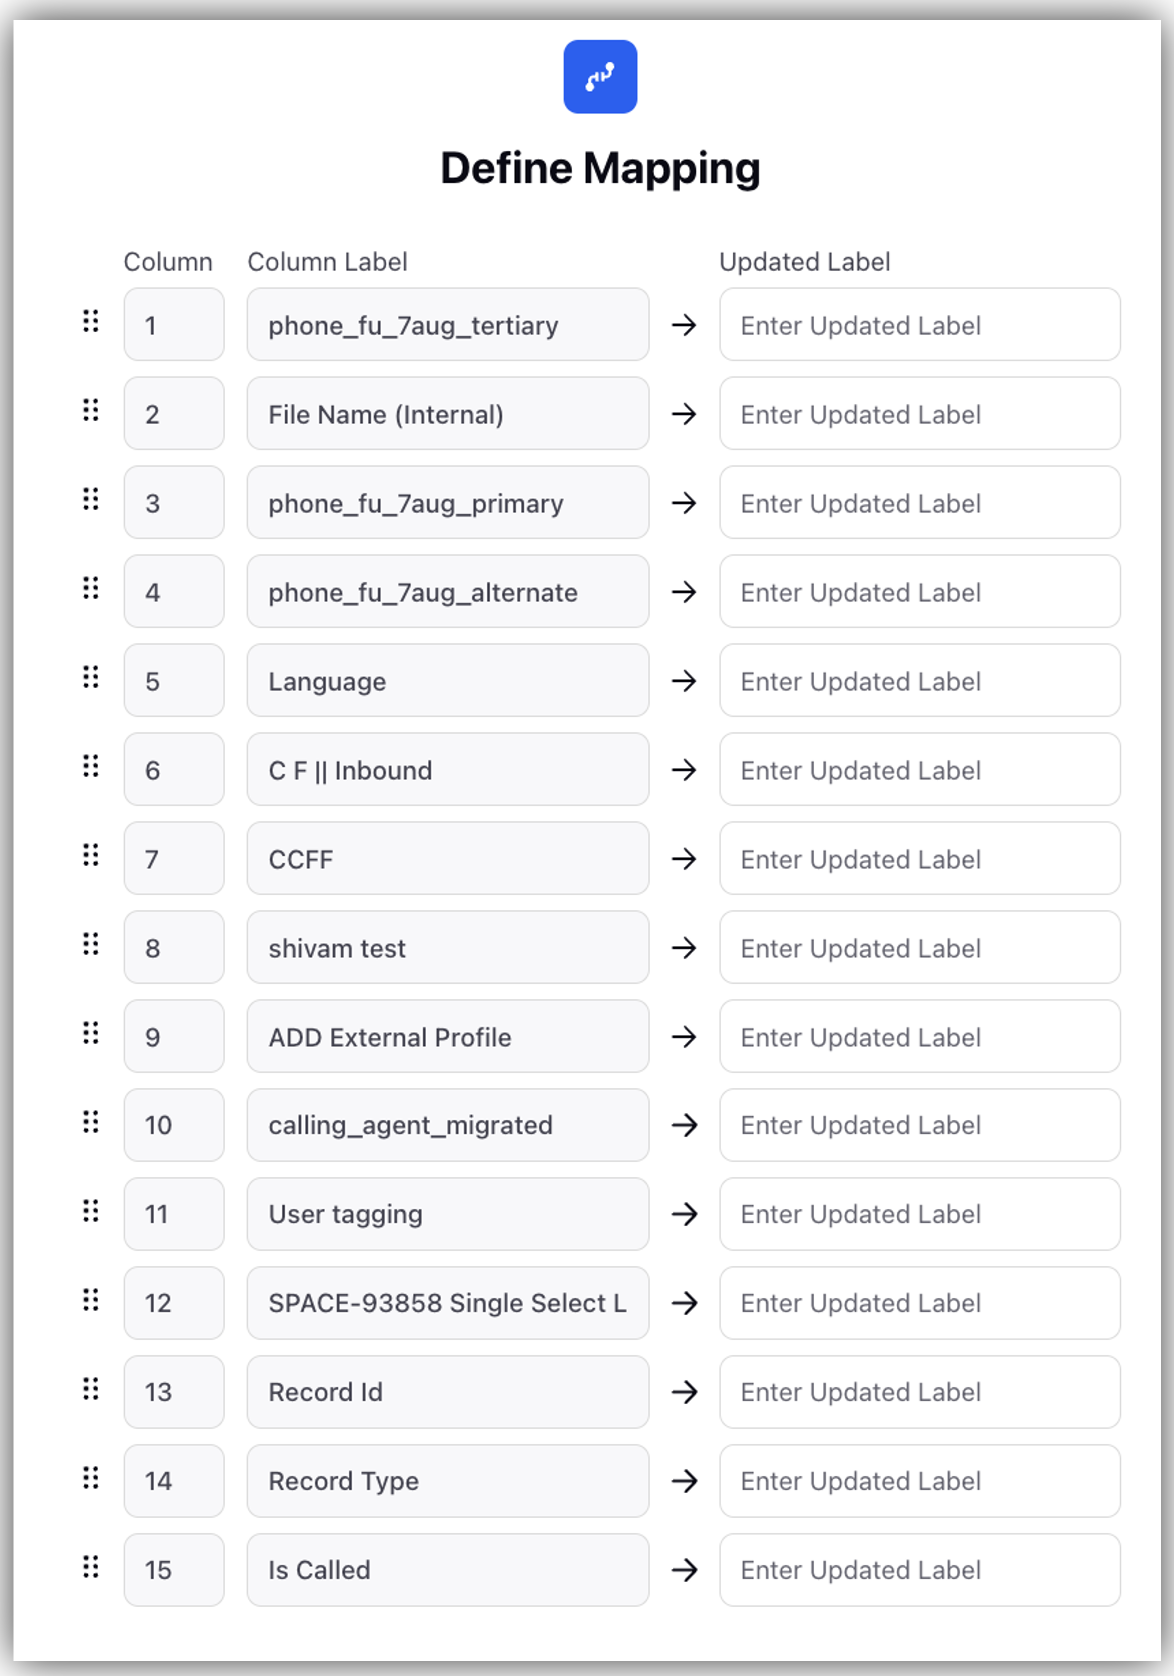
Clicking Next on Template Configuration displays the Mapping Screen. Fields that you select in Template Configuration gets populated in the Mapping Screen within the Column_Label. Each value selected in Template Configuration appears as a single row in the Mapping Screen.
Using the Mapping Screen you can perform the following actions:
Change Column Label Names: You have the option to rename various labels which appear in the Column Label field of the Mapping Screen. The modified label names appear under the Updated Label field that gets visible during the export process.
Drag and Drop: You can reorder various fields by dragging the six dots adjacent to the Column fields to the desired location. The same order is visible in your export.
Note: In the Mapping Screen, you won't be able delete the rows selected in the Template Configuration. To delete these rows go back to the Template Configuration.
