Compose Facebook App Install campaigns
Updated
Leverage Sprinklr's Ads composer to directly create an app-install campaign easily and define a specific audience group and budget.
Sprinklr allows you to create app-install campaigns to promote your app and increase the number of your App-Installs. In this article, you will learn how to create an App-Install campaign, its use cases, and how to sync apps for use in Sprinklr.
Use cases
App-Install campaigns help you reach more people and grow the audience for your app.
These campaigns make it easier for the audience to download your app.
To create a Facebook App Install campaign
Click the New Tab icon. Under Sprinklr Marketing, go to the Advertising sub-tab and click Ads Composer within Execute.
On the Ads Composer window, select your Facebook Ad account.
In the Campaign Details section, choose App Install from Select Objective for your Campaign.
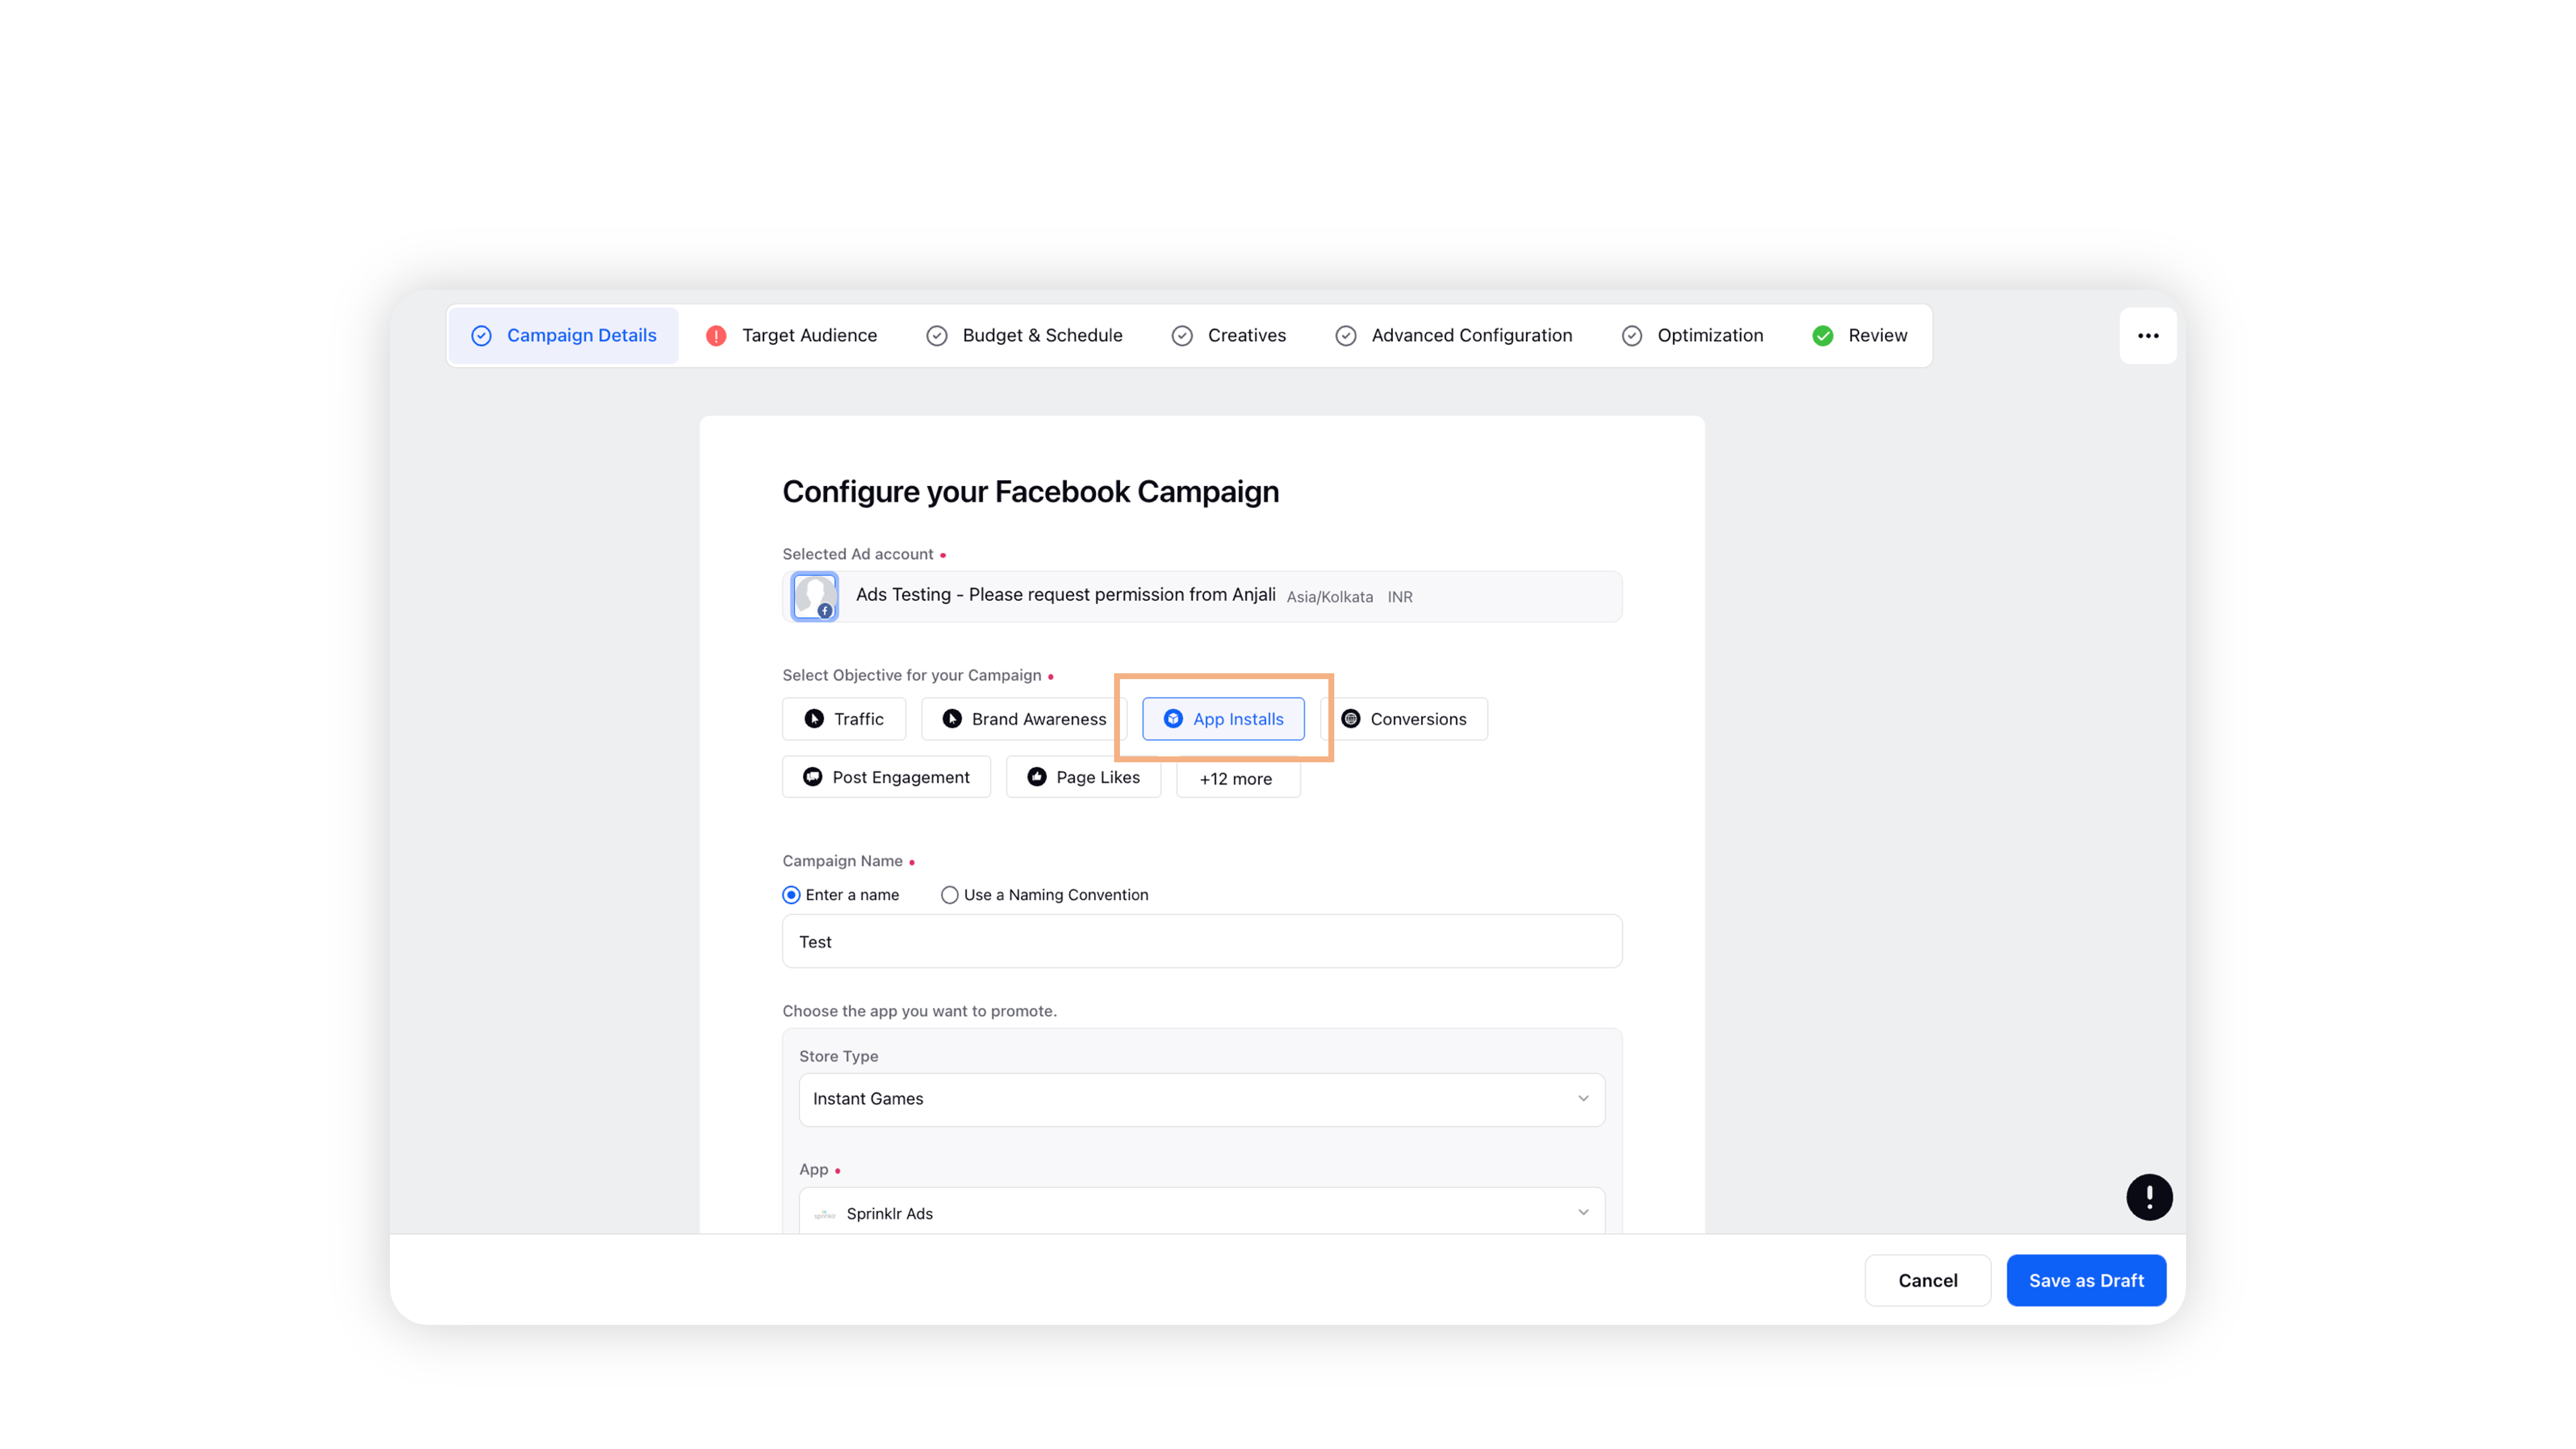
Enter a name for your campaign under Campaign Name.
Fill in the app details under Choose the app you want to promote. You can also add more than one app using the Add New App button.
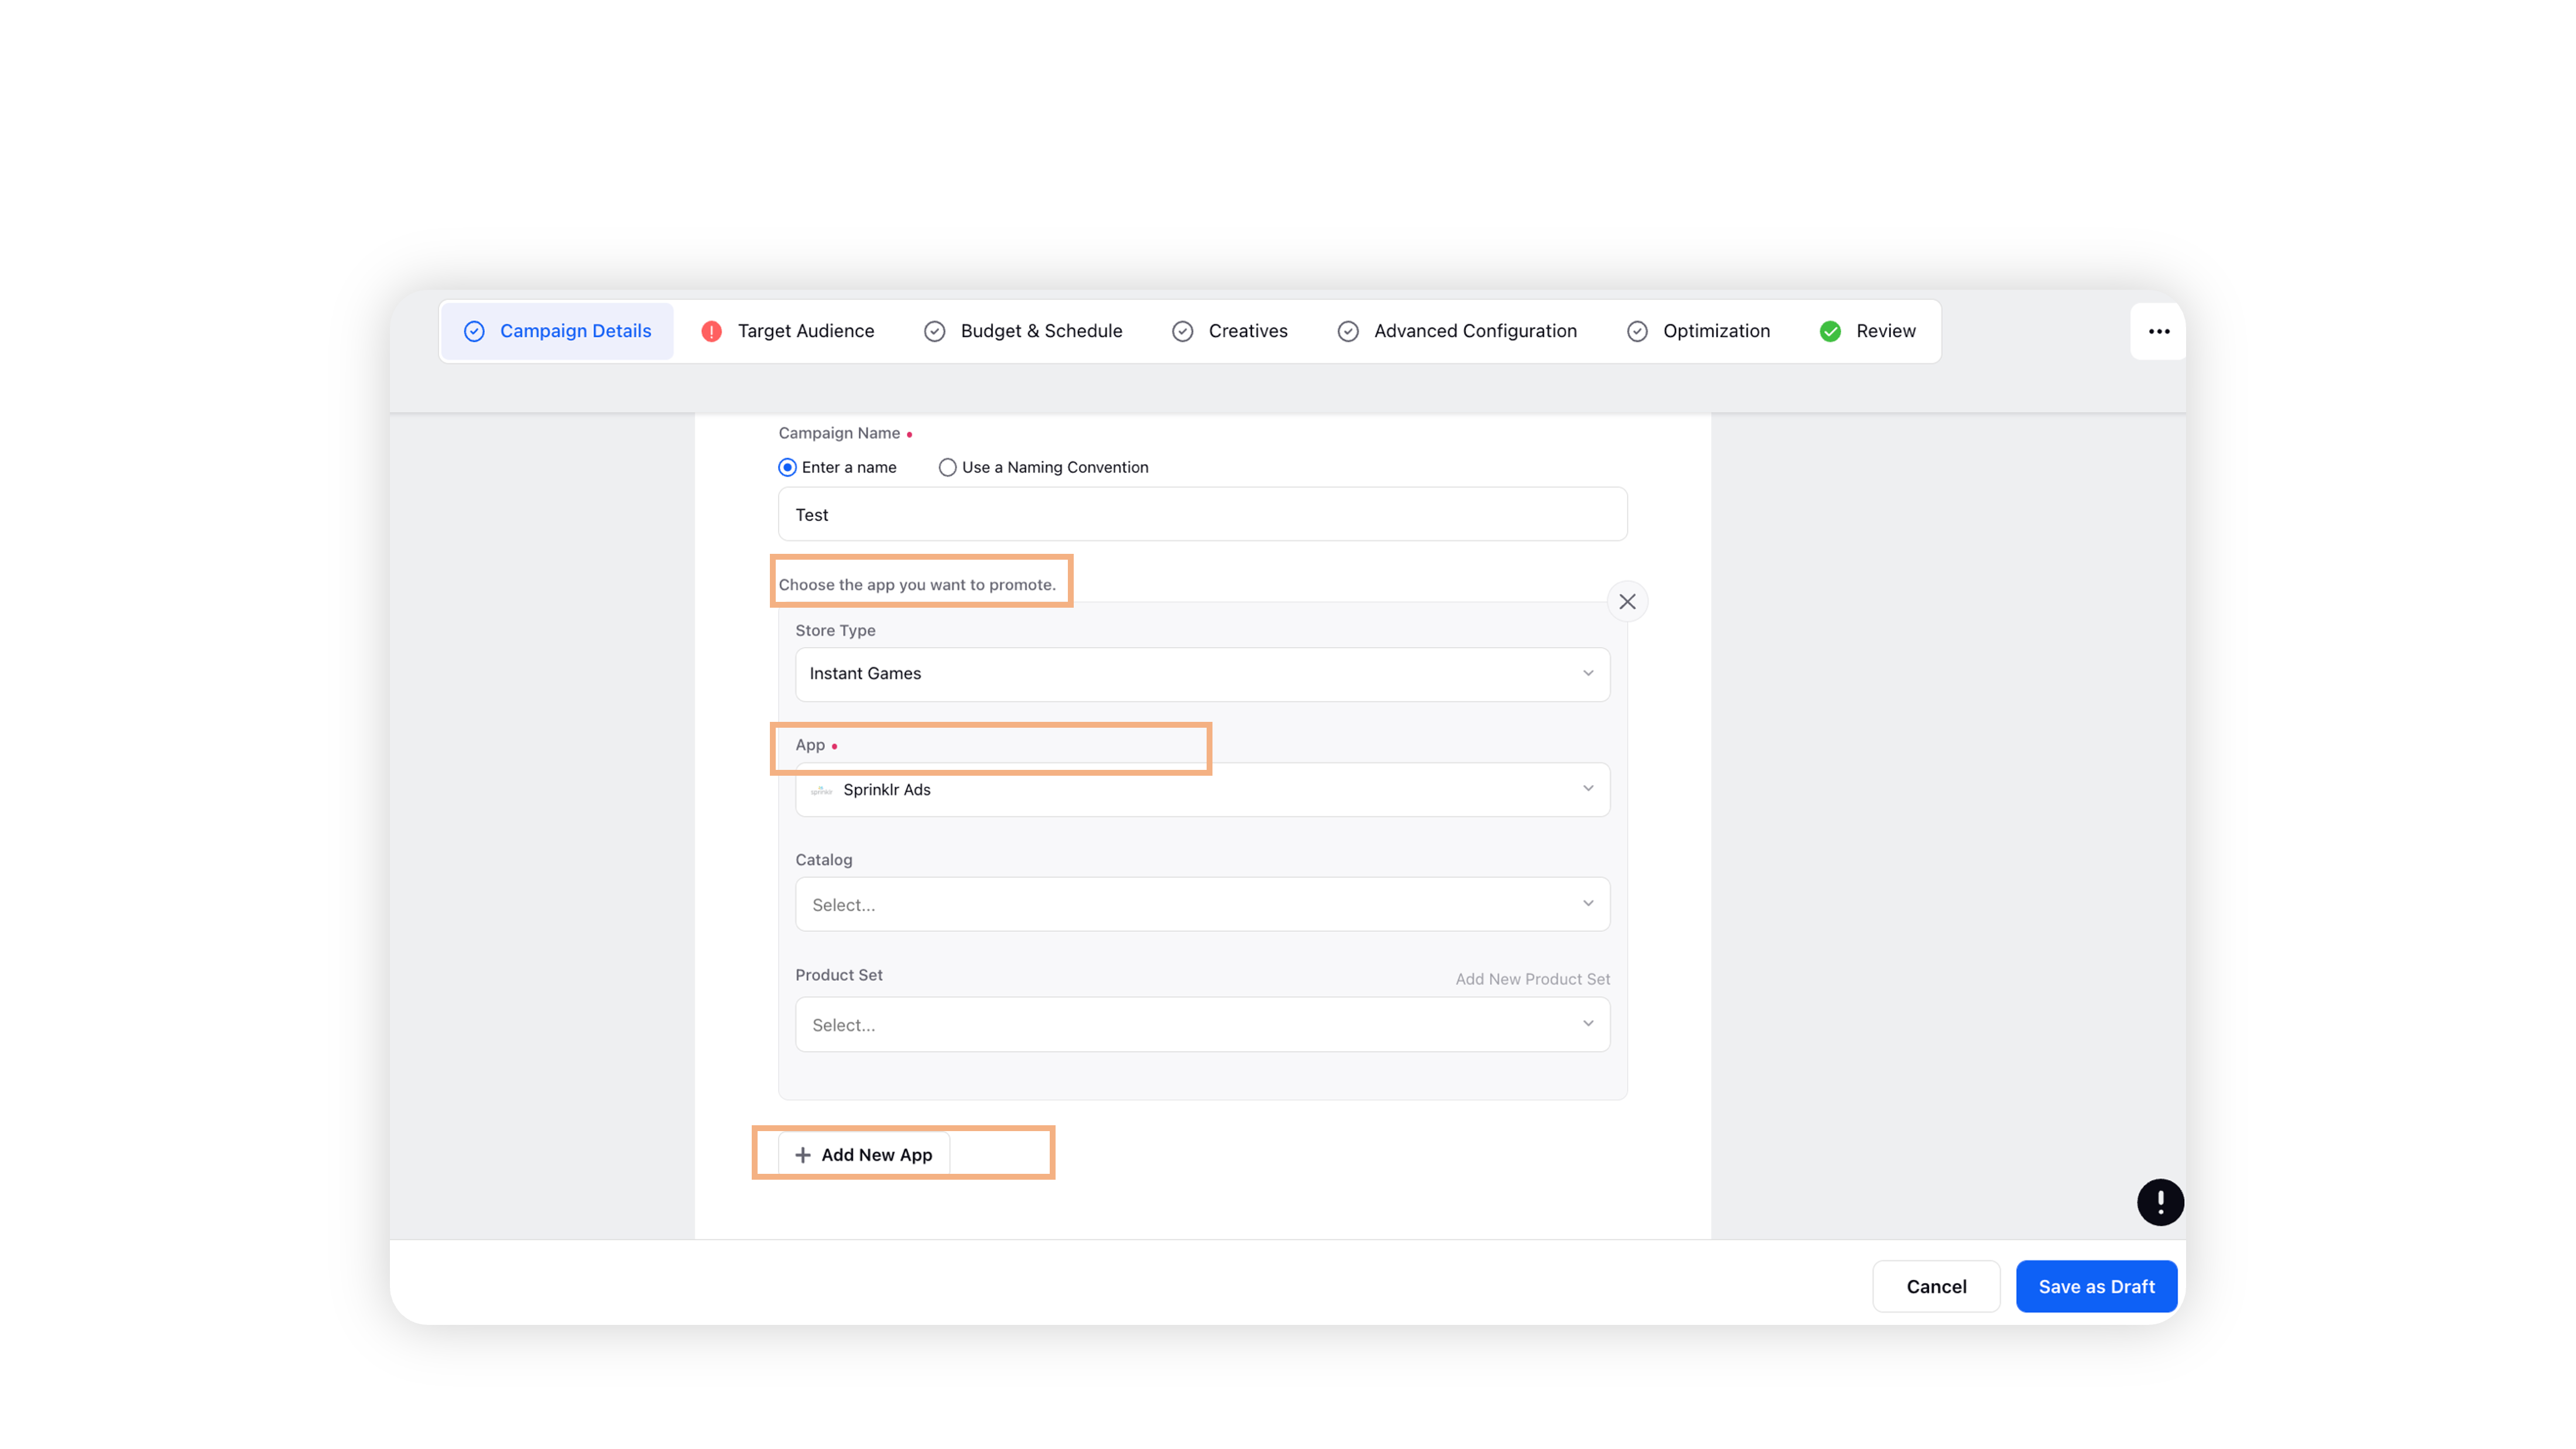
Note: The App you want to promote should be connected with your ad account on native. In Sprinklr, clicking Sync App will fetch the apps.

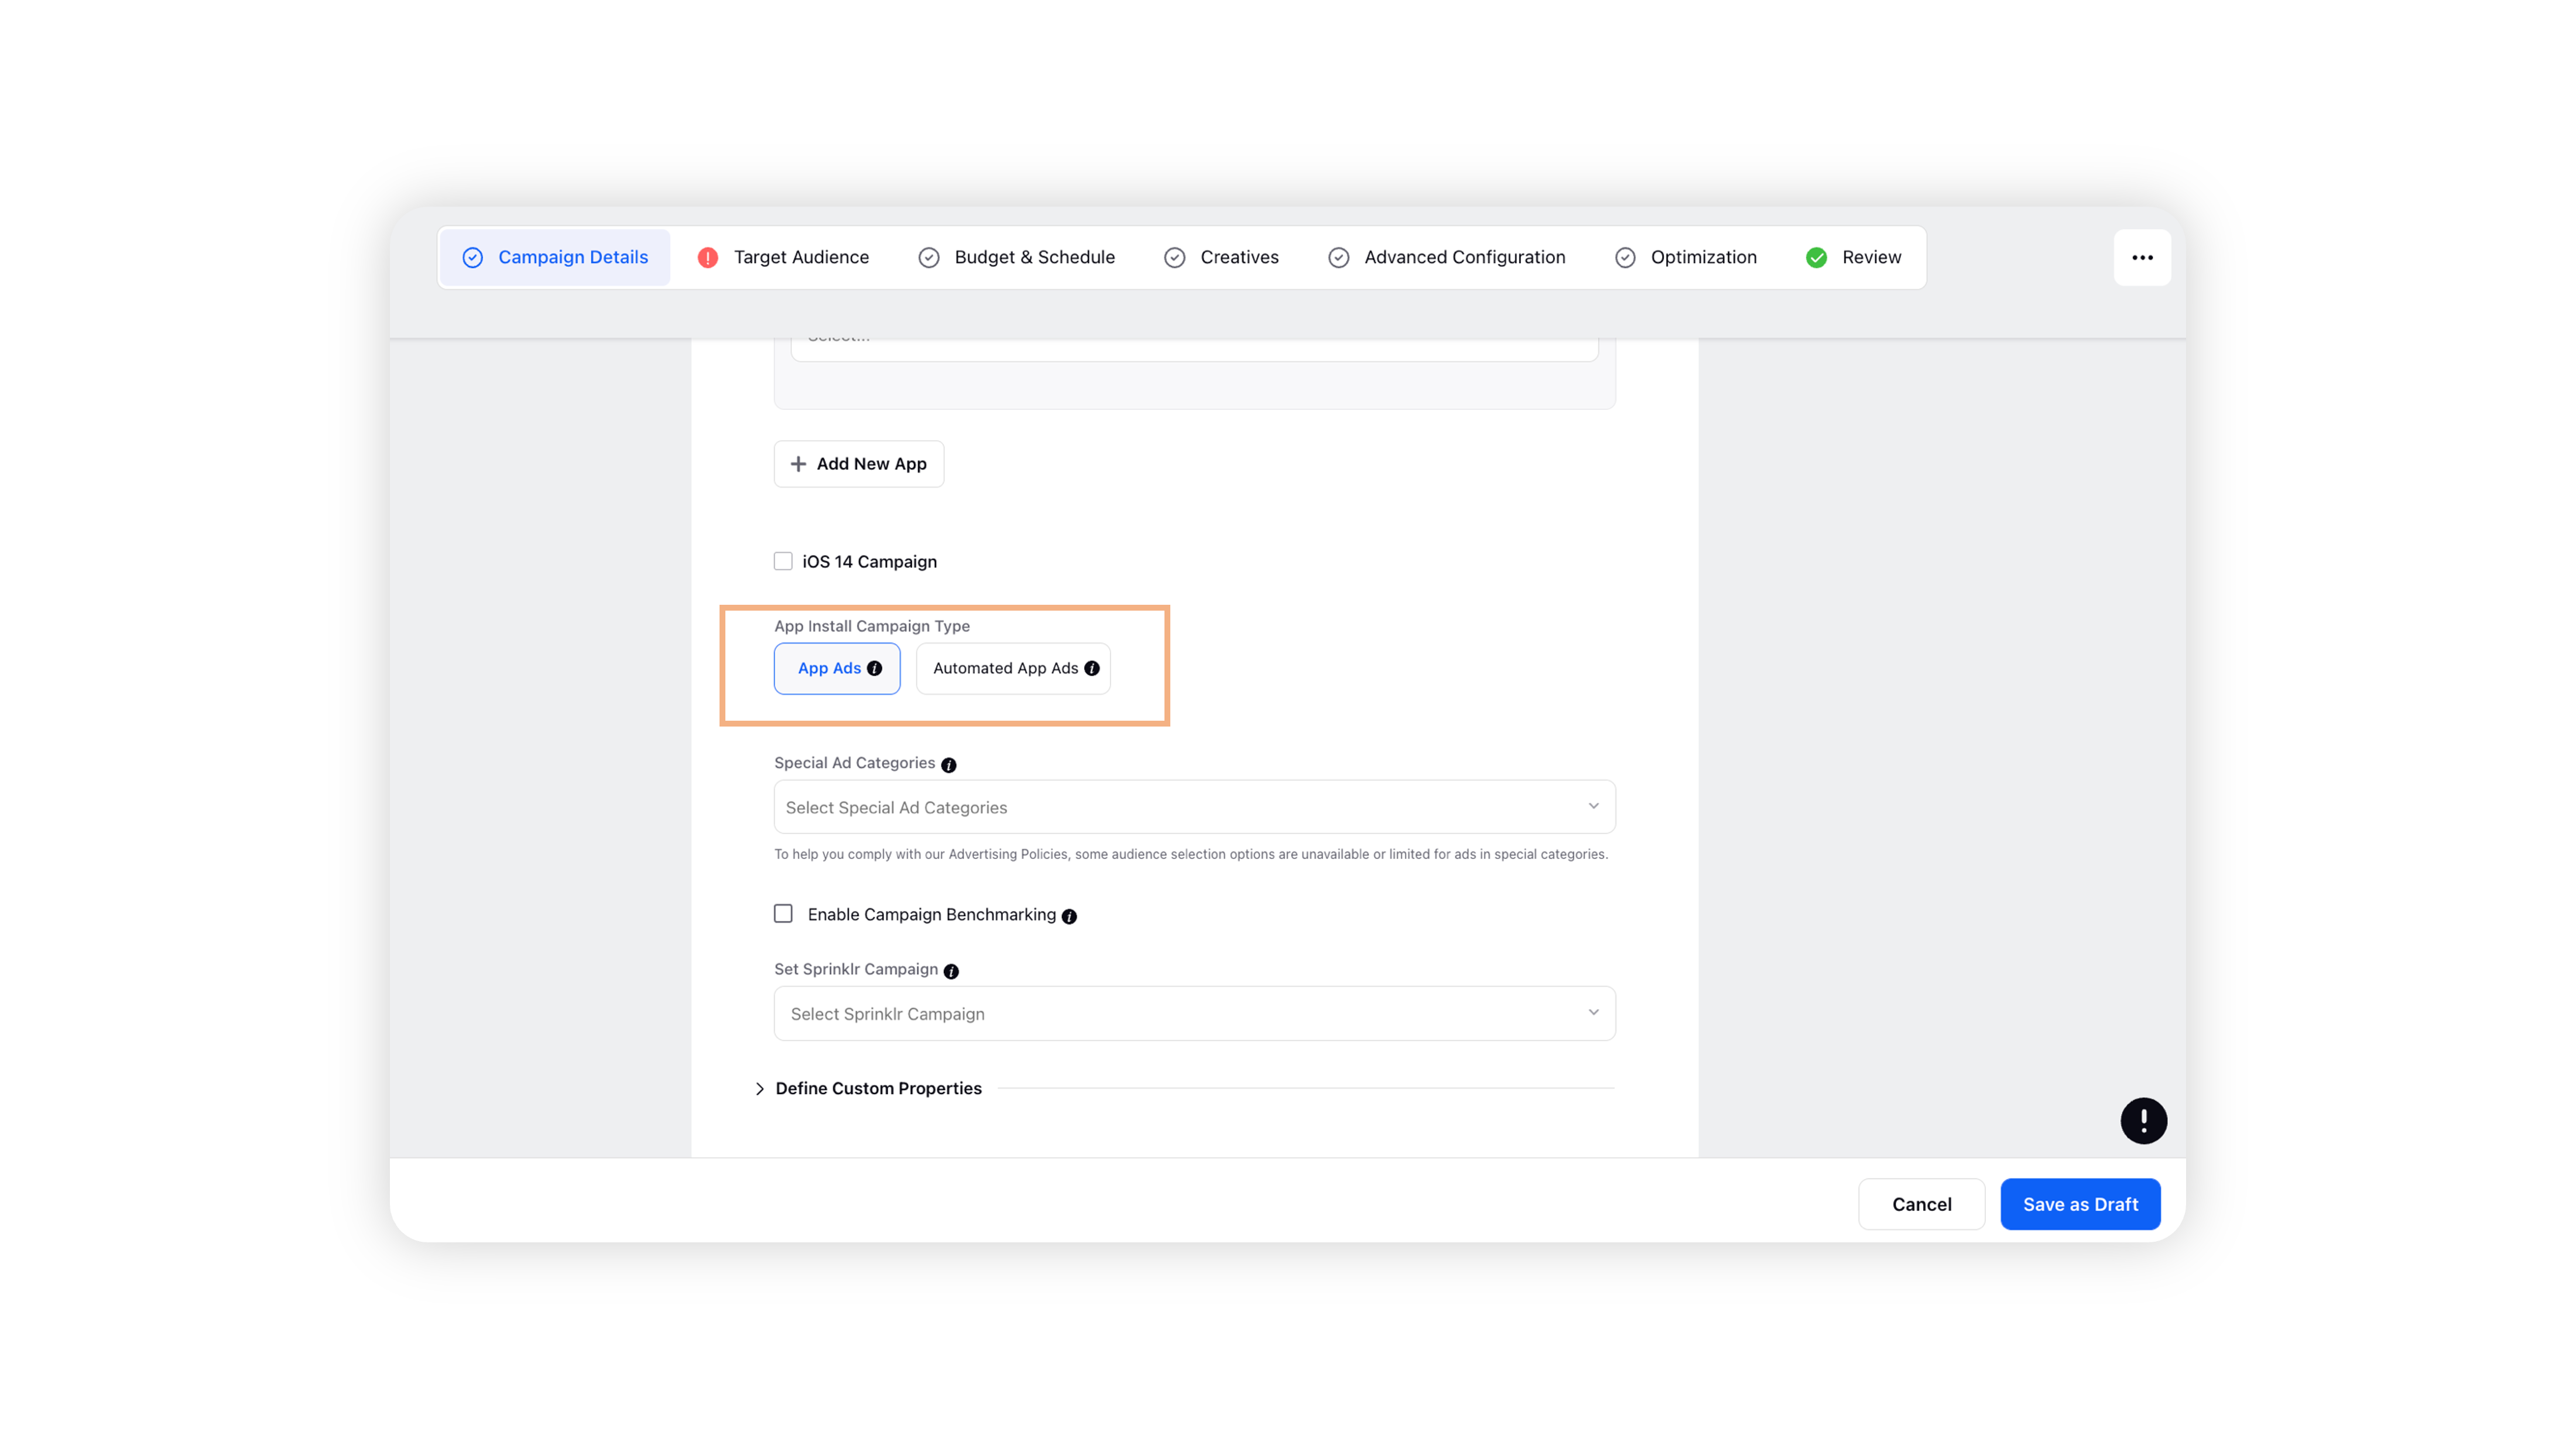
Under App Install Campaign Type, select App Ads.
Select one or more Special Ad Categories from the drop-down. There are four Ad Categories available in Sprinklr's Ads Composer.
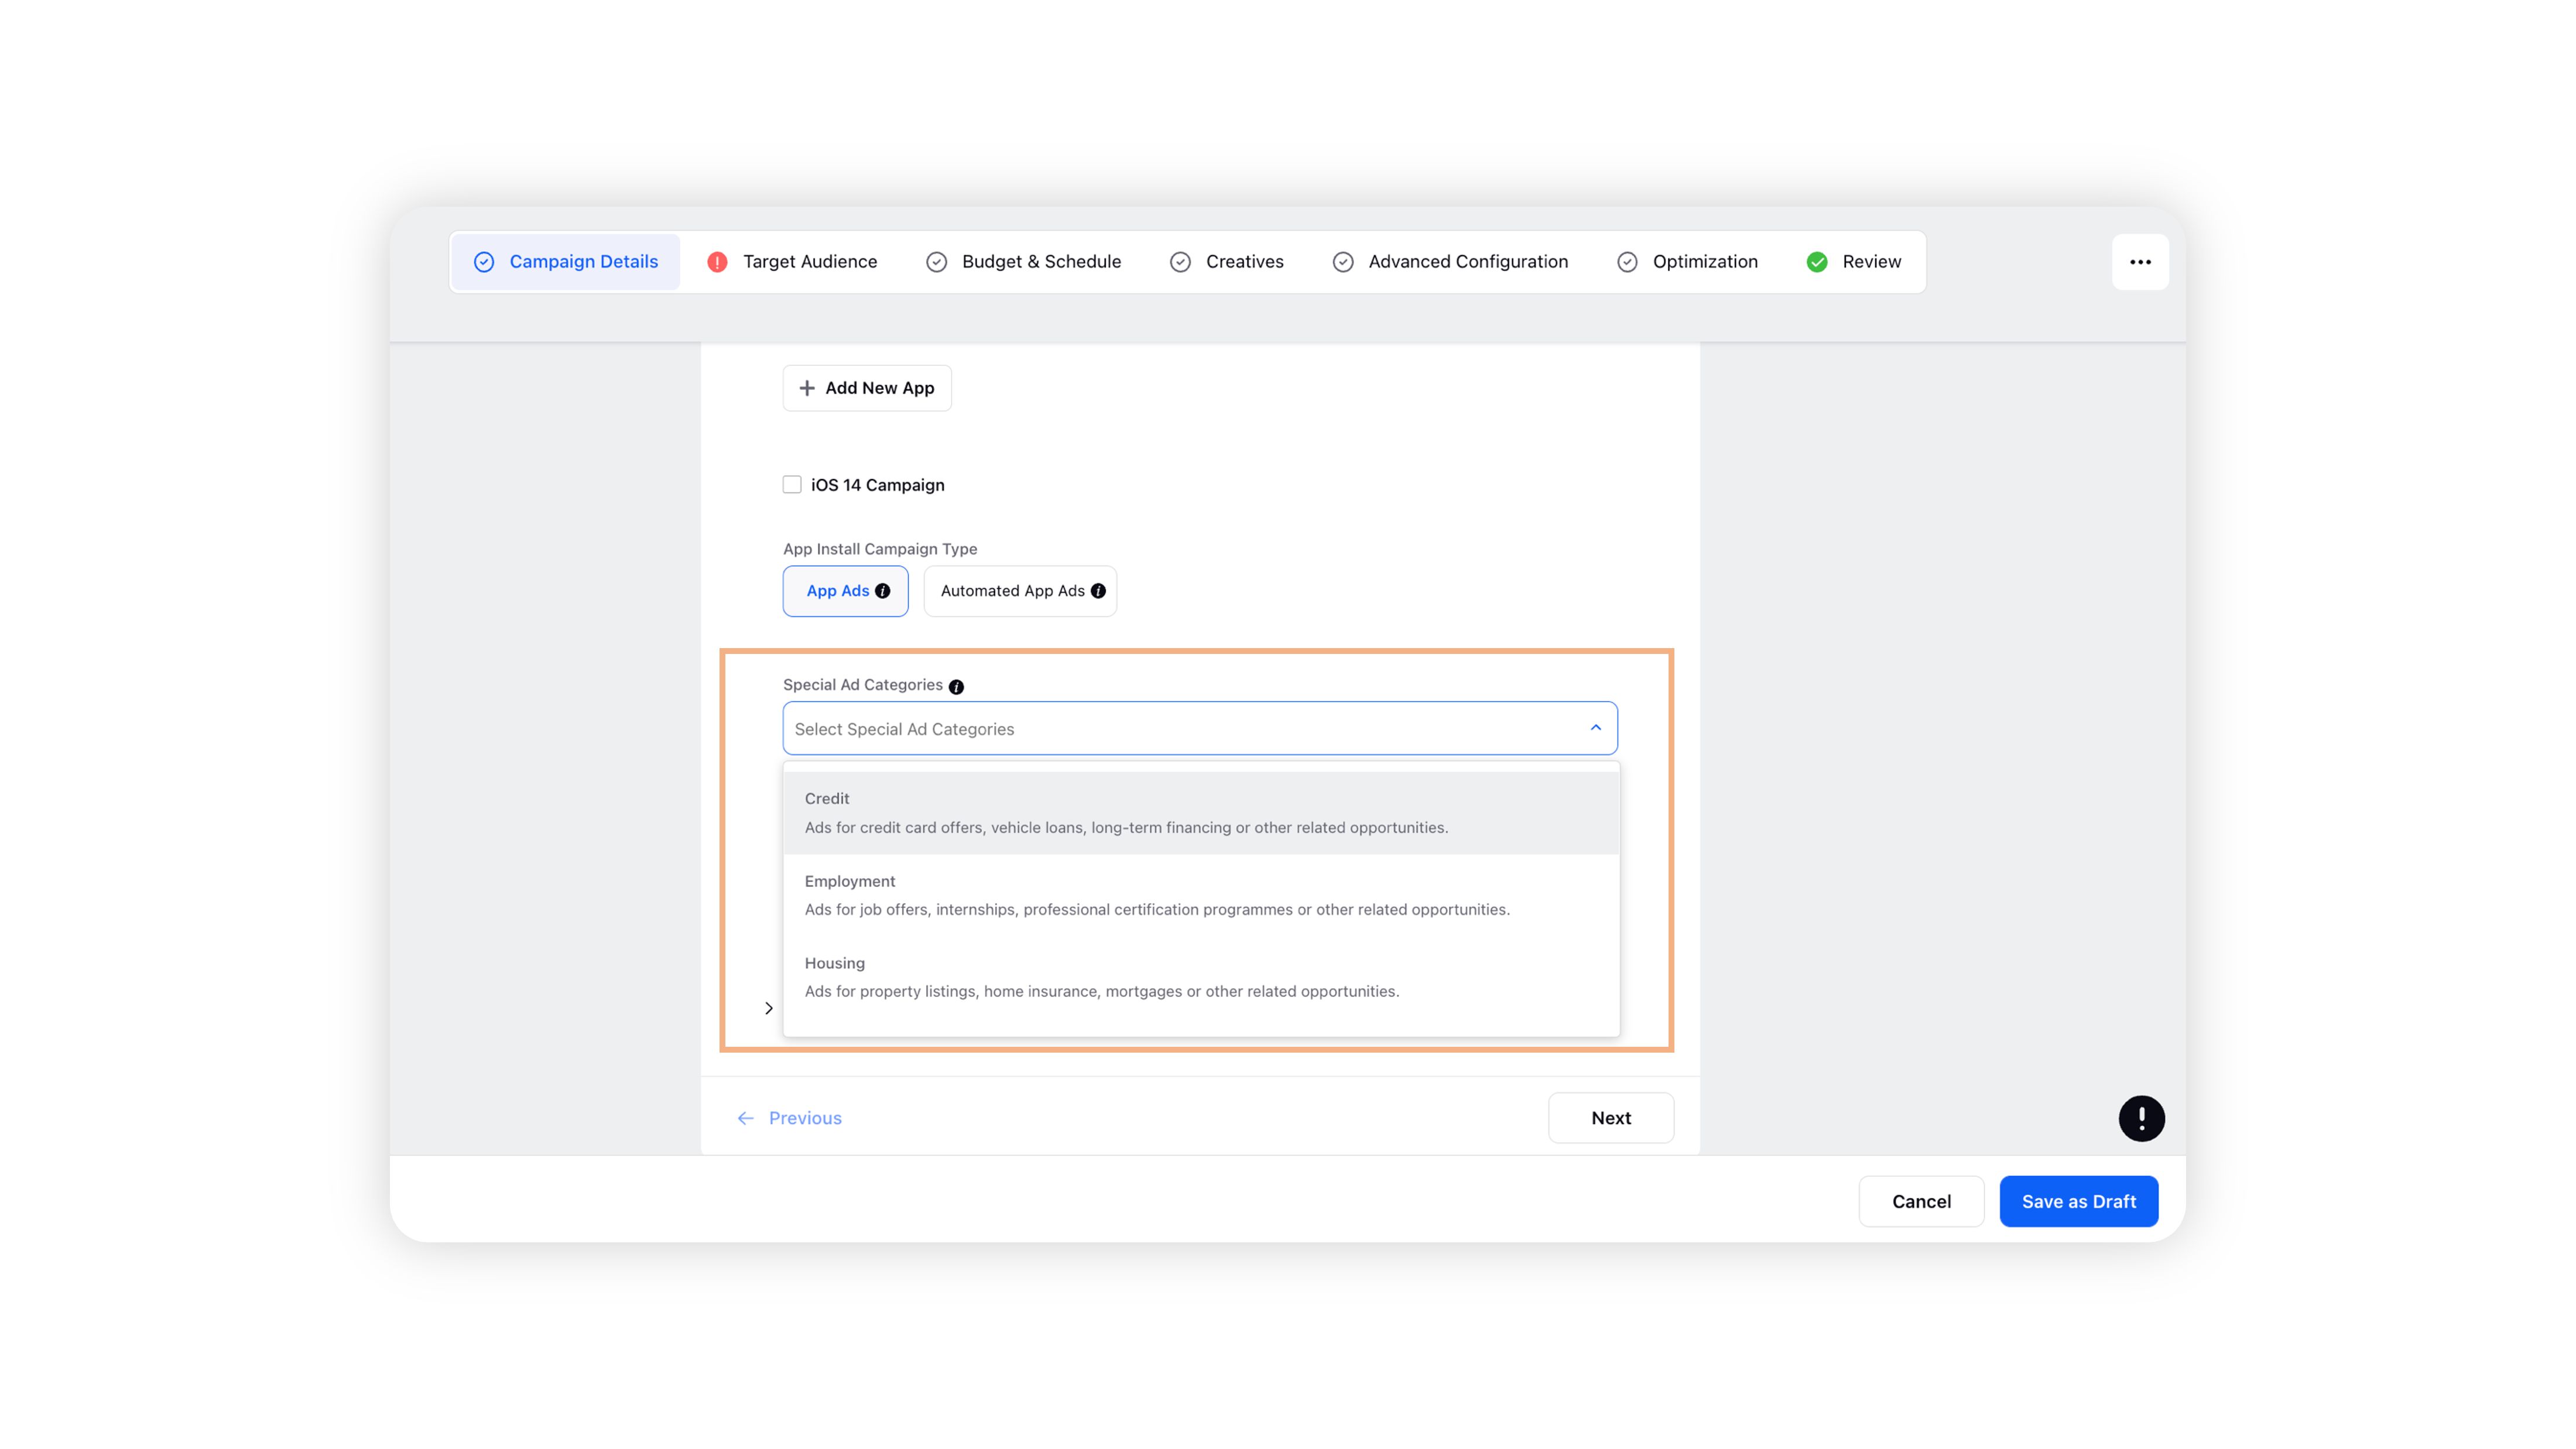
Special Ad Category
Description
Credit
Select to create ads for credit card offers, vehicle loans, long-term financing, or other related opportunities.
Employment
Select to create ads for job offers, proffessional certification programmes or other related oppotunities.
Housing
Select to create ads for property listing, home insurance, mortgages or other related opportunities
Social Issues
Select to create ads about the social issues (such as the economy, or civil and social rights), elections or political figures or campaigns.
Select the custom properties under Define Custom Properties and click Next.

For further steps, read this article.