Configuring Guided Workflow Settings
Updated
Overview
This article provides a concise guide to setting up and managing workflows within the Guided Workflow Manager. It outlines the steps to define workflow goals, customize process descriptions, and align workflows with specific use cases. By following this article, you can ensure accurate workflow configuration and efficient customer interactions.
Steps to edit Guided Workflow Settings
Open Launchpad. Under the Sprinklr Service tab, select Guided Workflows within Resolve.
Locate the desired Guided Workflow and click the Options icon
 next to it.
 Select Edit Settings from the dropdown menu to edit the settings of an existing Guided Workflow. You can also create a new Guided Workflow from +Add Guided Workflow to configure the settings.
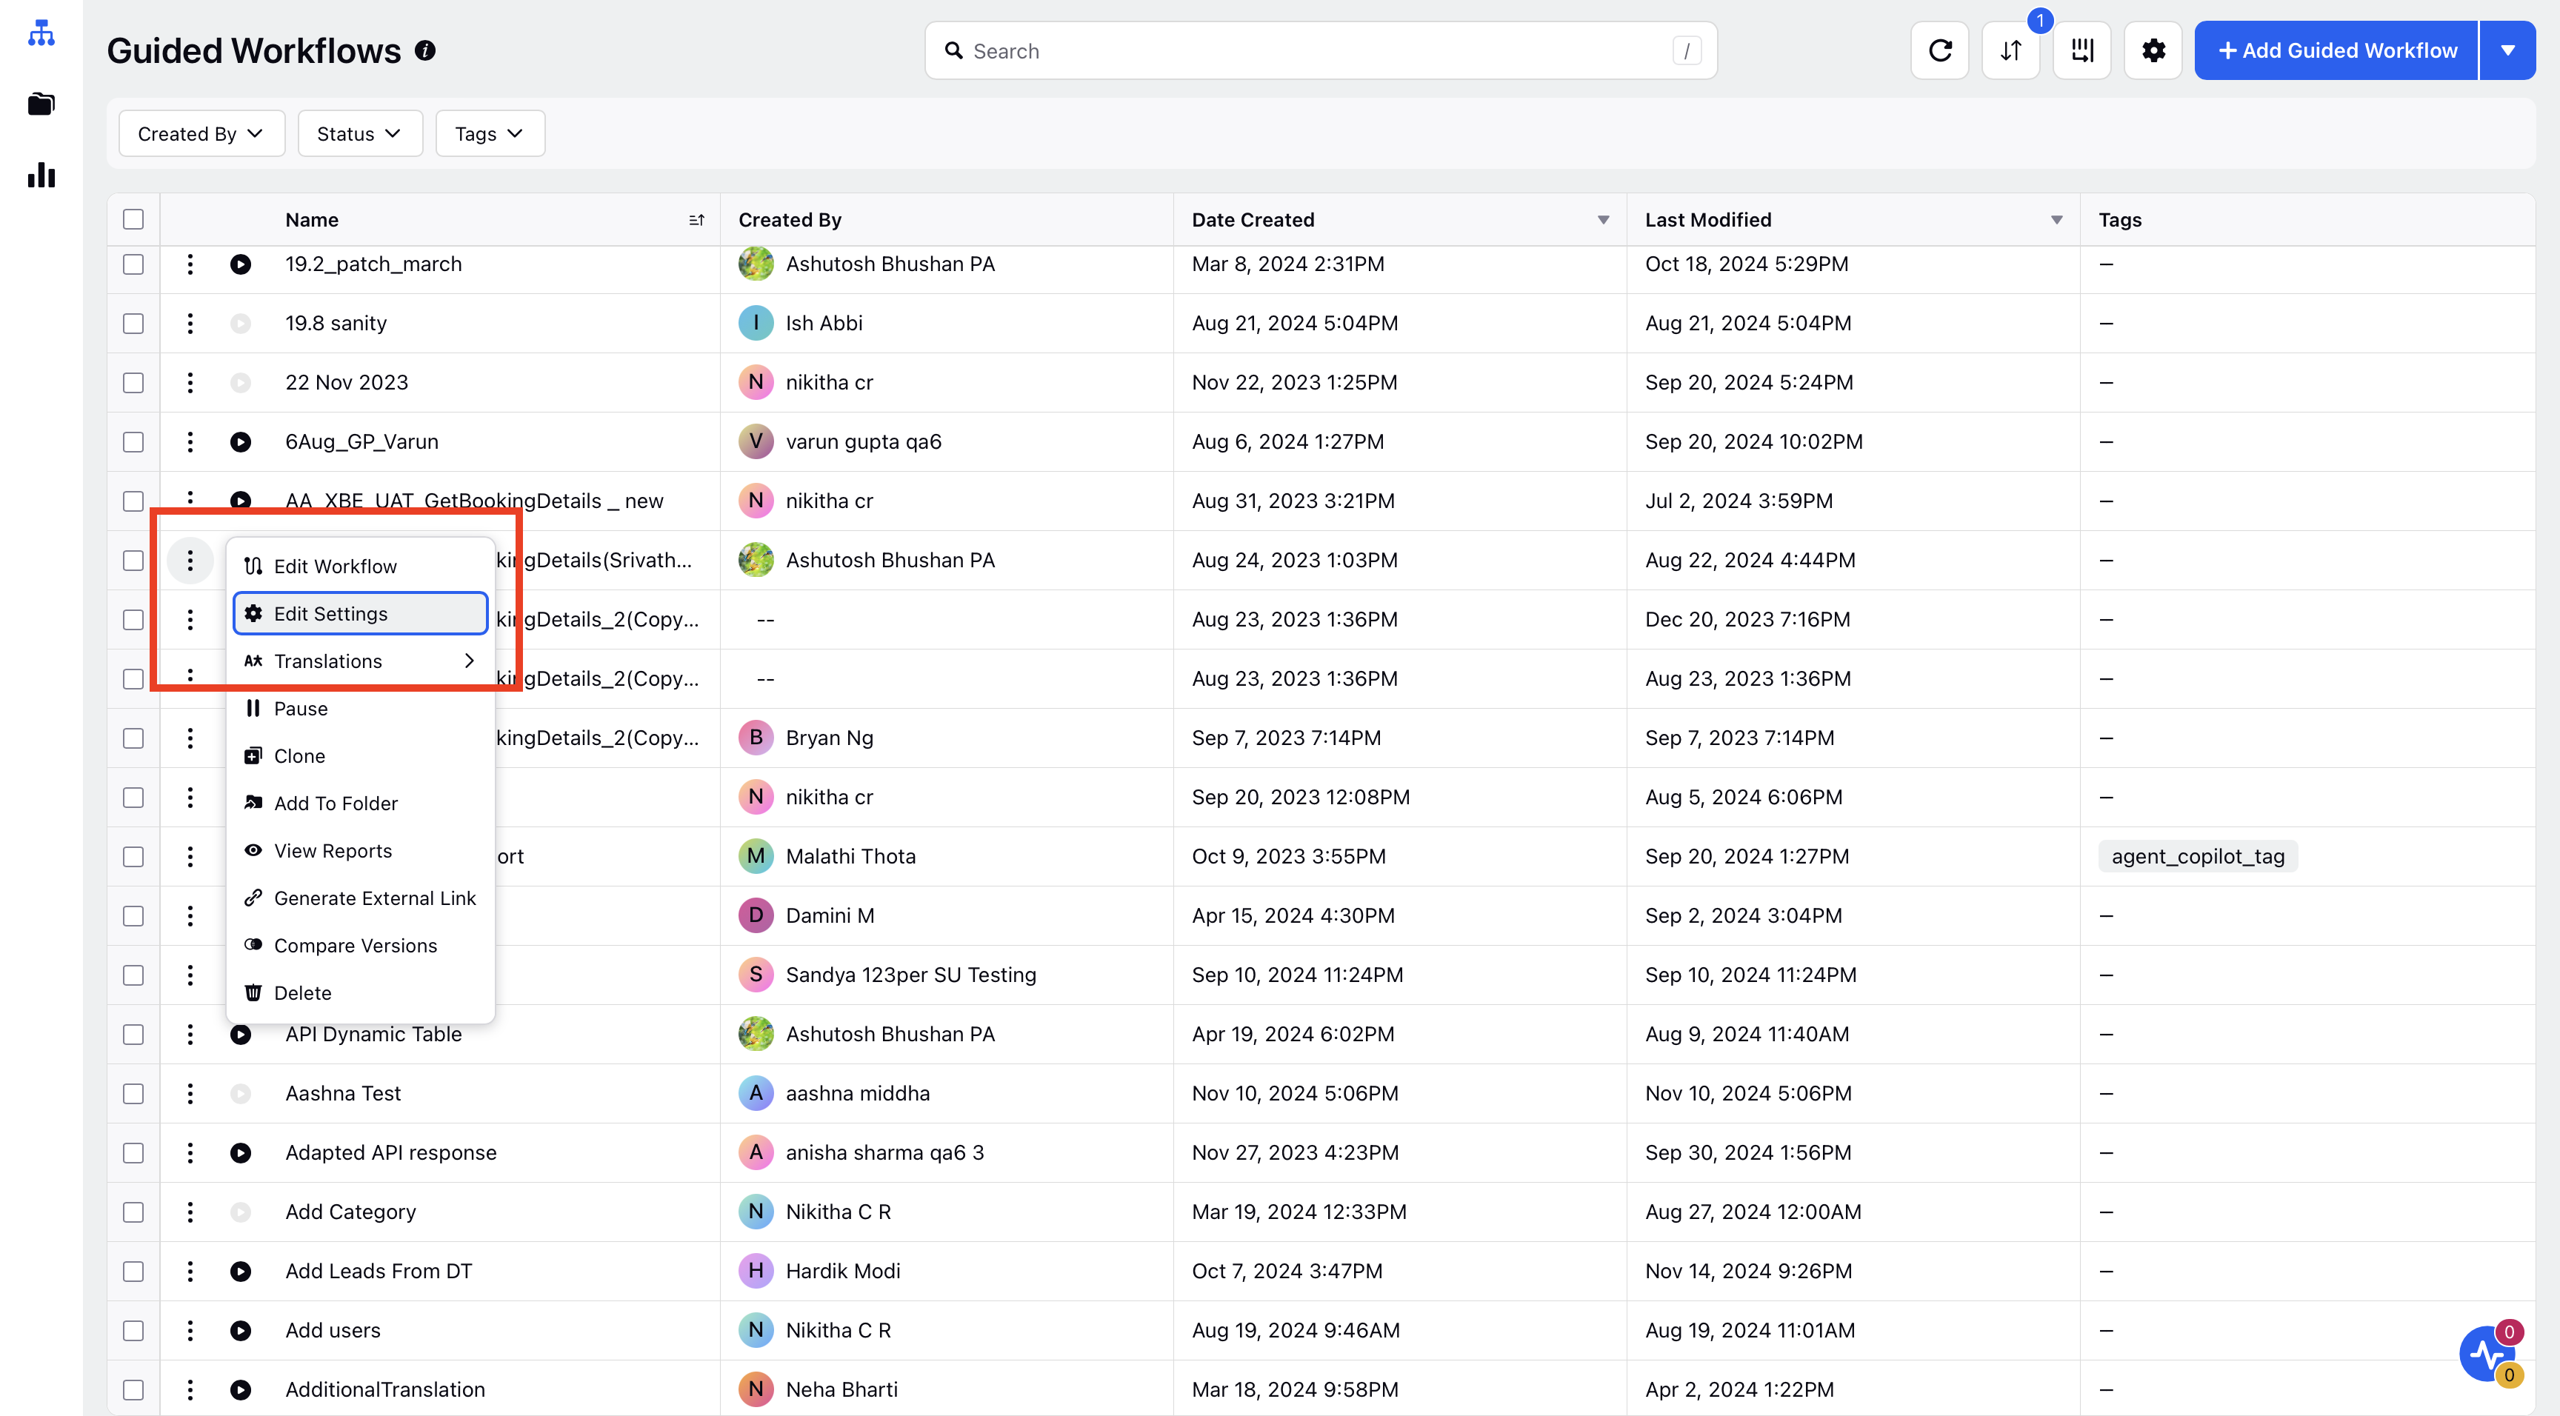
The Update Guided Workflow window will open, allowing you to configure the settings.
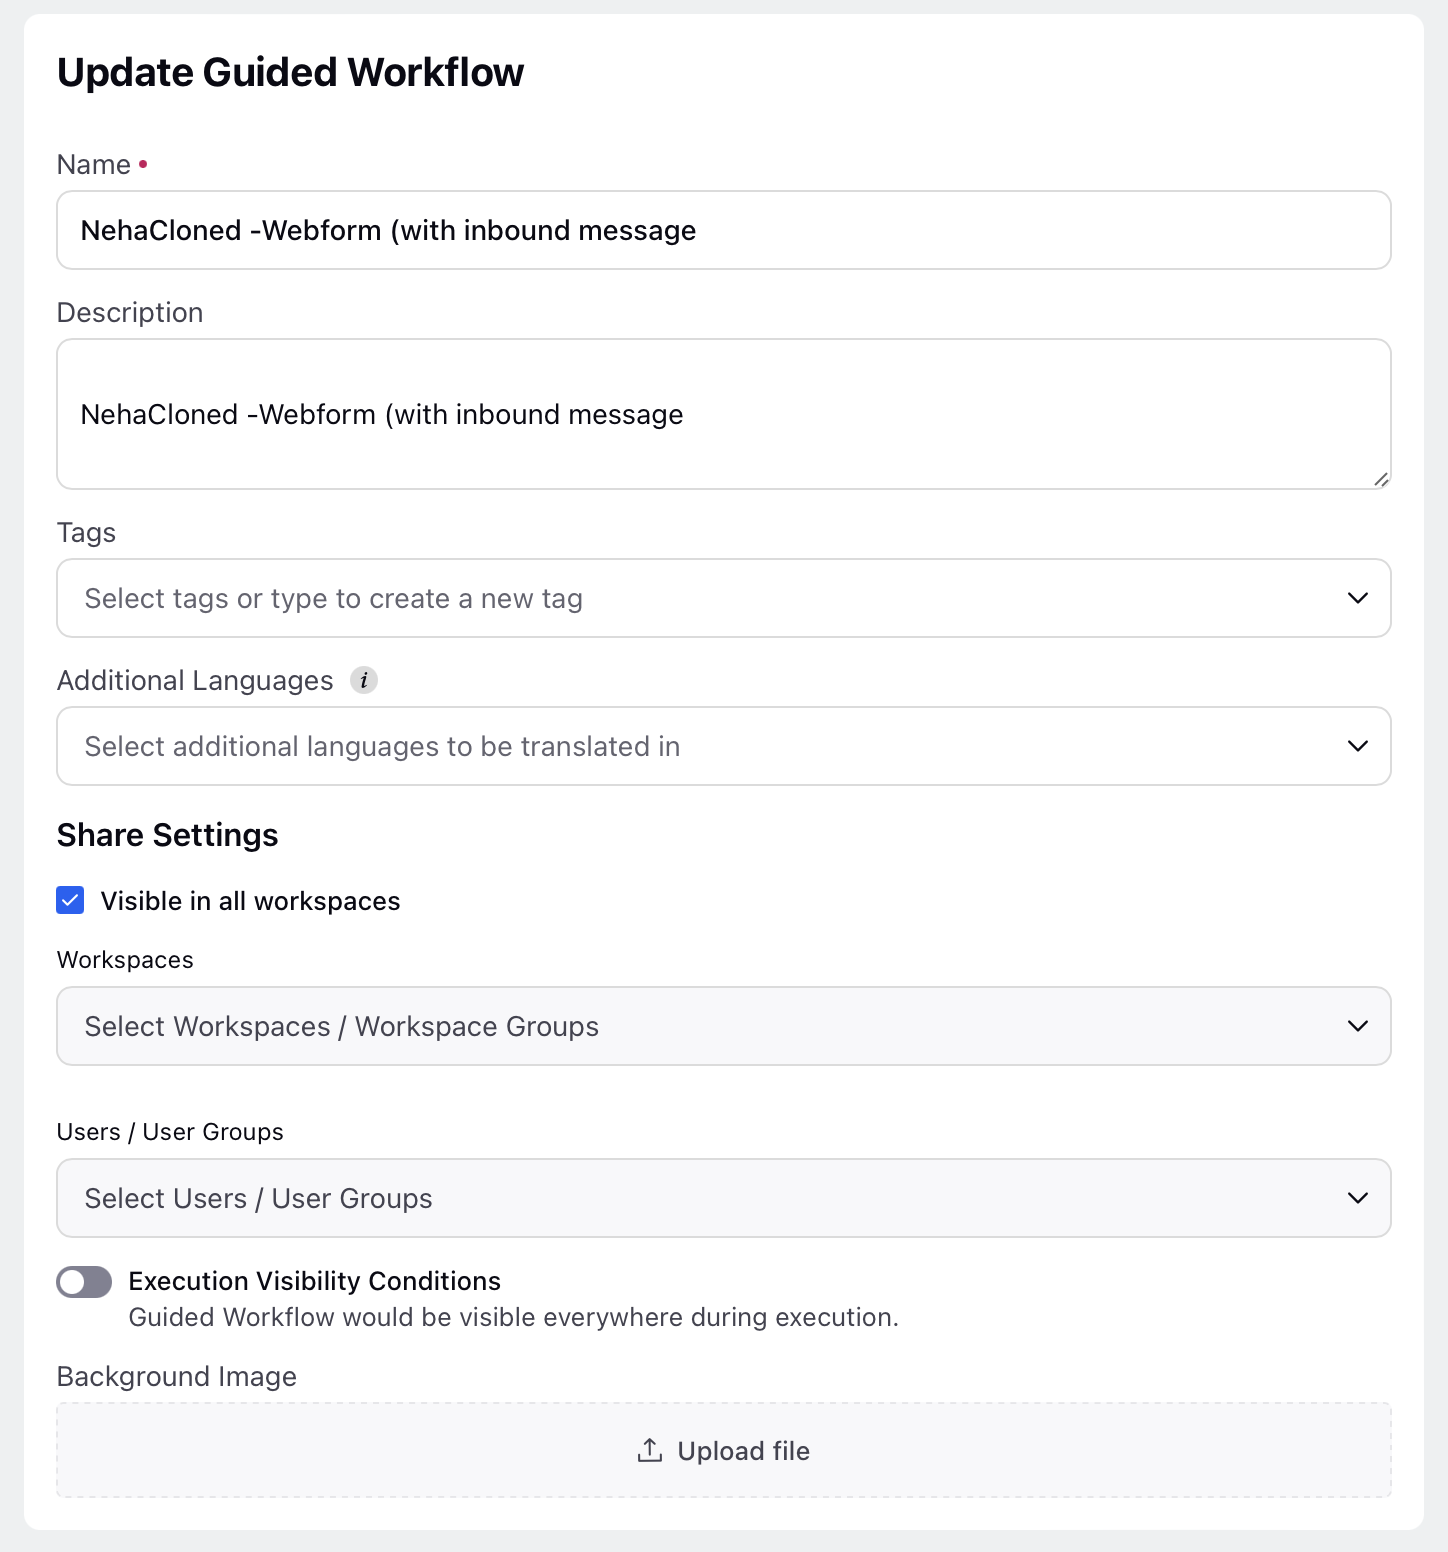
Update Guided Workflow - Fields and Description
The following are the field names and their description of the Update Guided Workflow page.
Name - The Name field is where you set the name of the Guided Workflow. This name is used when performing actions related to the workflow. For example: If you want to trigger this Guided Workflow through the rule engine, you can select options like “Send UI Push Notification” or “Trigger Process,” and then choose the name of the Guided Workflow that you want to activate from the rule engine.
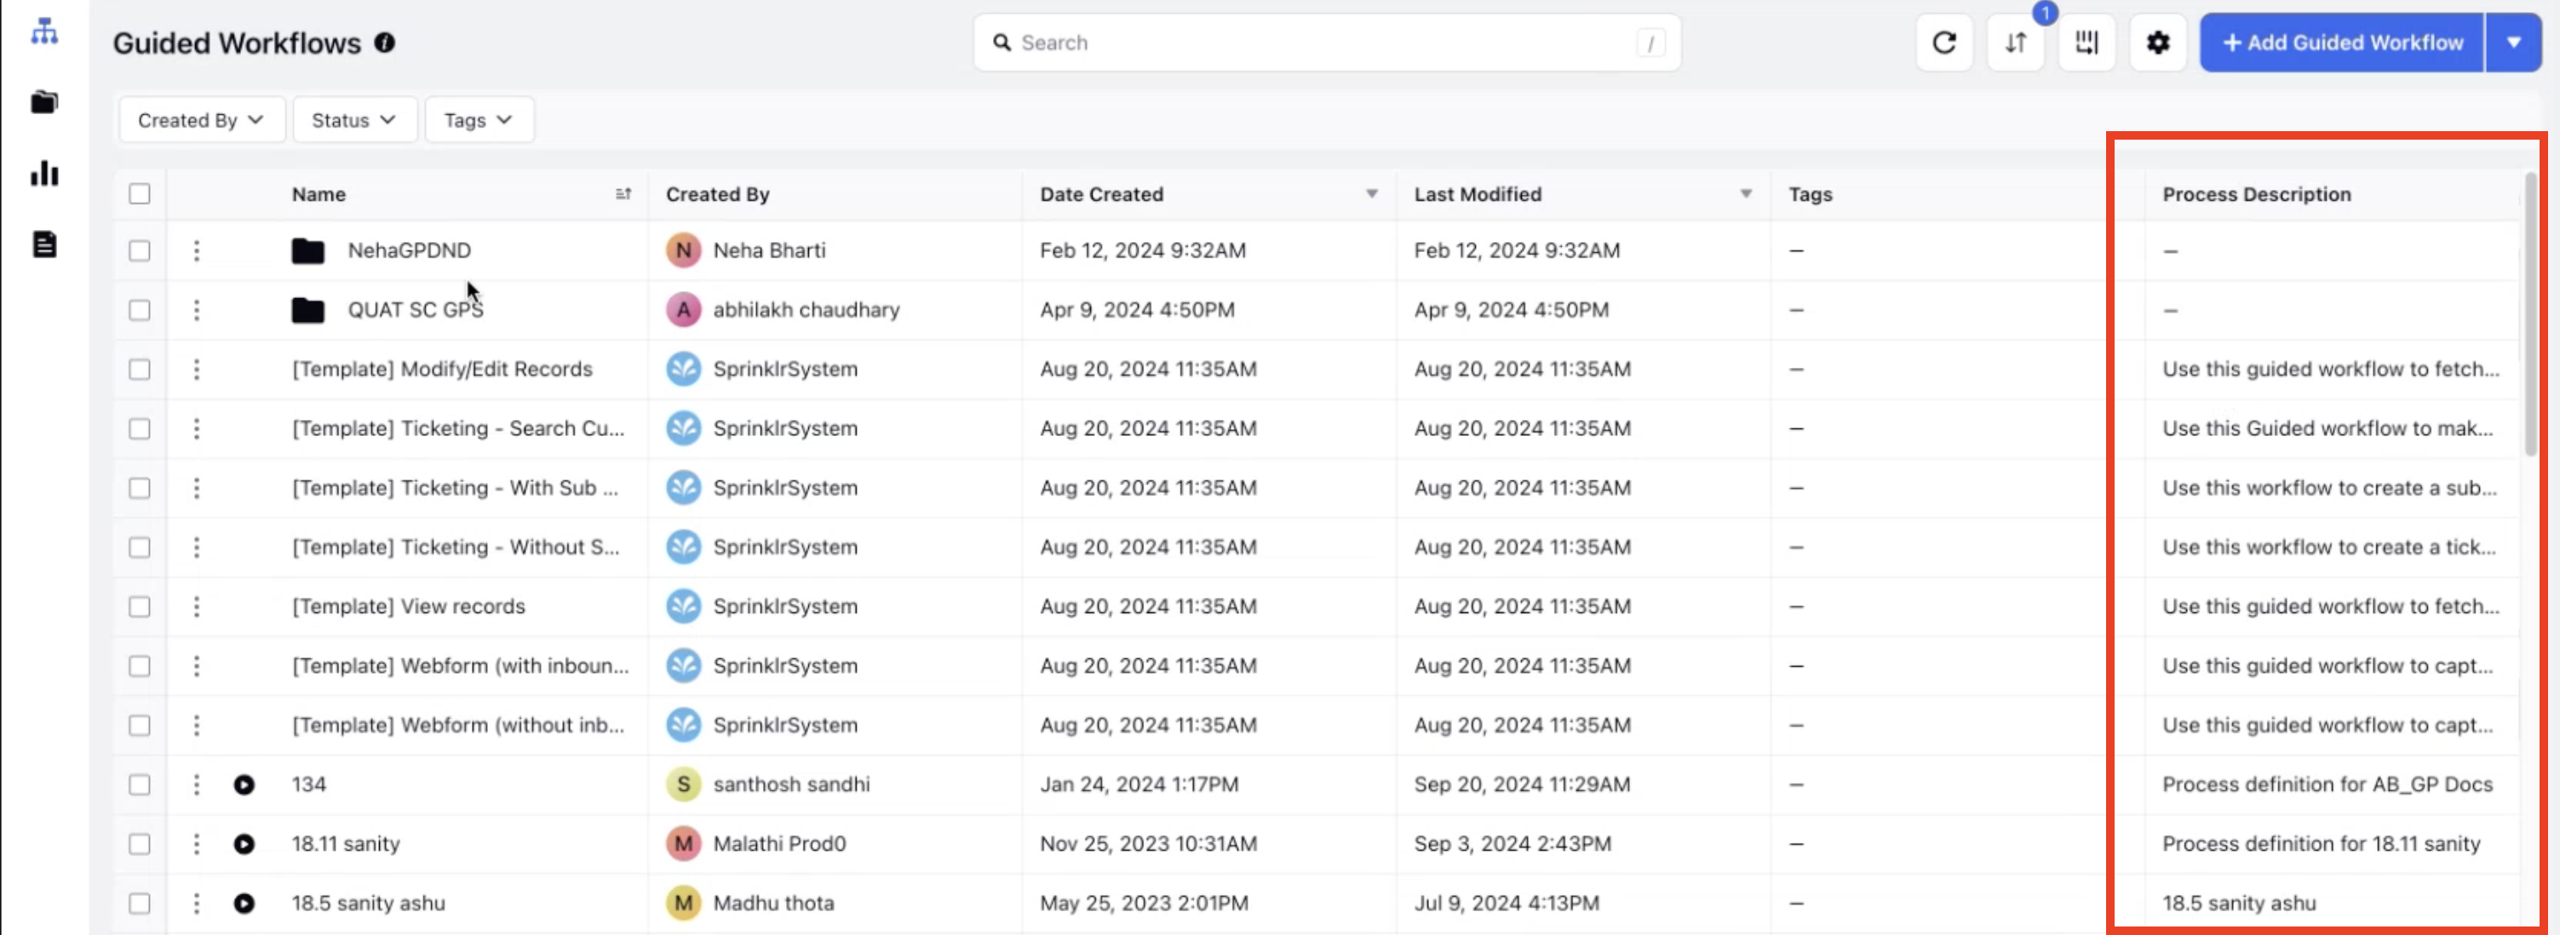
Description - In this section, you can provide a basic description of the Guided Workflow. This should define the high-level purpose or goal of the workflow, so users can quickly understand its purpose by reading the description without needing to review the full flow.
This description will appear under the “Process Description” column in the Guided Workflow Manager.
Tags - Tags act as attributes for the Guided Workflows, allowing easy filtering within the Guided Workflow Manager or Smart Assist tab. Although this is an optional section, adding tags can be helpful in organizing and categorizing the workflows.

You can select an existing tag from the list or create a new one by typing it in and clicking to add it.

Additional Languages - This section applies only to external Guided Workflows and allows you to define the languages for translation. It is optional and relevant only if you need to define or translate content into a language that is not supported by Sprinklr.
Implementation Steps
Once you've configured a guided workflow in a specific language, you can effortlessly translate it into other languages supported by Sprinklr by following these steps—there's no need to rebuild the workflow.
Export Translation File:
Hover over the three dots next to the guided workflow name.
Go to Translations and click on "Export."
Note: Access to the Translation feature is controlled by the Dynamic Property.
To enable this feature in your environment, contact your Success Manager. Alternatively, you can submit a request at tickets@sprinklr.com.
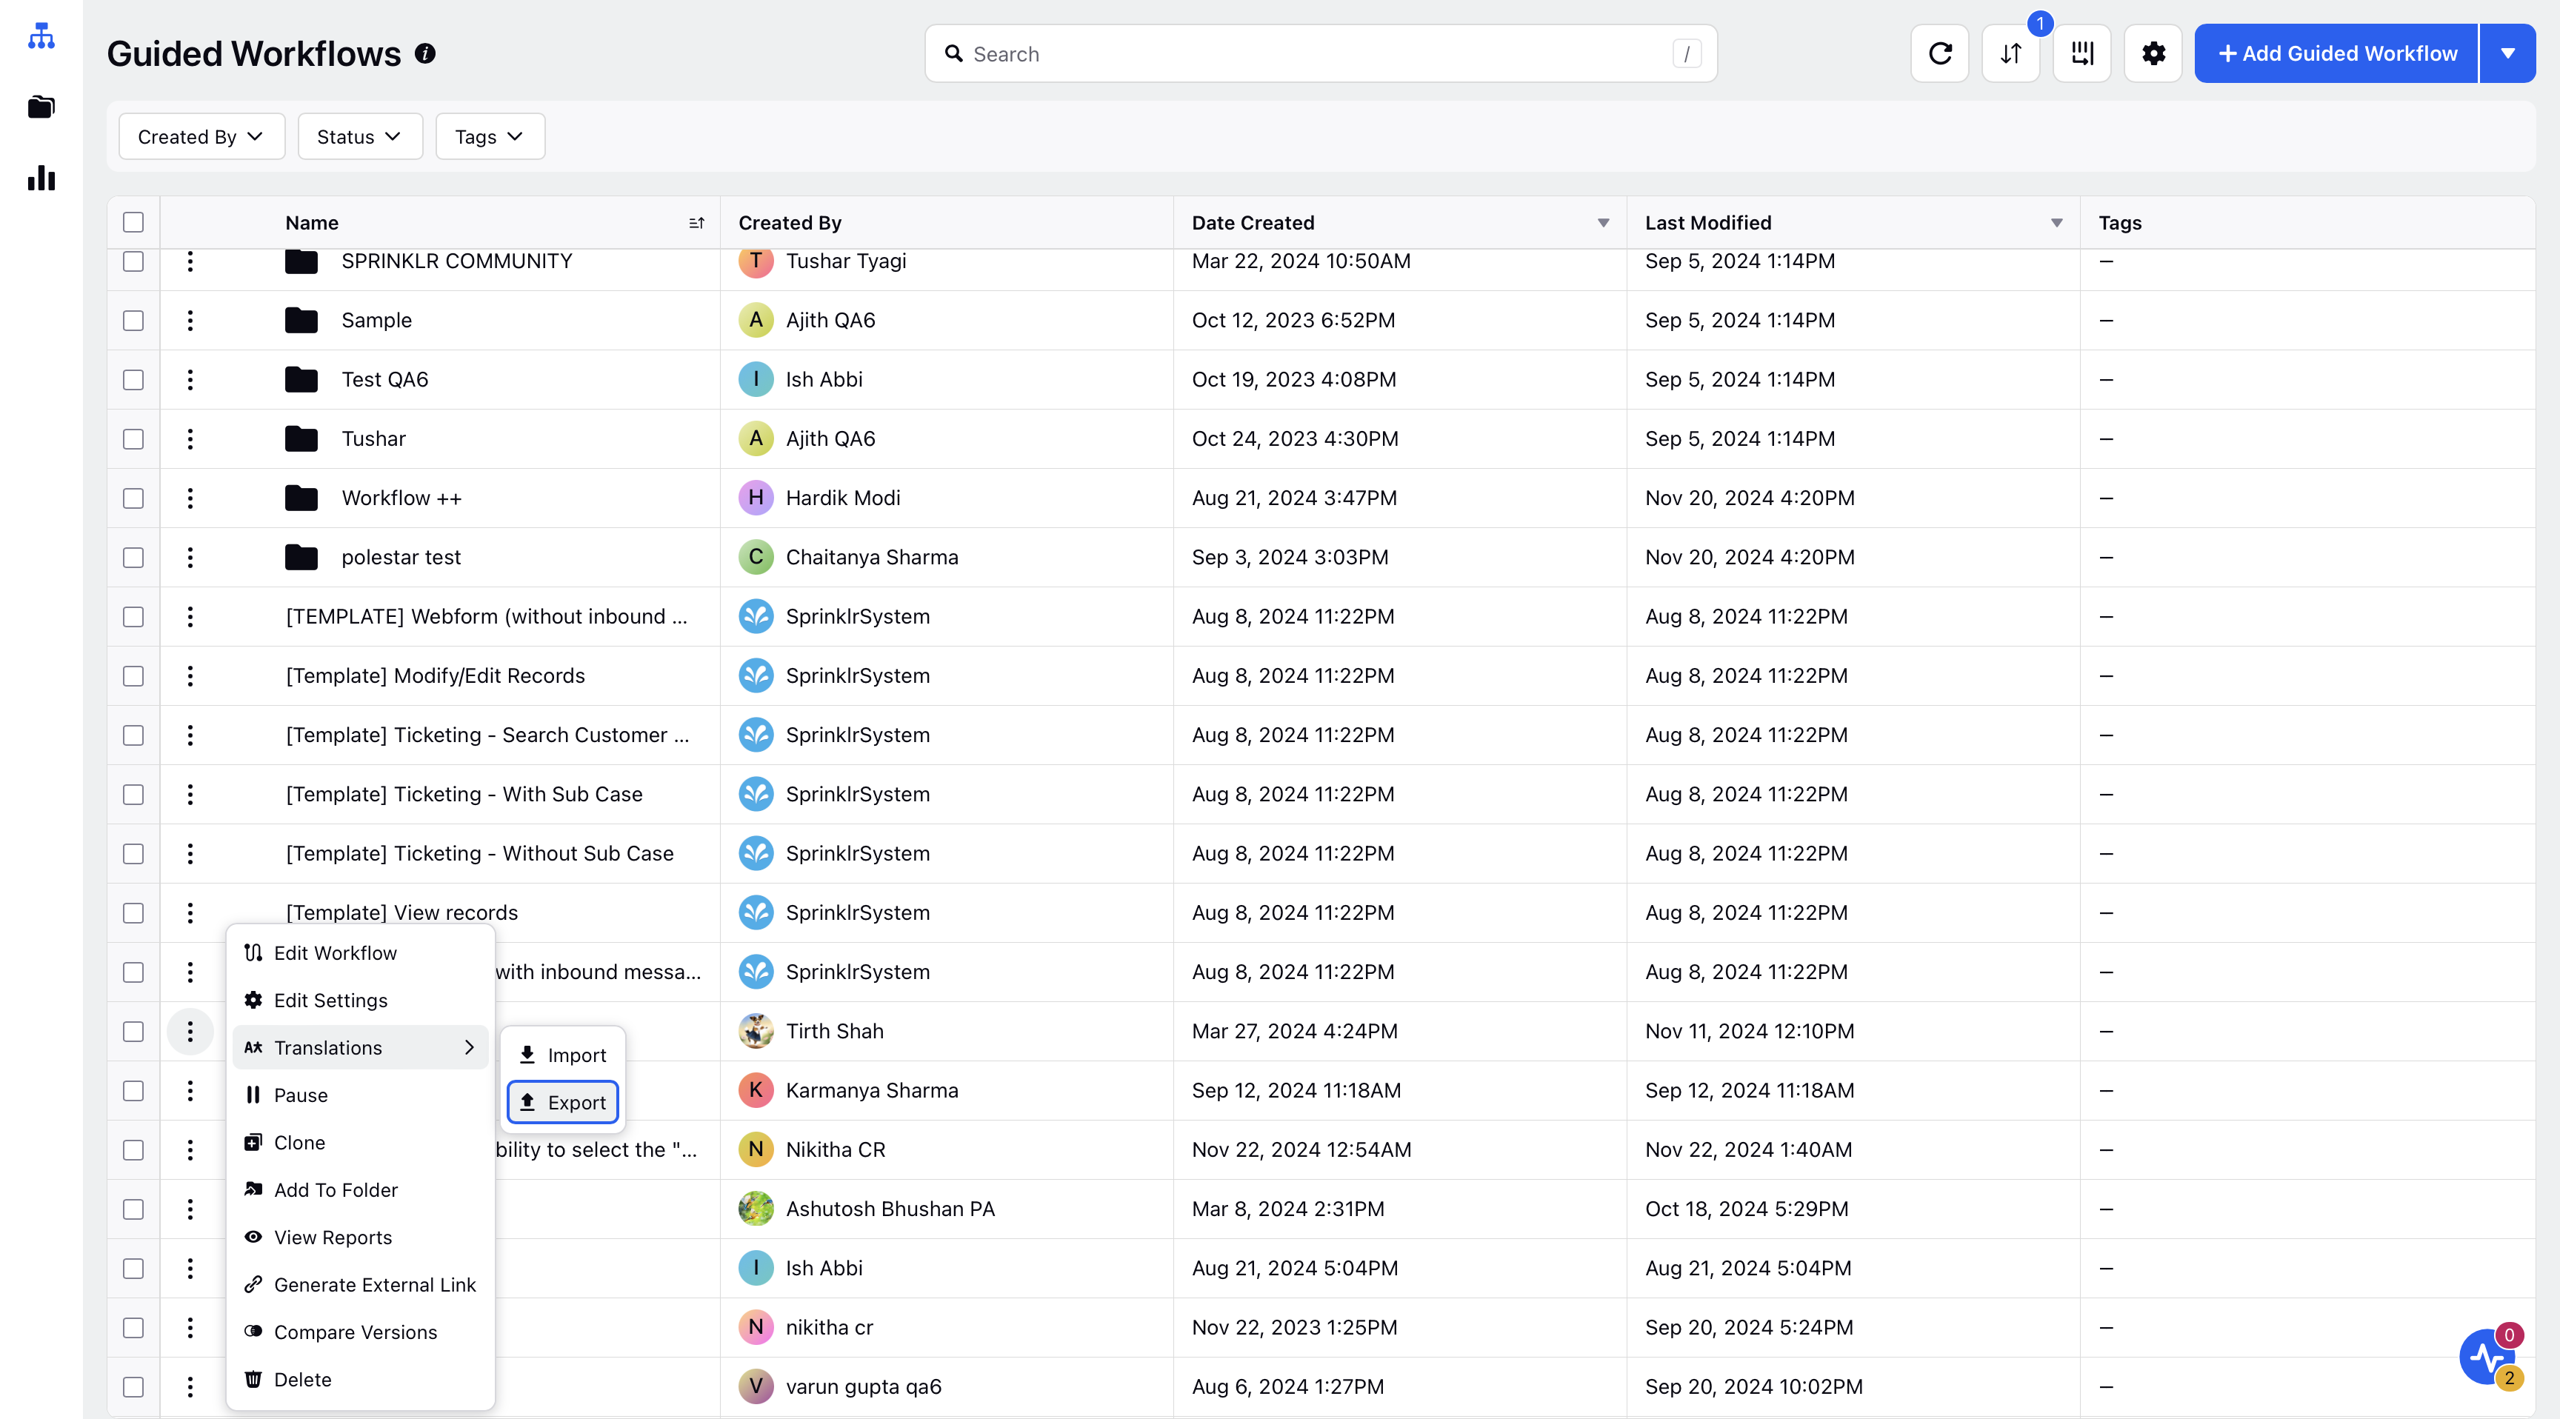
Download a file containing all labels, names of screen components, and screen properties.
In the downloaded file, translate the content under the desired language section.
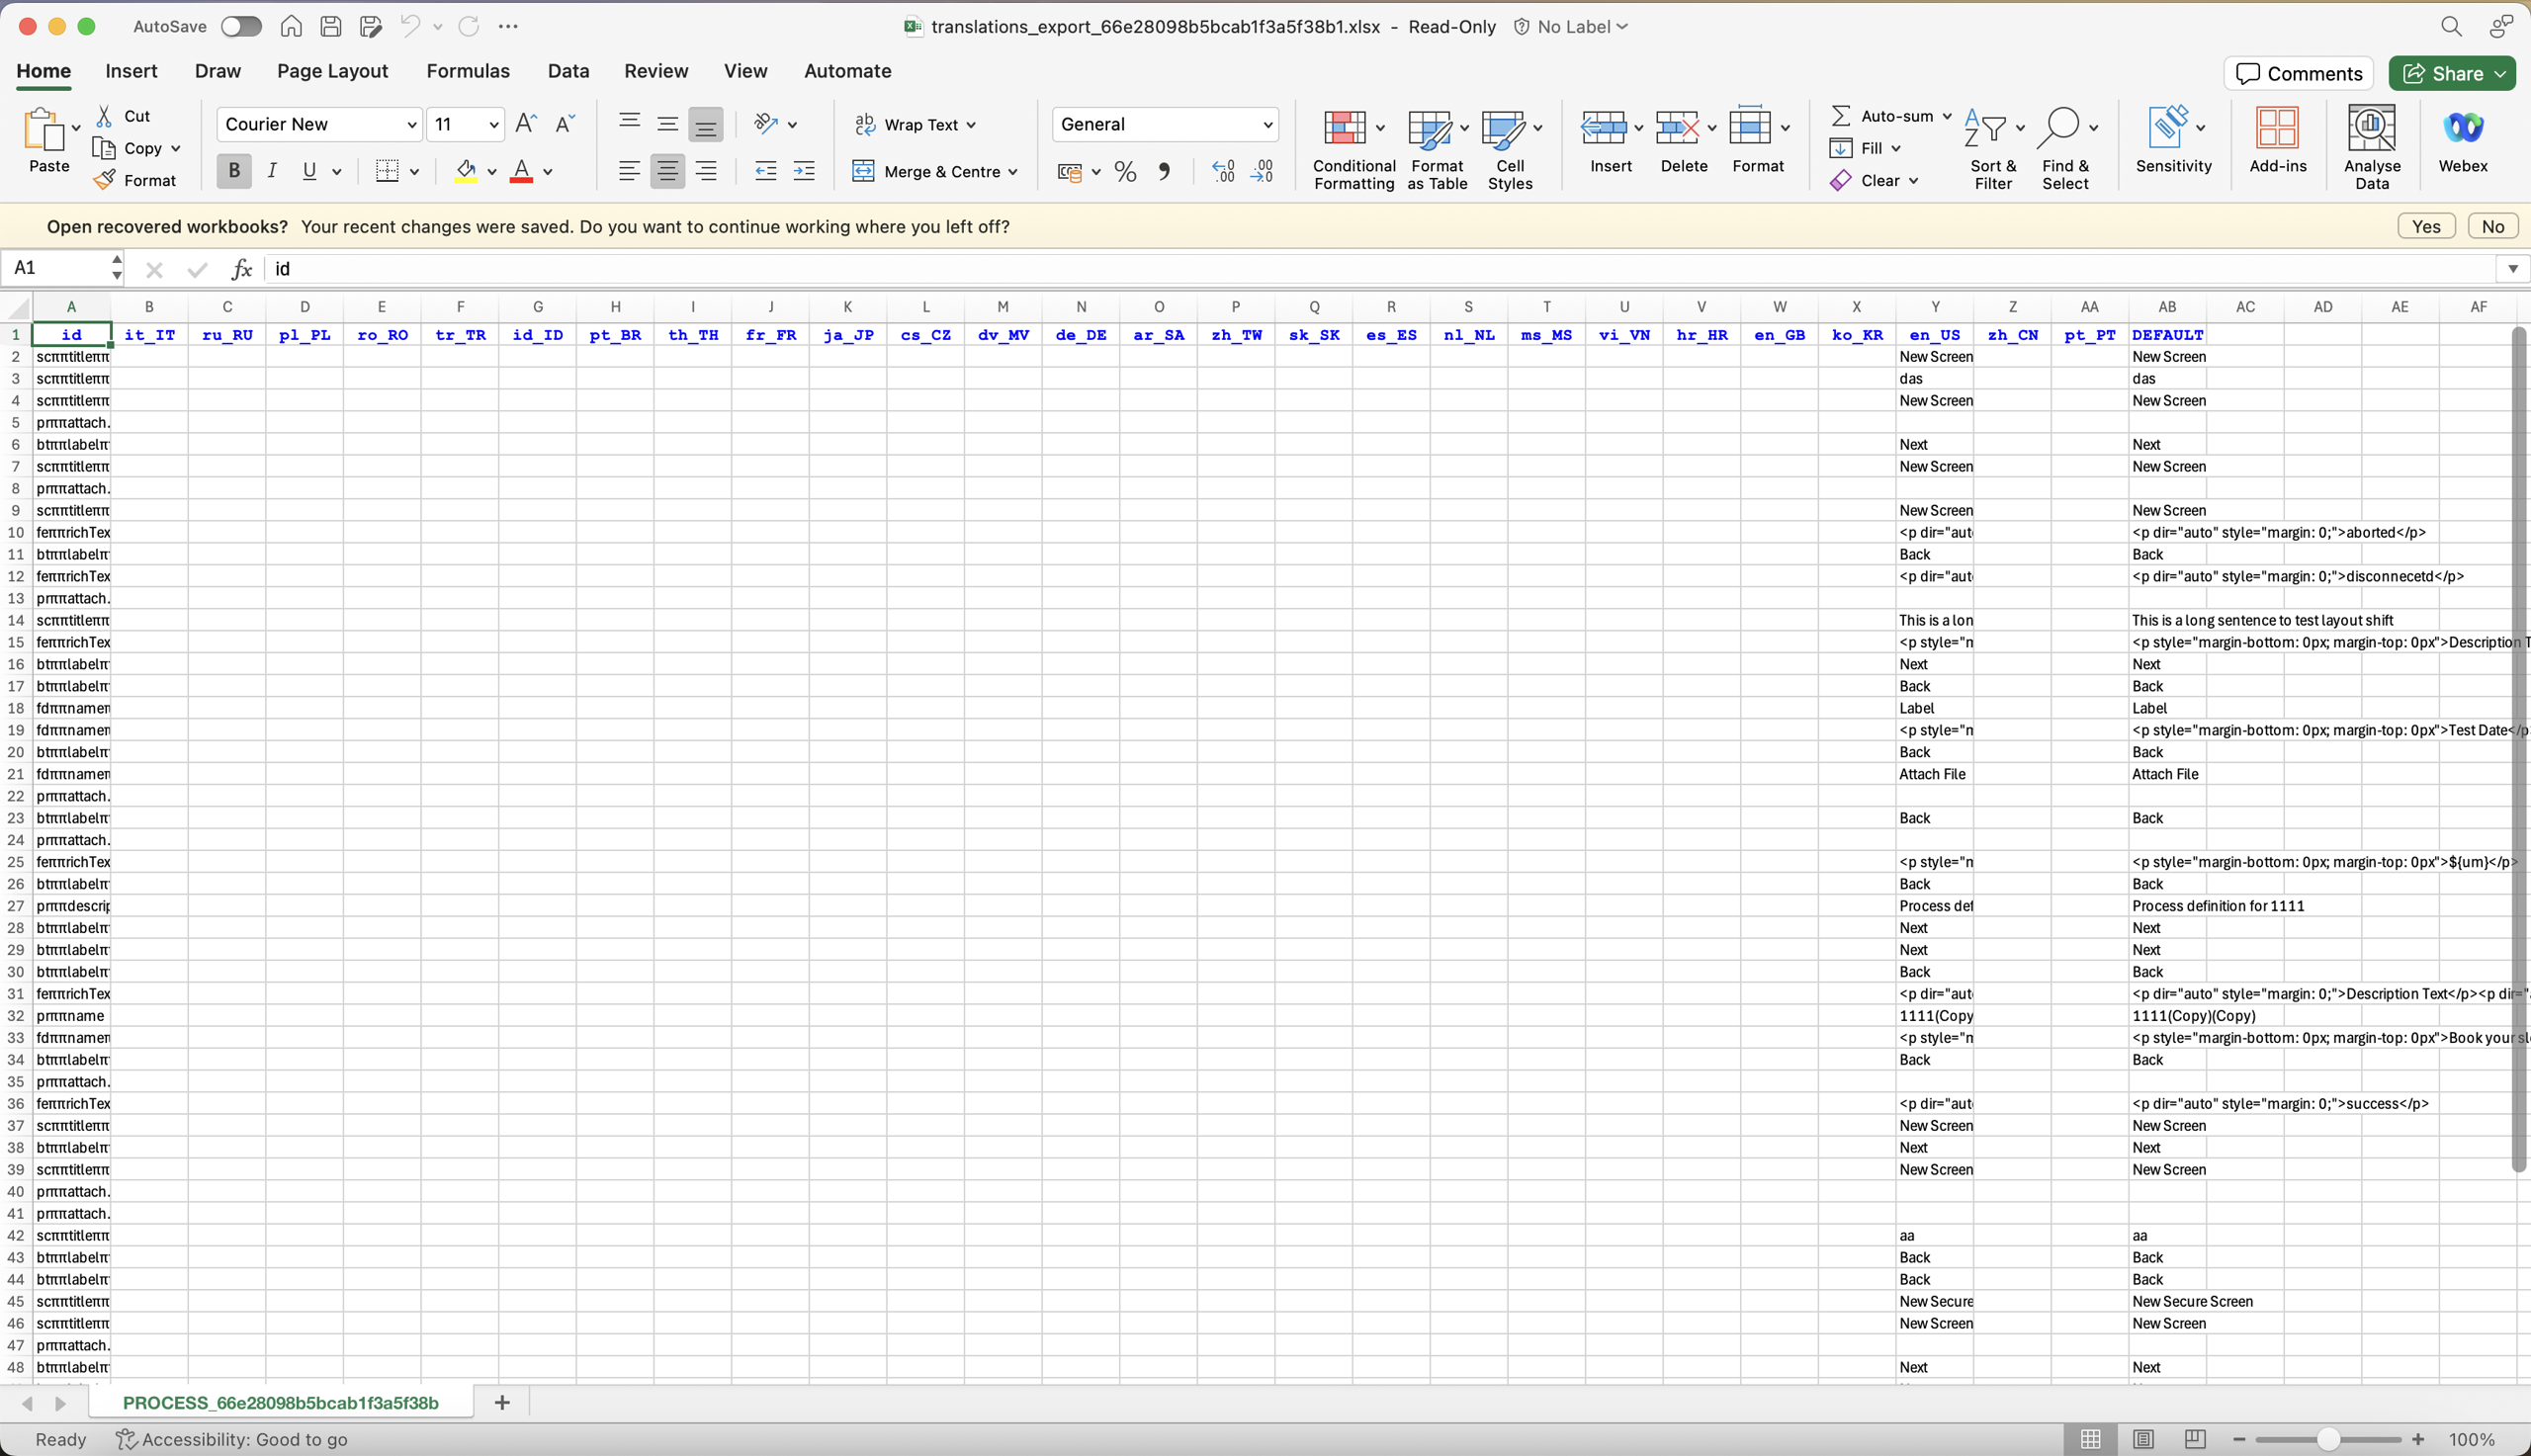
Import Translations:
Return to the Guided Workflow Builder.
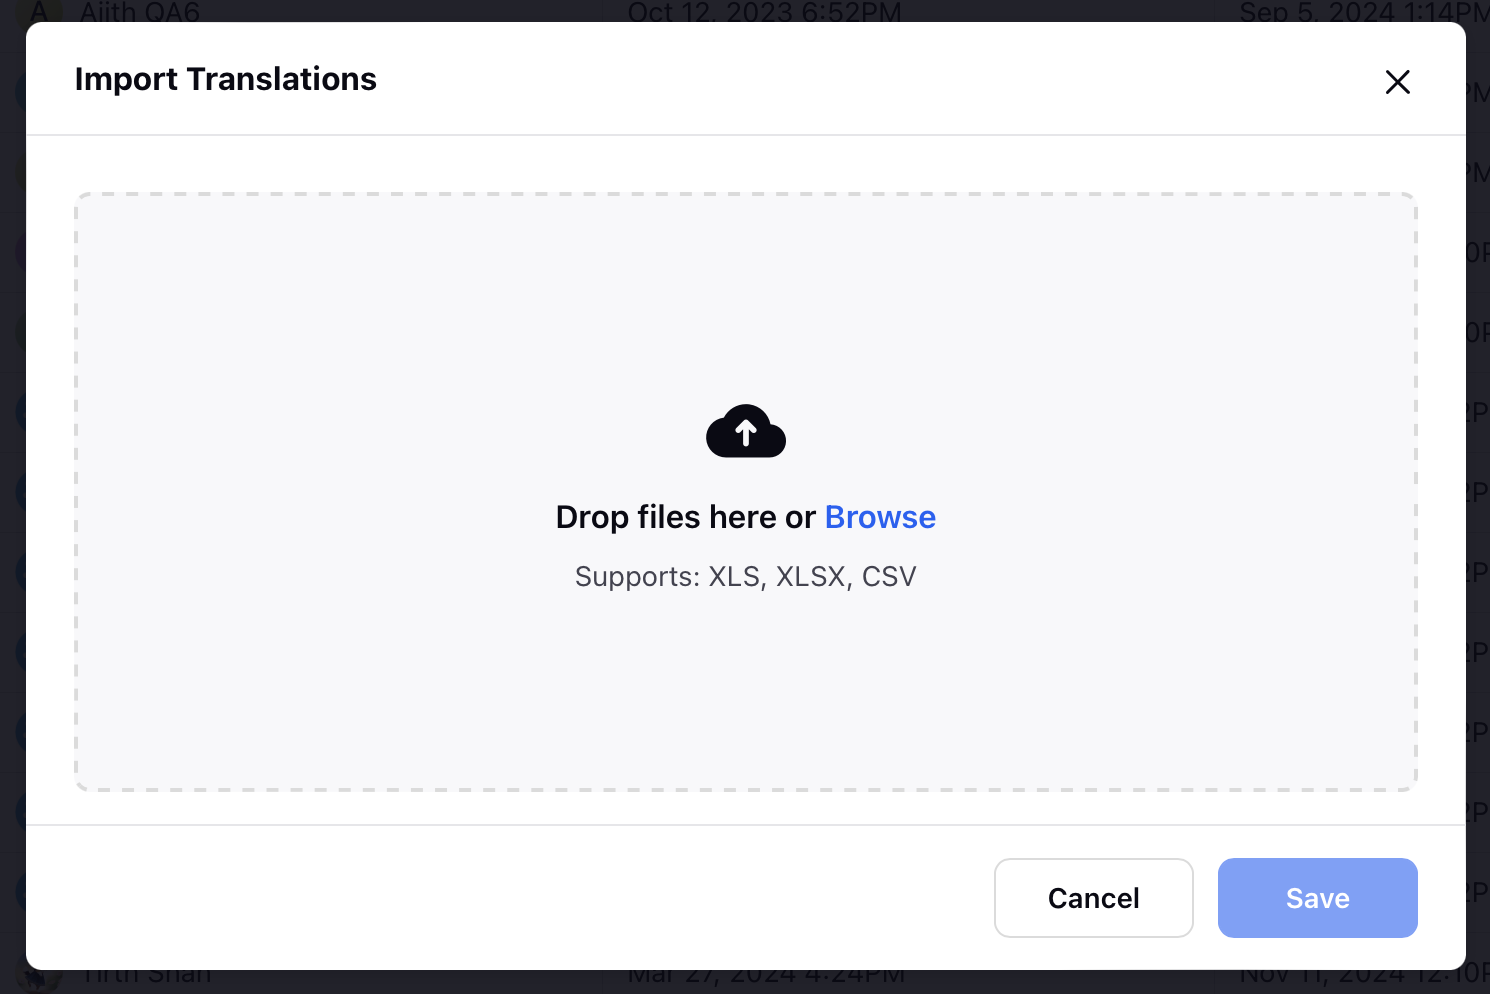
Hover over the three dots again, select Translations, and then choose "Import."
Click on "Browse" to pick the translated file.
Once the file is imported, deploy the guided workflow.
Now, when you execute the Guided Workflow with a language preference matching the translated language, all details will be presented in the translated language.
Share Settings - This section is used to share the Guided Workflow with specific users, user groups, workspaces, or across all workspaces.
Background Image - Here, you can upload a background image for the Guided Workflow. This setting is specifically for workflows hosted on Sprinklr Communities.