Sharing and Configuring Layouts for Users
Updated
The visibility and configuration of layout (record) pages for users can be managed using the Activate/Change Activations button. This feature enables you to associate a layout with specific user roles or custom fields.
Share a Layout with Users
To share a layout with specific user roles, follow these steps:
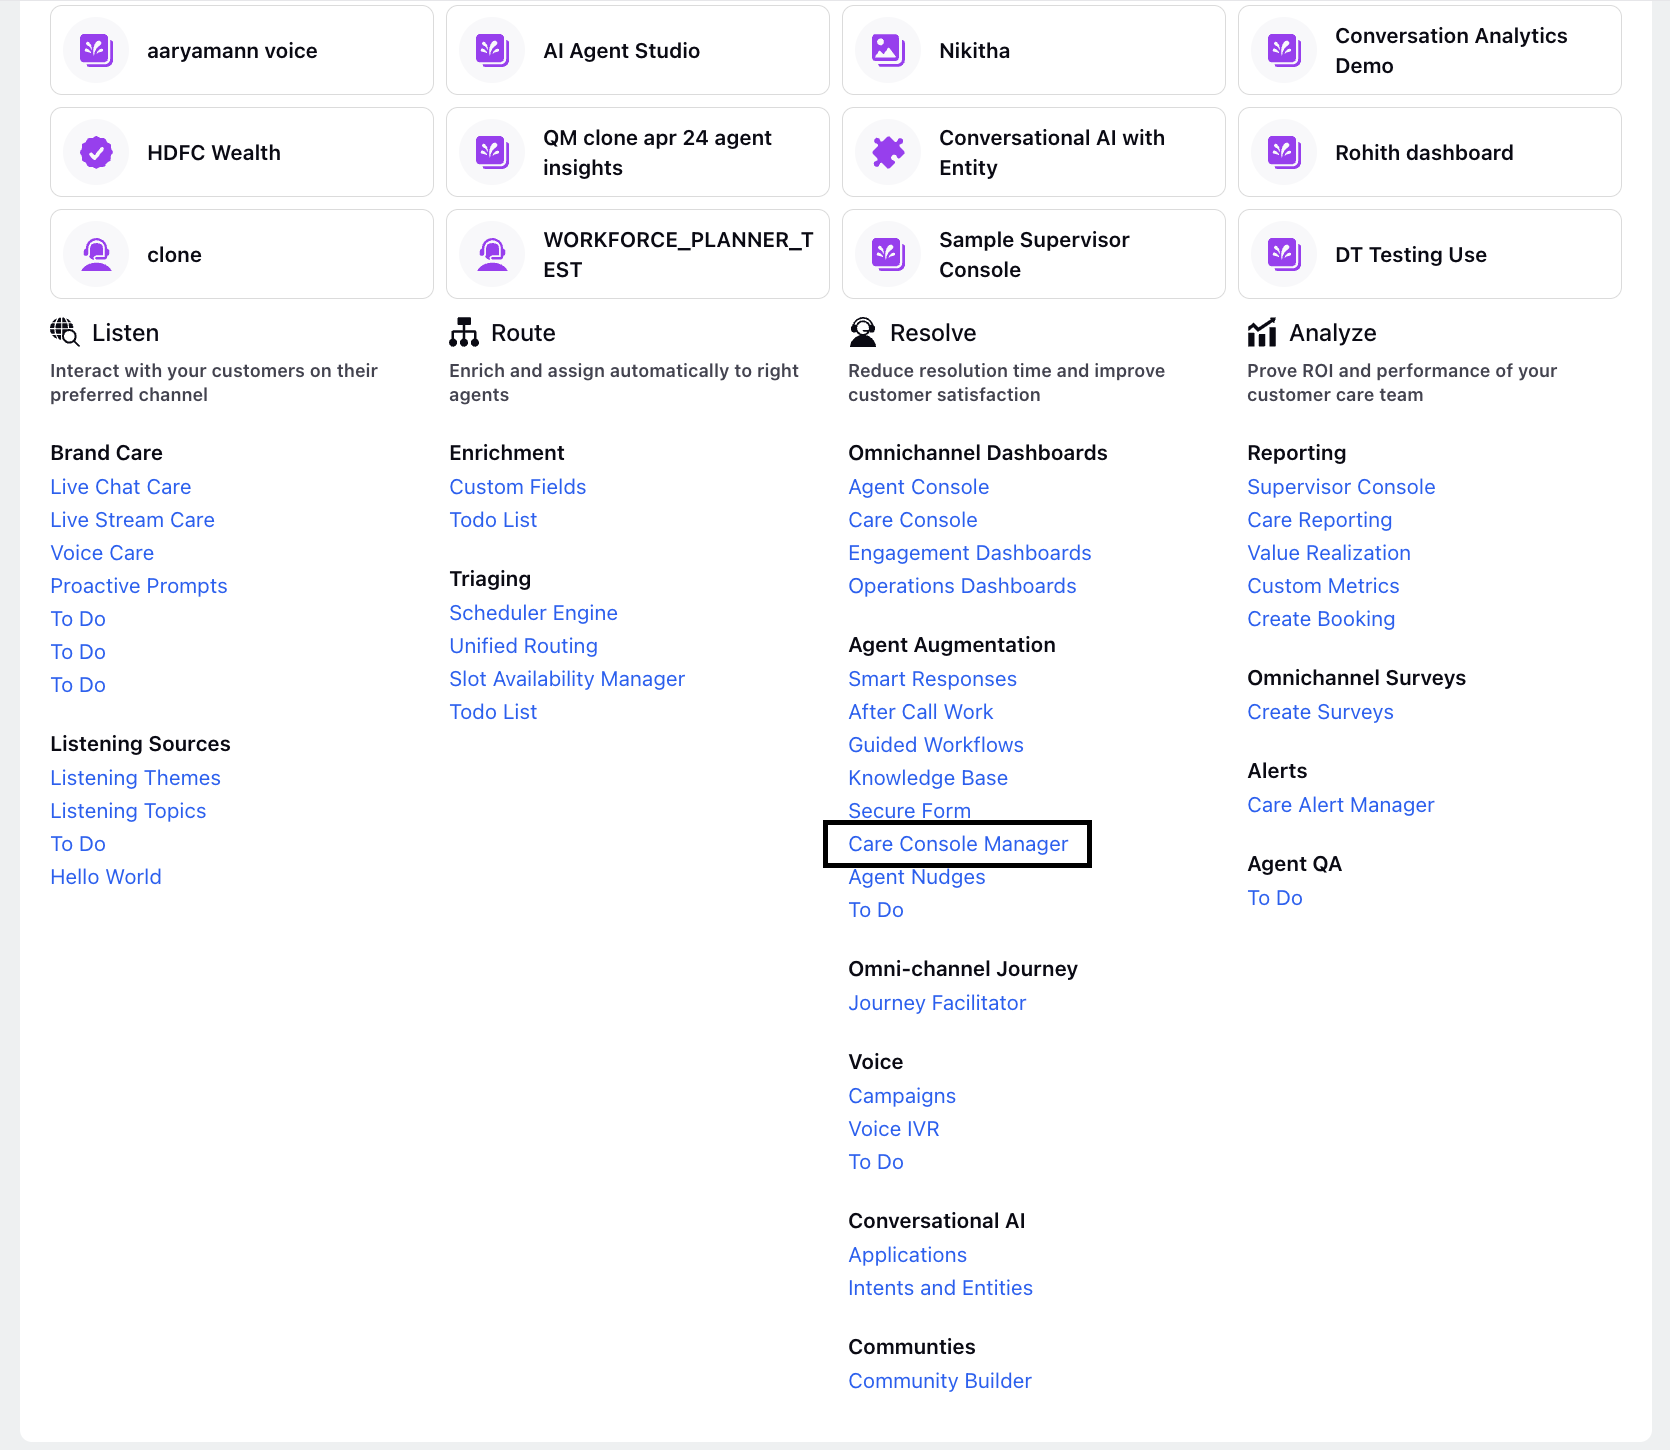
1. Click the New Page (+) icon to open the Launchpad.
2. On the Launchpad, under the Resolve section, click Care Console Manager.
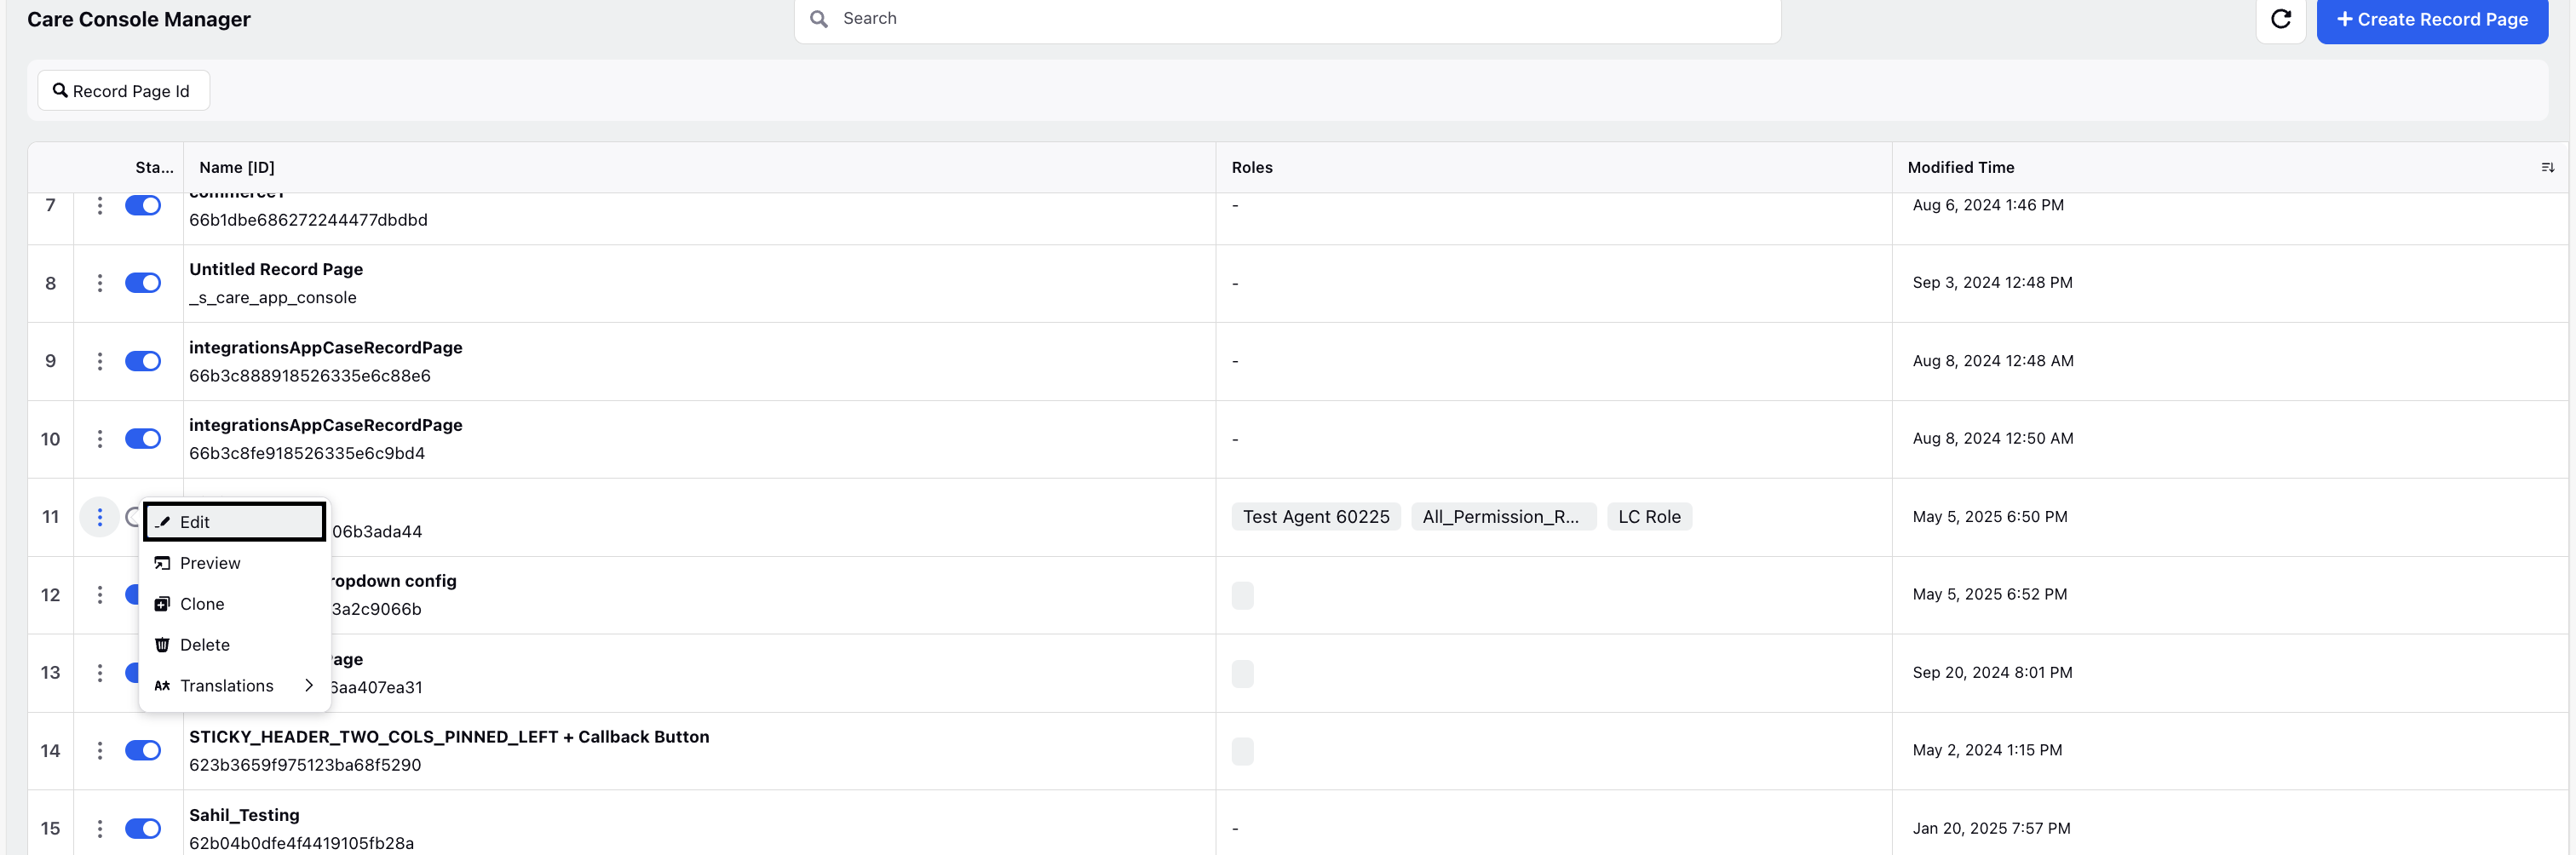
3. In the Care Console Manager, locate the desired record page.
4. Click the three-dot menu adjacent to the record page.
5. Select Edit from the menu.
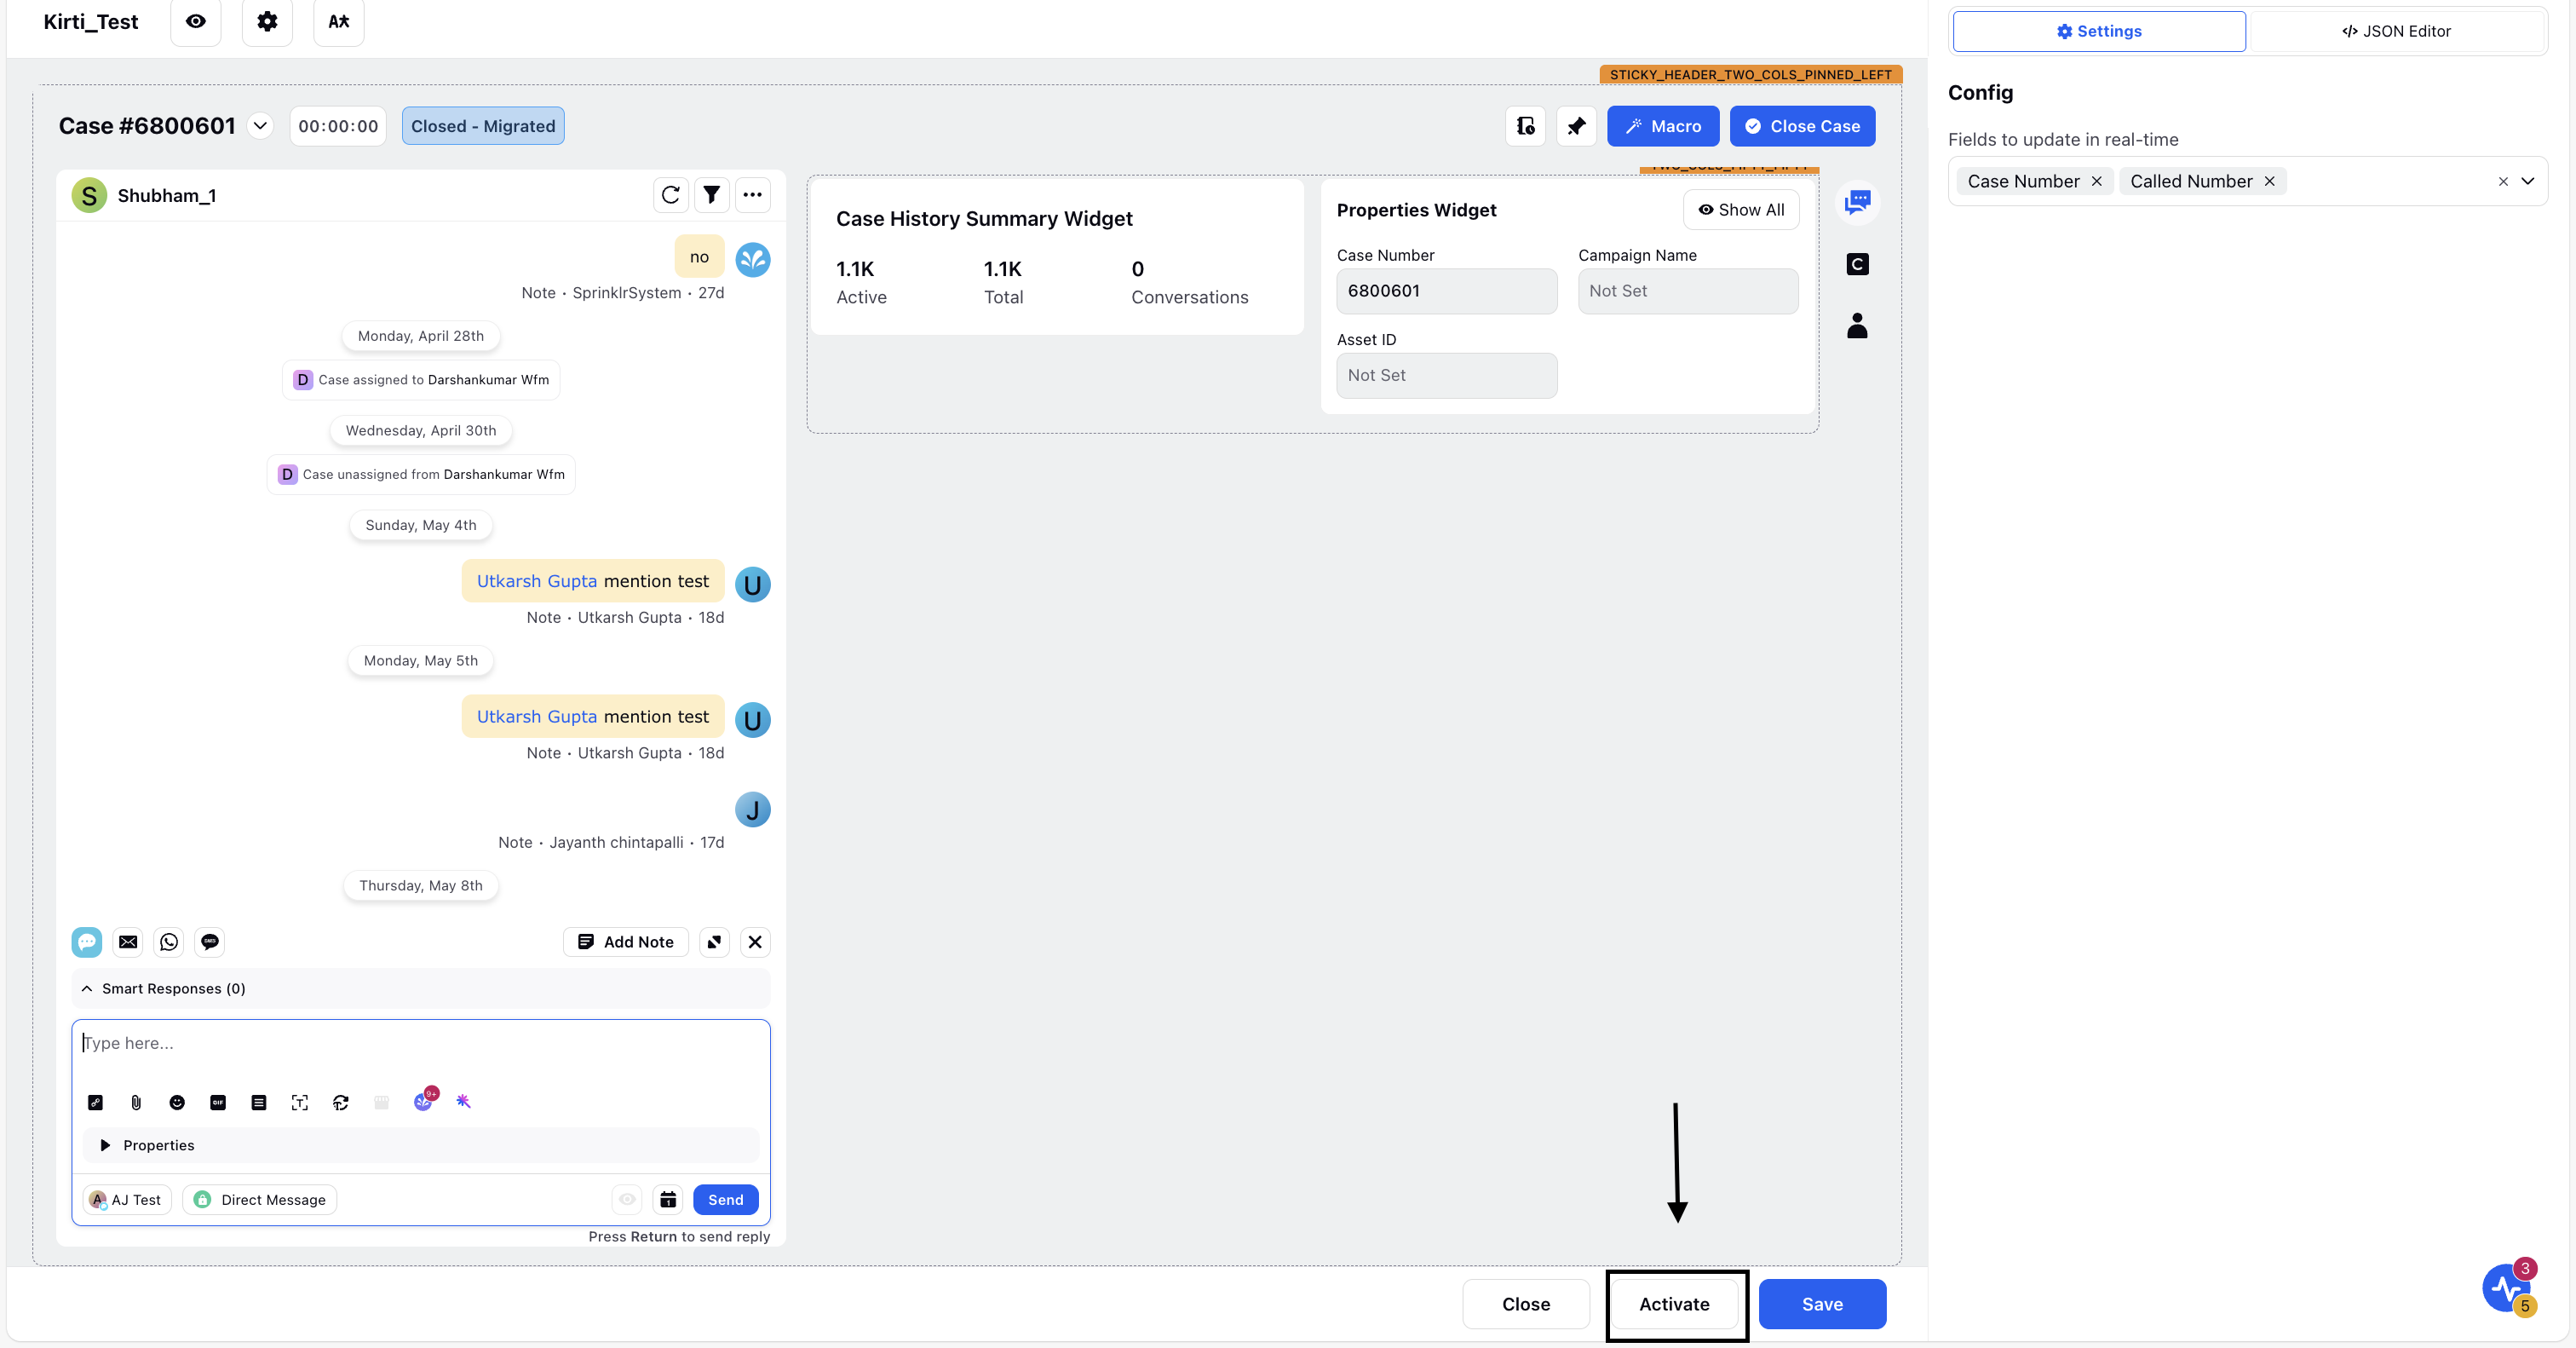
6. If you're sharing the layout for the first time, click Activate at the bottom-right of the screen. If it's not your first time, click Change Activations. This will open the Activate Record Page window.
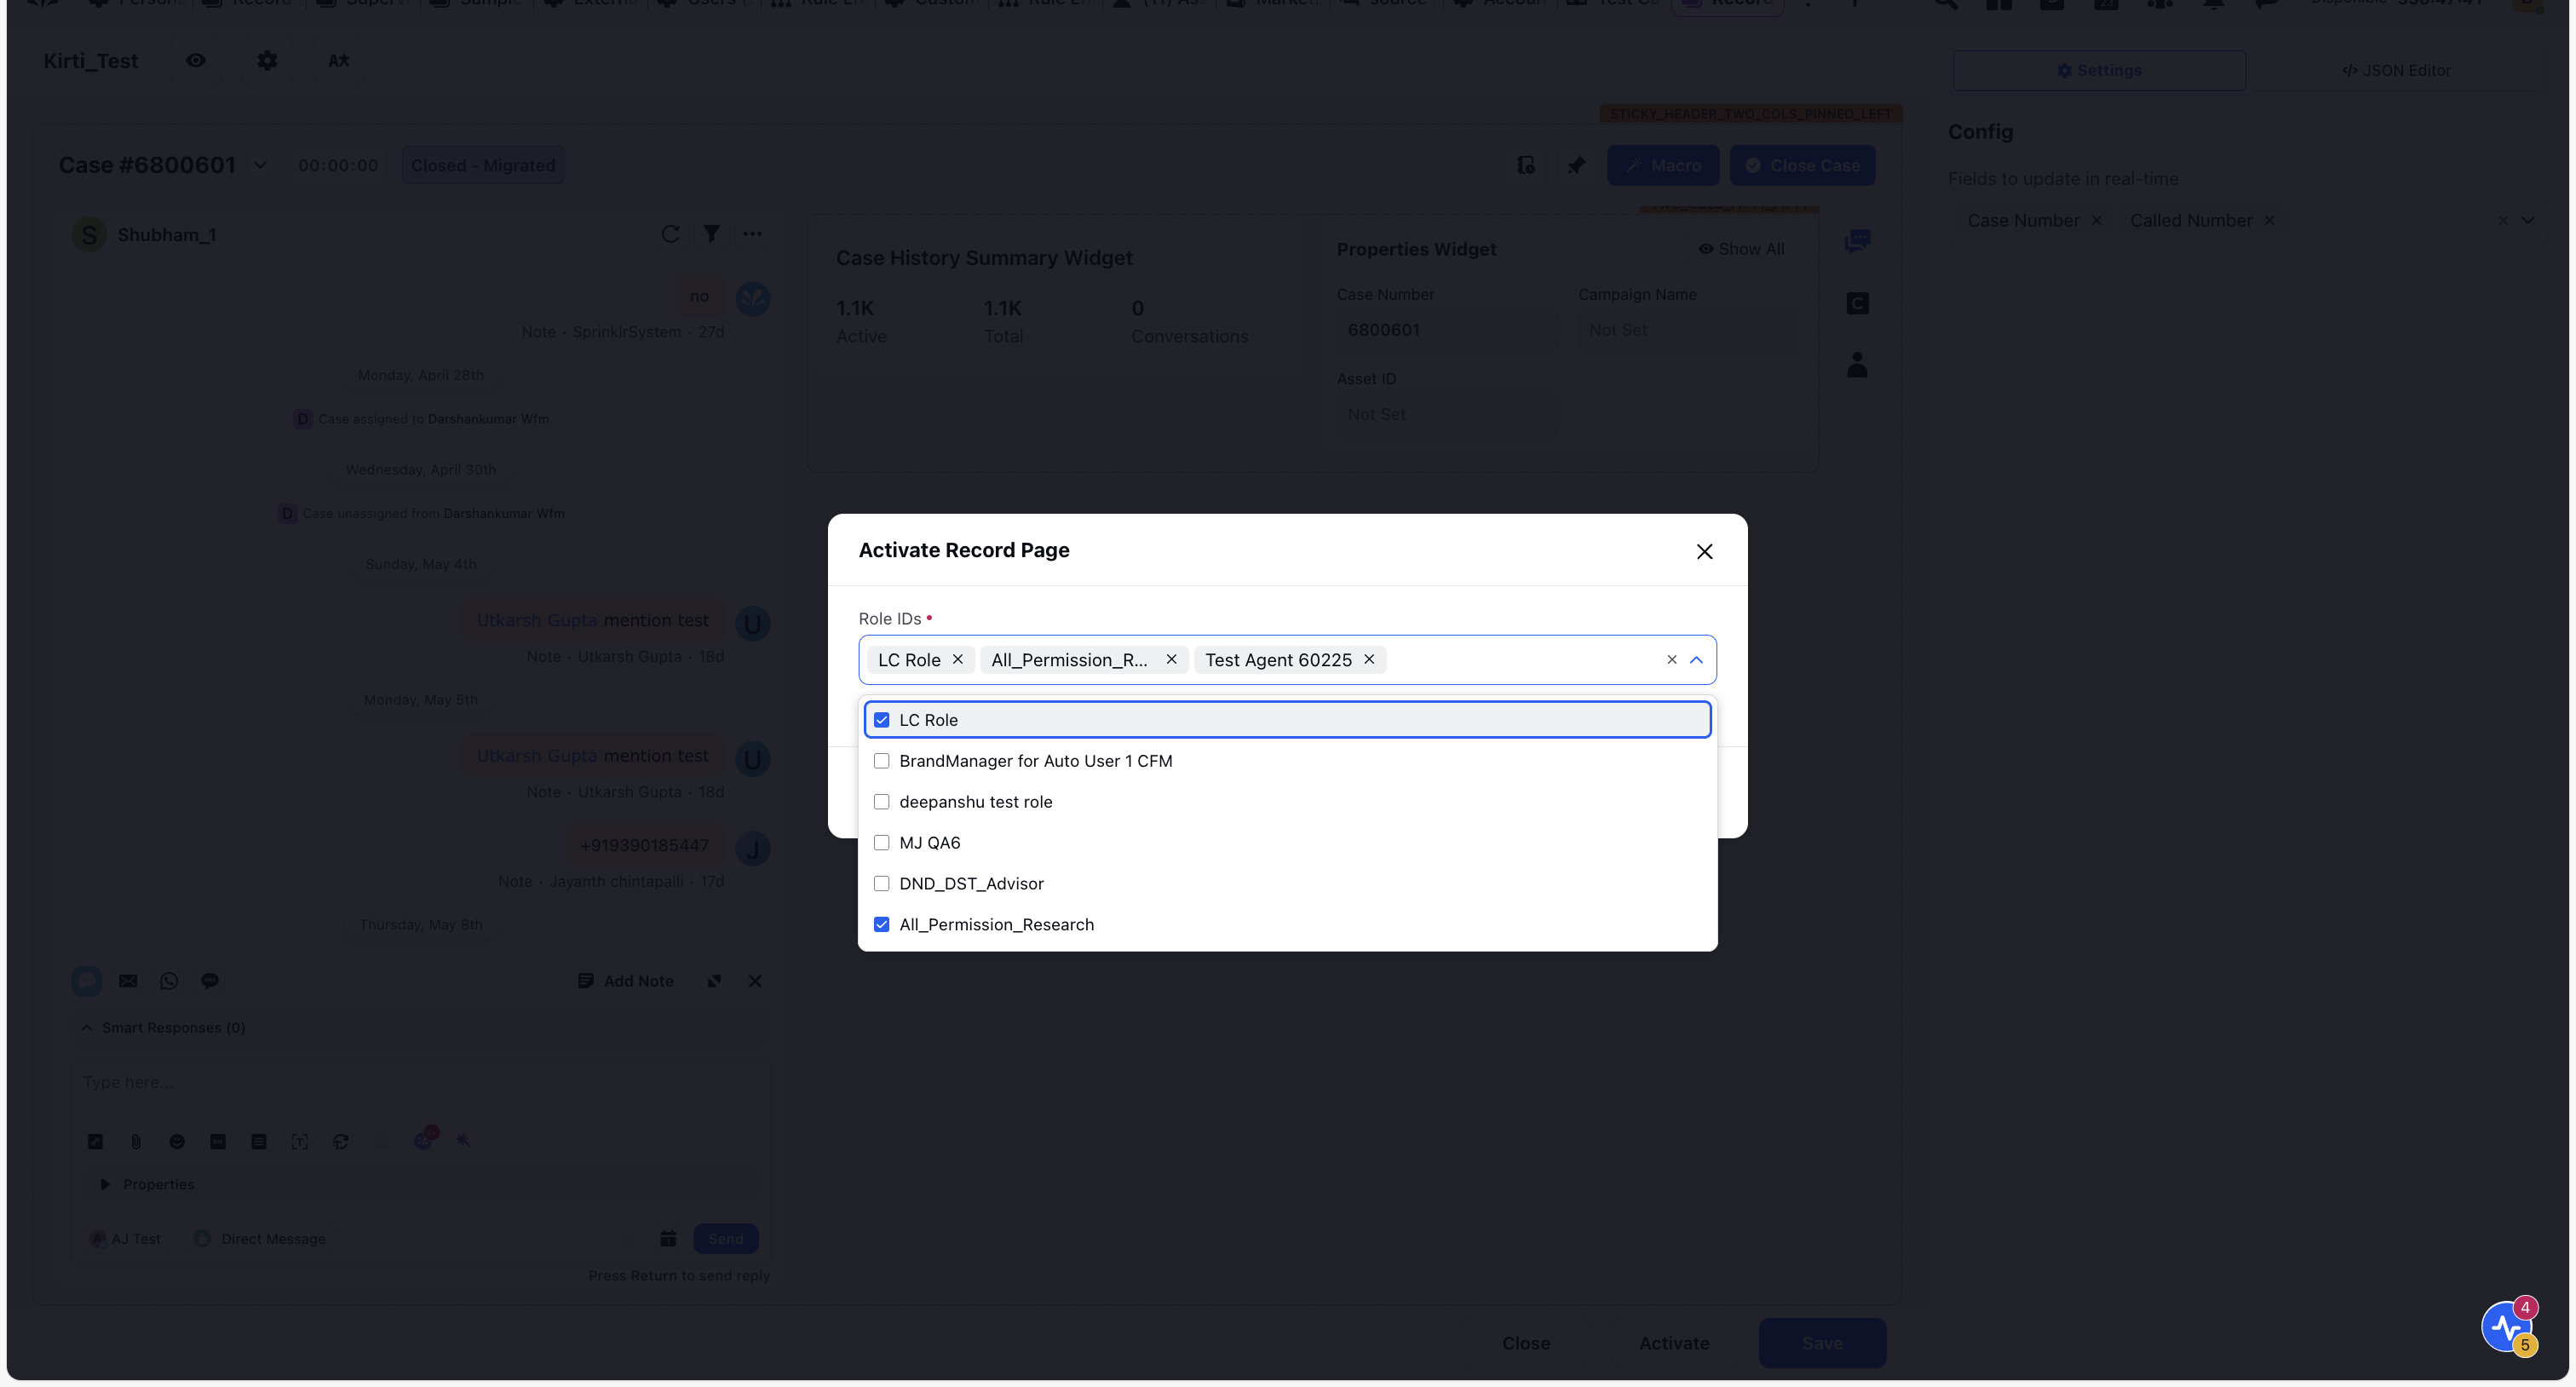
7. Under Role IDs, select the roles you want to share the layout with.
You can choose multiple roles to apply the layout to all relevant users.
8. (Optional) In Advanced Settings, you can define additional filters to control access based on custom field values.
Select the custom field, operator, and the custom field value based on which the layout is displayed.
9. Once done, click Activate.
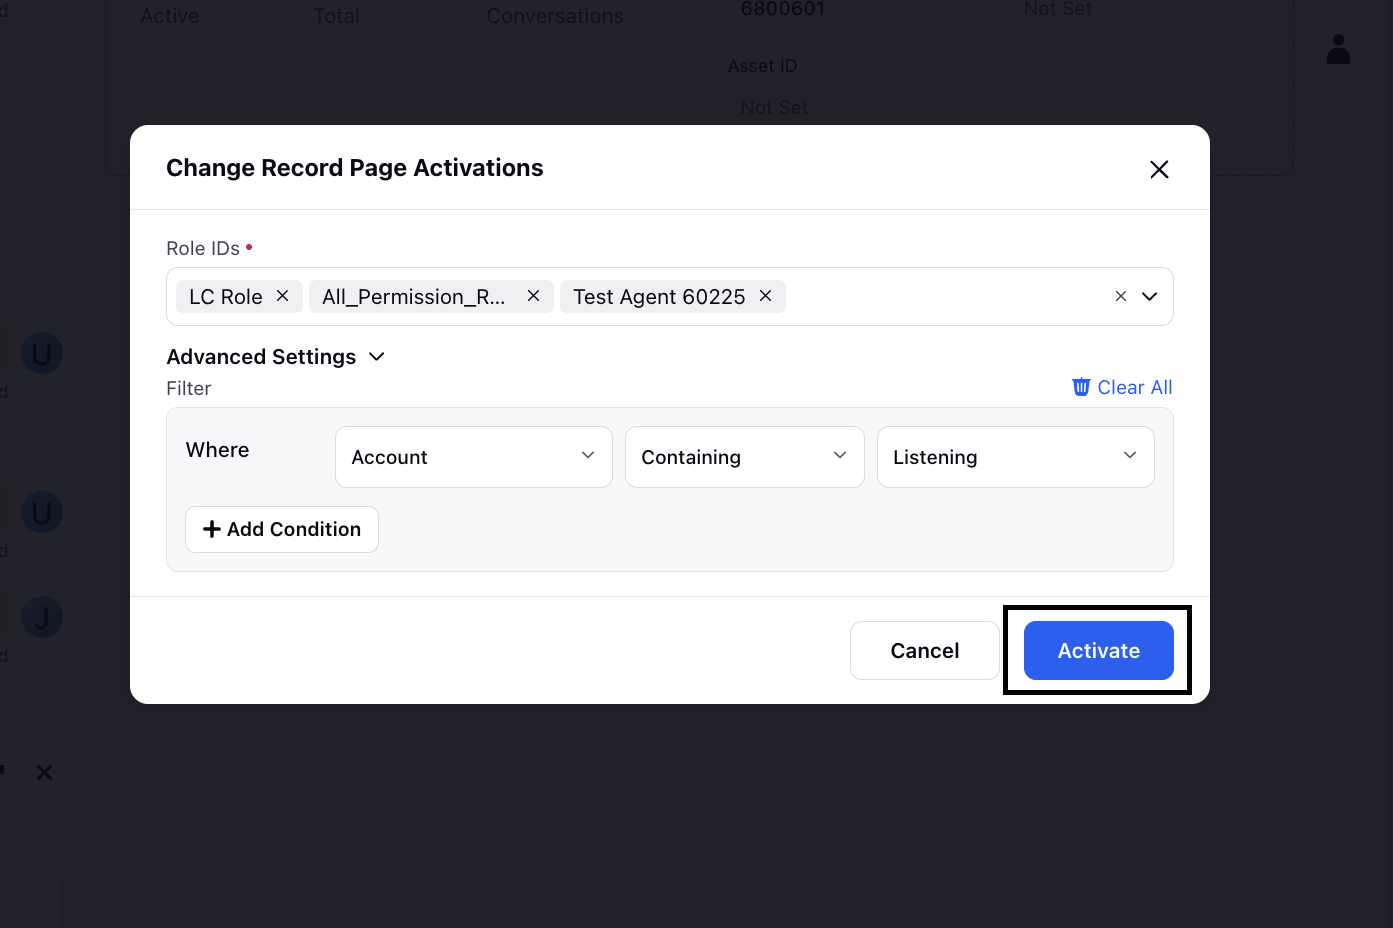
You have now successfully shared the layout with the selected roles and custom fields.
Configure Persona App-Specific Layouts
You can configure different case record page layouts for different persona apps. This allows the same user to view the same case with different layouts depending on the persona app from which the case is accessed.
 Note: Access to this feature is controlled by the ENABLE_GRANTS_BASED_CASE_LAYOUTS_FOR_PERSONA_APPS dynamic property (DP). To enable this feature in your environment, contact your Success Manager. Alternatively, you can submit a request to tickets@sprinklr.com.
Example
A user accesses the same case from two different persona apps:
Persona App A
Persona App B
For the same case record, the user can view Layout A in Persona App A and Layout B in Persona App B.
Configuration
Open the Entity Studio persona app.
In the left navigation pane, click Record Pages.
Locate the record page that you want to use as the layout.
Click the More Options (three-dot) icon alongside the record page, and then select Edit Activations.

In the activation settings, select the persona app for which you want to activate the record page.

Click Activate & Publish.
The layout is now configured for the selected persona app. Repeat the process to assign different layouts to other persona apps as needed.