Message Node
Updated
Overview
The Message node is used to automate chatbot responses to users by retrieving and delivering pre-defined messages. It enables quick, consistent replies, helping streamline conversations and improve response time.
Steps to Add a Message Node
On the Journey Builder window, click the Plus icon and add a Message node. You will see two options for adding a Message node - Text and Chat Templates.
For Text:
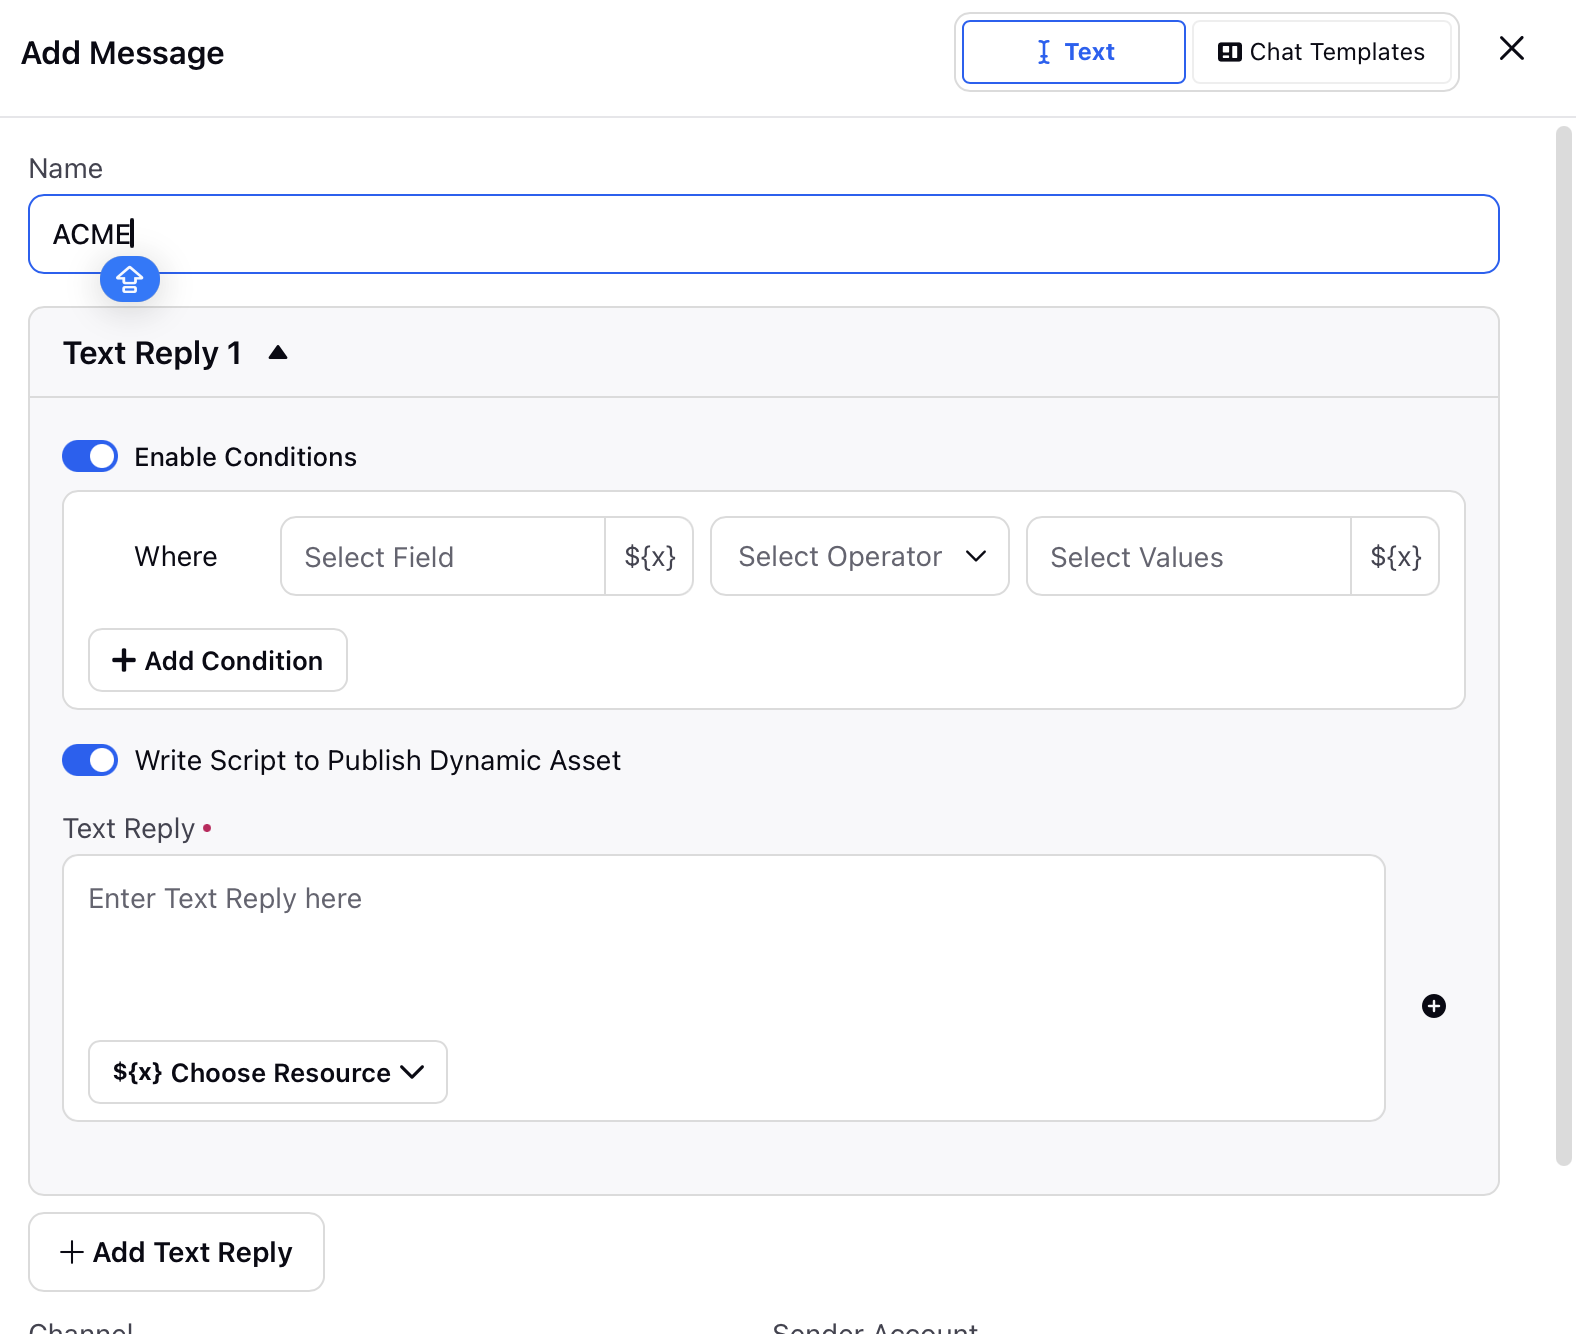
1. On the Add Message window, enter a Name and Text Reply. You could also add another message by clicking Add Text Reply.
2. Additionally, you can Enable Conditions to add conditions to each of your responses, so that a specific reply is given when a particular condition is met.
3. Toggle on Write Script to Publish Dynamic Asset for publishing a code, as the field will read the response as a code, not as a text or string.

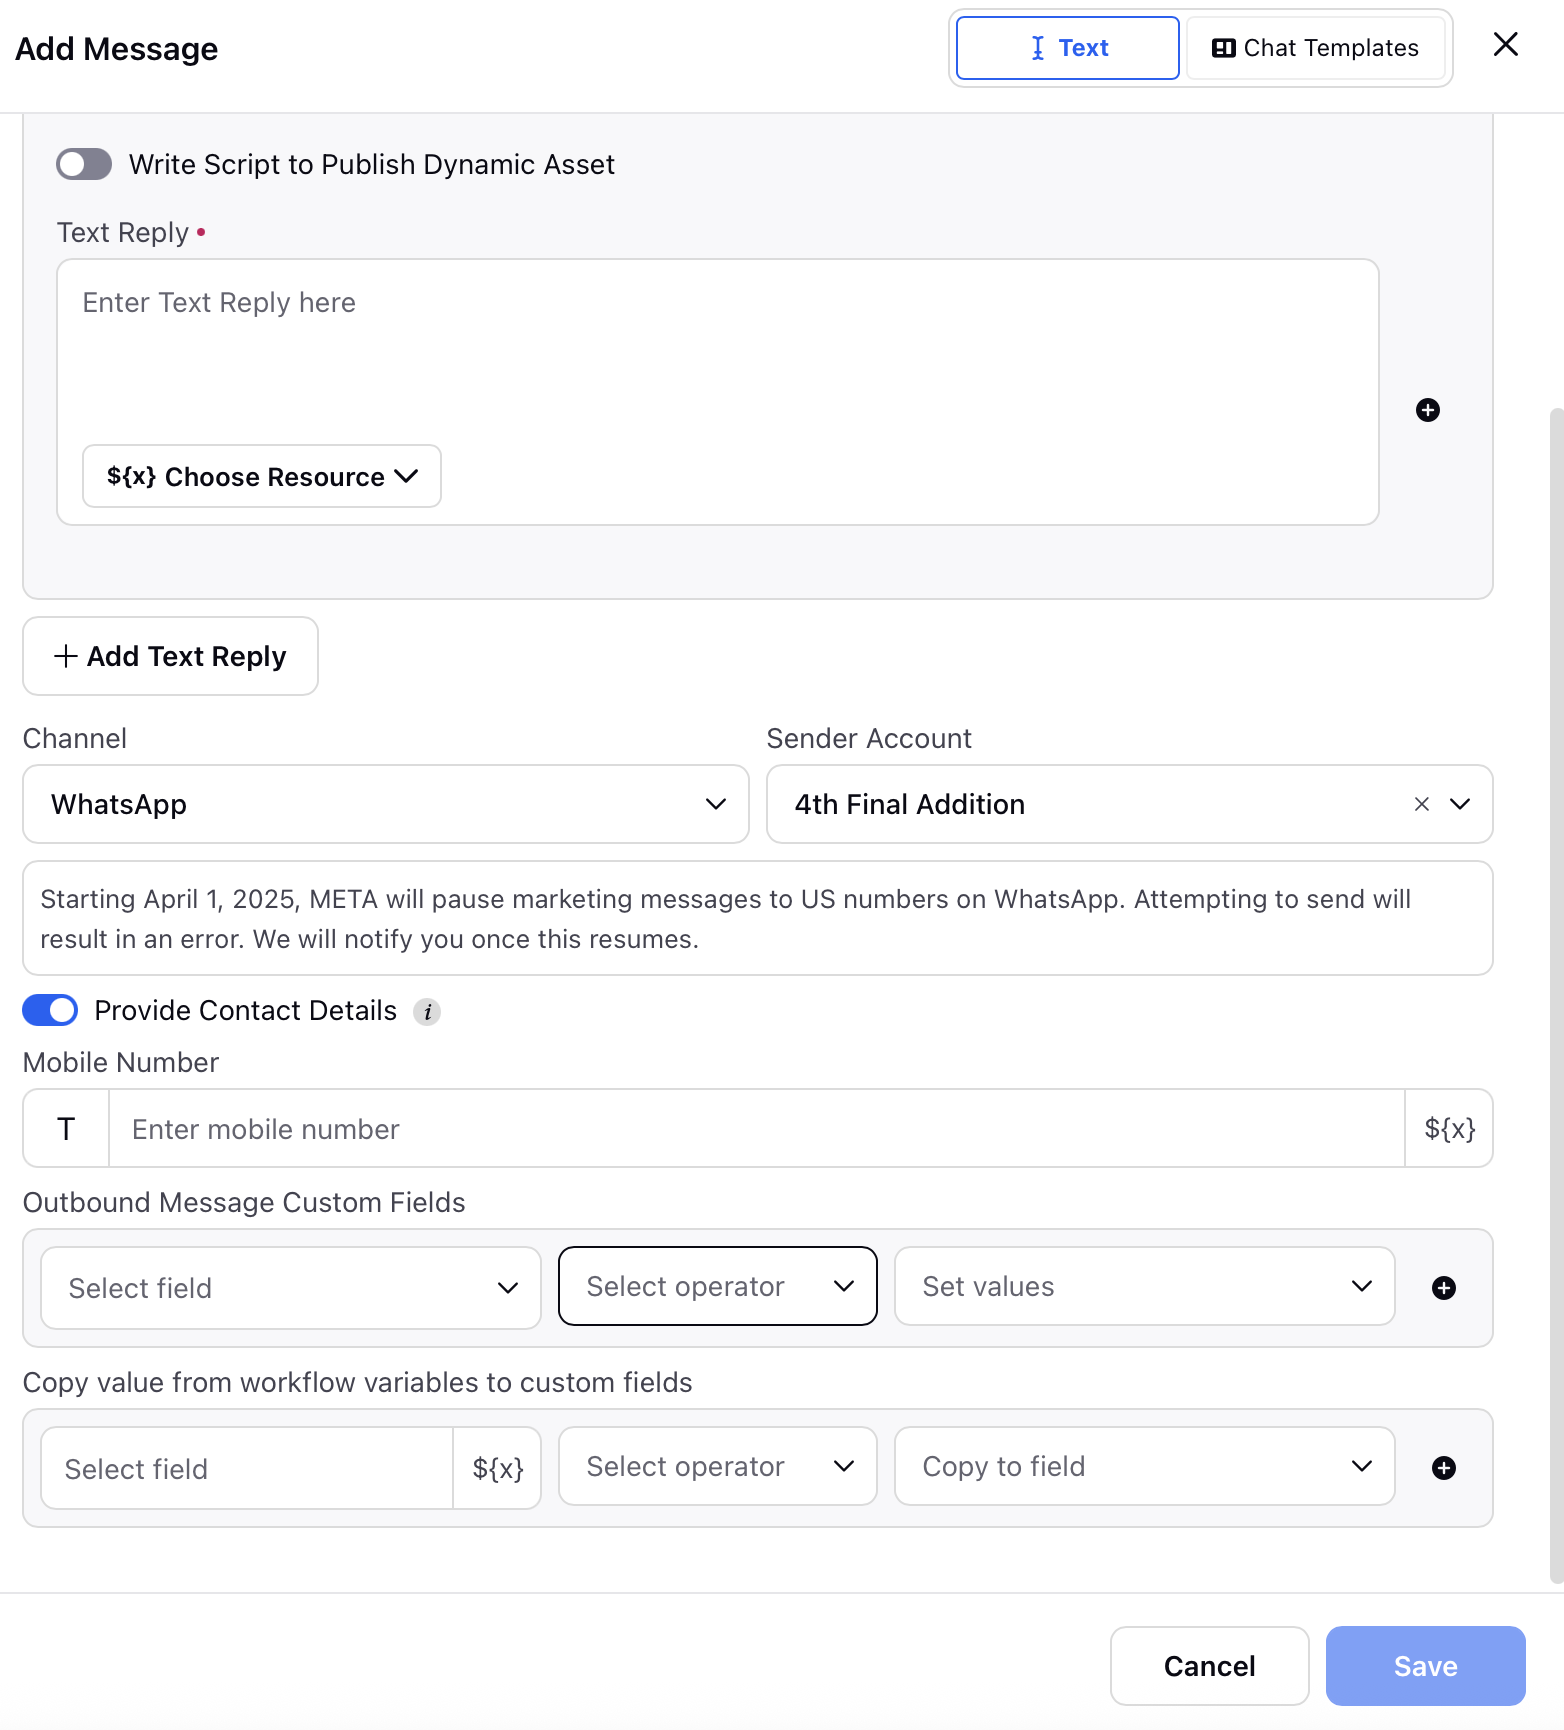
4. Select the Channel and Sender Account.
5. Enable the Provide Contact Details toggle to manually specify a different contact (e.g., phone number, email) to send the message to, because by default, the message is sent to the profile on which the journey is triggered.
Note: You can either type the contact manually, or if it is in a placeholder, you can select it by clicking the ${x} icon.
6. If you have to set the Outbound Message Custom Fields, you can select the Field, Operator, and Values using this field.
7. If you have to copy the Outbound Message Custom Fields from a placeholder, use the Copy value from workflow variables to custom fields. Select the Field,Operator, and Copy to Field action.

8. Click Save in the bottom right corner.