Configuration of Secure Forms
Updated
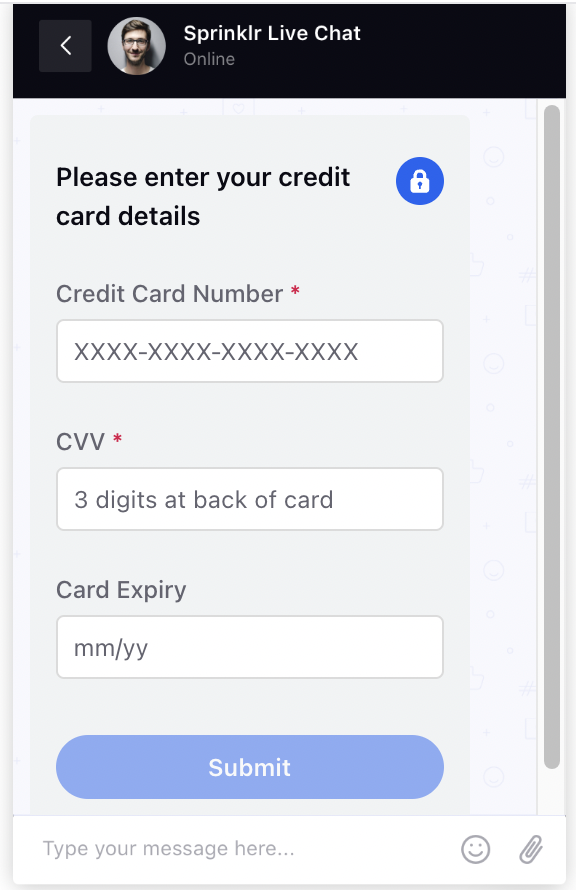
On PCI-compliant Sprinklr Live Chat, you can send Secure Forms that allow for sensitive and confidential information to be passed from a customer to an agent within a secure environment. For example, customers might need to provide their credit card information or PII information as a part of an identity validation process.
You can create a Secure Form template in Digital Asset Management and send it to customers at any time during a conversation, to collect requested data confidentially. The secure forms help in mitigating the risk of unapproved or fraudulent data access.
Enablement note: To learn more about getting this capability enabled in your environment, please work with your Success Manager. |
Create a Secure Form
To create a secure form, follow these steps:
1. Click the New Page (+) icon to open the Launchpad.
2. In the Sprinklr Social tab, under Engage > Digital Asset Management, and click Assets.

3. In the top-right corner of the Asset Management window, click Create Asset.

4. From the dropdown menu, select Templates > Omni Chat Templates.
This opens the Create New Asset window.

5. In the Basic Details section, enter a Name and optional Description for your asset.
6. In the Asset Specific section, select the following:
Channel: Select Sprinklr Live Chat
Template Type: Select Secure Form

7. In the Secure Form section, enter Secure form title. This title will be displayed at the top of the form.
8. Add the fields to the form. Click Add New Field to include form fields.
For each field, you can also configure the following:
Field | Description |
Type | Select the type of input field: Checkbox, Checkbox Group, Email, Phone, Text, Number, Credit Card Number, Credit Card CVV, Credit Card Expiry, Date, Password |
Field name | Field name is a unique indentifier that can be used as a reference to the value of this field. This is auto-generated but must be present for every field. |
Label | The visible name of the field shown to users. This appears above the input field. |
Help text | Optional supporting information shown when users hover over the ( This helps users understand what the field is for or how to fill it correctly. |
Mark field as mandatory | Enables validation to ensure the field is filled out. Select the Required option to make the field mandatory. |
Placeholder | Greyed-out text inside the input field that provides a hint or example of the expected input. |
Field validation using regular expression (RegEx) | Allows advanced input validation using regular expressions (RegEx). This ensures the data entered meets specific formatting or value criteria. Using RegEx validation improves data quality by enforcing correct formats for inputs like email, phone numbers, or custom patterns. |
9. Configure the Submit button fields:
Field | Description |
Submit button text | Text displayed on the submit button. |
Enter the post back submit title | The message displayed after successful form submission (for example, “Thank you”). |
Make external callback on submit | Enable this if your system, rather than Sprinklr, will handle submitted data. |
External Action Name | Name of the external action (if applicable). |
Hide post submission image | Hides the checkmark icon that appears after submission.
|

10. Add a Cancel button.
This enables users to exit the form and proceed with the workflow if they choose not to provide the requested information.
Field | Description |
Enable cancel button | Select this checkbox if you want to add a cancel button to your form. |
Enter the cancel button text | Text displayed on the cancel button (for example, Cancel, Go Back). |
Enter the post back cancel title | Title shown after the user cancels the form. |
Enter the post back cancel message | Message displayed after the form is canceled (for example, “Your form has been canceled”). |
10. Add translations for the asset, if needed. For steps, see Add Translations for Your Secure Form.
11. Under Asset Details, select Campaigns, Sub Campaigns, Status, Available from, Visible from, Expires on, Tags, Restricted, Brands, Persona, Customer Journey Stage, Automated Tags, and Information.
12. Fill in the required fields under Asset Sharing and Properties.
13. Once all details are complete, click Save in the bottom-right corner.
Add Translations for Your Secure Form
Switch to the Translation tab and add languages from the top left corner.
Enablement note:
To learn more about getting this capability enabled in your environment, please work with your Success Manager.
Tabs for the added languages will appear at the top. Click on the desired tab to add the translations.

Go back to Editor and click Save at the bottom to save the translations.
Create a Secure Form with External Callback
To create a secure form with external callback, follow these steps:
When creating a secure form, ensure that each field added to the form has a designated Field name.

Enable the Make external callback on submit checkbox for your webpage to process the entered data externally rather than through Sprinklr.
Provide an External Action Name, which will serve as a unique identifier for the submitted secure form.

Send the Form
While setting the action to send an auto-response, from the dropdown corresponding to Choose Reply Template, select the secure form template that you want to send.