Configure Jira Connector
Updated
After the Jira and Sprinklr connection is established, you are redirected to the Jira connector page. On the Jira connector page, you can view and manage the Jira connector properties.
On the Jira connector configuration screen, you can do the following:
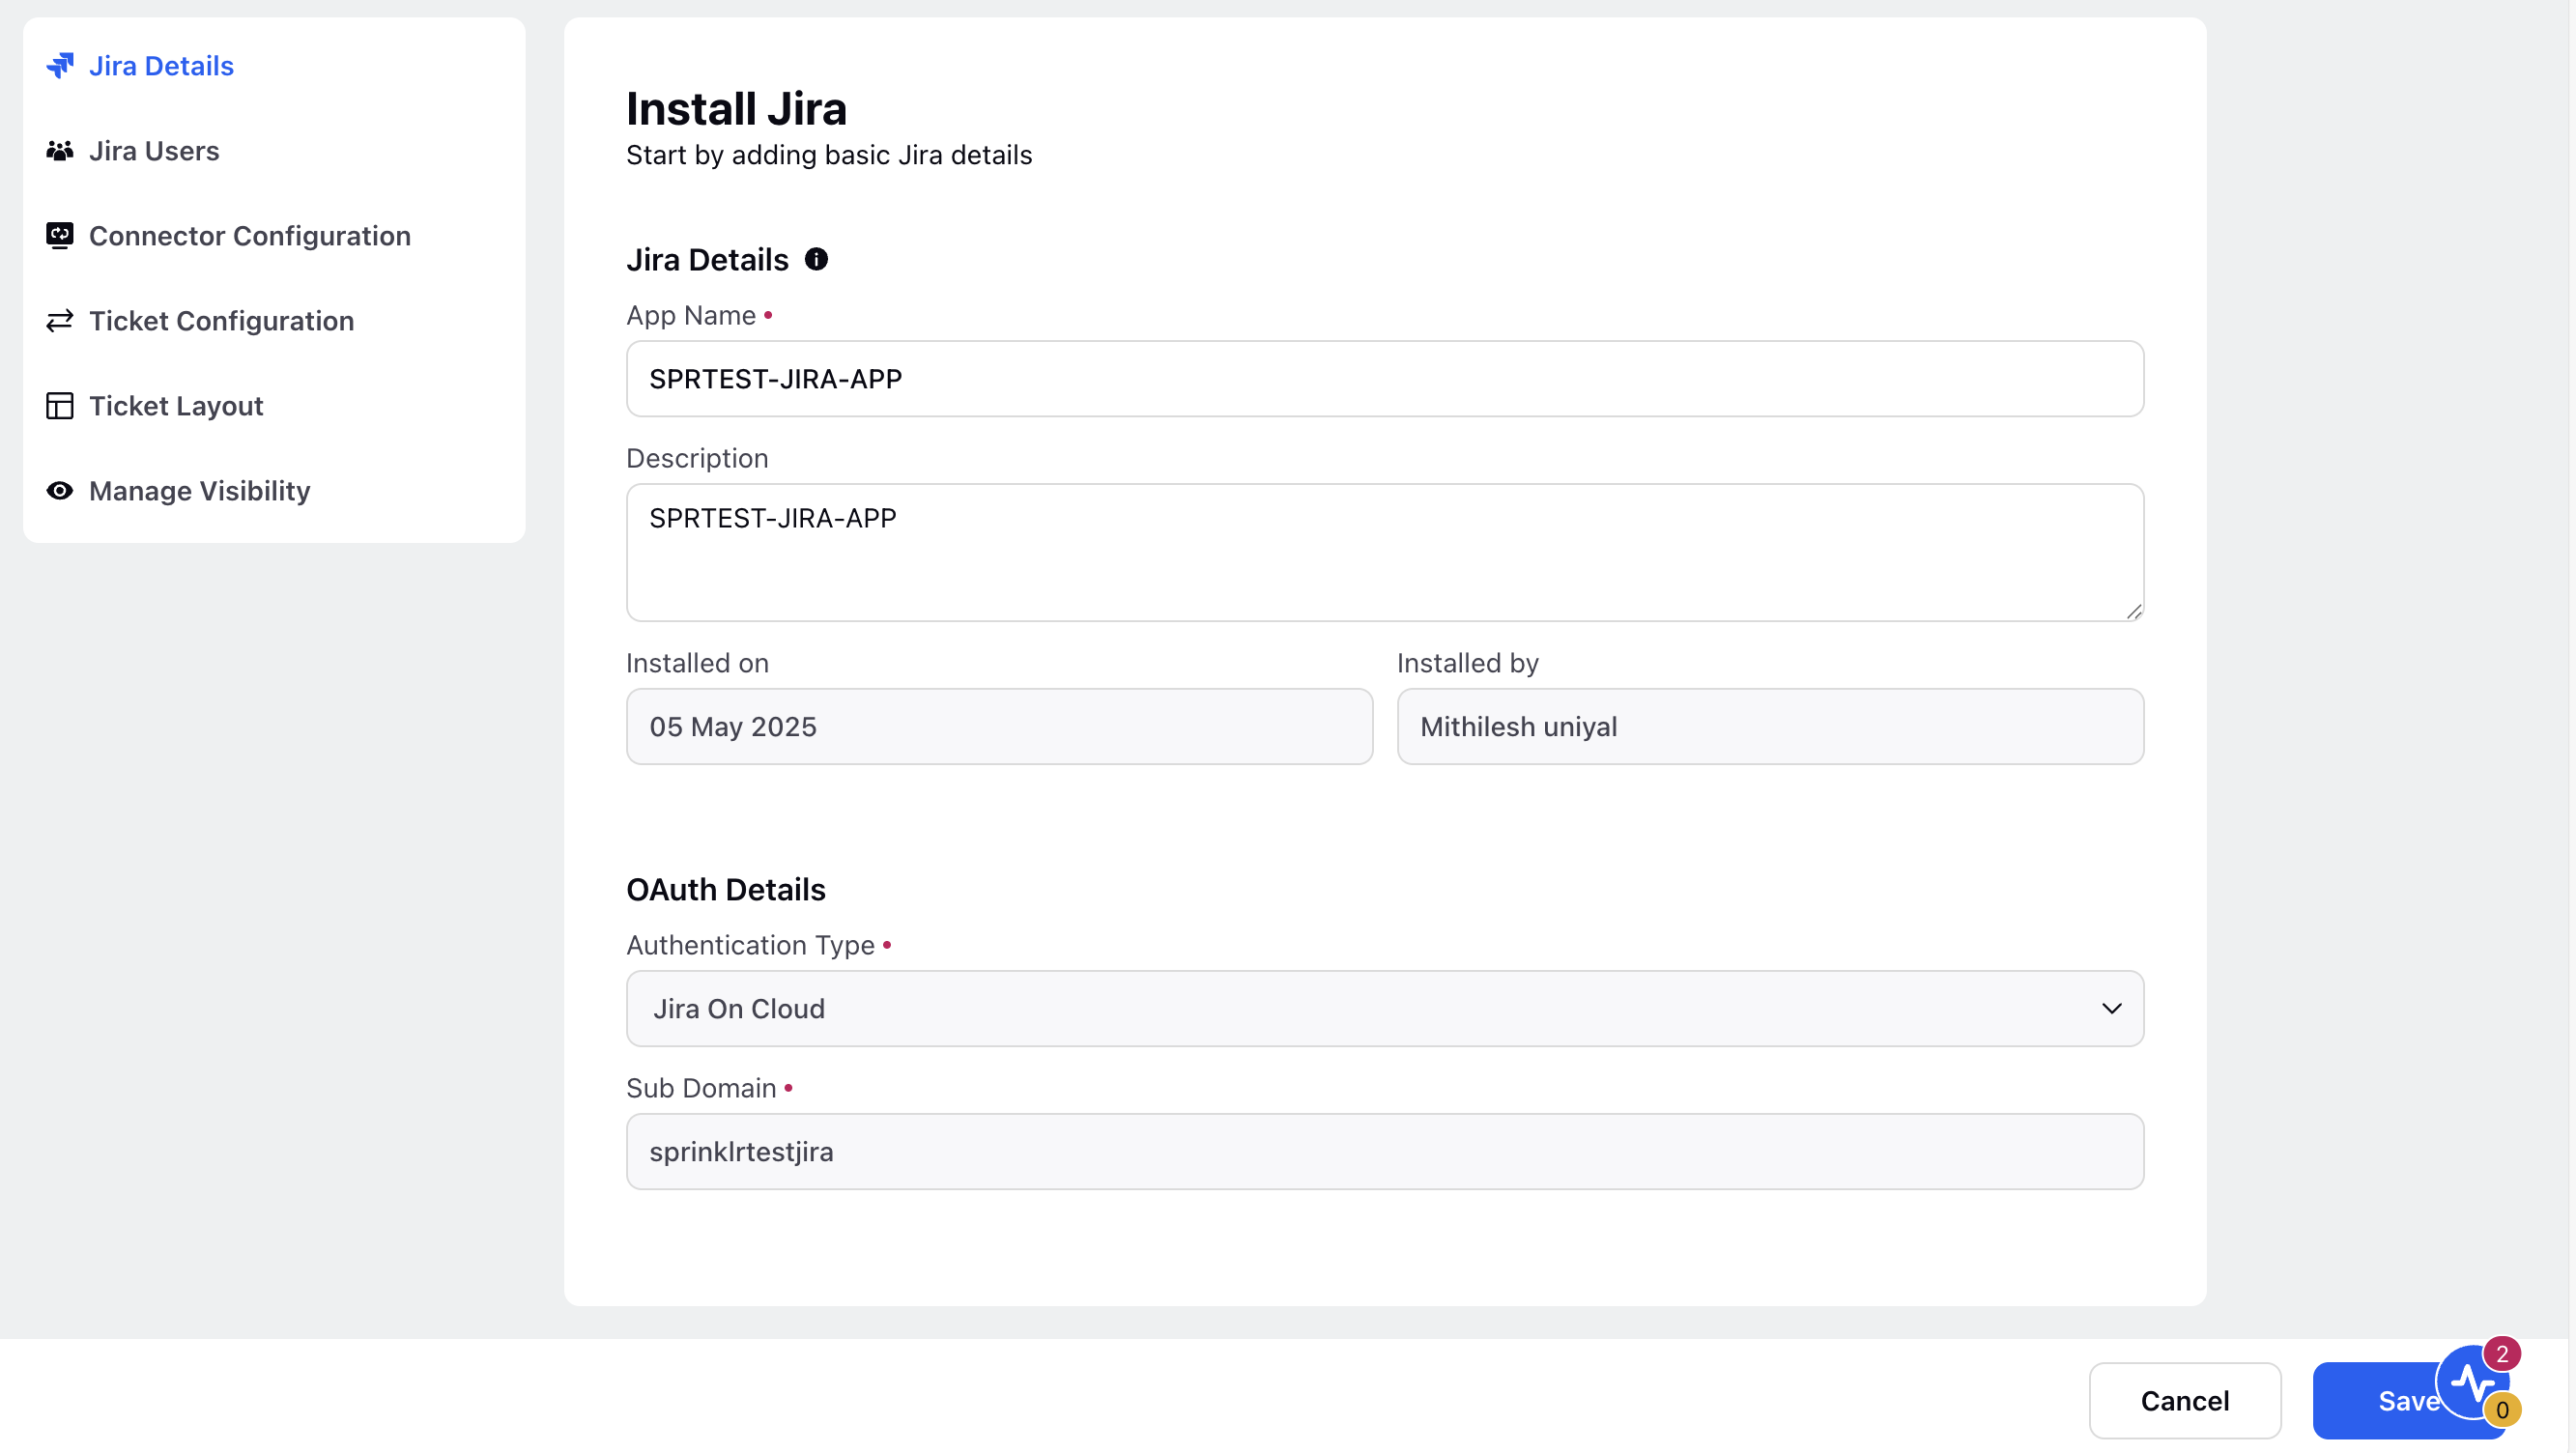
Jira Details
On this screen, you can view the app and OAuth details you provided during the installation. You can edit the app name and the description.
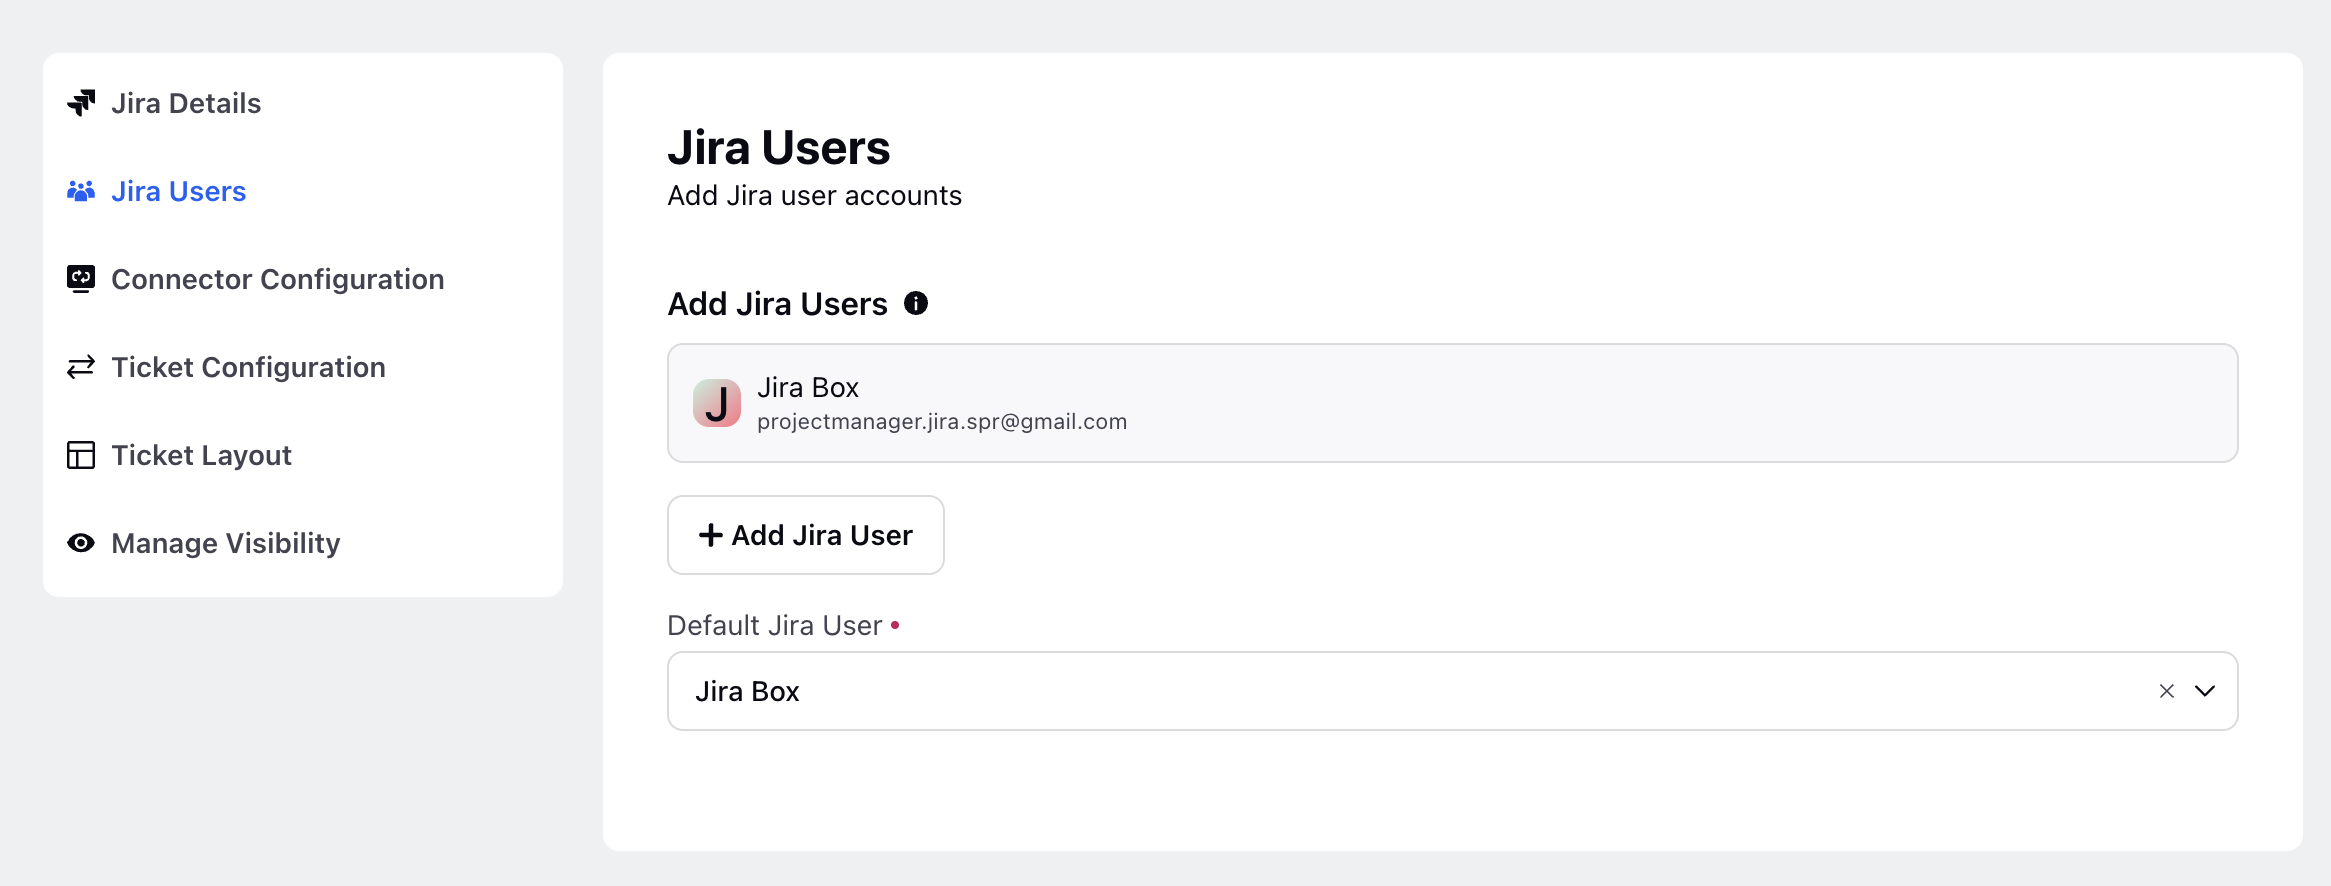
Jira Users
On this page, you can view the Jira users added for the integration. To add more users from the same Jira subdomain, click the Add Jira User button. You can select a default user from the Default Jira User dropdown.
![]() Note: If you add the same Jira user again using the Add Jira User button, the Jira screen will display the projects selected during the initial installation. You can add or remove additional projects from that screen as needed.
Note: If you add the same Jira user again using the Add Jira User button, the Jira screen will display the projects selected during the initial installation. You can add or remove additional projects from that screen as needed.
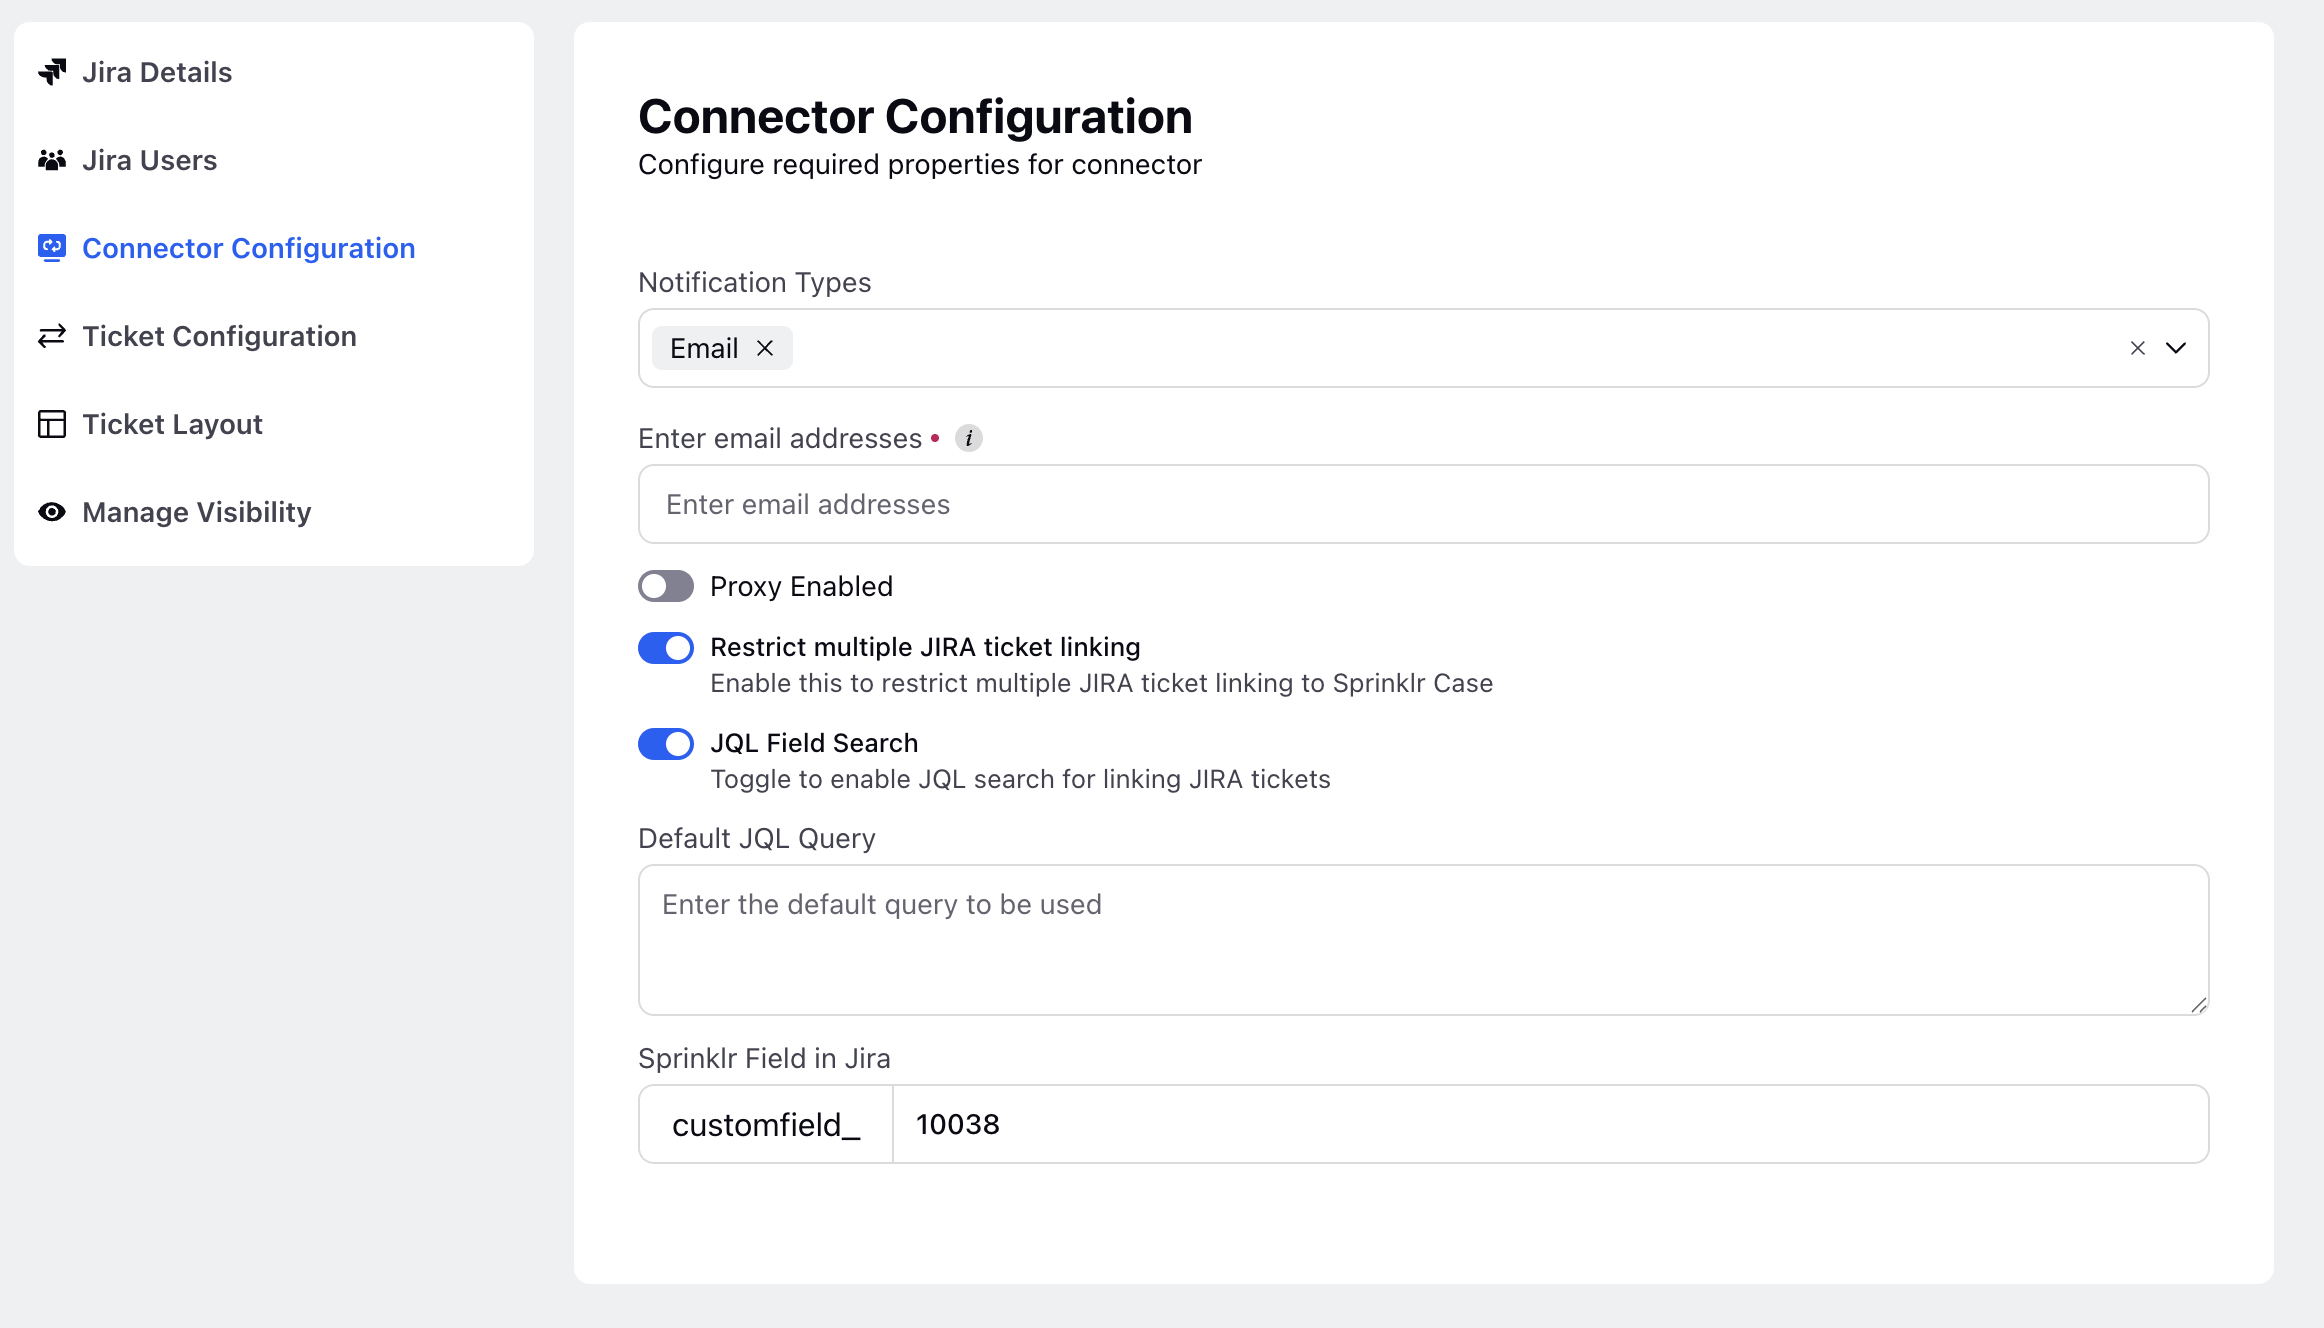
Connector Configuration
On the Connector Configuration screen, you can configure the following:
Notification Types: Select the notification type on which you want to get notified about ticket creation or updation failure.
Enter Email Addresses: Specify the email addresses to receive the notifications.
Proxy Enabled: If your Jira instance only allows API calls from whitelisted IPs, enable the proxy in the connector configuration and whitelist Sprinklr IP addresses.
Restrict Multiple Jira Ticket Linking: Control the many-to-many linking of Sprinklr cases and Jira tickets using this toggle. Enabling this will allow only one Jira ticket to be linked to one Sprinklr case.
JQL Field Search: Use this toggle to enable the use of JQL (Jira Query Language) to search for Jira tickets you want to link to Sprinklr cases.
Default JQL Query: Enter the default JQL query to be used for searching the Jira tickets.
Sprinklr Field in Jira: Enter the Id of the custom field created in Jira in the cutomfield_ box. This field is to be created in Jira to capture the Sprinklr case number linked to a particular Jira ticket.
Ticket Configuration
On the Ticket Configuration screen, you can map Jira ticket fields to corresponding Sprinklr case fields.
1. Click the Add (+) icon next to a field mapping row.
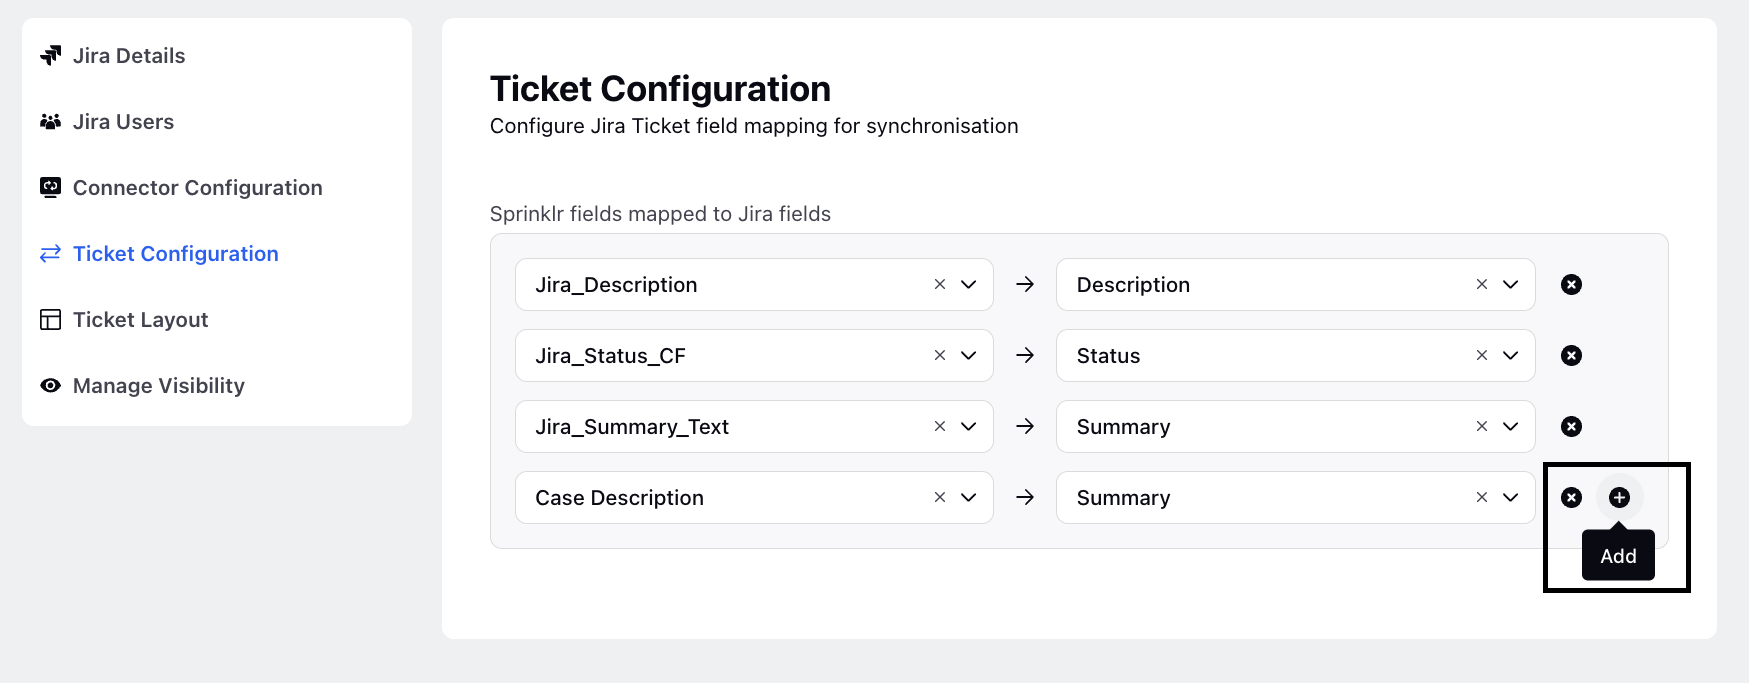
2. In the left drop-down menu, select a Sprinklr field.
3. In the right drop-down menu, select a Jira field.
4. Repeat these steps to map additional fields.
5. To remove a field mapping, click the Remove (x) icon next to the corresponding row.
6. Once done, click Save.
Ticket Layout
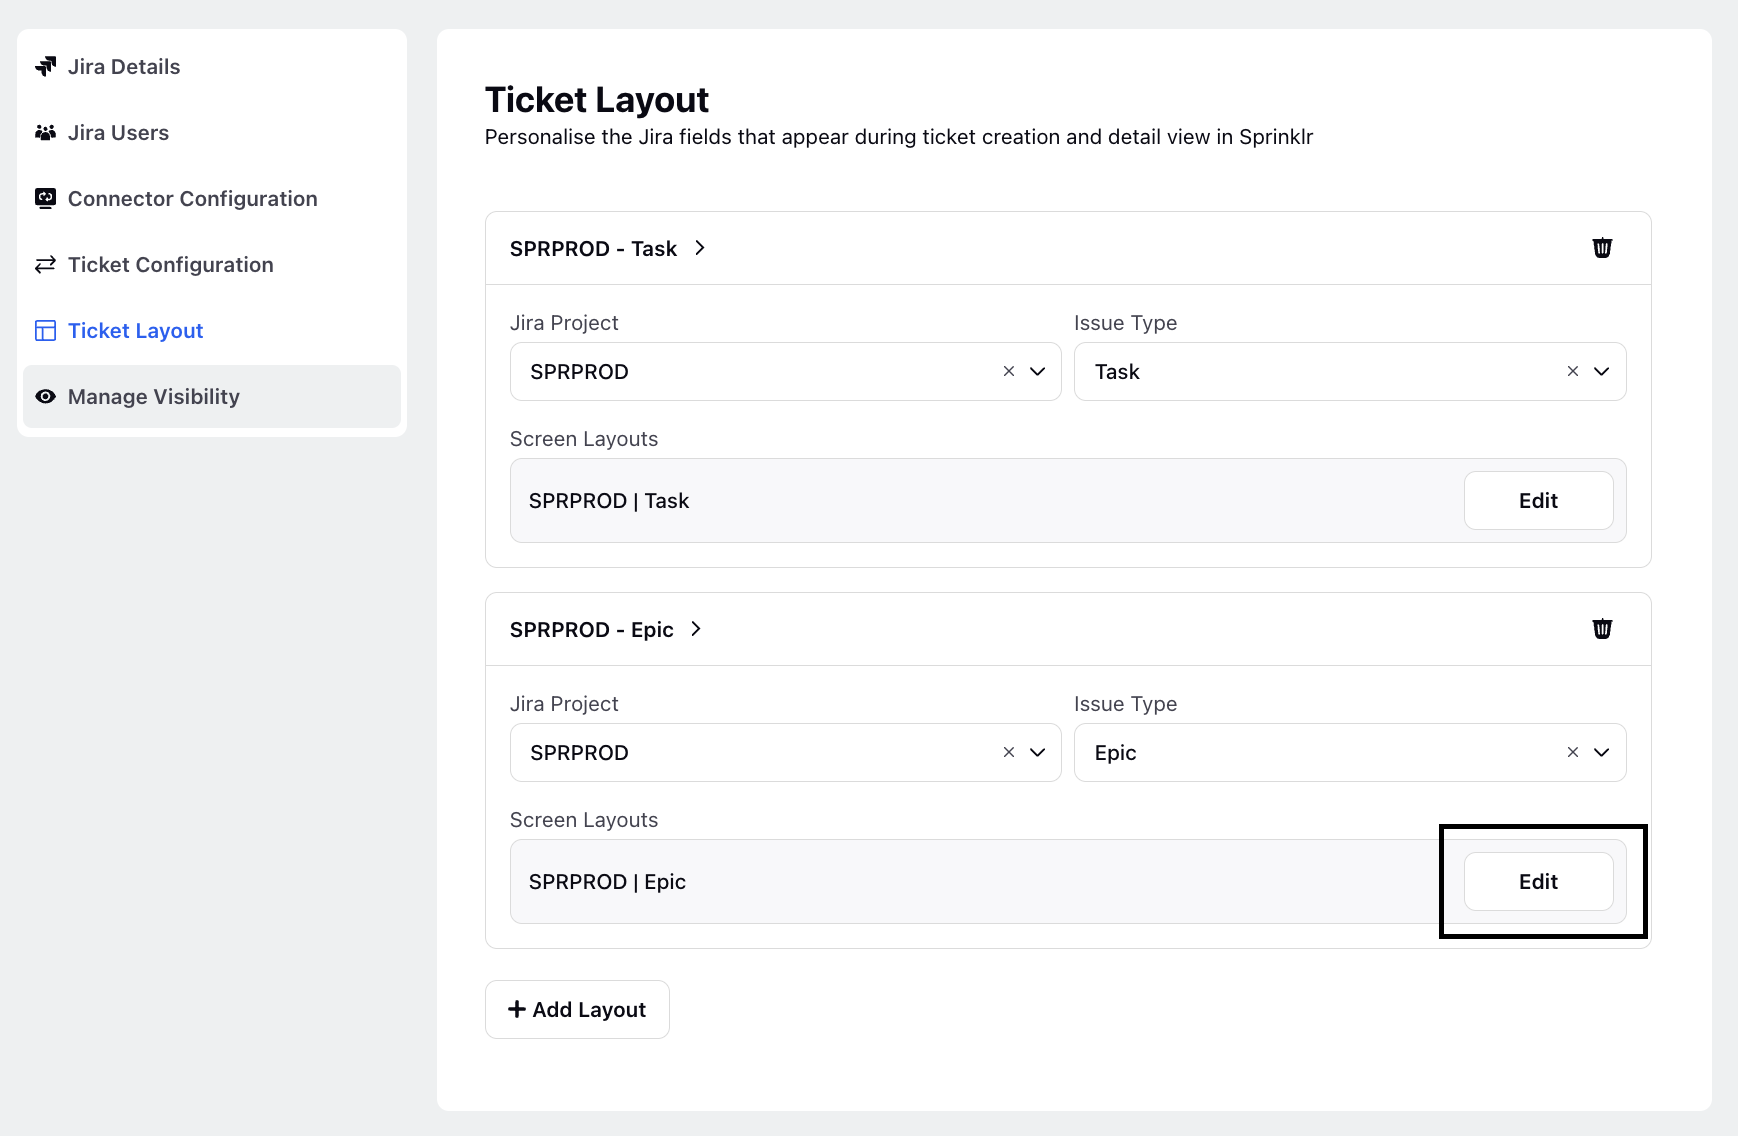
On the Ticket Layout screen, you can customize the layout for ticket creation and detail view screens in Sprinklr’s Care Console. This allows you to control which Jira fields are displayed during ticket creation and in the ticket detail view within Sprinklr.
To create a new layout, follow these steps:
1. Click Add Layout.
2. Select the appropriate Jira Project, then choose the Issue Type (for example, Epic, Bug, Sub-task, Story). The predefined screen layout for the selected issue type will be displayed.
3. To customize the layout, click Edit.
The Edit Layout screen is displayed.
4. Click Edit Fields. The screen displays the following key components:
Fields List: A list of available Jira fields.
Editable Fields: Fields that agents can modify.
Viewable Fields: Read-only fields that agents can view but not edit.
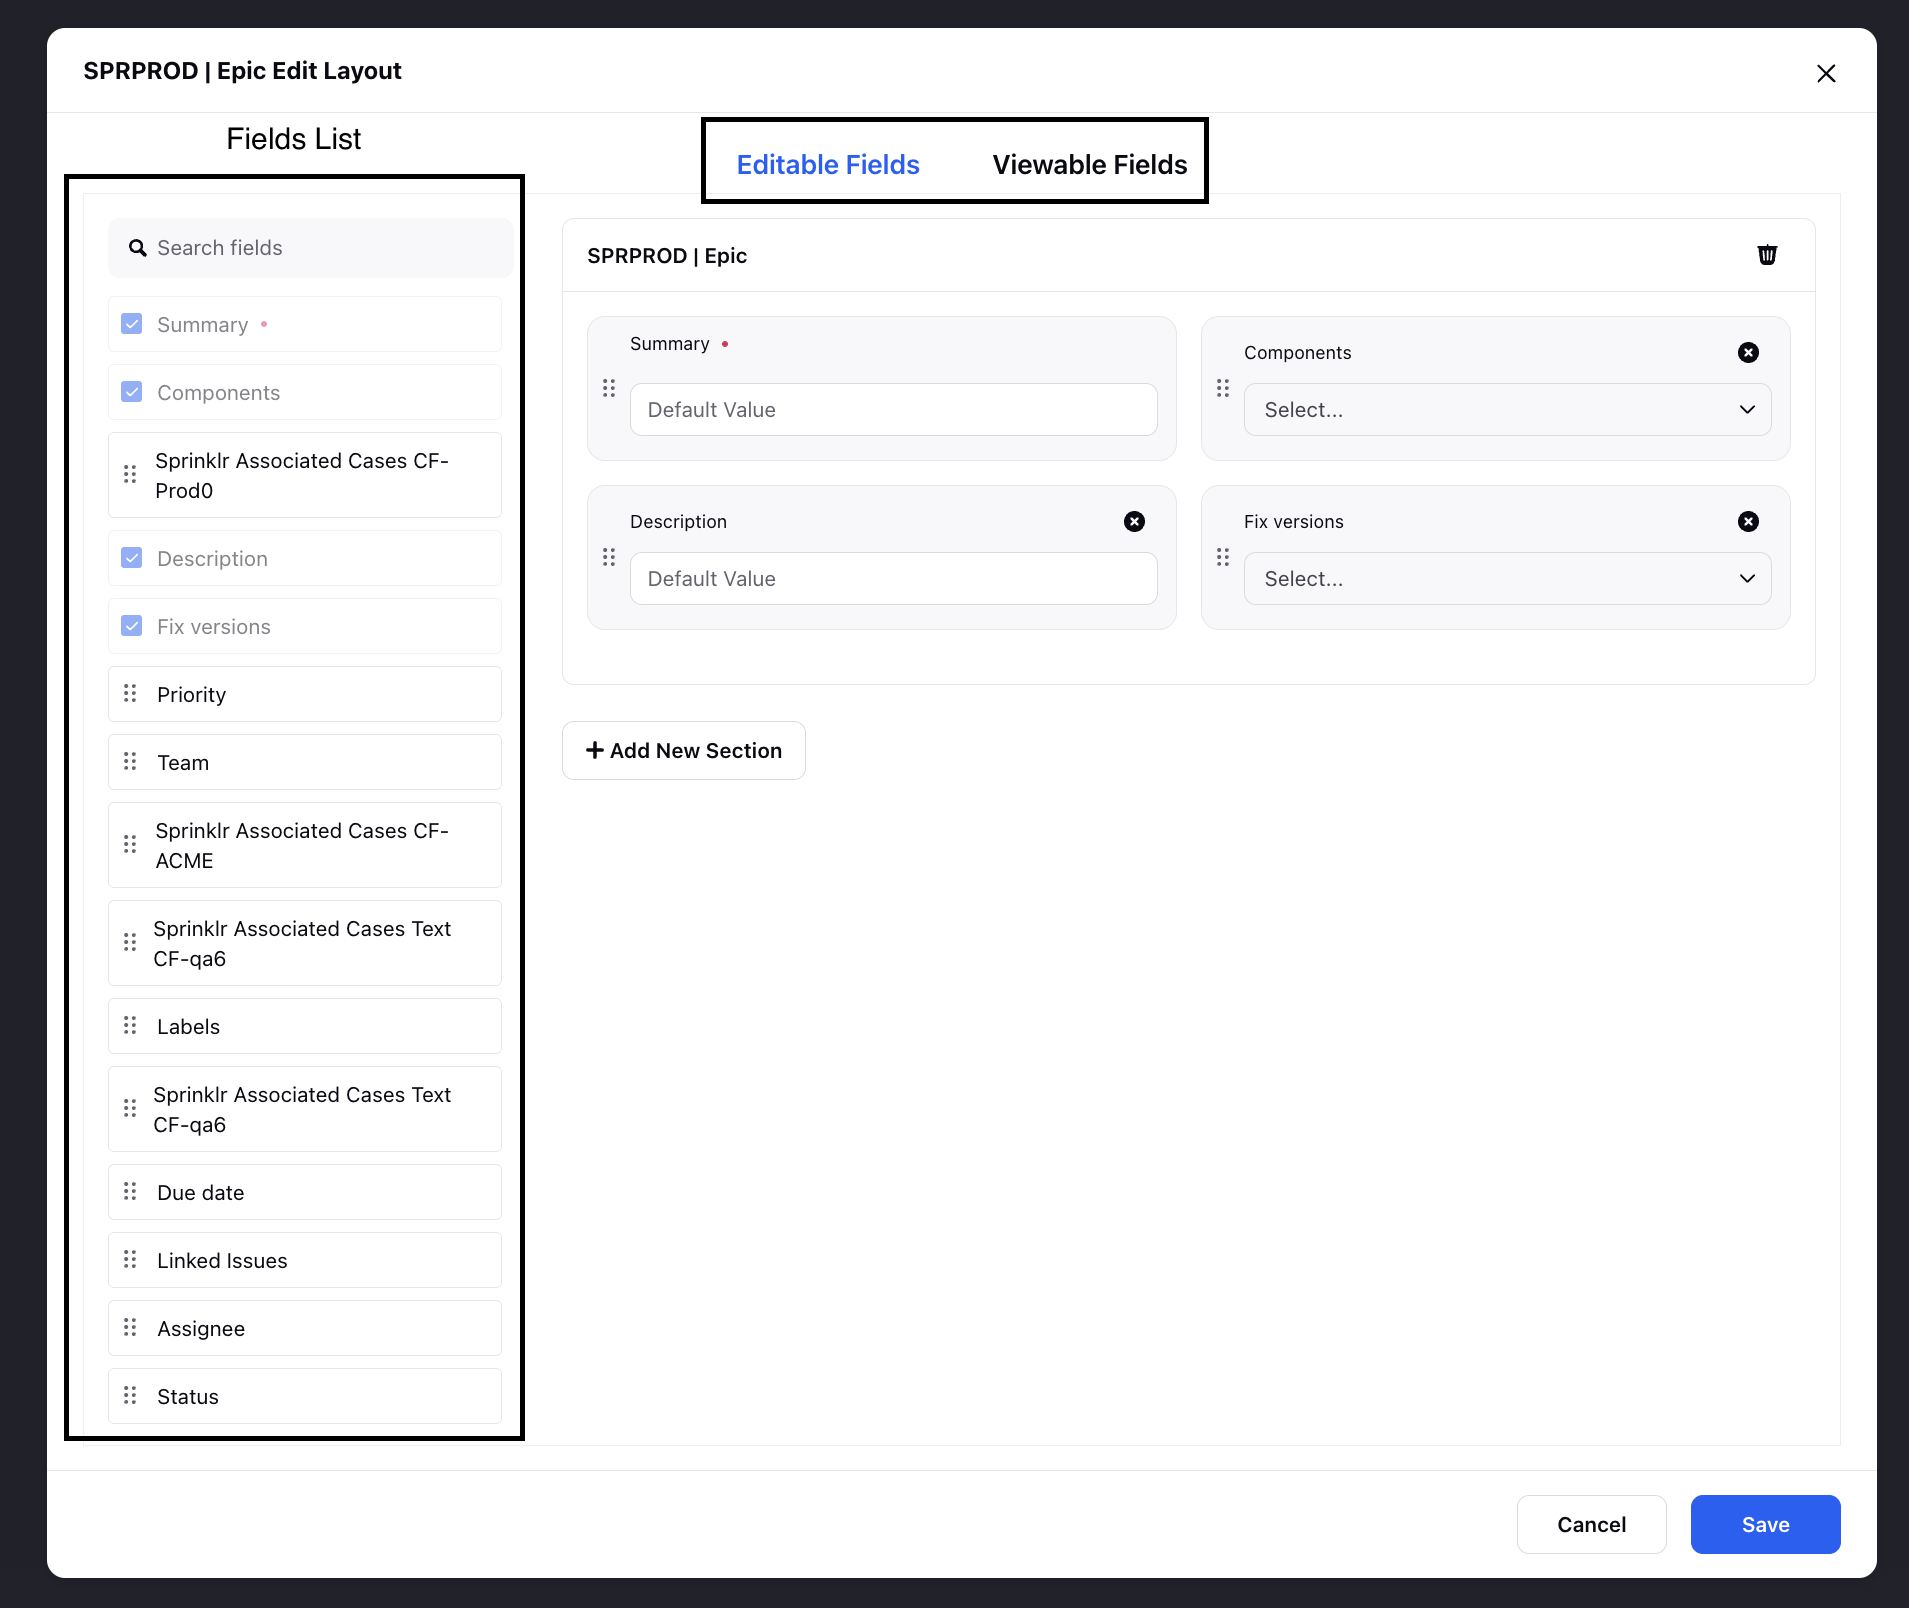
5. From the Fields List, drag and drop fields into the desired sections of the layout.
6. Set a default value for a field, if applicable.
7. To add a new section to the layout, click Add New Section.
A new section with a default name will appear. Rename the section as needed.

8. Once done, click Save.
Manage Visibility
On the Manage Visibility screen, you can select the workspaces, users, and user groups that have access to this connector. These users will be able to create Jira tickets and view status updates.
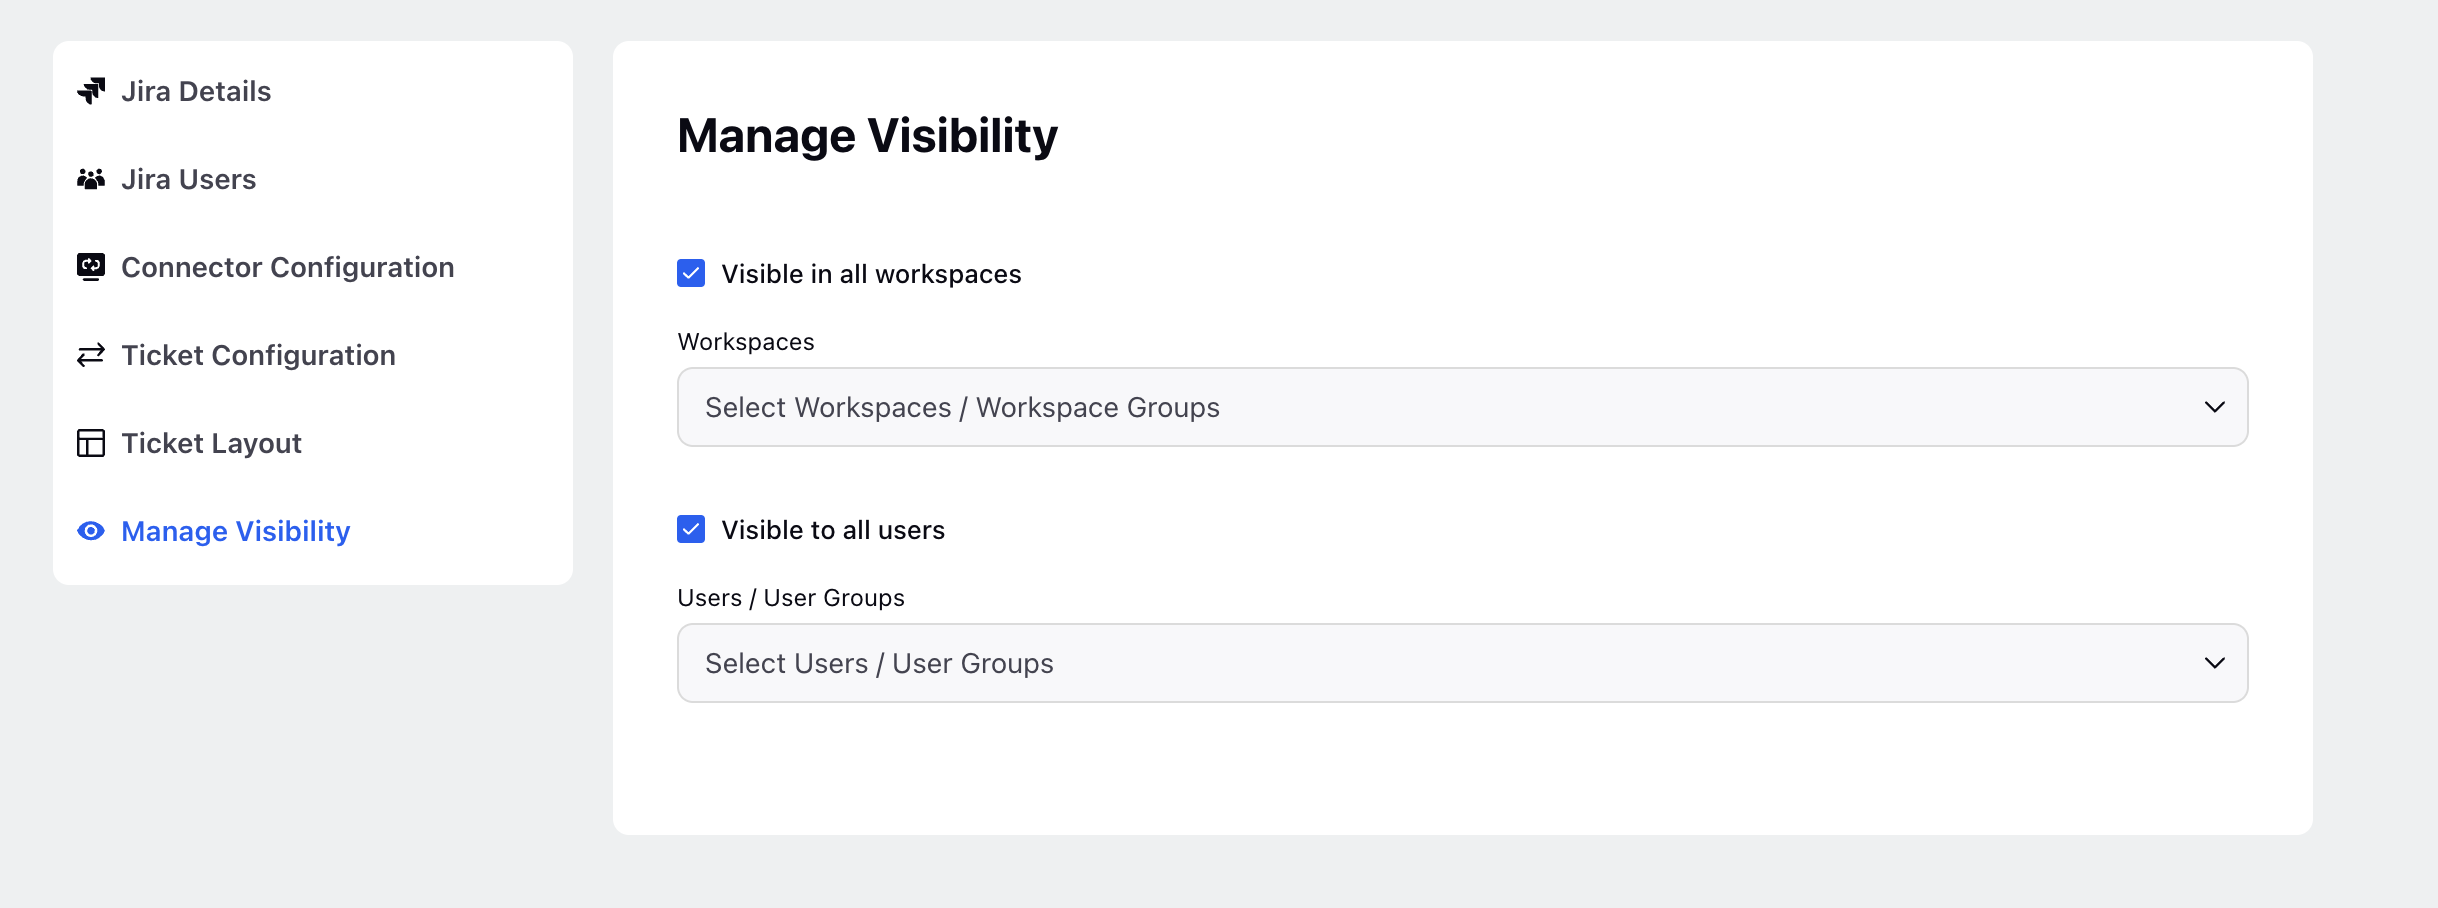
Once you have made all the configuration changes, click Save.
Next Step