Create or Link Jira Ticket
Updated
You can create a new Jira ticket for a Sprinklr case or link an existing Jira ticket directly from the Care Console. This guide provides step-by-step instructions on how to manually send create a Jira ticket for a Sprinklr case.
Prerequisites
Before you begin, ensure the following prerequisites are met:
You must have the necessary permissions to access the Care Console in Sprinklr.
Ensure that the Jira integration is properly configured in Sprinklr.
The case you wish to send should be available in the Care Console.
You must have necessary Role level permissions required to access Jira integration.
You must have access to the Jira instance to which the case is sent.
Create or Link Jira Ticket
To create or link a Jira ticket, follow these steps in Sprinklr:
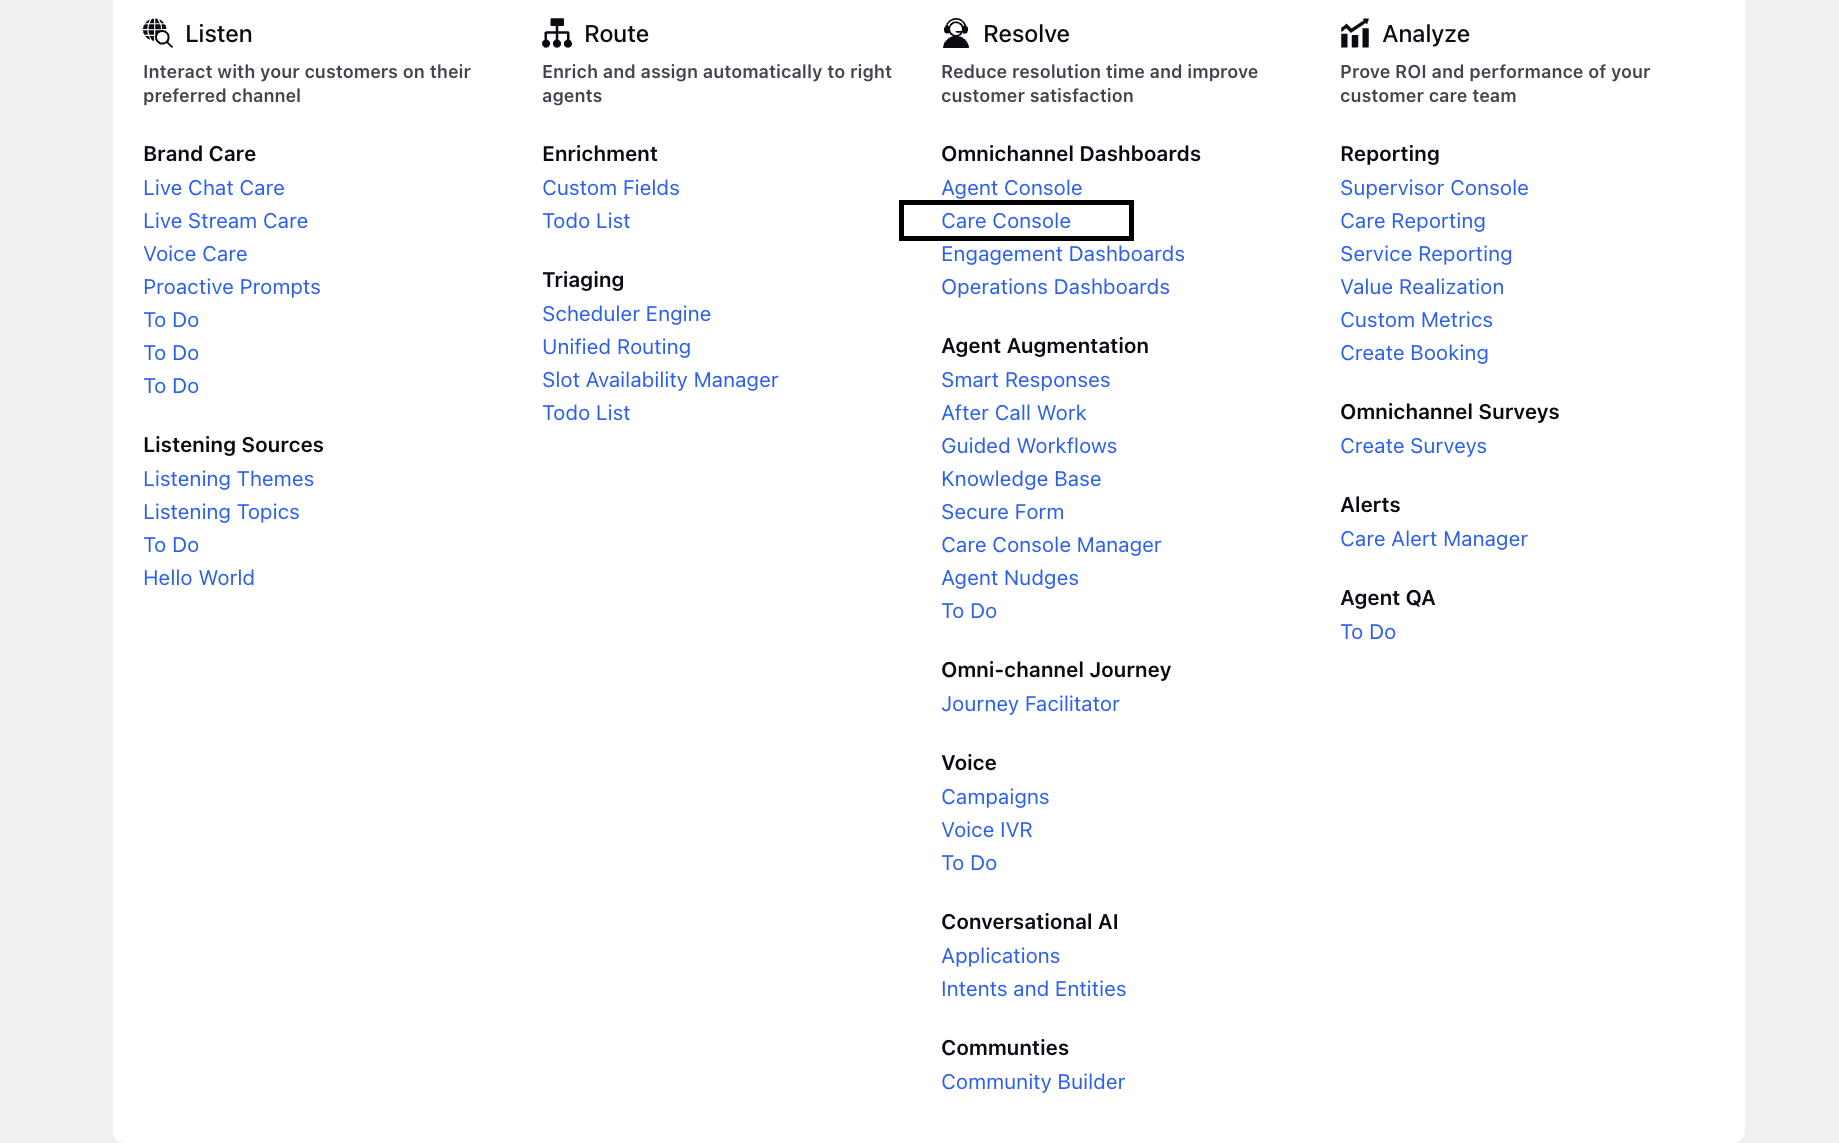
1. Access Care Console.
Click the New Page (+) icon to open the Launchpad.
On the Launchpad, under Resolve, click Care Console.
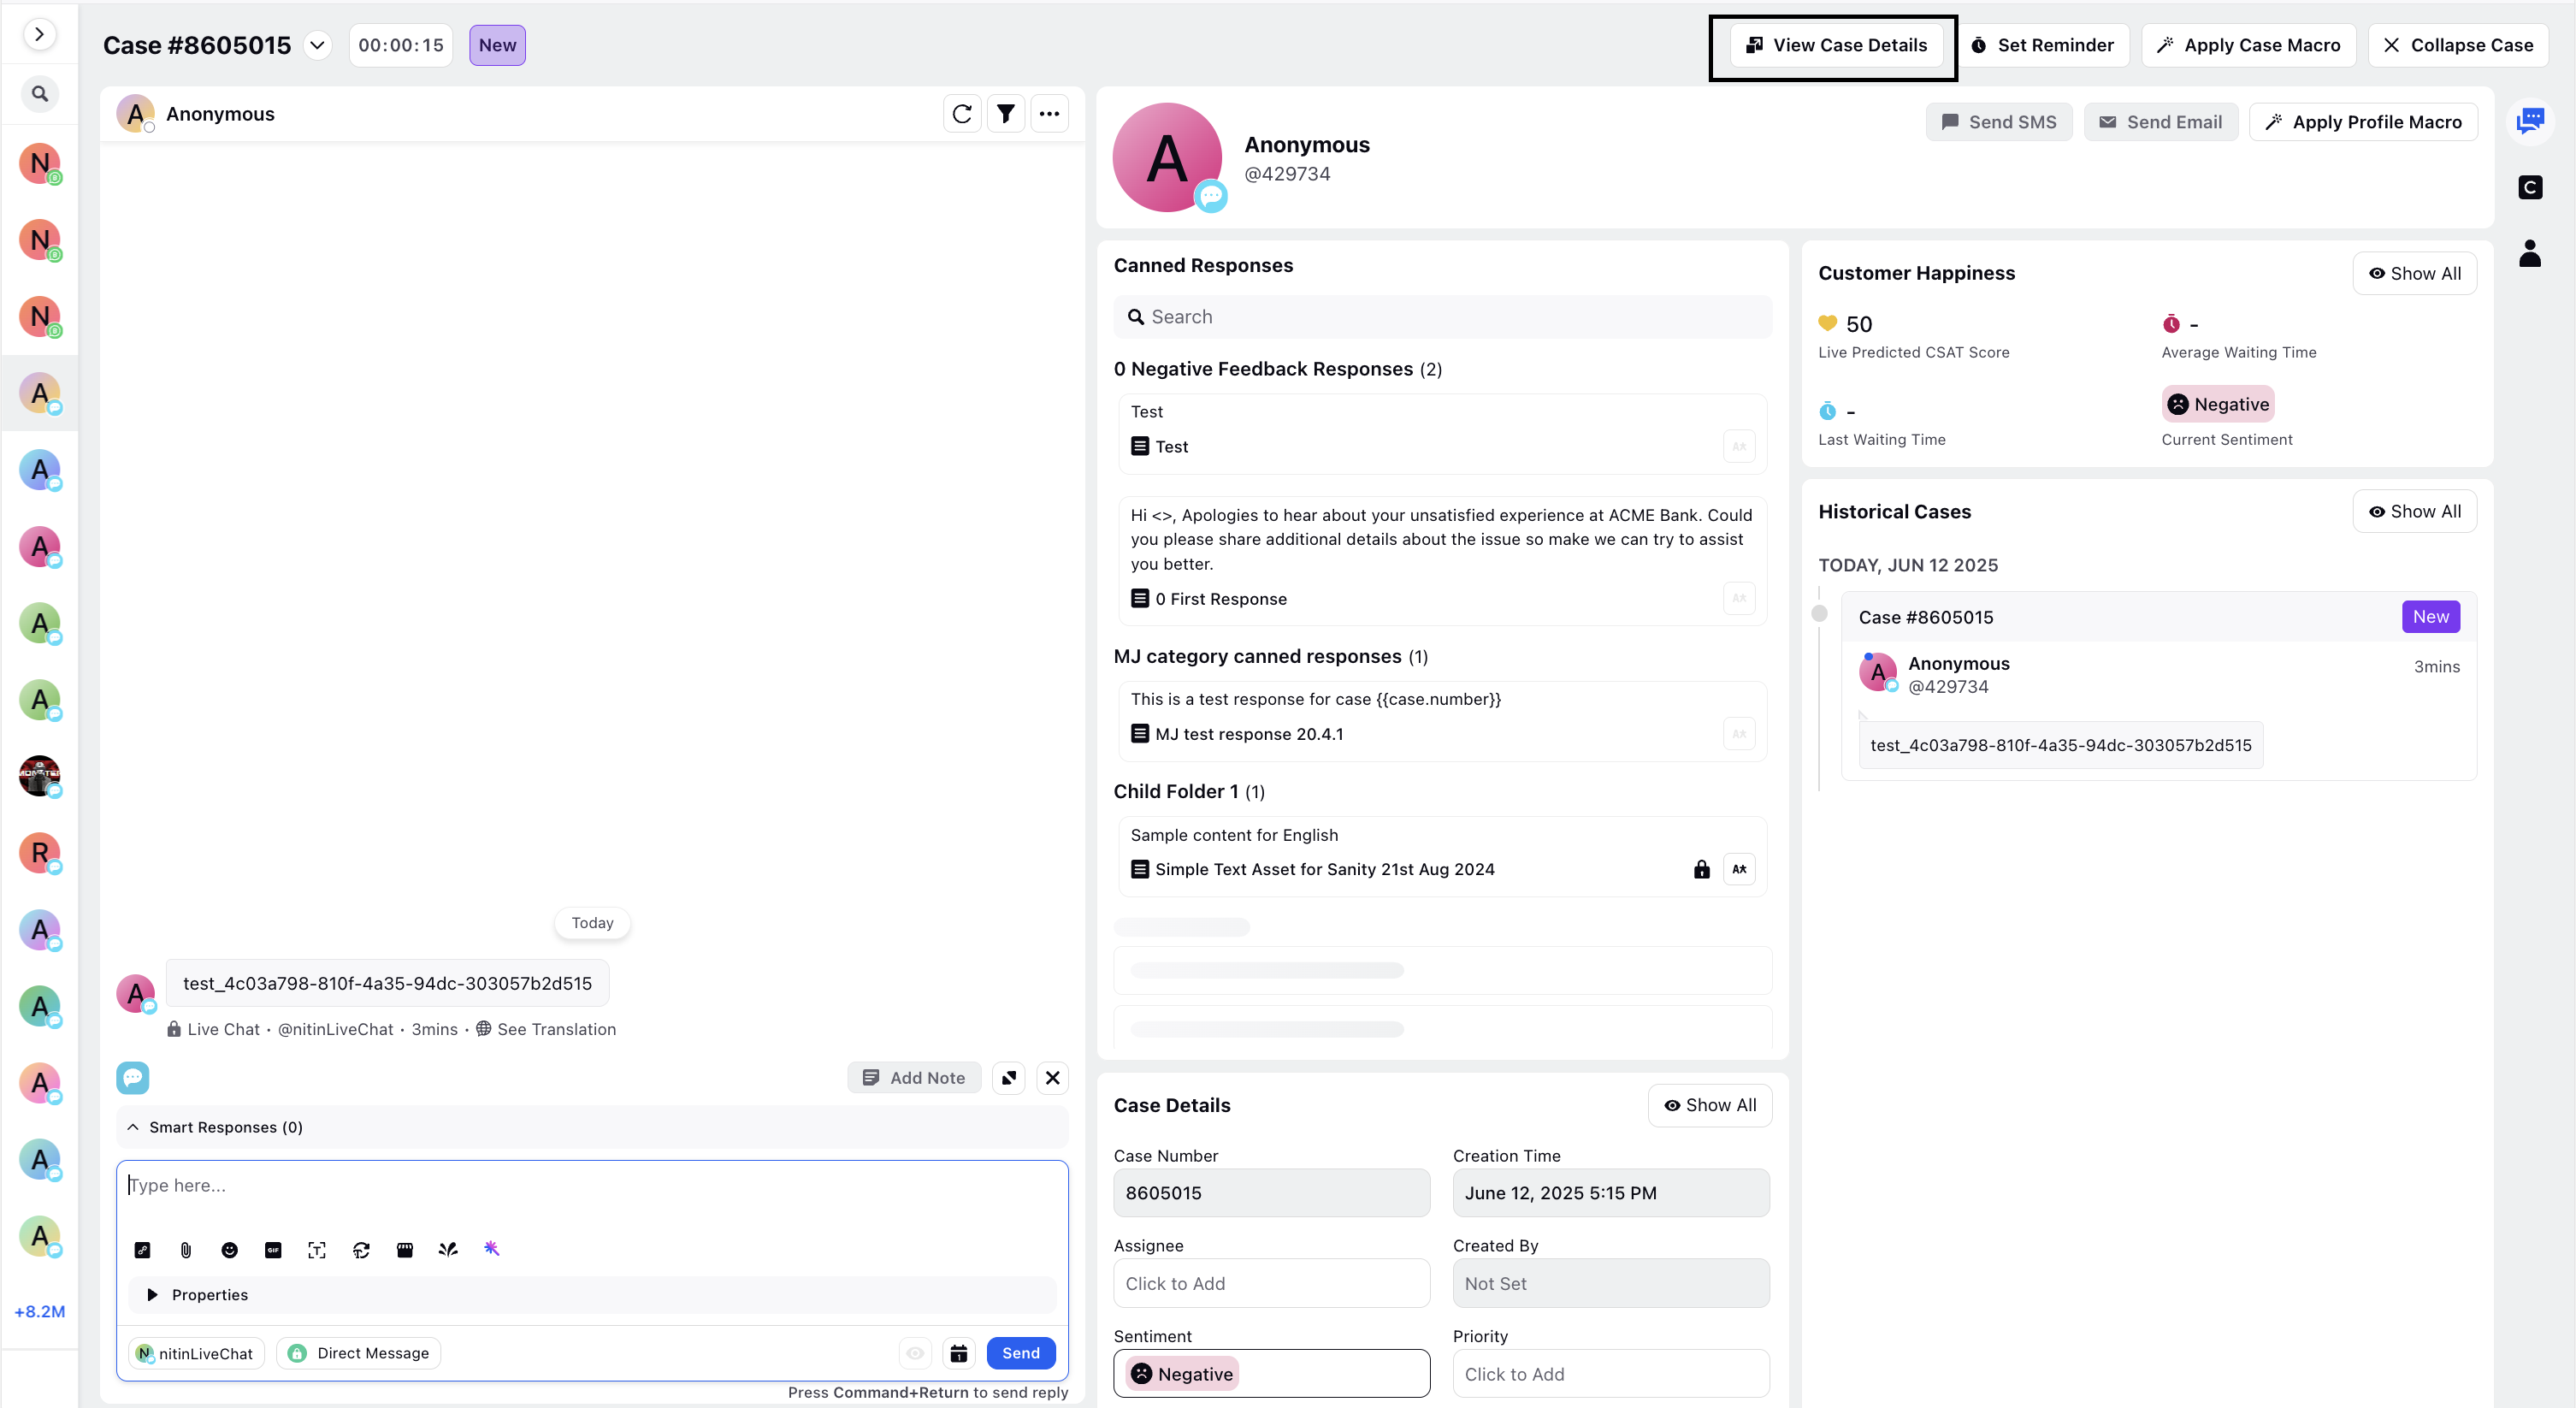
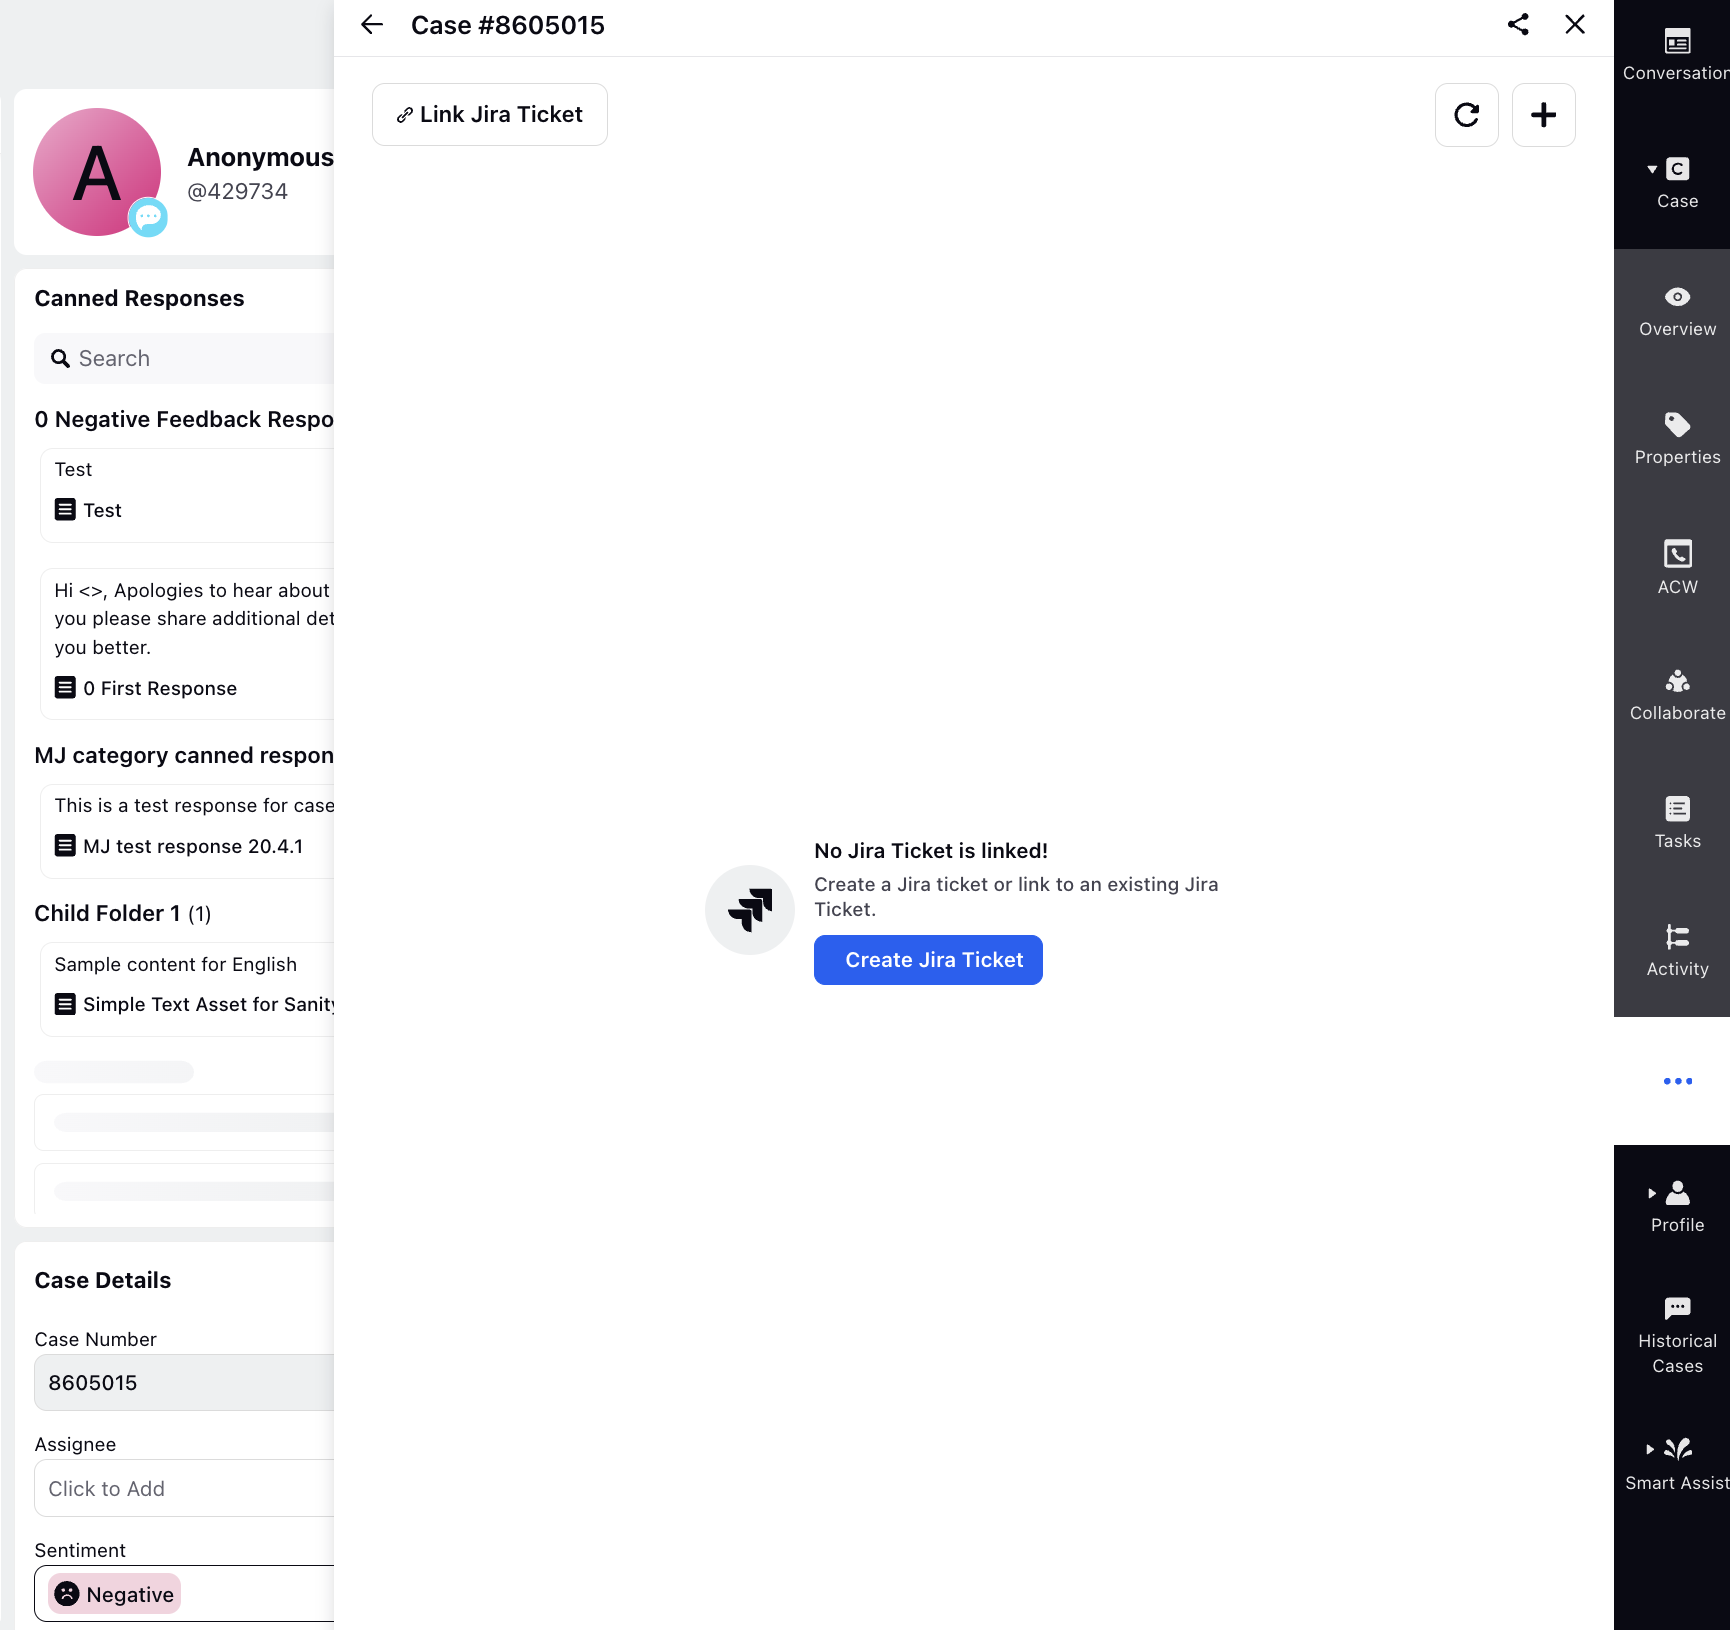
2. In Care Console, find the case that you want to link to a Jira ticket or create a new Jira ticket for.
3. Click View Case Details.
4. In the right-pane, click the three-dot icon menu. From the options displayed, click Jira.
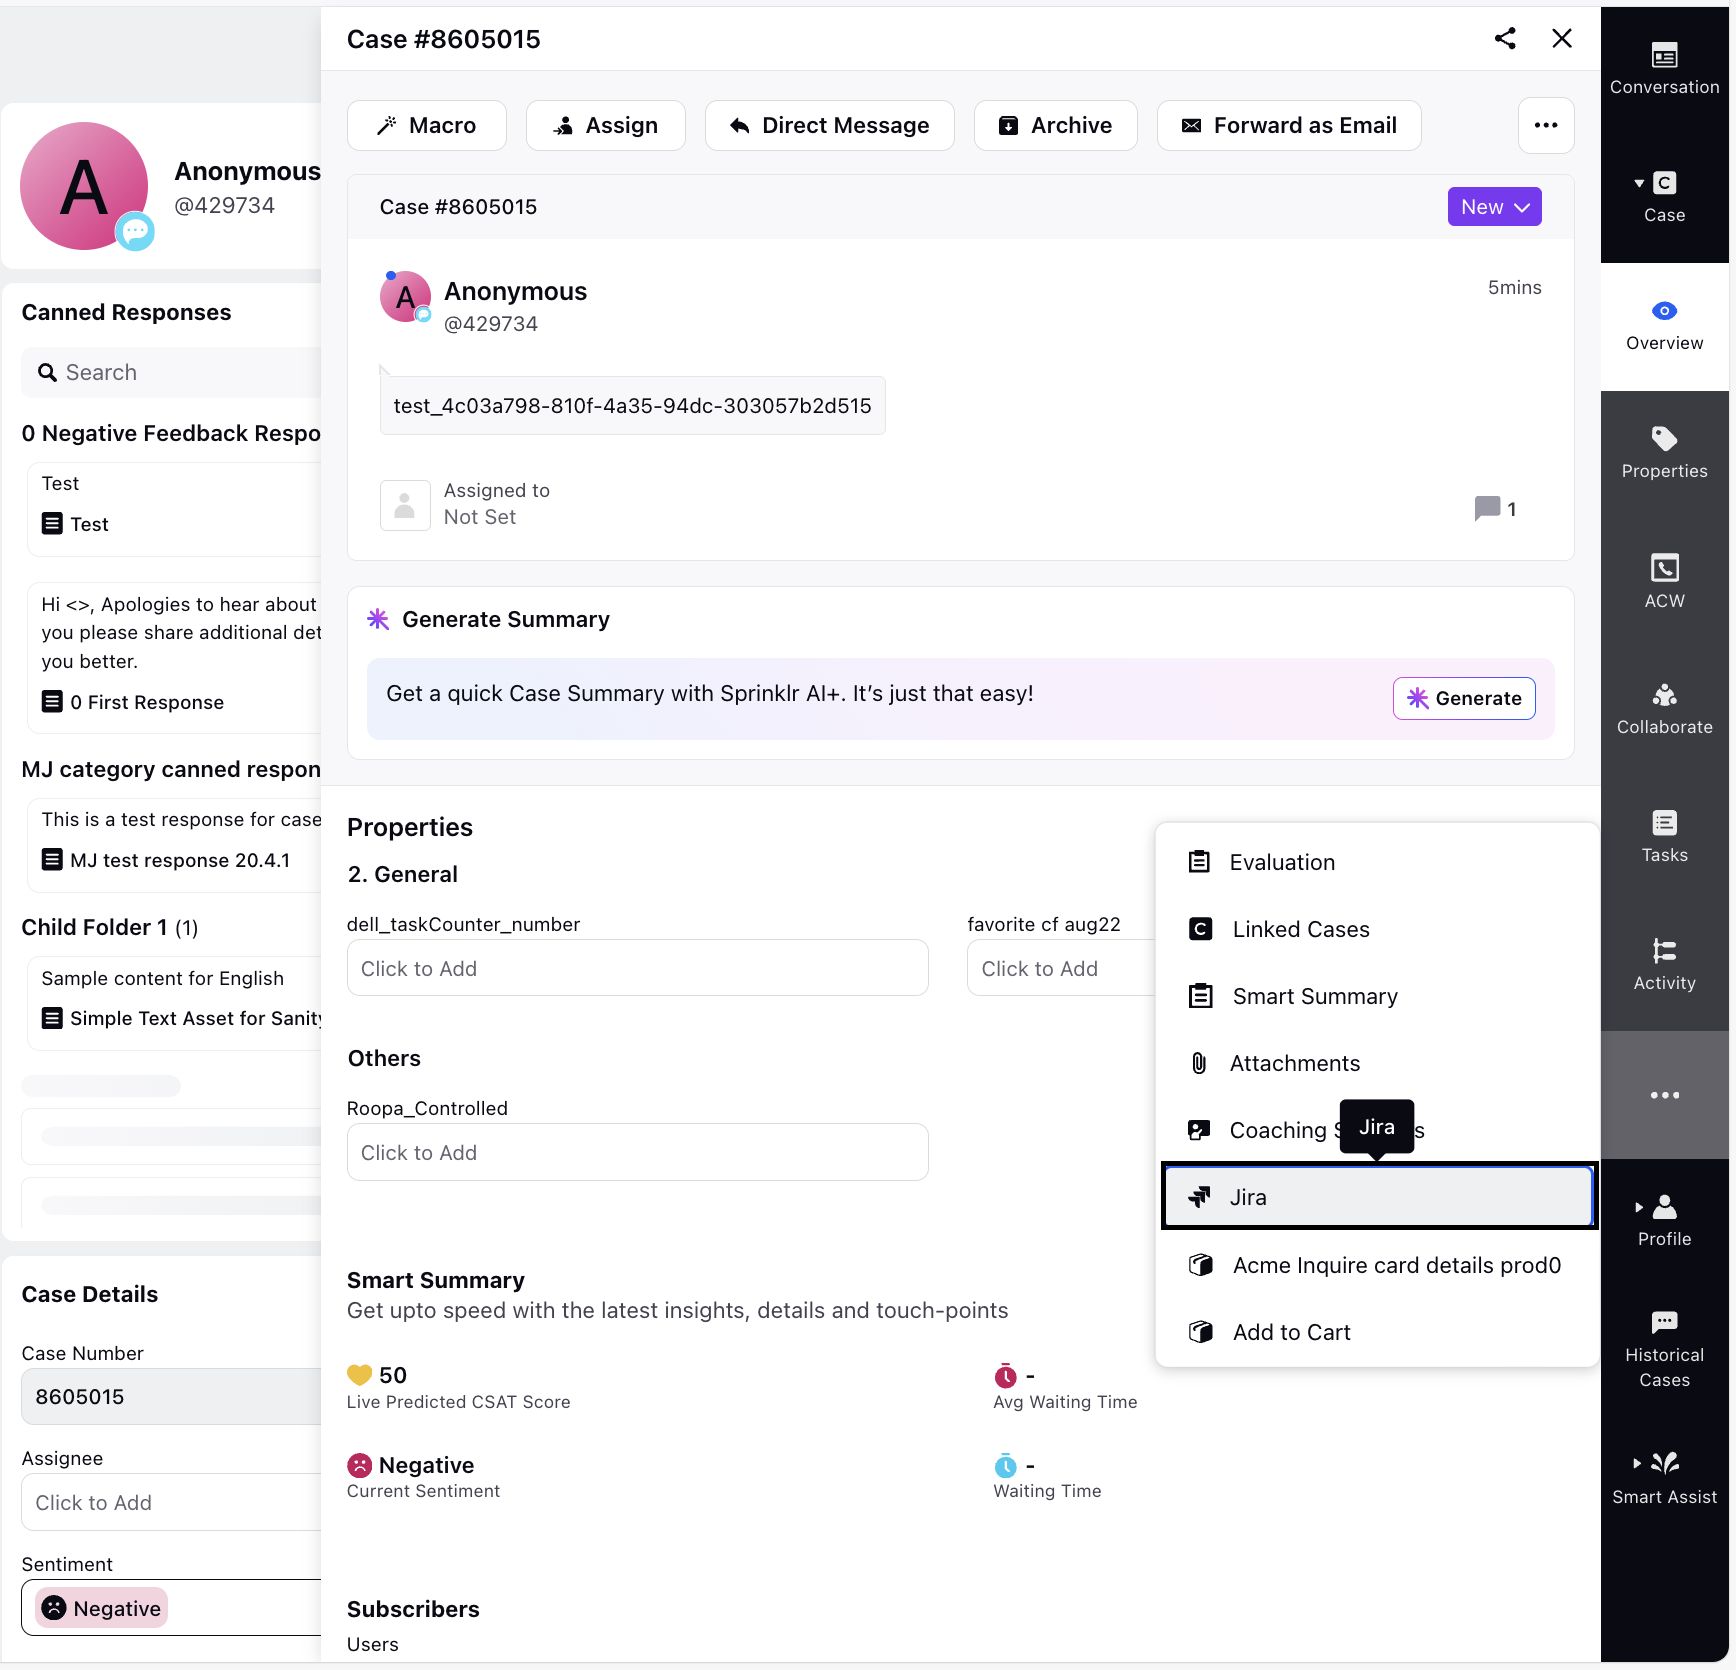
You will see two options:
Link Jira Ticket: Use this to associate the Sprinklr case with an existing Jira ticket.
Create Jira Ticket: Use this to create a new Jira ticket for the case.
Link Jira Ticket
To link a Jira ticket, follow these steps:
1. On the Link Jira Ticket window, from the dropdown, select the appropriate Jira connector application.
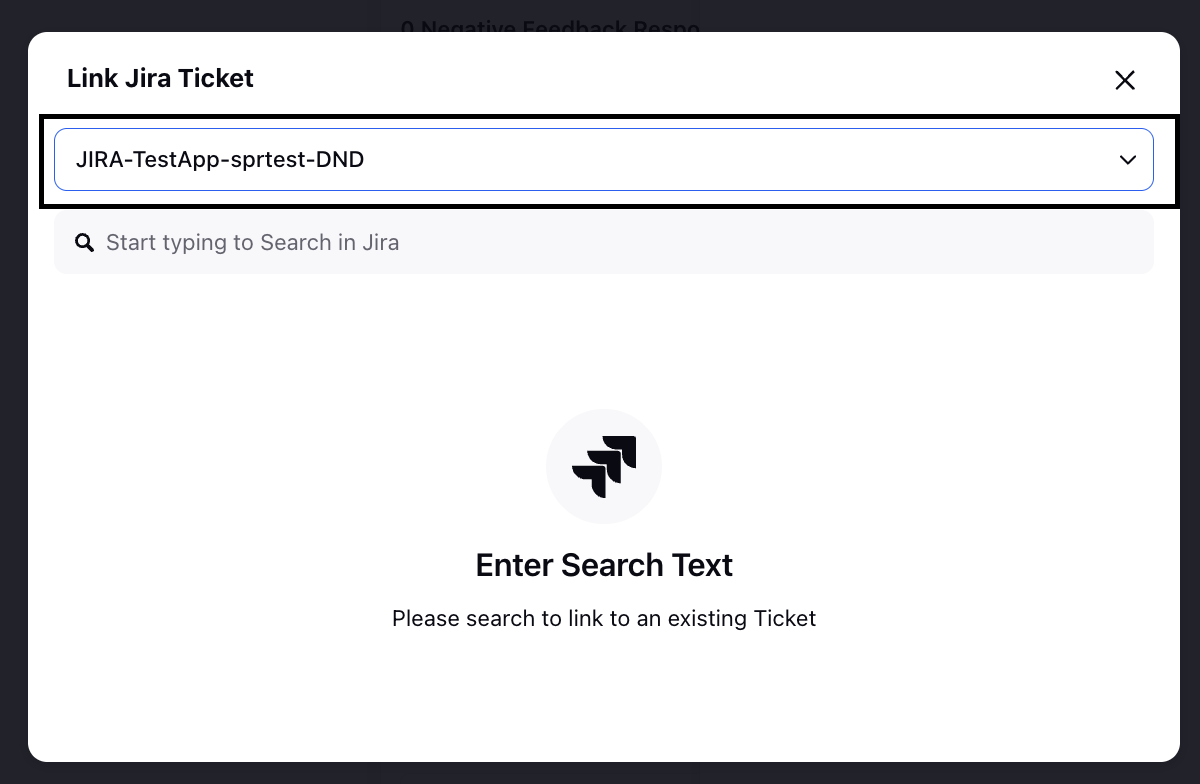
2. Use the search field to find the Jira ticket you want to link.
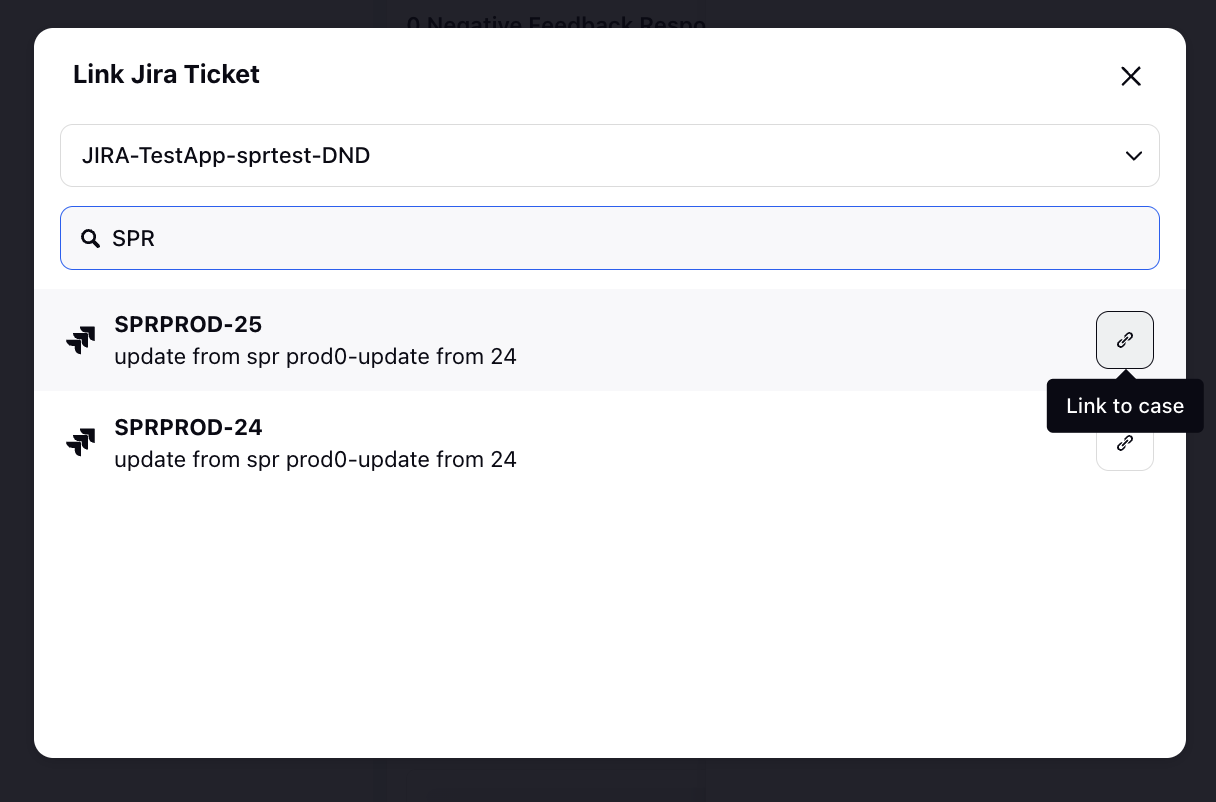
3. Click the Link to case icon.
Once the ticket is successfully linked, the icon updates to Linked. You can then close the screen.
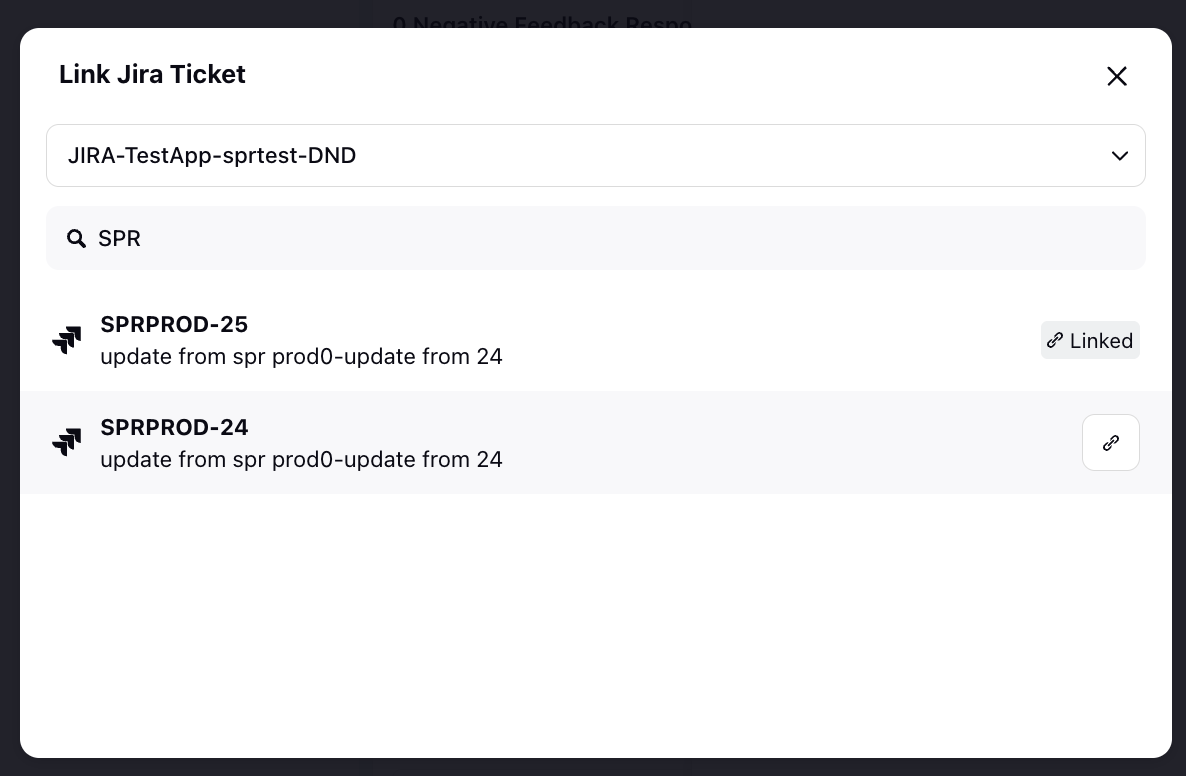
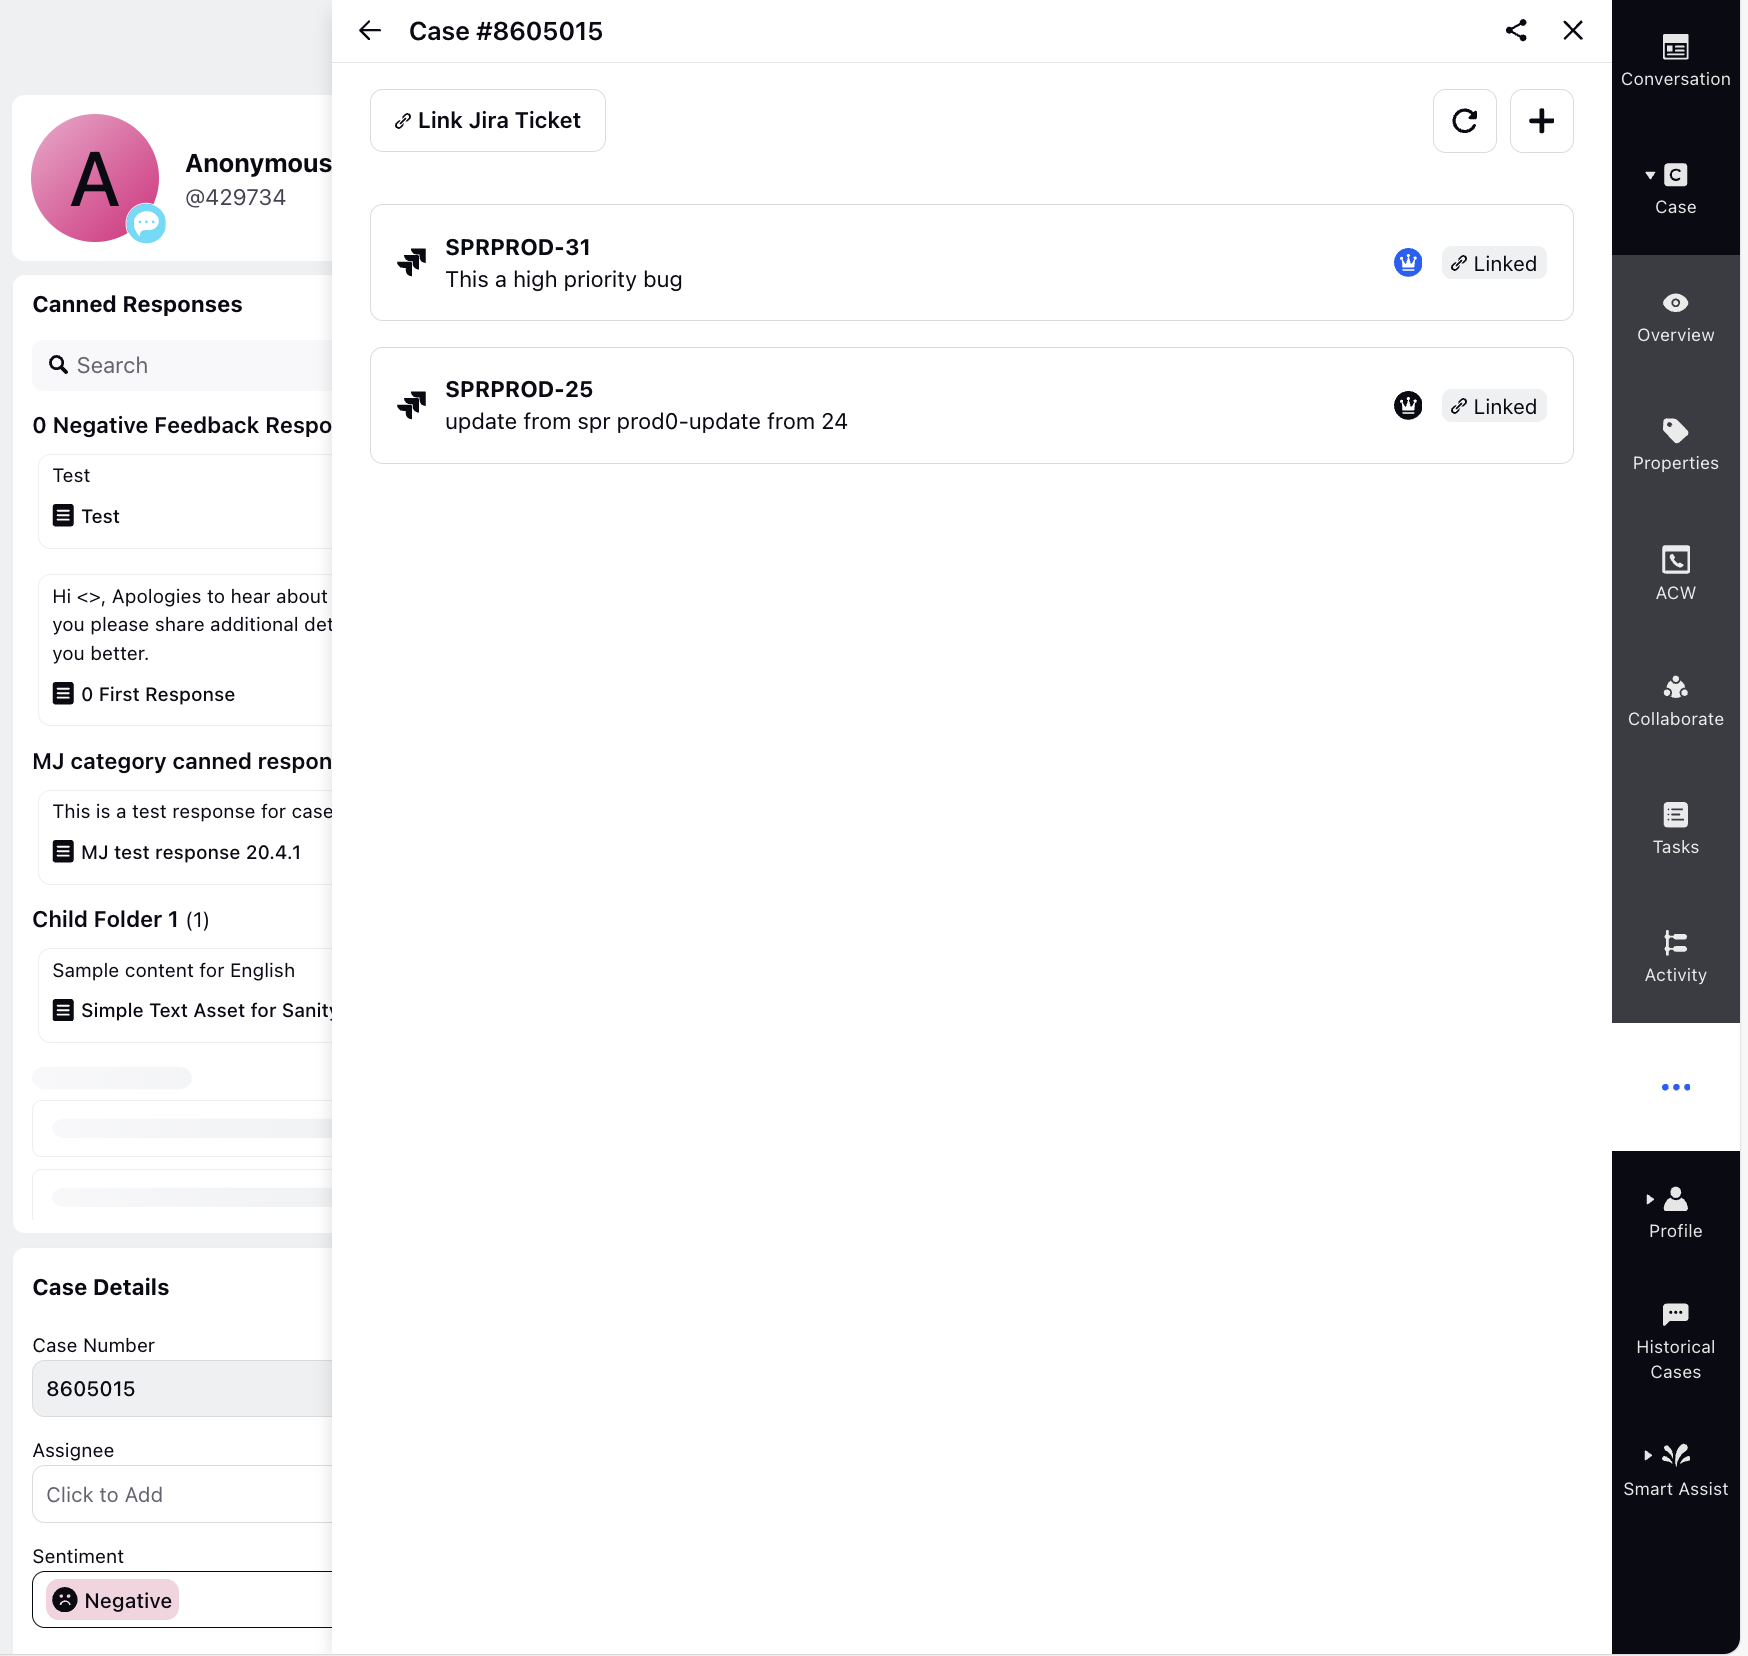
You are returned to the Create or Link Jira Ticket screen. The linked Jira ticket will be listed here.
Create Jira Ticket
To create a Jira ticket, follow these steps:
1. On the Create Jira Ticket form, fill in the required details to create the new ticket.
Field | Description |
Application | Select the Jira connector application with which the Jira instance is integrated. |
Jira Project Type | Select Jira project. |
Jira Issue Type | Select the Jira issue type. For example, Epic, Bug, Task. |
Based on the layout configured for the selected issue type, additional fields may appear. Fill in all relevant fields.
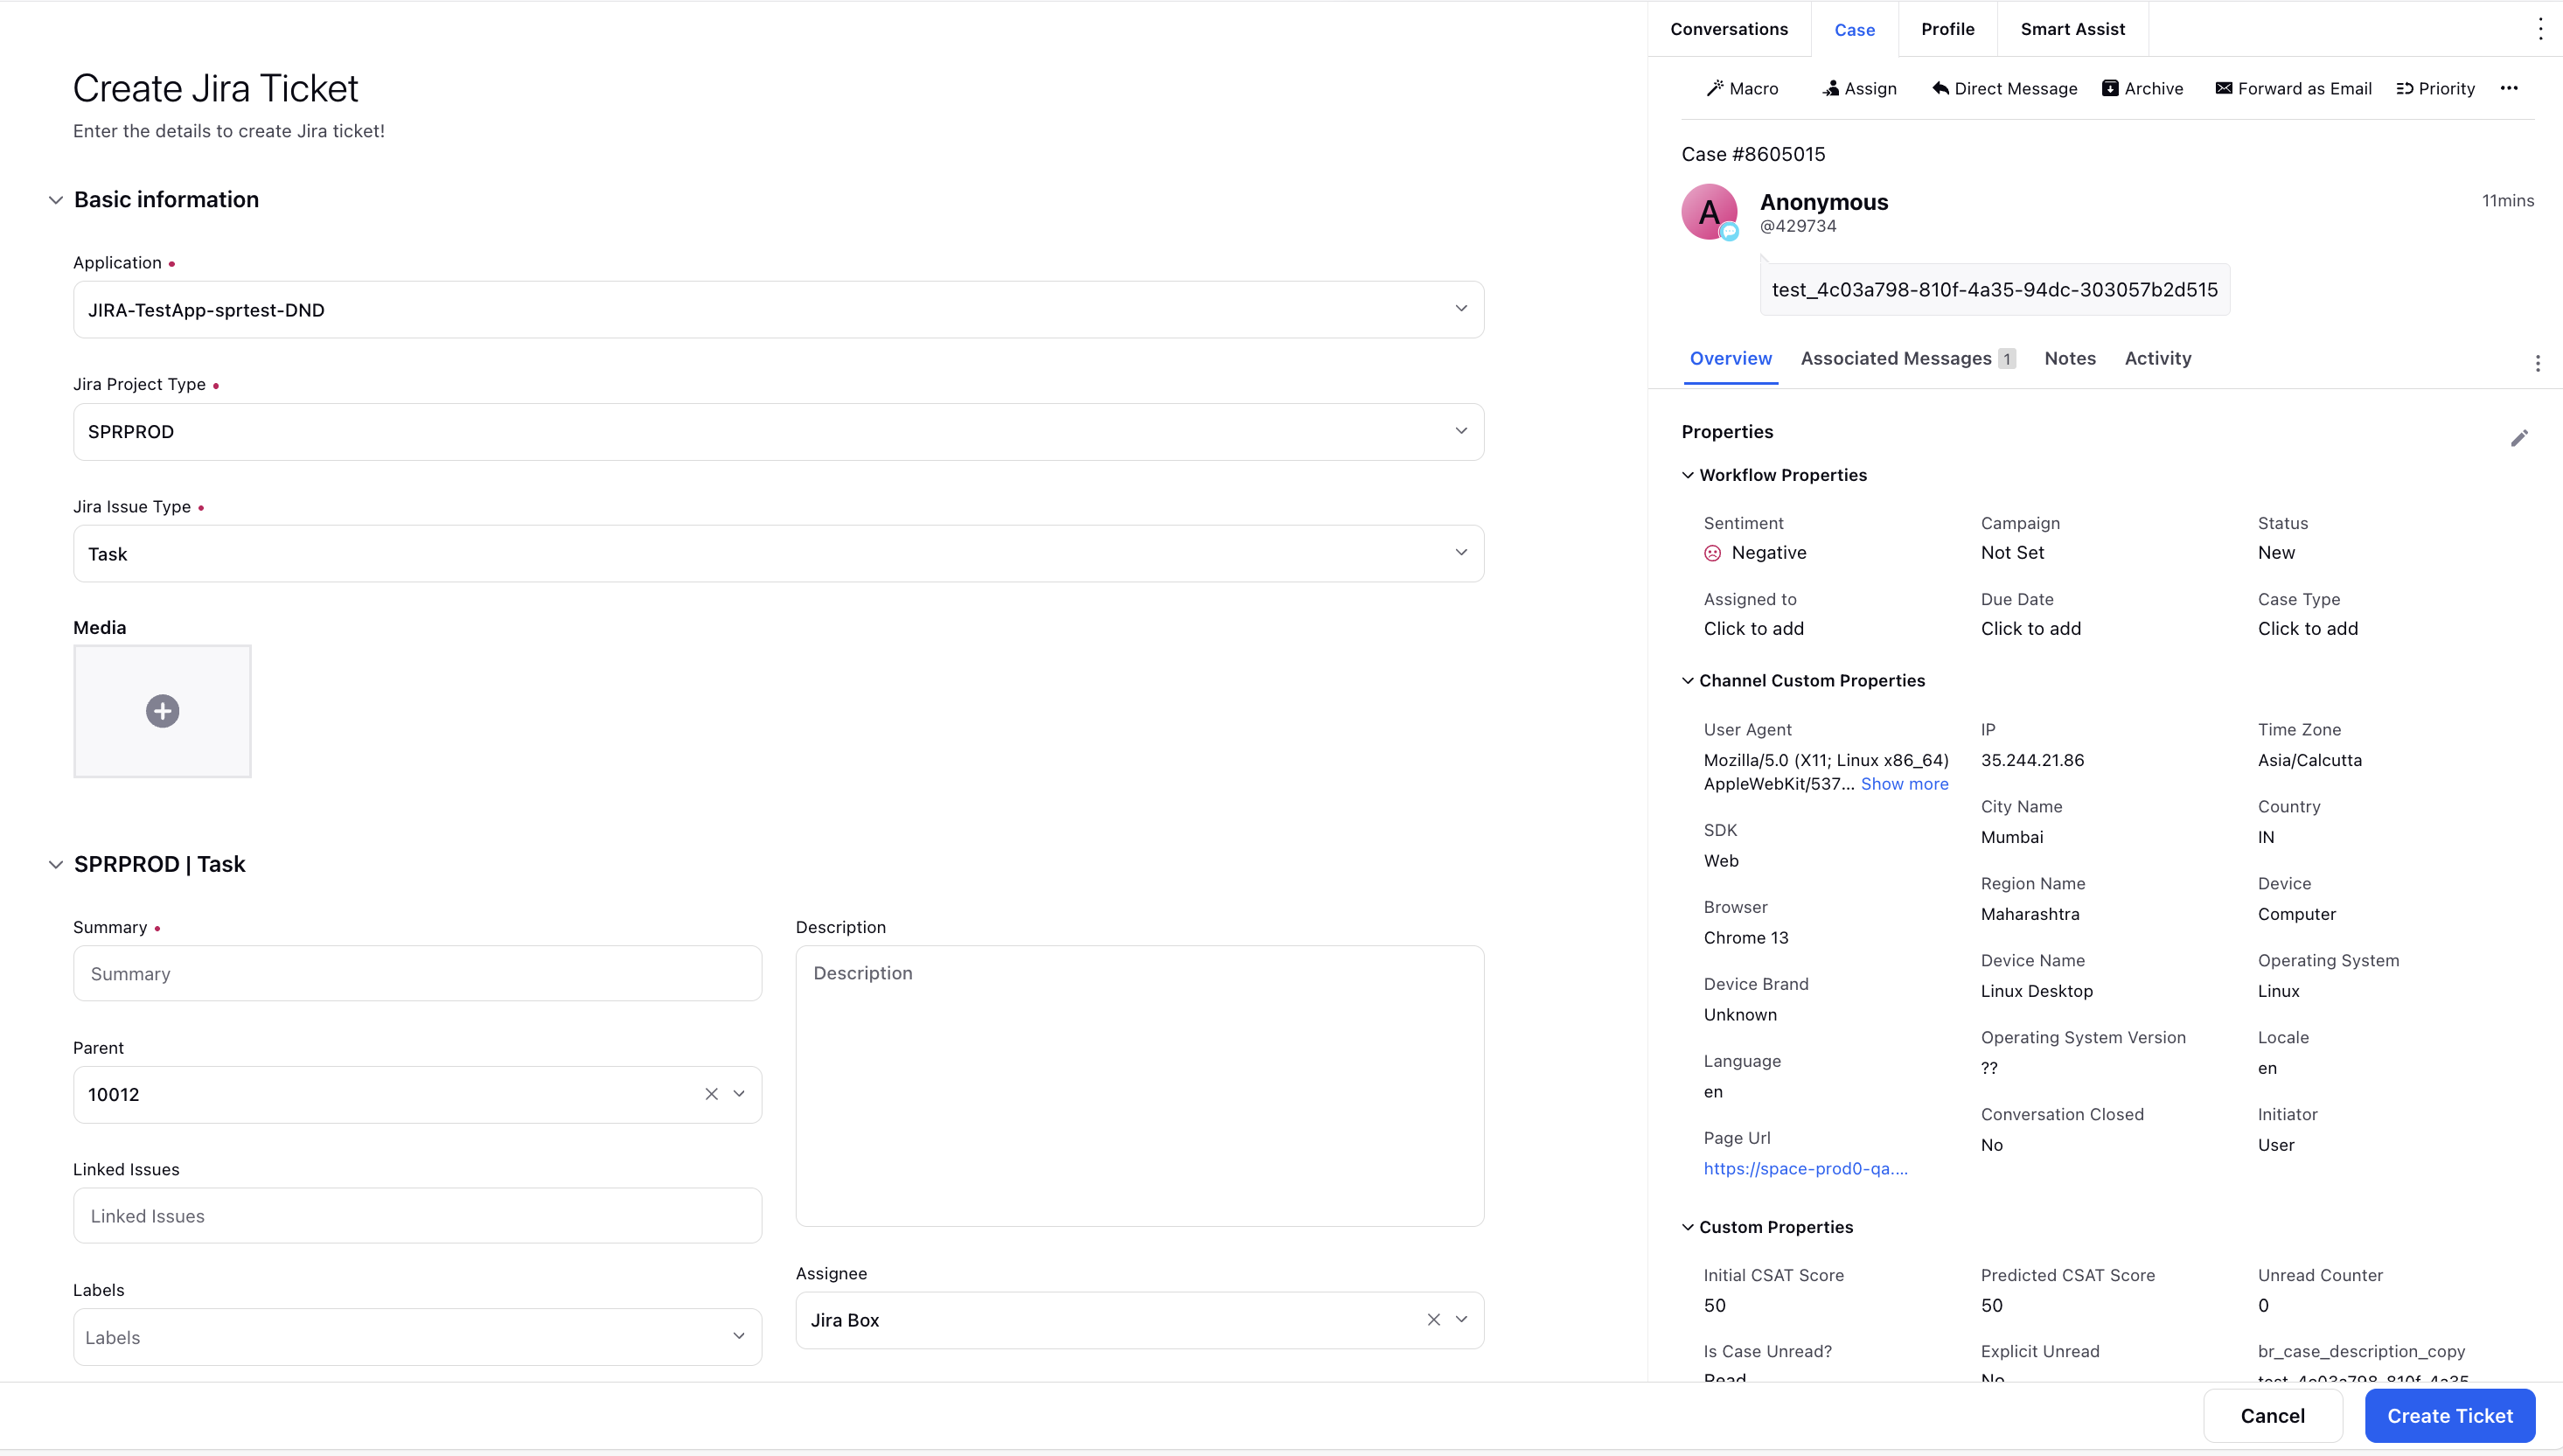
2. Click Create Ticket.
The Jira ticket is created and you are returned to the Create or Link Jira Ticket screen. The newly created ticket will be listed here.
To create additional tickets associated with this Sprinklr case, click the + icon. You can use the refresh icon to update the ticket list.
Additional Actions on the Linked Ticket
On the Create or Link Jira Ticket screen, you can mark a ticket as primary, view it in Jira, or unlink it from the Sprinklr case. To view these options, hover over the linked ticket.
Mark Ticket as Primary (
 ): If multiple Jira tickets are linked to the case, click this icon to designate one as the primary ticket.
View in Jira (
 ): Click this icon to open and view the ticket directly in Jira.
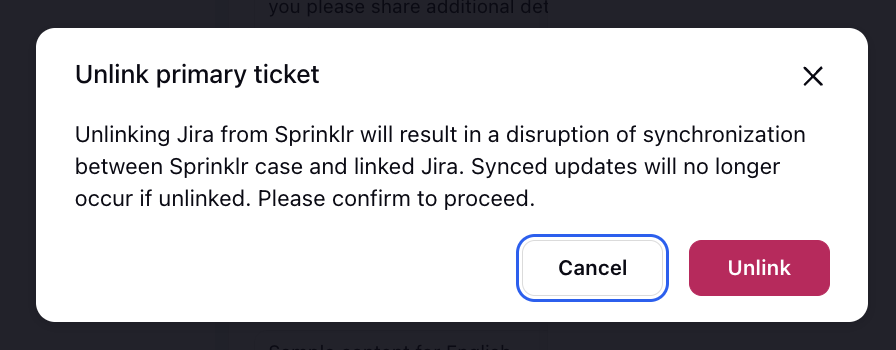
Unlink (
 ): Click the unlink icon to disconnect the Jira ticket from the Sprinklr case. A confirmation message will be displayed, click Unlink to confirm.
![]() Note: Unlinking stops data synchronization between Sprinklr and Jira. Updates made to the Sprinklr case will no longer reflect in Jira. However, the Jira ticket will remain unchanged.
Note: Unlinking stops data synchronization between Sprinklr and Jira. Updates made to the Sprinklr case will no longer reflect in Jira. However, the Jira ticket will remain unchanged.