Add an Update Properties Skill
Updated
Overview
The Update Properties skill is used to capture or update the value of a variable or custom field during a workflow. This allows dynamic modification and tracking of data as the workflow progresses.
Key Benefits
Improved User Experience: Capturing user input in a variable ensures that critical information is readily available throughout the conversation, eliminating repetitive requests and providing a seamless and efficient interaction for the customer.
Steps to Add an Update Properties Skill
Refer to this article for detailed steps on adding a skill to an AI Agent.
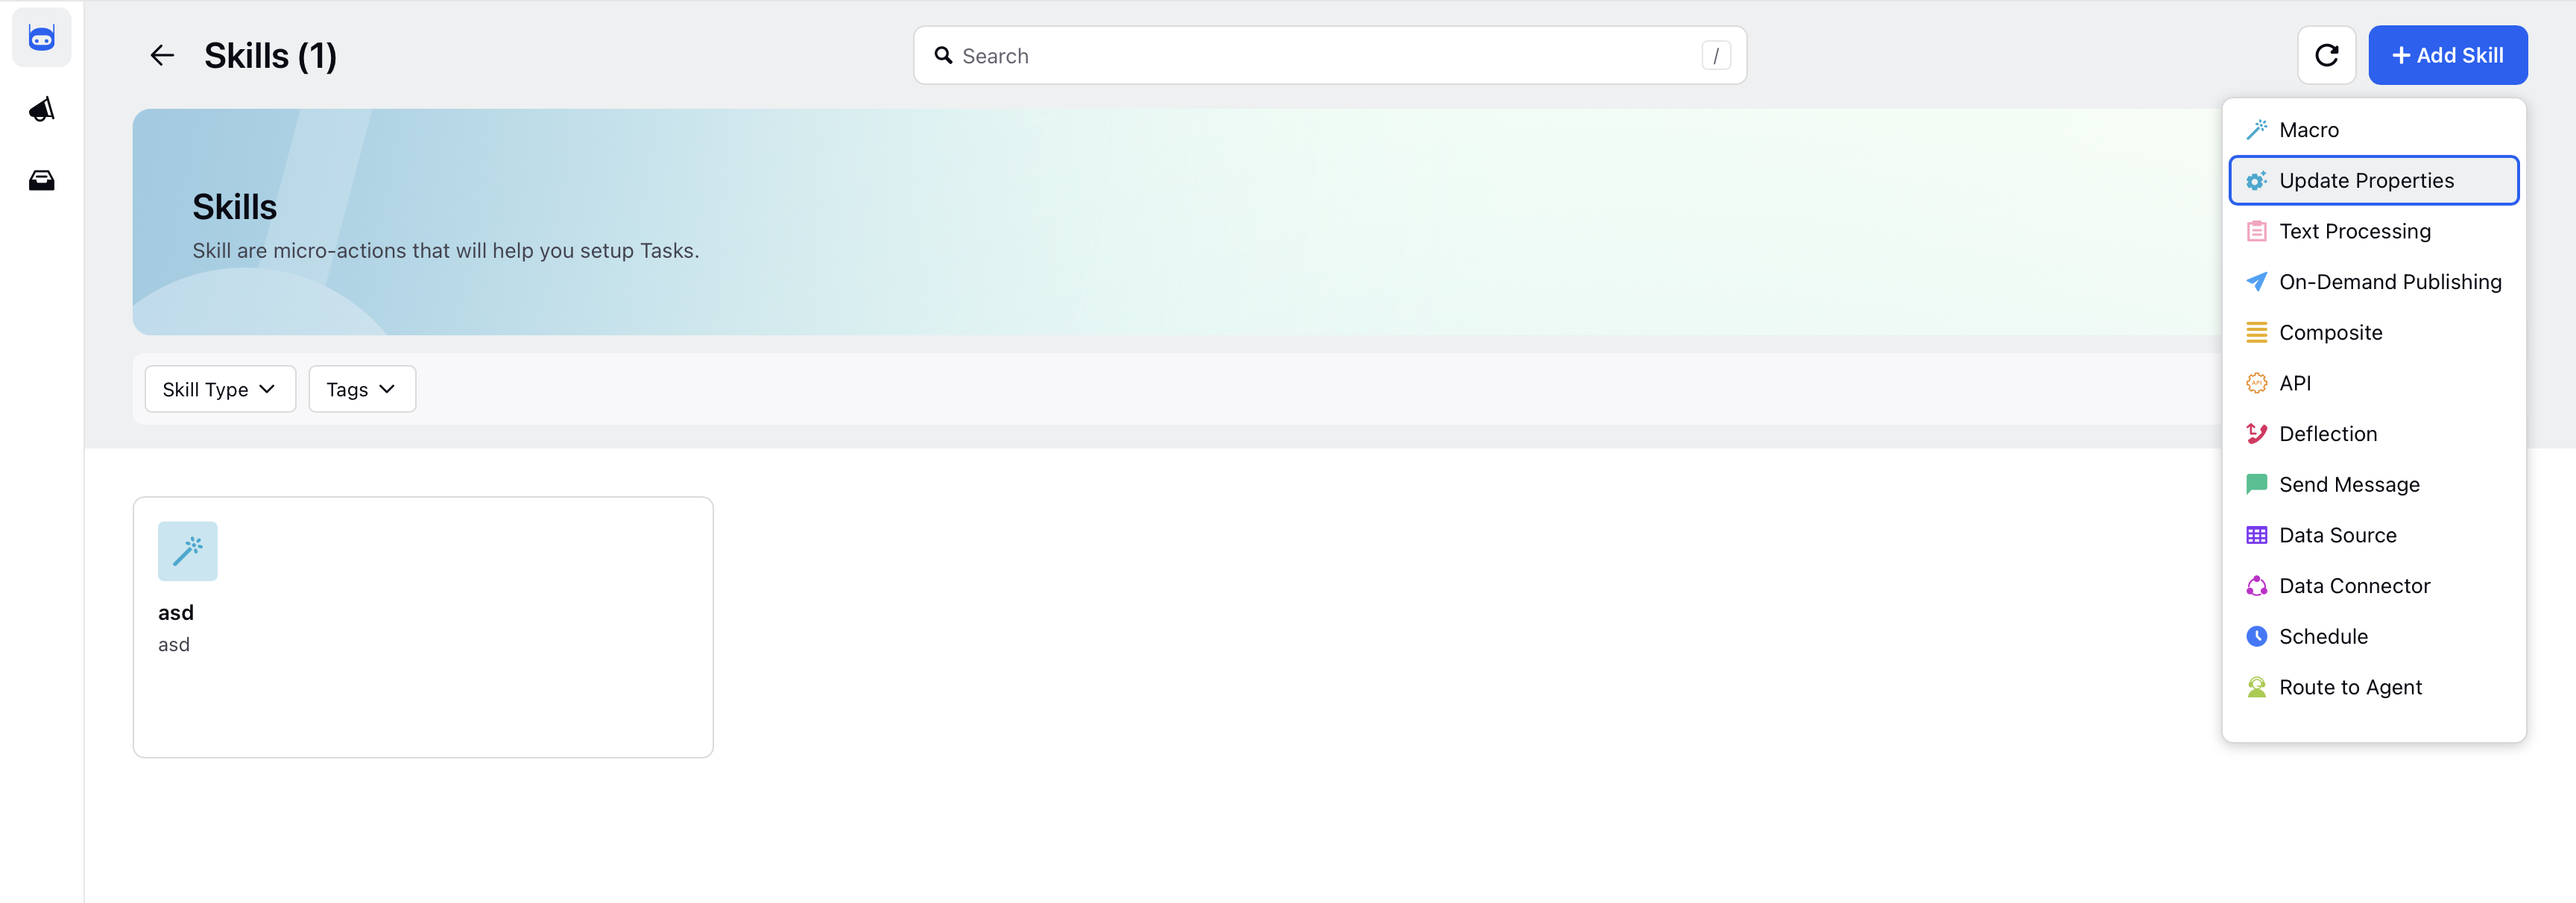
On the Skills window, click Add Skill in the top right corner and select Update Properties from the dropdown.

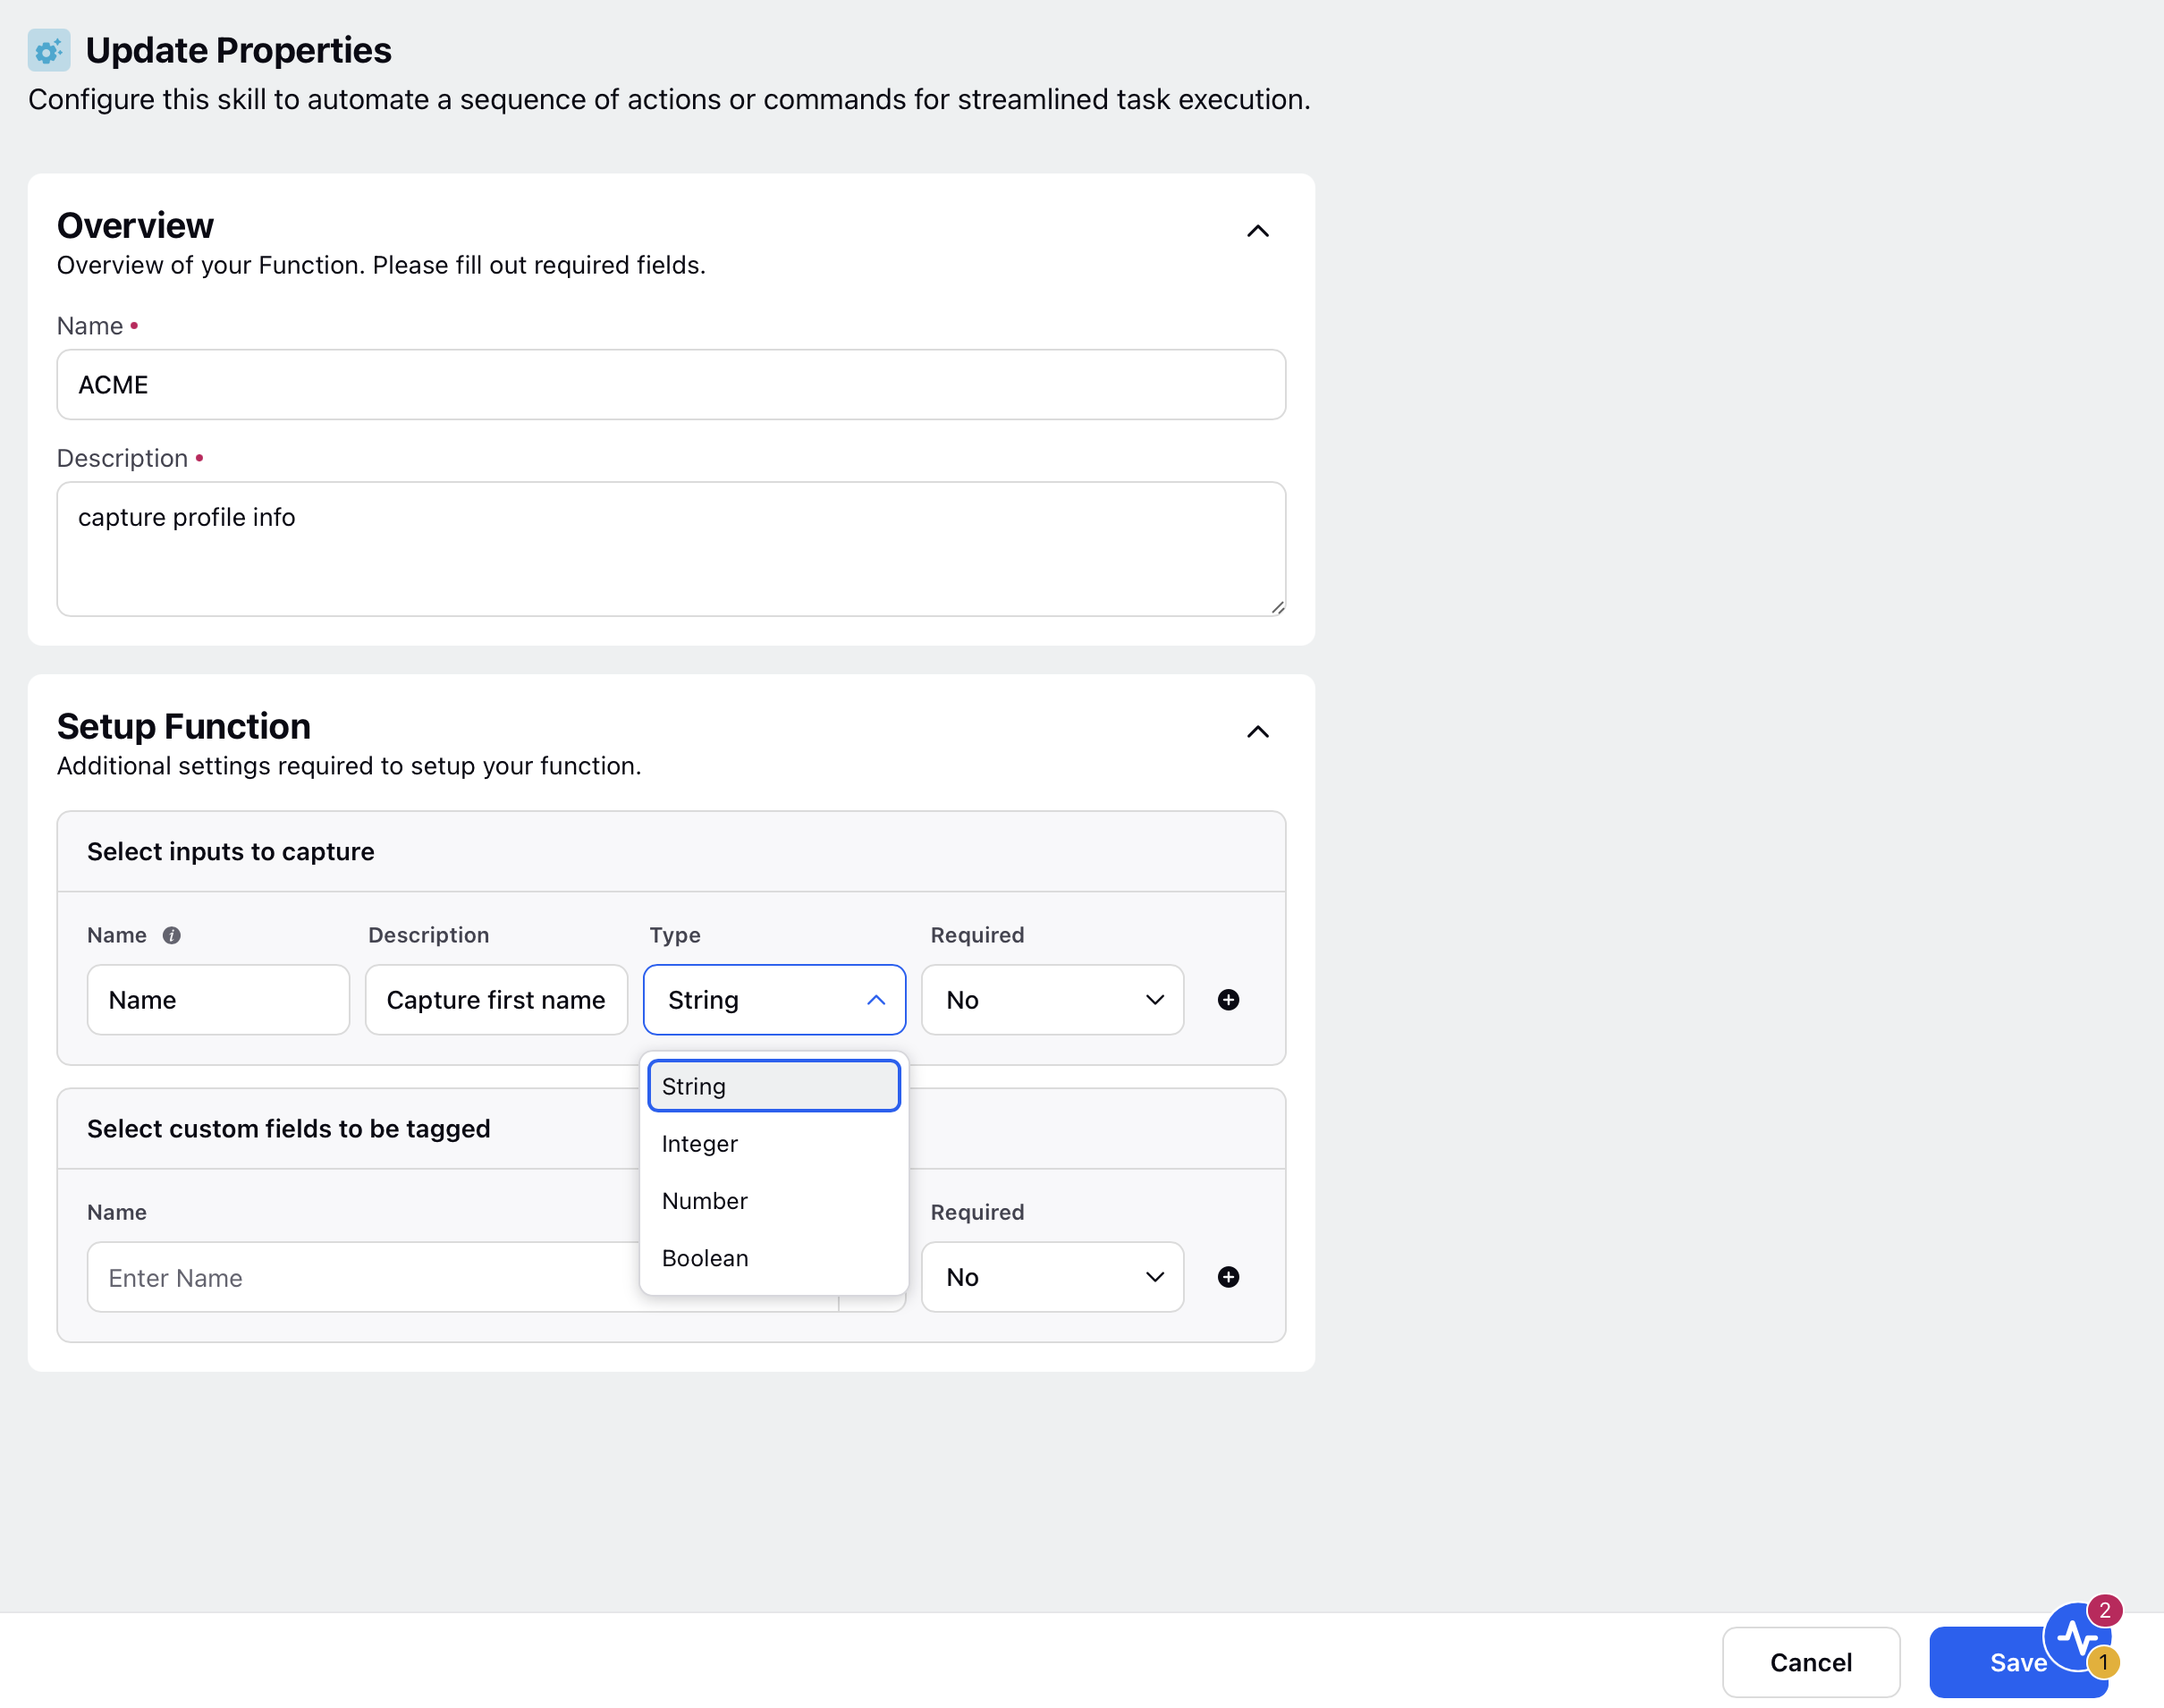
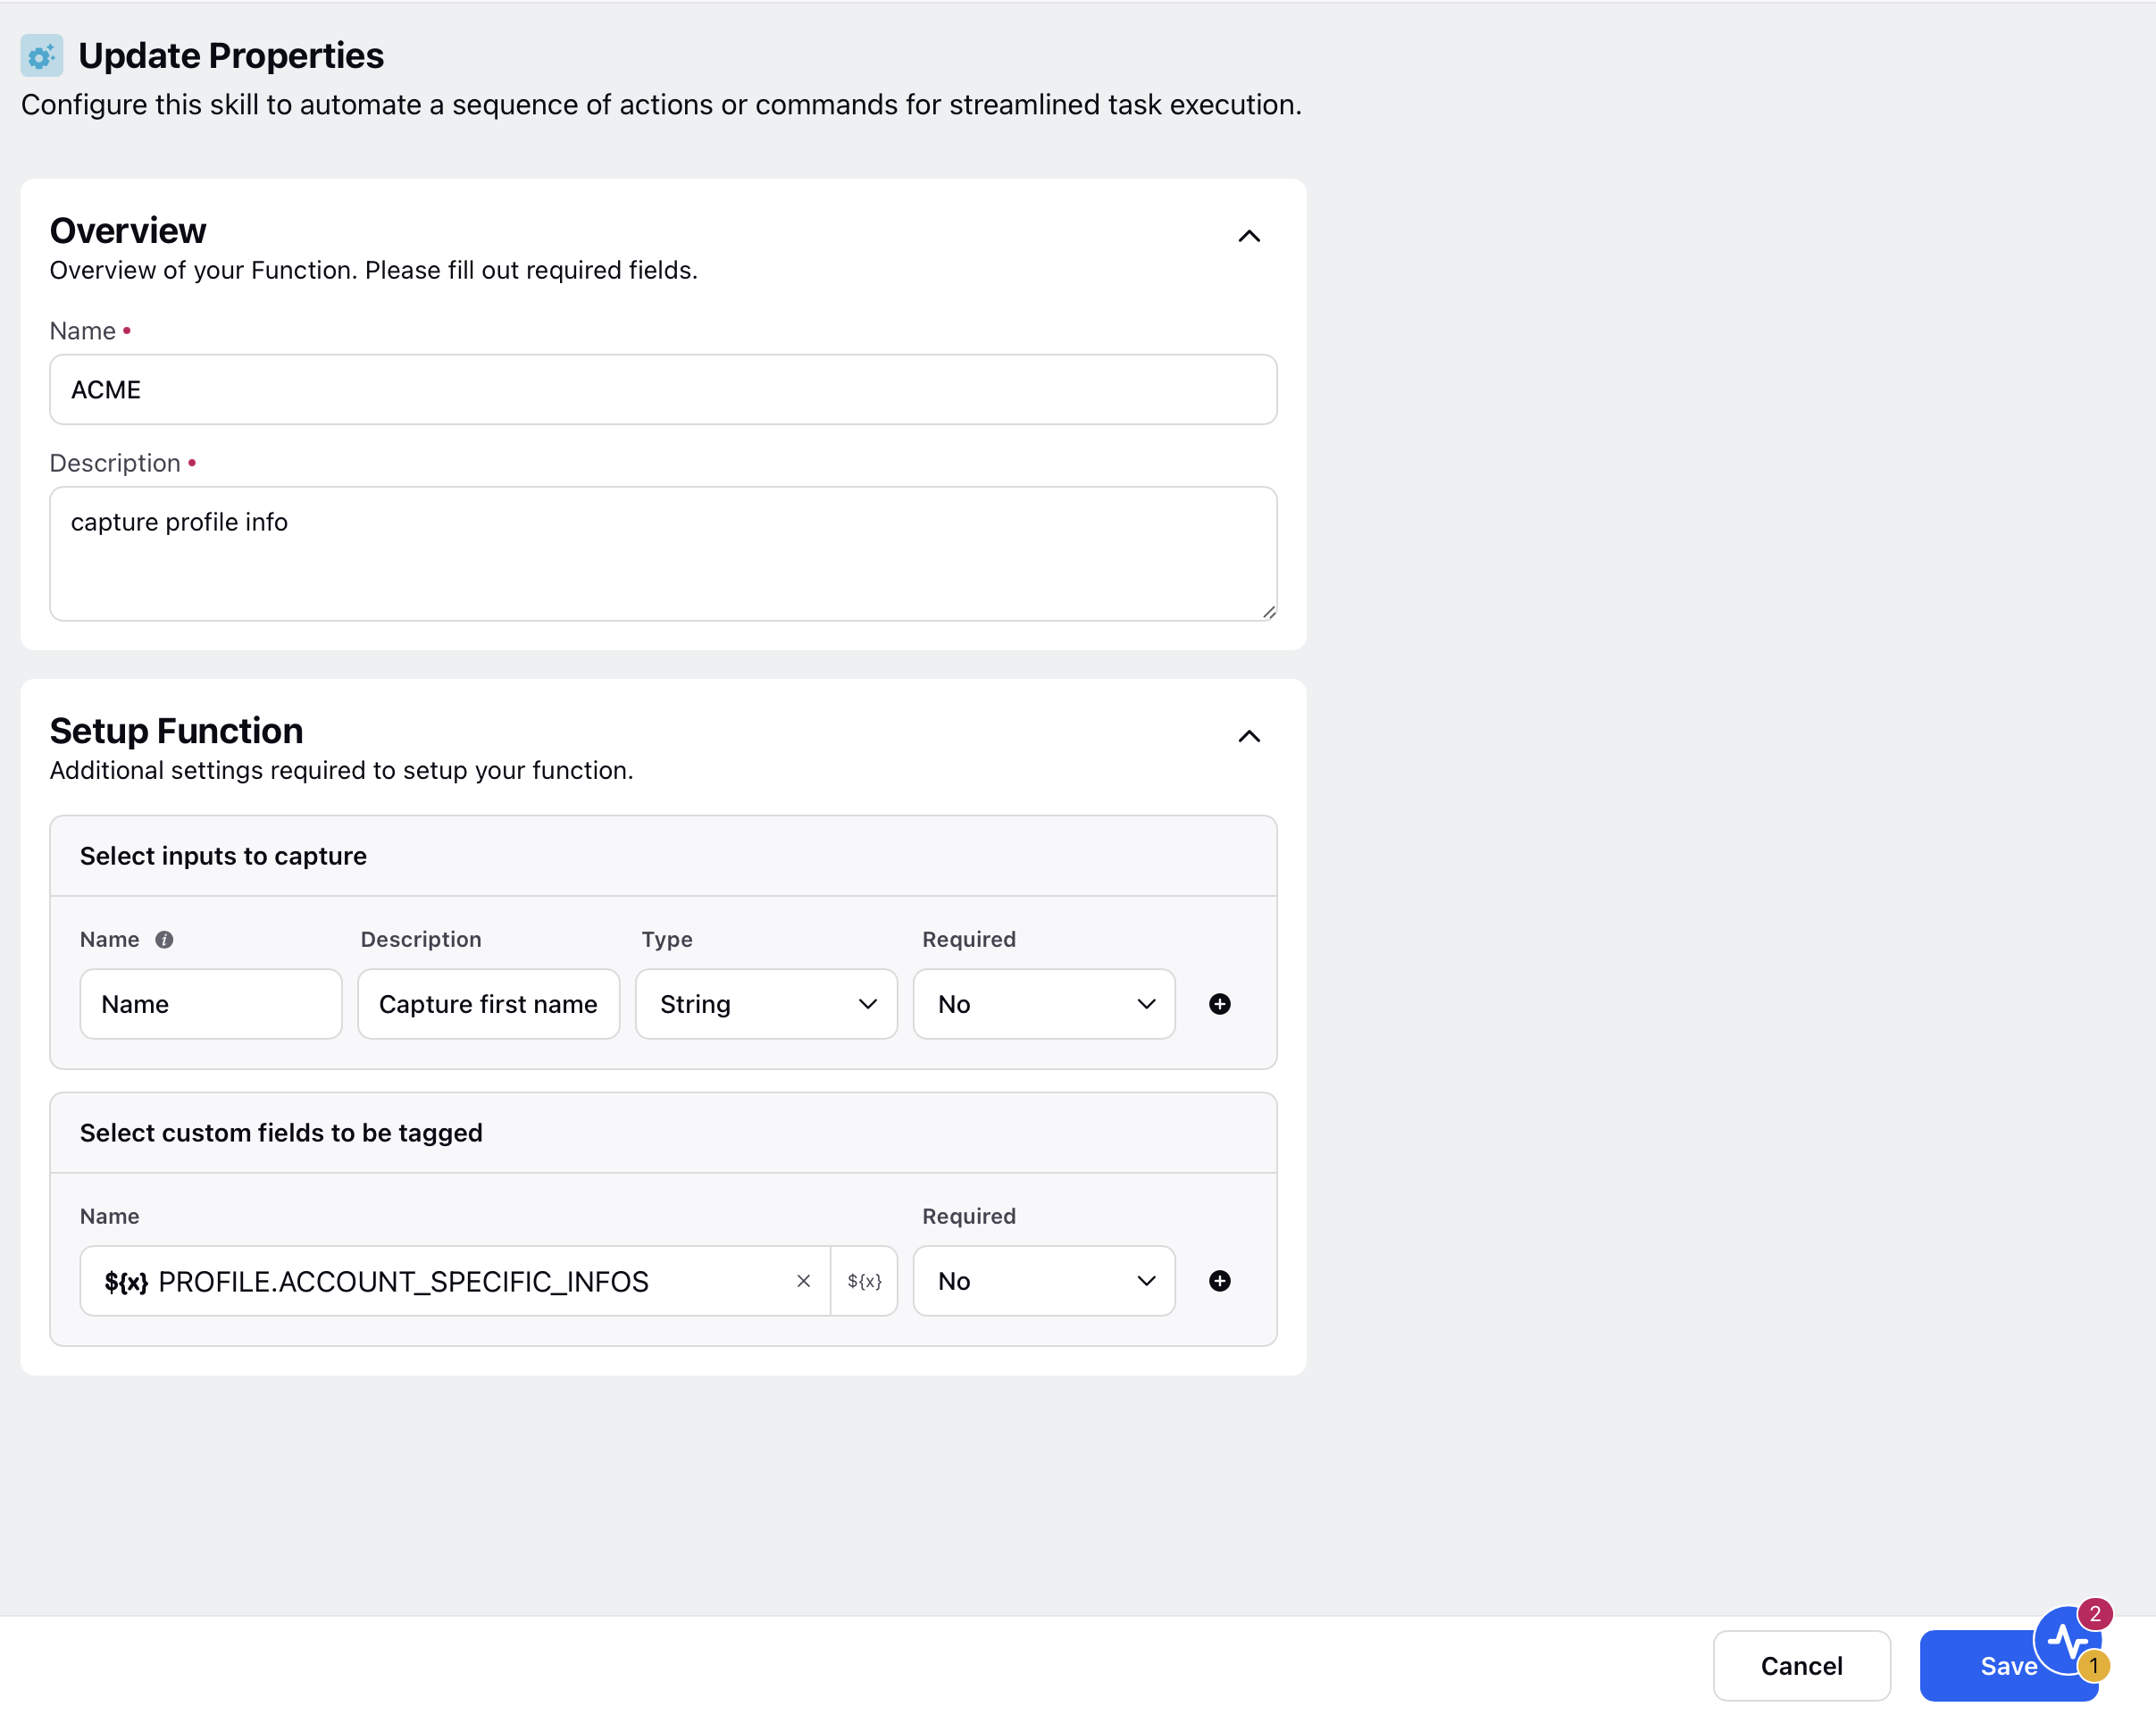
Enter the Name and Description. You can create an internal variable or select from the custom field in the Setup Function field.
Guidelines for Skill Names:
Be Clear and Direct: Use action-oriented, unambiguous verbs.
Keep It Concise: Aim for 2-4 words that clearly describe the function's purpose.
Avoid Generic Names: Ensure the name is distinct from other functions.
Use a Noun or Output Indicator: Reflect the returned value (such as fetch_exchange_rate, not convert_money).
Guidelines for Skill Descriptions:
Start with a Clear Action Verb: Use verbs like "Retrieves," "Fetches," or "Generates."
Clearly State Function Purpose: Describe what the function does without assuming prior knowledge.
Mention Key Inputs: Include relevant inputs, but avoid specifying types (handled separately).
Specify Expected Output: Clarify what the function returns.
Keep it Concise: Aim for a description under 20 words.
To add an internal variable, fill in the Name, Description, Type, and Required as Yes or No in the Select inputs to capture section. To use this variable later in any skill or task, reference it by writing $ {variable}.

To add a Custom Field, select the Name from the dropdown and Required as Yes or No in the Select custom fields to be tagged section.
Refer to this section to learn more about Custom Fields.

Note: Always provide a description when creating a custom field. This improves clarity and increases the likelihood that the field will be correctly tagged and used.
Click Save at the bottom.
Note:
If the required field is set to Yes, the AI Agent will prompt the user for the information till it’s received.
If the required field is set to No, the AI Agent will not prompt the user for information; rather, it will leave the field empty or extract the requirements from the information given by the user.
Use Case
For example, a customer may ask a digital assistant for the Point of View (POV) on a company. To handle this, the assistant collects the company name and stock ticker, stores them in custom fields in Sprinklr, and uses them for reporting and follow-up actions.