How to Configure Auto Boost Posts based on Performance
Updated
This article will give a basic example of how posts can be automatically boosted through the Rule Engine based on their organic performance. For details of the conditions and actions possible, see here. For example, you can add to an existing paid initiative, send for approval, apply custom fields and more.
Unless you want all posts to be eligible for boosting, it is recommended that you use a custom field to filter such posts out in the Rule. This field can then be applied to whichever posts are deemed potentially suitable for auto-boosting. Alternatively, use filters such as Account in the Rule.
Open a new tab and go to Sprinklr Marketing > Advertising > Manage Rules.
Click the dropdown icon in the top left corner and select Customer > Paid.
In the Paid (Customer) screen, click +Create New Rule to create a new rule. For more details on how to create a paid rule, click here.

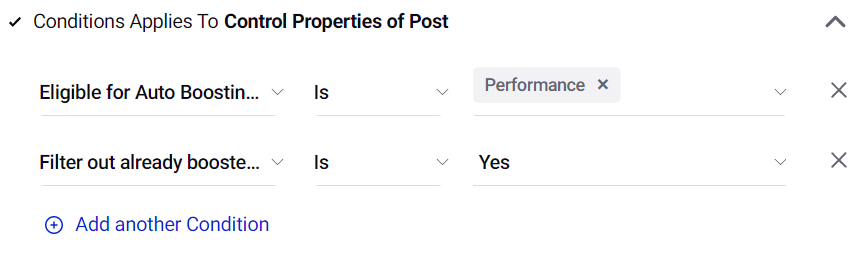
In the rule builder screen, add a condition to check if the Post is eligible for boosting:
Under Control Properties of Post, select the custom field Eligible for Auto Boosting / Paid Rules?, choose Is as the operator and select Performance as the value.
Add a new line within this same section and select Filter out already boosted posts as Yes.
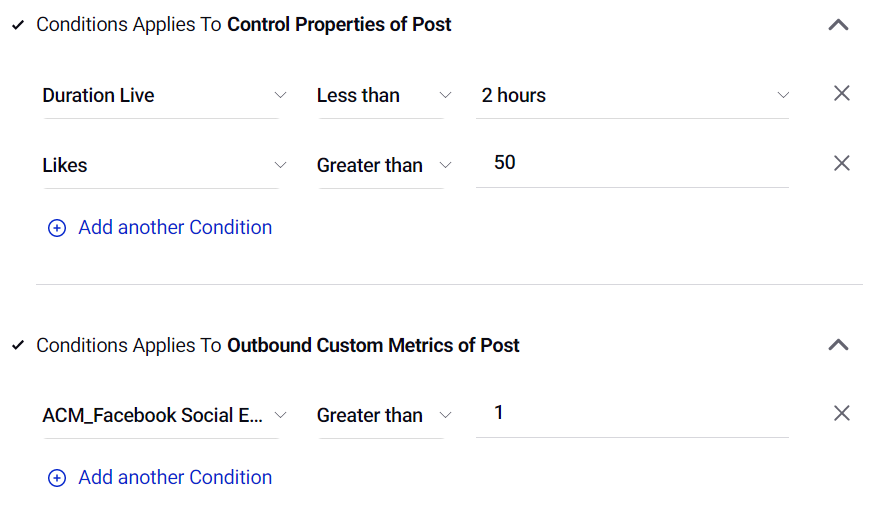
Add a Condition to check the organic performance of the post:
Under Control Properties of Post, choose Likes, Greater than and enter a suitable number.
Under Outbound Custom Metrics of Post, choose a custom metric such as Facebook Social Engagement Rate with operator Greater than and enter a suitable number (this will be a percentage if the custom metric is formated as a percentage).
Recommend having both a volume and rate metric, since low-impression posts can skew the engagement rate abnormally high.
Add an Action to boost the post:
Under Actions to Create Ad, select the ad account.
Next, choose to either create a new paid initiative and a new ad set, use existing paid initiative with new ad set or use existing paid initiative and existing ad set. This example creates new for both.
Choose the Ad Objective, Target Audience (which must be created beforehand in the Audience Manager), Ad Set Duration and Ad Set Budget. Additionally, you can add other actions as well, for example, sending for approval.

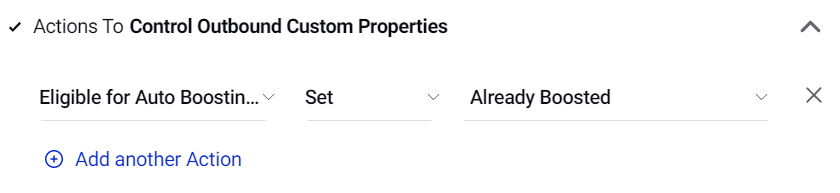
Finally, under Control Outbound Custom Properties, set the Custom Field Eligible for Auto Boosting / Paid Rules? to Already Boosted.
The completed rule should appear as shown in the image below:
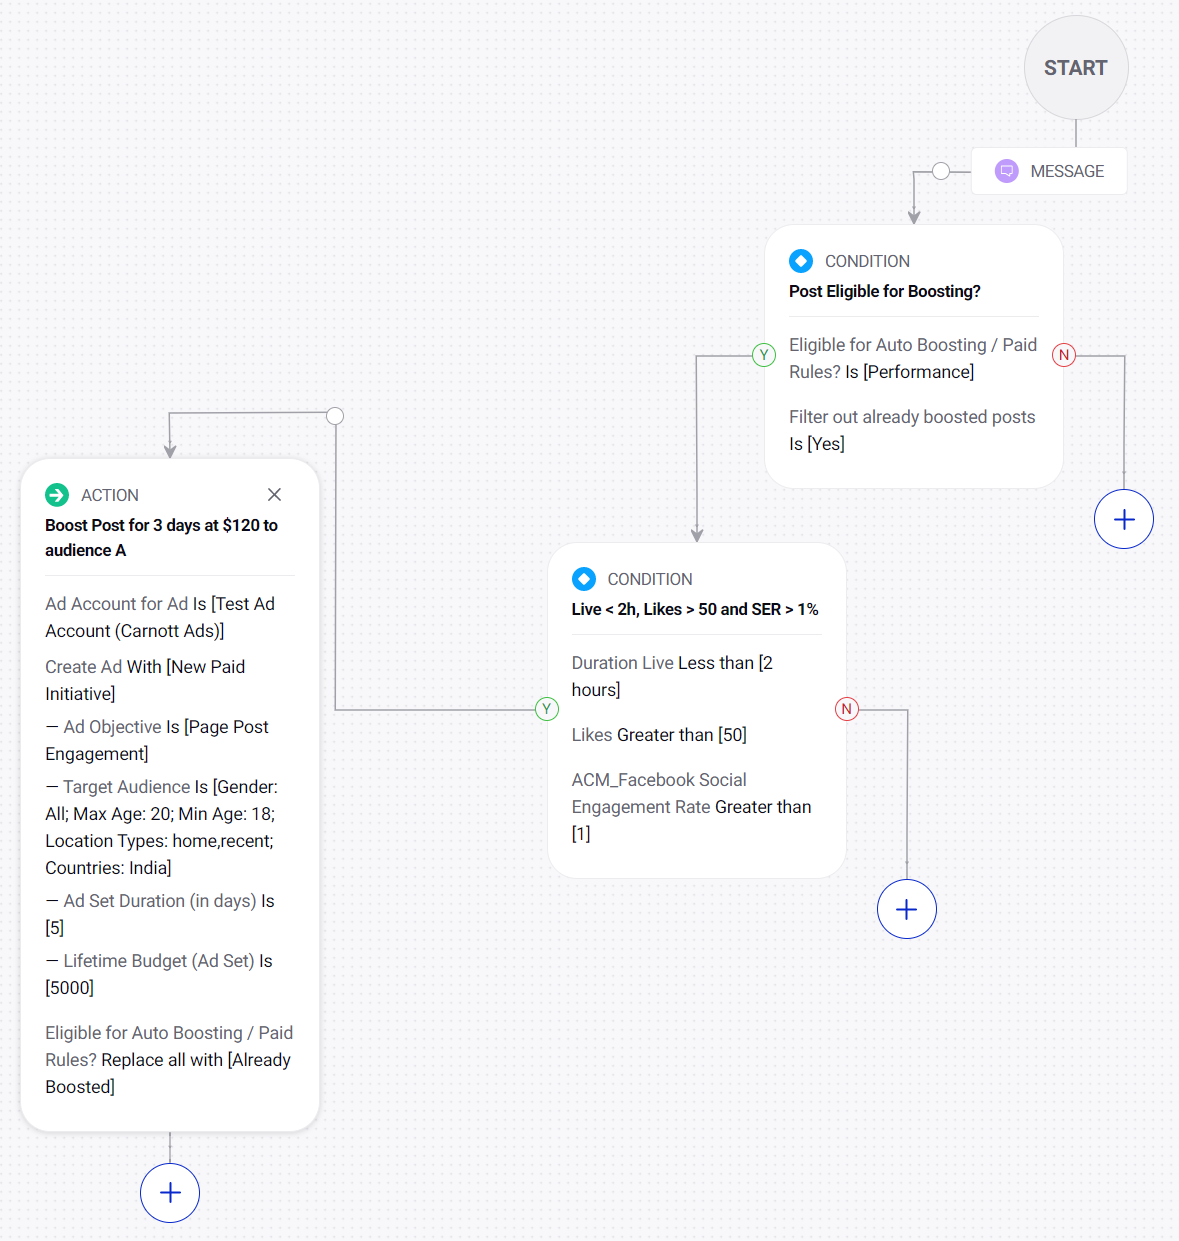
Finished Rule