Customer Journey
Updated
In Live Chat, customers can book an appointment to connect with a live agent at a time slot of their choice. The step-by-step appointment booking journey is described below.
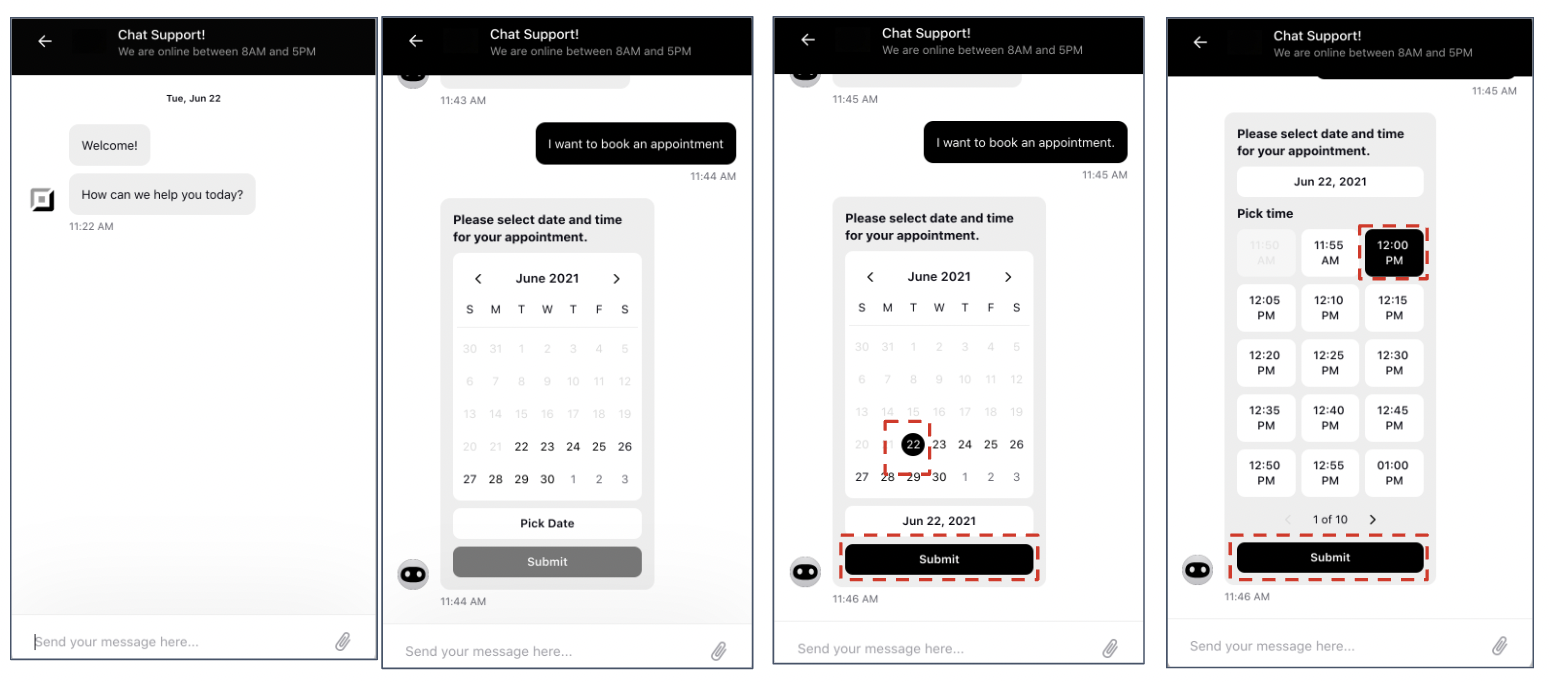
Customer Opens Chat and Chooses an Available Time Slot: The customer choose a chat on the brand's website/mobile. To schedule an appointment, the customer is prompted to select a date and time from a list of currently available slots.
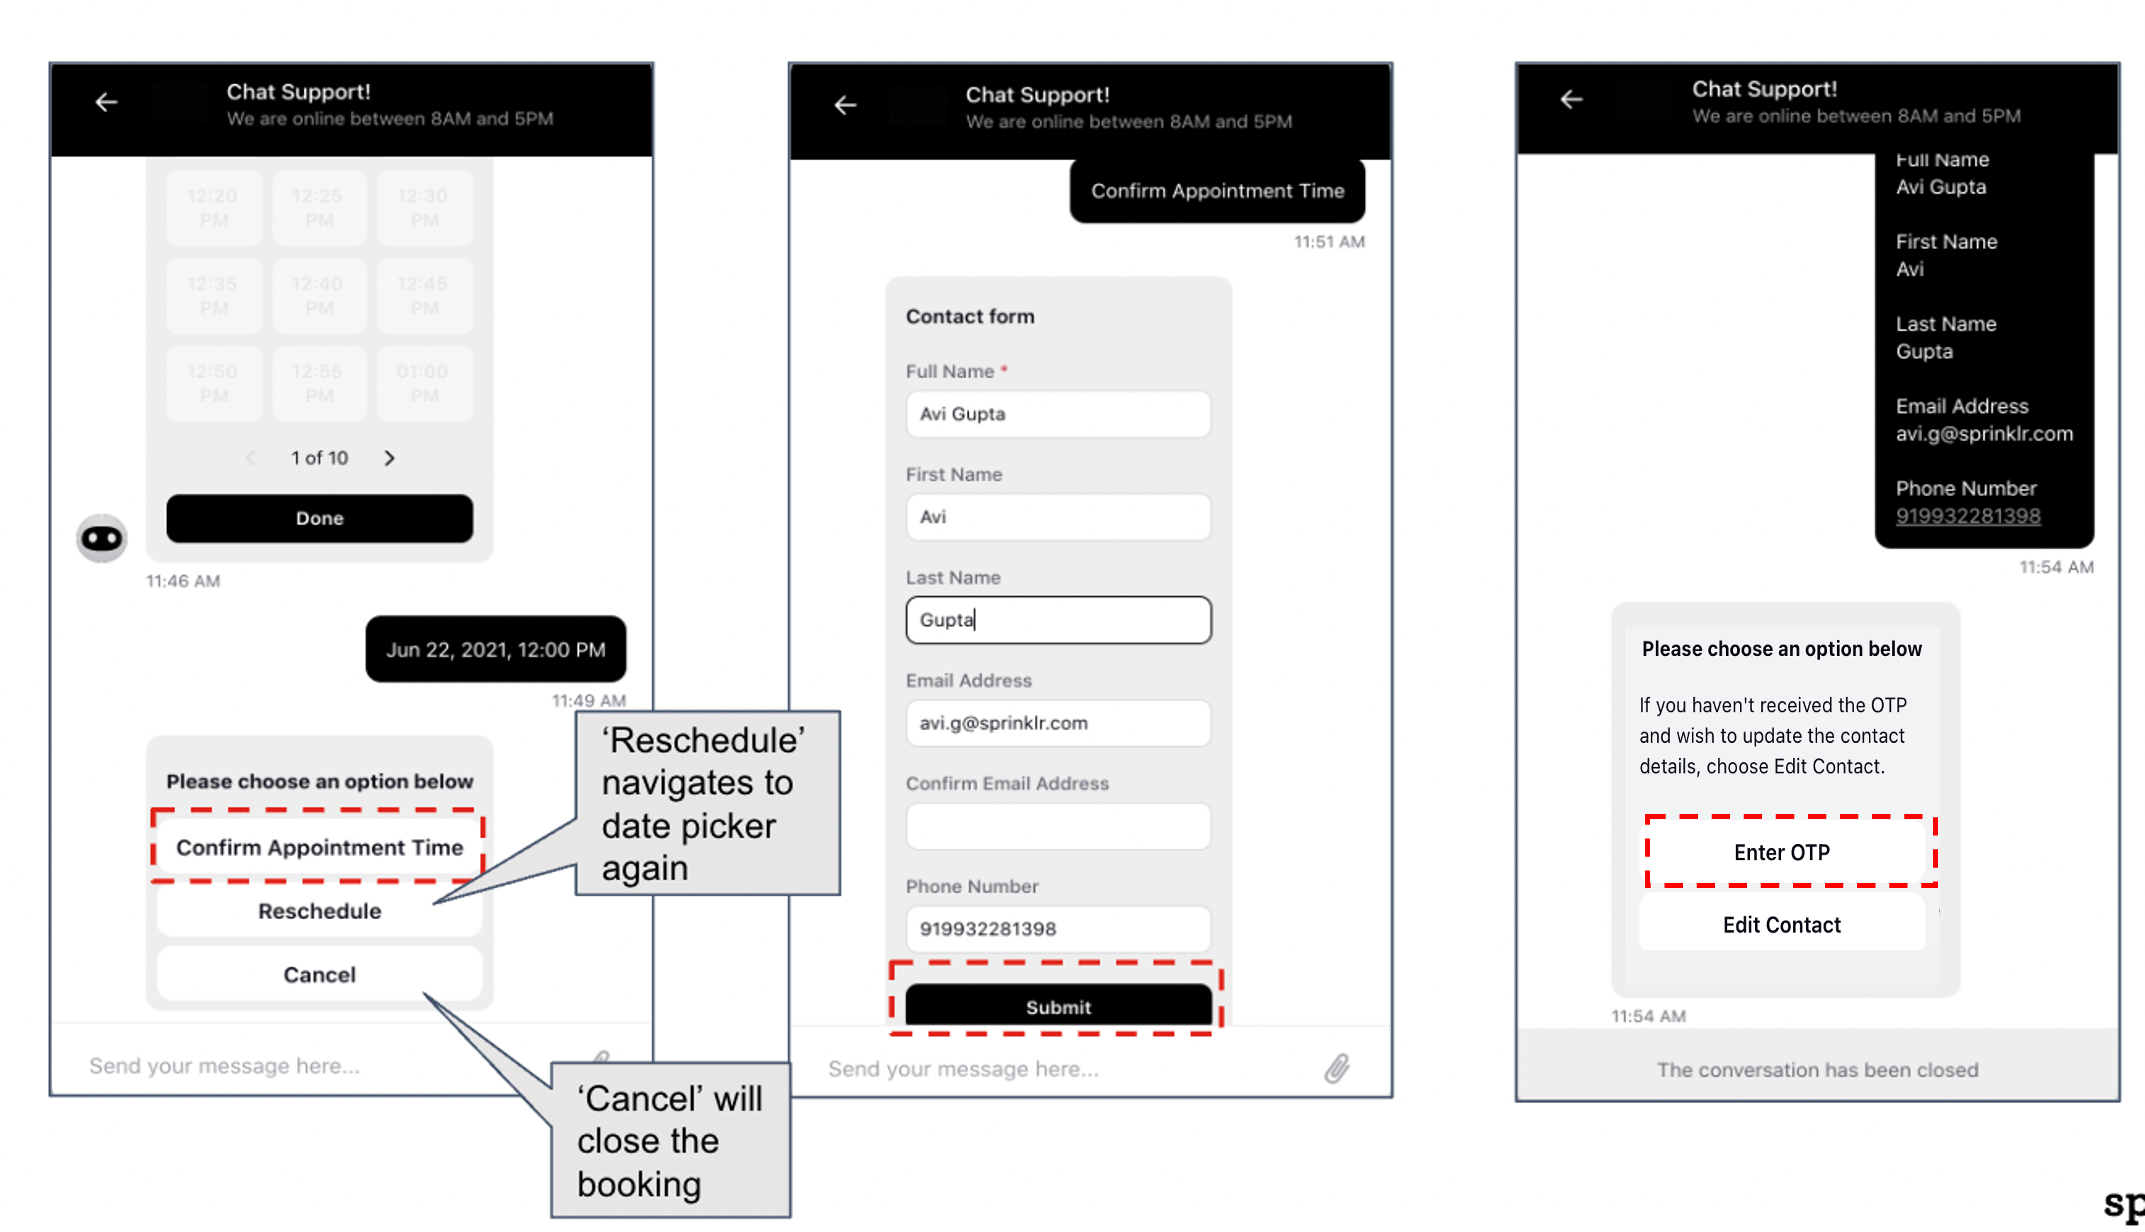
Customer Confirms, Reschedules or Cancels Appointment: Once a slot has been selected by the customer, we give them an option to either confirm the current appointment time, reschedule to a different time (in case customer entered a wrong date/time), or cancel the appointment altogether.
Live Chat Captures Customer Contact Details: After the user confirms the date and time, we capture their user details via a contact details form. These details are used for sending confirmation and reminder messages via email, SMS or WhatsApp and hence its crucial to verify the email address/phone number before sharing appointment details.
Verify Customer Contact Details: After the customer enters the contact details, we ask them to verify their contact details by entering the OTP received on their email/ phone number. Here they have an option to update contact details if they were entered incorrectly.
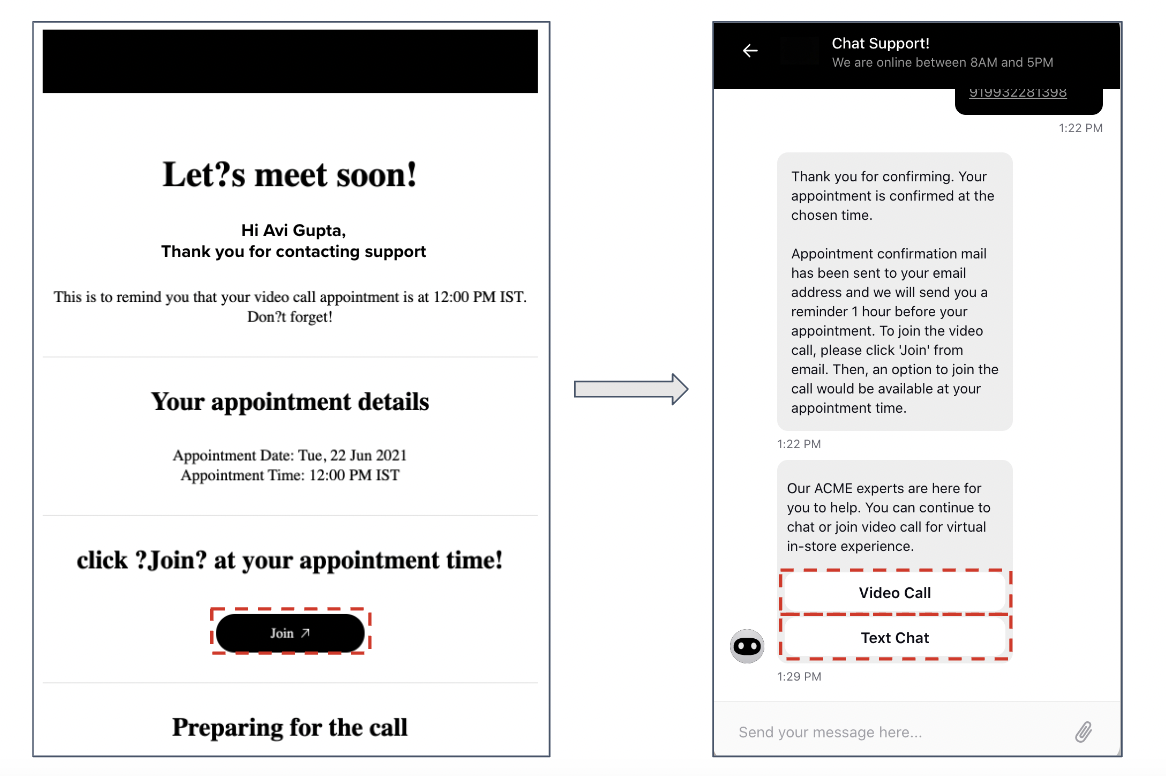
Appointment Confirmation: After the customer enters OTP and confirms their appointment timeslot on Live Chat, we send them a confirmation message on email and/or SMS and/or WhatsApp (depending on brand's use case). Following is an example of what a confirmation email looks like:
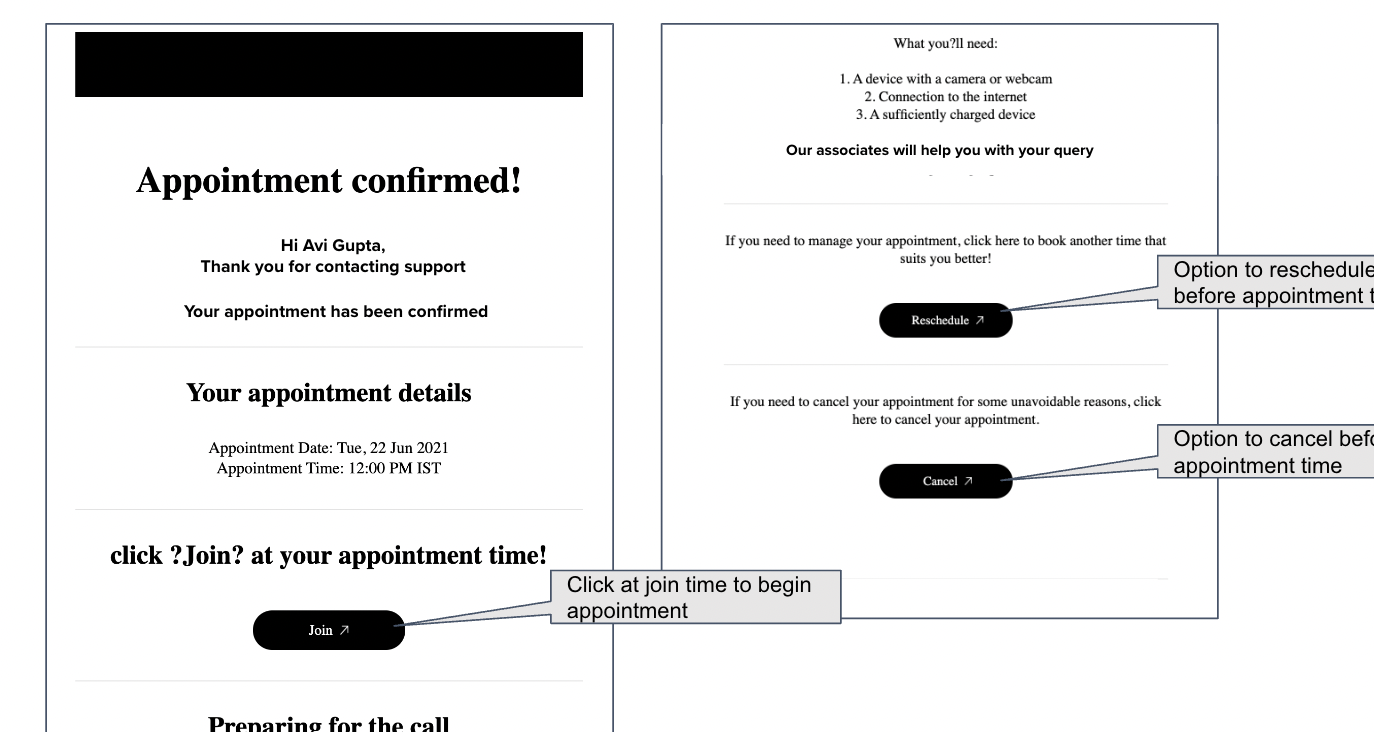
The email content and style can be customized based on brand's requirement. The email contains 3 CTA buttons. All CTA buttons redirect the customer to the website where the appointment was confirmed. On landing there, they will see their previous conversation also where they initiated the appointment.
At time of appointment, customer clicks on the Join CTA in the mail and starts their appointment.