Agent Screen Share Configuration
Updated
To enable agent screen sharing, begin by creating an Agent Screen Share template within the Digital Asset Manager. This template invites your customers to participate in a screen-sharing session with one of your agents for personalized assistance and support.
Following this, integrate the template into the live chat application within the builder.
Note: By default, every agent has permission to share their screen. If you need to manage this permission for individual users within the workspace settings, raise a support ticket at tickets@sprinklr.com to get the Agent Screen Share permission added.
Enablement note: To learn more about getting this capability enabled in your environment, please work with your Success Manager. |
Create an Agent Screen Share Asset
Once agent screen share is enabled for your environment, the next step is to create an Agent Screen Share asset. This asset will be sent by agents to customers to request their permission to share their screen.
To create an Agent Screen Share asset, follow these steps in Sprinklr:
1. Click the New Page (+) icon to open the Launchpad.
2. In the Sprinklr Social tab, under Engage > Digital Asset Management, and click Assets.

3. In the top-right corner of the Asset Management window, click Create Asset.

4. From the dropdown menu, select Templates > Omni Chat Templates.
This opens the Create New Asset window.

5. In the Basic Details section, enter a Name and optional Description for your asset.
6. In the Asset Specific section, select the following:
Channel: Select Sprinklr Live Chat
Template Type: Select Co-browse Invite

7. In the Co-browse Invite section, select the Agent Screen Share mode.
8. Fill in the details for the Agent Screen Share invite asset.
Field | Description |
Upload Image | Upload an image that will appear in the Agent Screen Share invite. |
Title | Enter a visible title for the invite. Formatting options: bold, italic, underline, strikethrough. |
Description | Provide a description. You can format the text using bold, italic, underline, strikethrough, and hyperlinks. |
Join Agent Presentation Label | Enter the label text for the accept invite button. This is what customers will click to join the screen-sharing session. |
Terms and Conditions | Add any terms and conditions that customers must accept before joining the screen-sharing session. |

8. Add translations for the asset, if needed. For steps, see Adding Translations.
9. In the Asset Details section, configure the following fields according to your requirements:
Campaigns, Sub Campaigns, Status, Available from, Visible from, Expires on, Tags, Restricted, Brands, Persona, Customer Journey Stage, Automated Tags, and Information.
10. In the Properties section, configure any additional properties as per your requirements.
11. In the Asset Sharing section, select Workspace(s) and Users/Users Group(s) you want to share this asset with.
You can also select Visible in all workspaces to share the asset with all workspaces.
12. Once all details are complete, click Save in the bottom-right corner to create the co-browsing asset.
Adding Translations
You can add translations to the Agent Screen Share invite to ensure that customers receive it in their preferred language. This allows agents to use a single, unified invite across different regions while delivering localized experiences that enhance customer satisfaction and engagement.
To add translations, follow these steps:
1. In the Create New Asset window, navigate to the Translation tab.
The English version of the invite appears on the left.

2. Click Add Language and select one or more languages from the dropdown.
A separate tab is created for each selected language.

3. For each language tab, enter the translated content for the following fields:
Title
Description
Join Agent Presentation Label
Terms and Conditions

4. Once you've added all translations, click Go Back to Editor or switch to the Editor tab, then click Save.
Add an Agent Screen Share Template to Live Chat Application
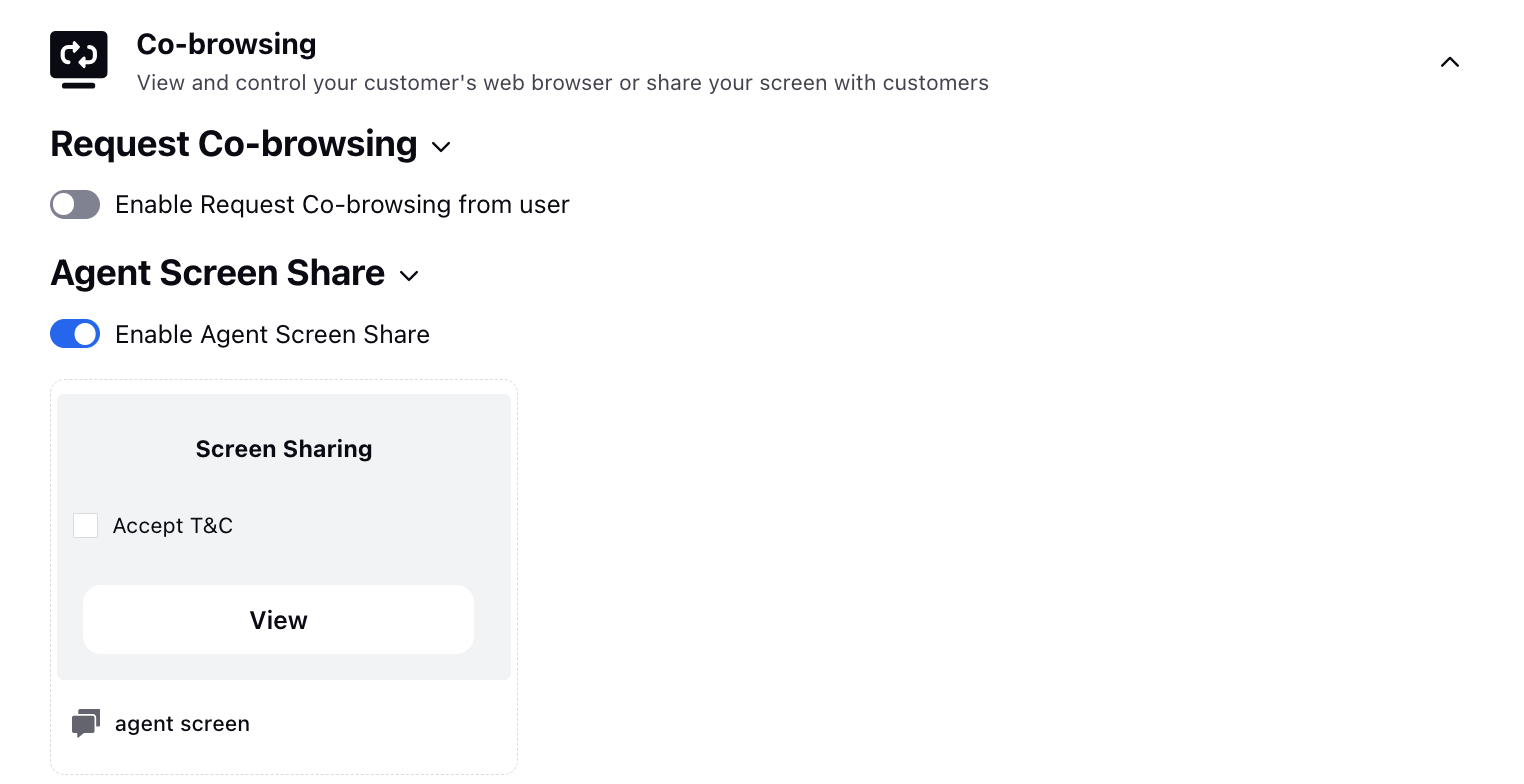
Edit the desired live chat application and scroll down to the Co-browsing section.
Under Agent Screen Share, enable the toggle for Agent Screen Share and select the configured template from Digital Asset Manager. Click Update at the bottom.
