How to Use Case Monitoring?
Updated
The Case Monitoring screen is a centralized, real-time dashboard for monitoring omnichannel cases. It allows supervisors to oversee ongoing customer interactions across Sprinklr’s voice and digital channels. This article explains how to access the screen and understand its key components.
![]() Note: Access to this feature is controlled by a dynamic property (DP). To enable this feature in your environment, reach out to your Success Manager. Alternatively, you can submit a request at tickets@sprinklr.com.
Note: Access to this feature is controlled by a dynamic property (DP). To enable this feature in your environment, reach out to your Success Manager. Alternatively, you can submit a request at tickets@sprinklr.com.
Prerequisites
Before you begin, ensure the following prerequisites are met:
Permissions
You must have the Live Cases Monitoring permission to access the Case Monitoring screen.
To check your permissions:
Click your user profile in the top-right corner of the Sprinklr platform.
Go to the Permissions tab and search for Live Cases Monitoring.
Persona App Setup
The Case Monitoring screen must be added to your persona app.
.png)
Access Case Monitoring
To access Case Monitoring, follow these steps:
Open the relevant Supervisor Console persona app from the Launchpad.
In the left pane, click Case Monitoring.
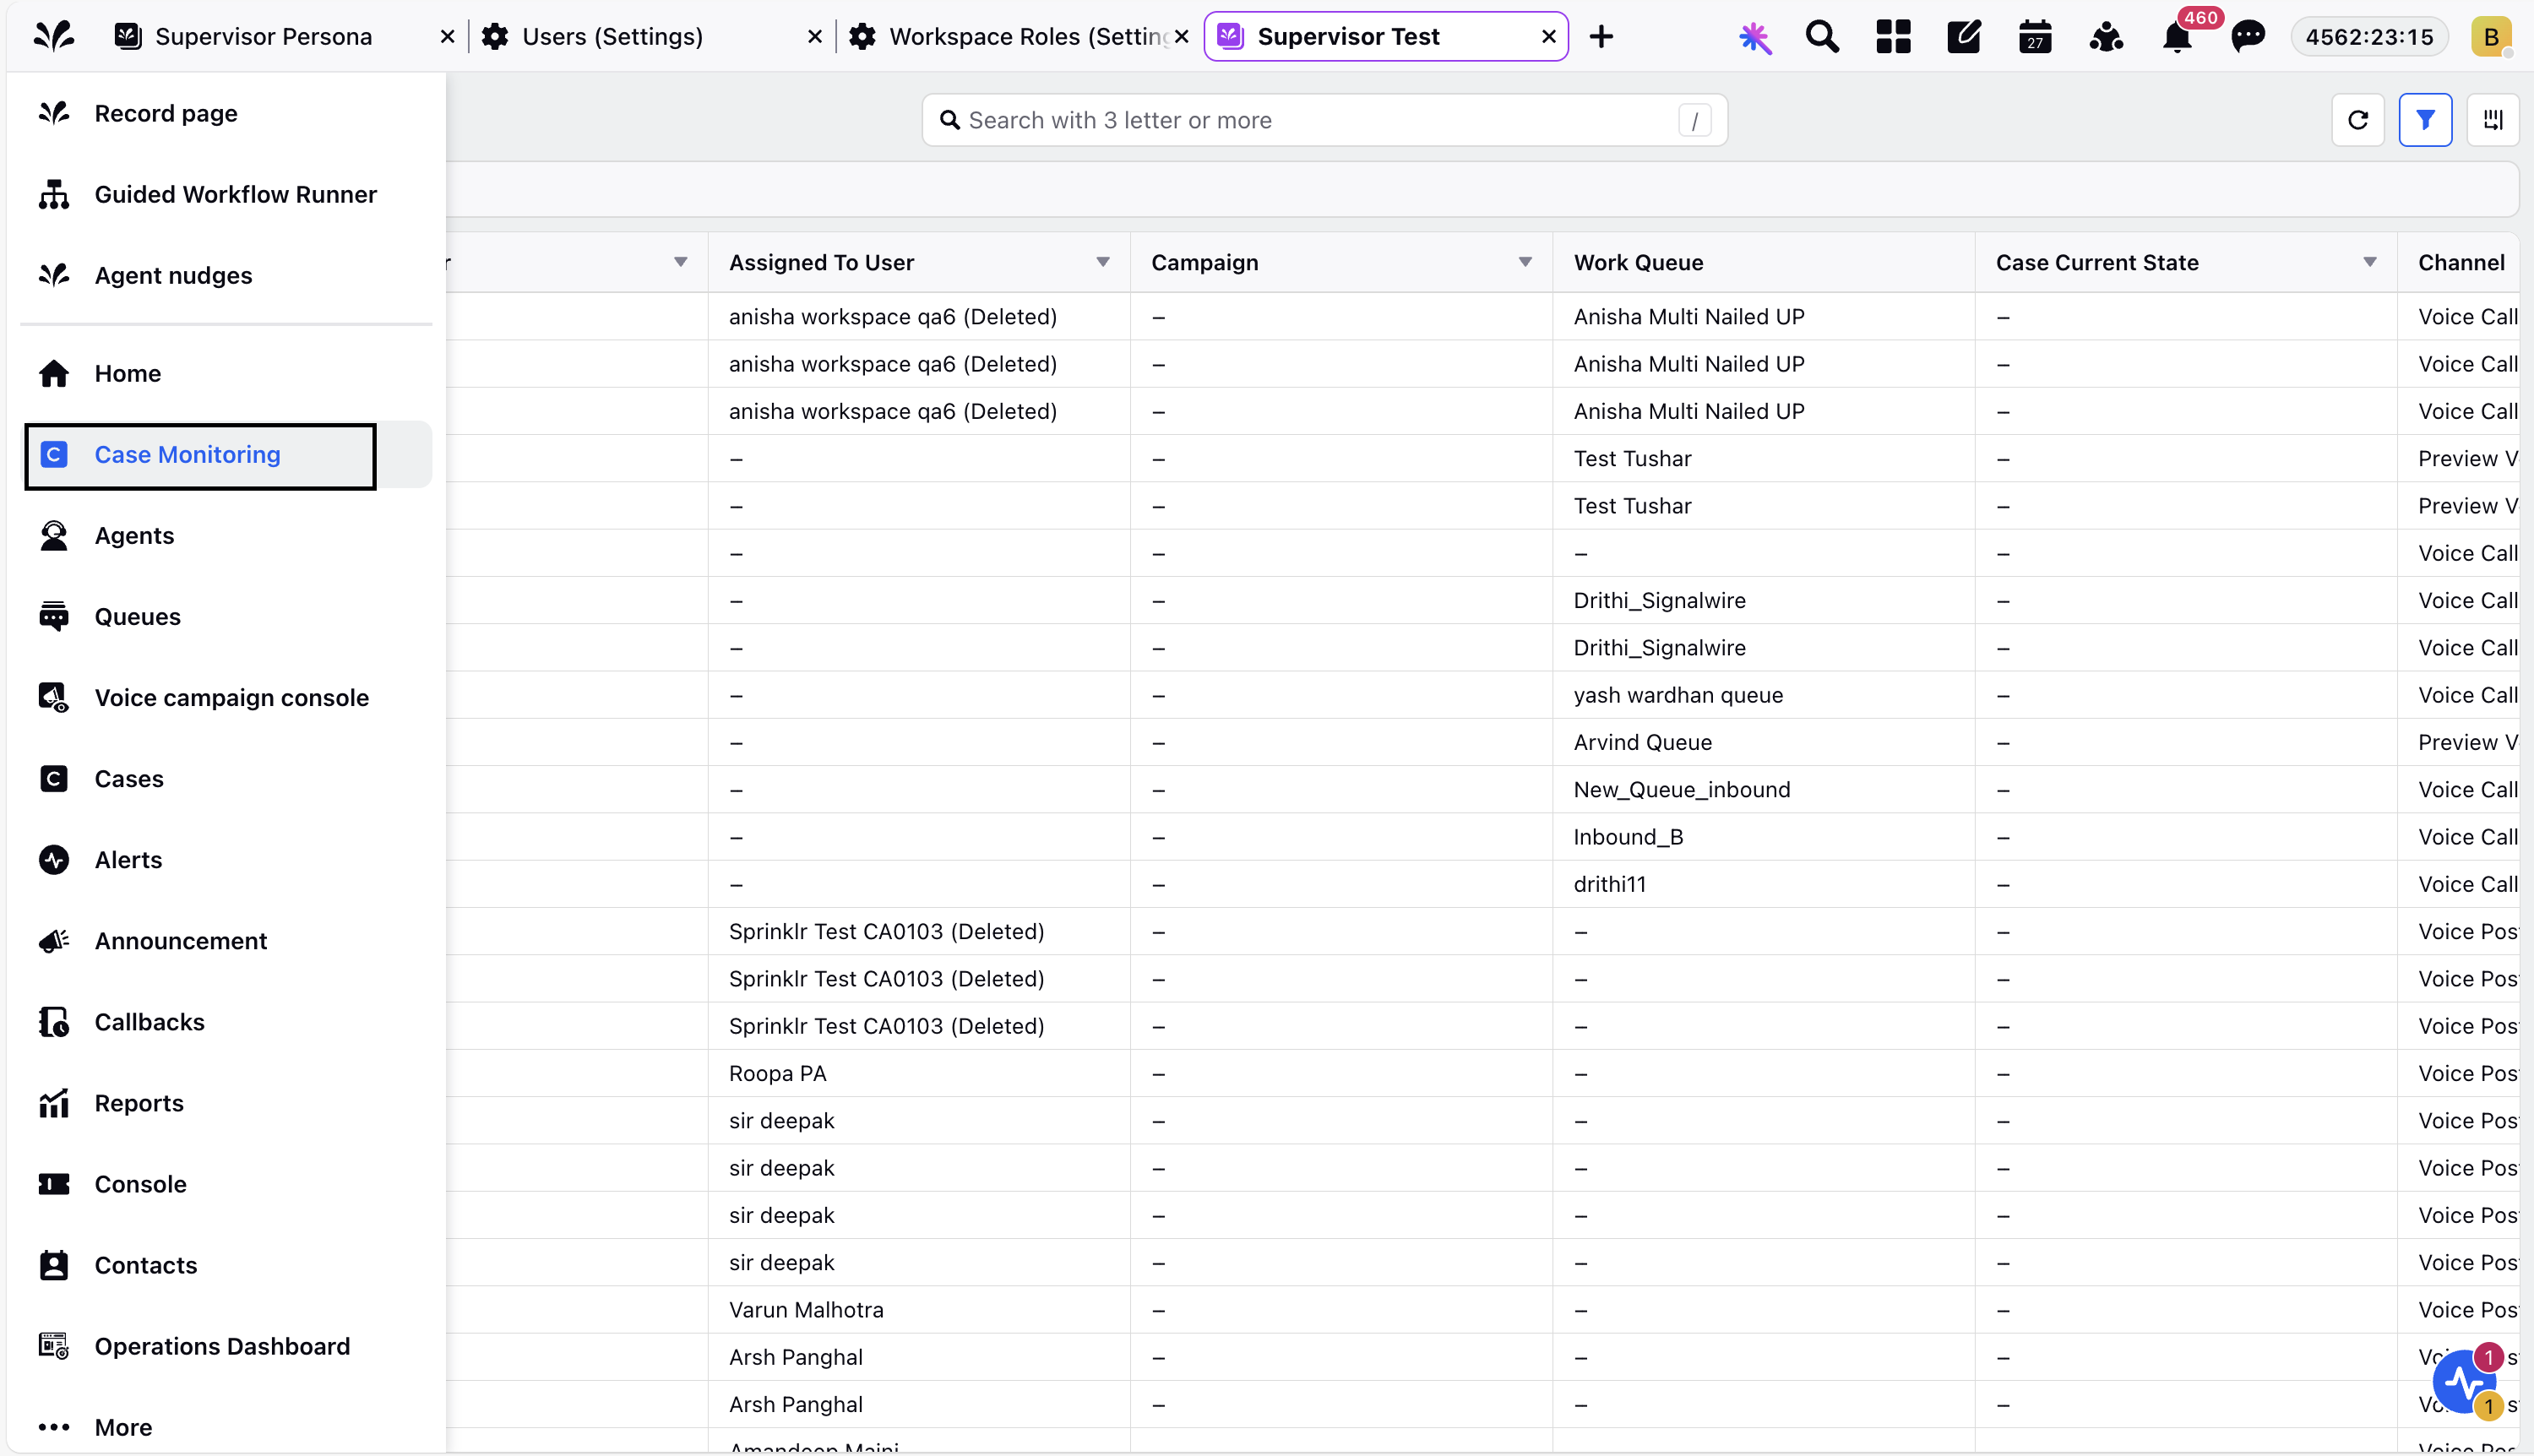
You have successfully accessed the Case Monitoring screen.
Case Monitoring Components
The Case Monitoring screen includes the following key components:
Aggregate View
Detail View
Aggregate View
The Aggregate Summary View provides a high-level overview of all ongoing cases by displaying the number of cases in each state. This view helps supervisors quickly understand the current workload and overall case distribution.
Supervisors can use the click-to-filter functionality, that is, clicking on any case state dynamically filters the Detailed View, allowing supervisors to focus on specific groups of cases with ease.

Detailed View
The Detailed View gives supervisors full visibility into individual cases, displaying key details like case number, assigned agent, work queue, status, communication channel, and more. Supervisors can take action on single cases or perform bulk actions directly from this view. By centralizing critical information, this view streamlines case management and enables faster, more informed decision-making.
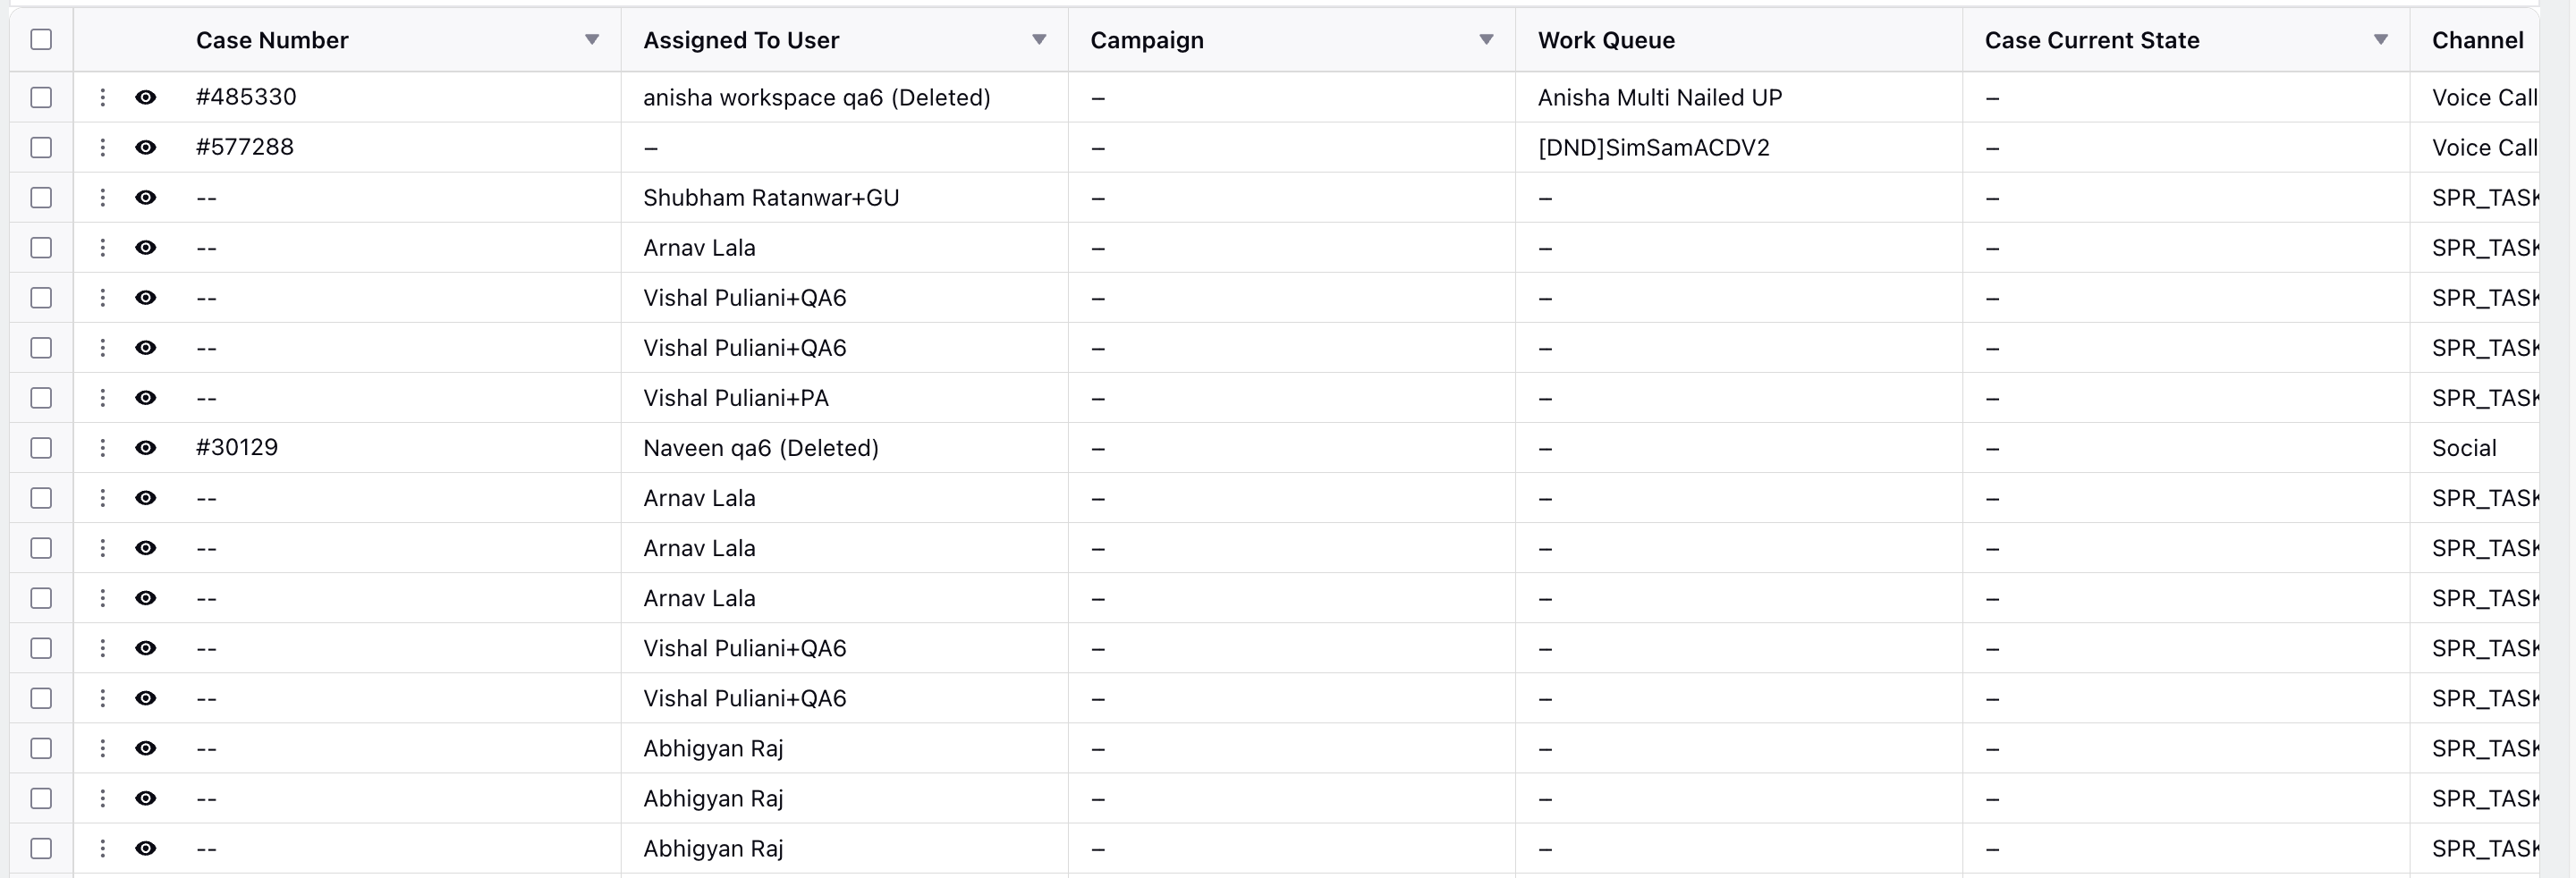
The Case Monitoring Detailed View includes the following columns:
Column Name | Description |
Case Number | The case number along with case state icons. |
Assigned To User | The agent name to whom the case is assigned. |
Campaign | The campaign associated with the case. |
Work Queue | The queue in which the case is added. |
Case Current State | The current state of the case. For more details, refer to the Case States table. |
Channel | The communication channel used. For example, Voice. |
Escalated Nudge Count | This column shows the number of nudges triggered for this case. To know more, see View Escalated Cases section. |
Required Skills Criteria | The required skills needed to handle the case. |
Time Since Assignment | Time elapsed since the case was created. |
Time in case current state | Tracks how long the case has been in its current state. |
Entity Visibility Rules in Case Monitoring
The Case Monitoring screen honors configured entity visibility rules, ensuring that supervisors only see the cases and related information they are authorized to access.
Key behavior
Cases and records outside the defined visibility scope are excluded from the dashboard.
The displayed data aligns with the platform’s visibility model, so supervisors only view cases and agents relevant to their responsibilities.
This reduces unnecessary information, streamlines monitoring, and helps supervisors focus on actionable cases.
Configuration Path
Entity visibility rules are managed in All Settings > Audit & Compliance > Entity Visibility Controls.
.png)
Use Custom Fields as Columns
The Case Monitoring screen supports adding custom fields as columns. This allows users to view case information that is specific to their workflows directly in the monitoring view. The custom fields can be used to view, filter, and aggregate cases based on configurable attributes, enabling more flexible analysis and improved operational visibility.
![]() Note: This feature requires backend configuration. To use custom fields as columns, contact Sprinklr Support at tickets@sprinklr.com.
Note: This feature requires backend configuration. To use custom fields as columns, contact Sprinklr Support at tickets@sprinklr.com.
.png)
Case States
Case states indicate the current progress of a case within the system. They help supervisors track where a case is in the workflow. For example, it indicates whether the case is waiting in a queue, in progress, or on hold.
The following table describes the different case states:
Case States | Description |
Case waiting in queue | This indicates that the inbound case is waiting in the queue. |
Call Ringing | This indicates that the inbound call is ringing. |
Incoming call | This indicates that an incoming call is in progress |
Call on hold | This indicates that the customer call is on hold. |
ACW | This indicates that the agent is filling After Call Work (ACW) for the call.
|
Call Dialing | This indicates that the agent is dialing an outbound call. |
Outgoing call | This indicates that an outbound call is in progress. |
Case In Progress | The digital case is in progress and open on the screen, indicating the agent is actively working on it. |
Idle | The digital case is in progress but is not currently open on the agent’s screen. This indicates the agent has previously opened the case but is not actively working on it at the moment.
|
Agent Holding Queue | The case is addressed by the agent. Customer gets a query immediately. They are then added to the agent holding queue. |
Generate Case Summary
![]() Note: Supervisors can view a smart summary of active cases agents are handling, generated by Sprinklr AI+. This option appears when a case is in the Case In Progress and Idle states. The case summary provides key context details before supervisors join the live interaction.
Note: Supervisors can view a smart summary of active cases agents are handling, generated by Sprinklr AI+. This option appears when a case is in the Case In Progress and Idle states. The case summary provides key context details before supervisors join the live interaction.
This feature requires backend configuration. To enable this feature in your environment, contact Sprinklr Support at tickets@sprinklr.com.
.png)
The case summary includes details such as case number, customer predicted CSAT, case duration, reason for contact, and agent actions taken. By having this information upfront, supervisors can make faster, more informed interventions, leading to improved resolution times and more effective case management.