Setting Up AWS Chime Account for Video Calling
Updated
You can integrate Live Chat with AWS Chime to enable video chat functionality. This involves setting up an AWS Chime account with the necessary permissions and linking it to Sprinklr. To support video recording and transcription, you can additionally configure service-linked roles in AWS and set up an S3 bucket for storage.
Prerequisites
Before you begin, ensure the following prerequisites are met:
Active AWS Account with Chime SDK
Ensure you have an active AWS account.
The Amazon Chime SDK must be enabled and correctly configured.
The AWS Region used for the Amazon Chime SDK should support both meeting control and meeting media. For more information, see Available AWS Regions for the Amazon Chime SDK.
Raise a Support Ticket
To enable the Video Call feature, contact Sprinklr Support (tickets@sprinklr.com) and include the following details:
Partner Name
Partner ID
Preferred account for video calls: AWS Chime
Request activation of the Video Call IAM role and enablement of Video Calling dynamic properties
Cloud Provider Identity and Authentication Details
The cloud provider identity and authentication details that you need in Step 1 are listed in the section below.
![]() Note: If the details are not listed for your cloud provider, reach out to Sprinklr Support at tickets@sprinklr.com.
Note: If the details are not listed for your cloud provider, reach out to Sprinklr Support at tickets@sprinklr.com.
Set Up AWS Chime Account
In this section, you will create a role in your AWS account with the required permissions. Once the role is set up, you can add an AWS Chime account in Sprinklr.
Step 1: Create a Role in Your AWS Account
Depending on your Sprinklr-hosting environment, see the relevant section:
Step 2: Create AWS Chime Account in Sprinklr
1. Log in to Sprinklr.
2. Navigate to the Sprinklr's Accounts page:
Click the New Page (+) icon. Under Platform Modules, select All Settings. Search for Accounts and select it to open the Accounts page.
Alternatively, you can go directly to the Accounts page using this link: https://space.sprinklr.com/social/governance/accounts.
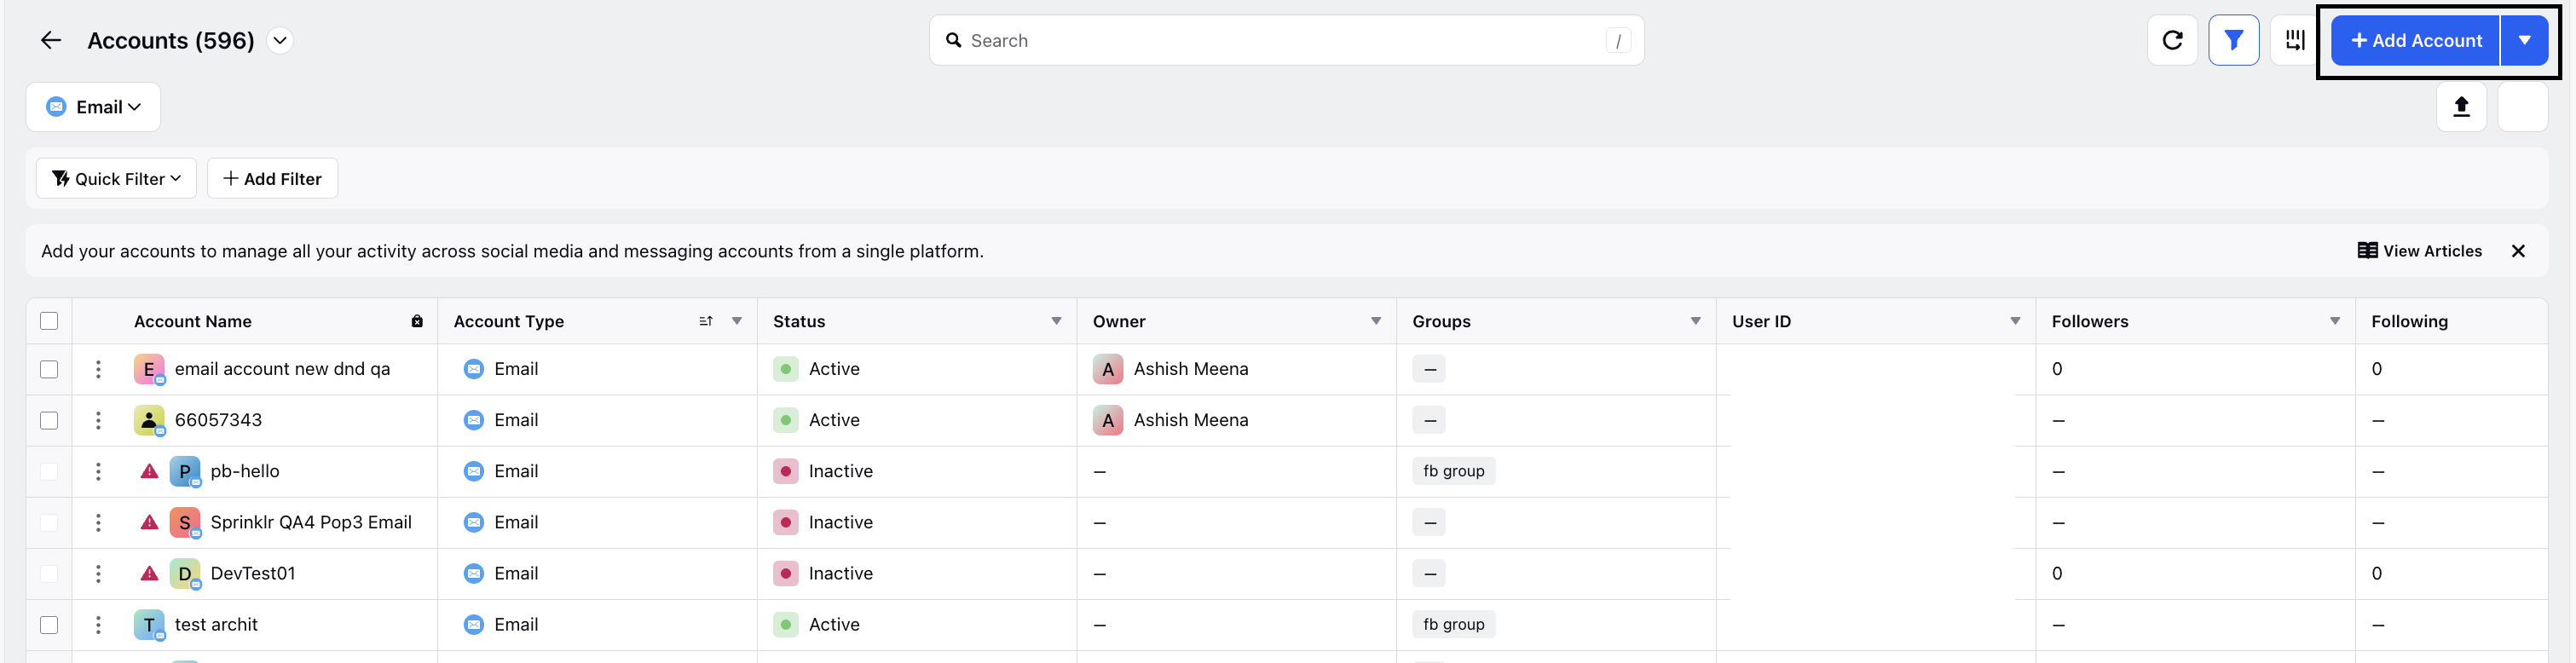
3. On the Accounts page, click Add Account.
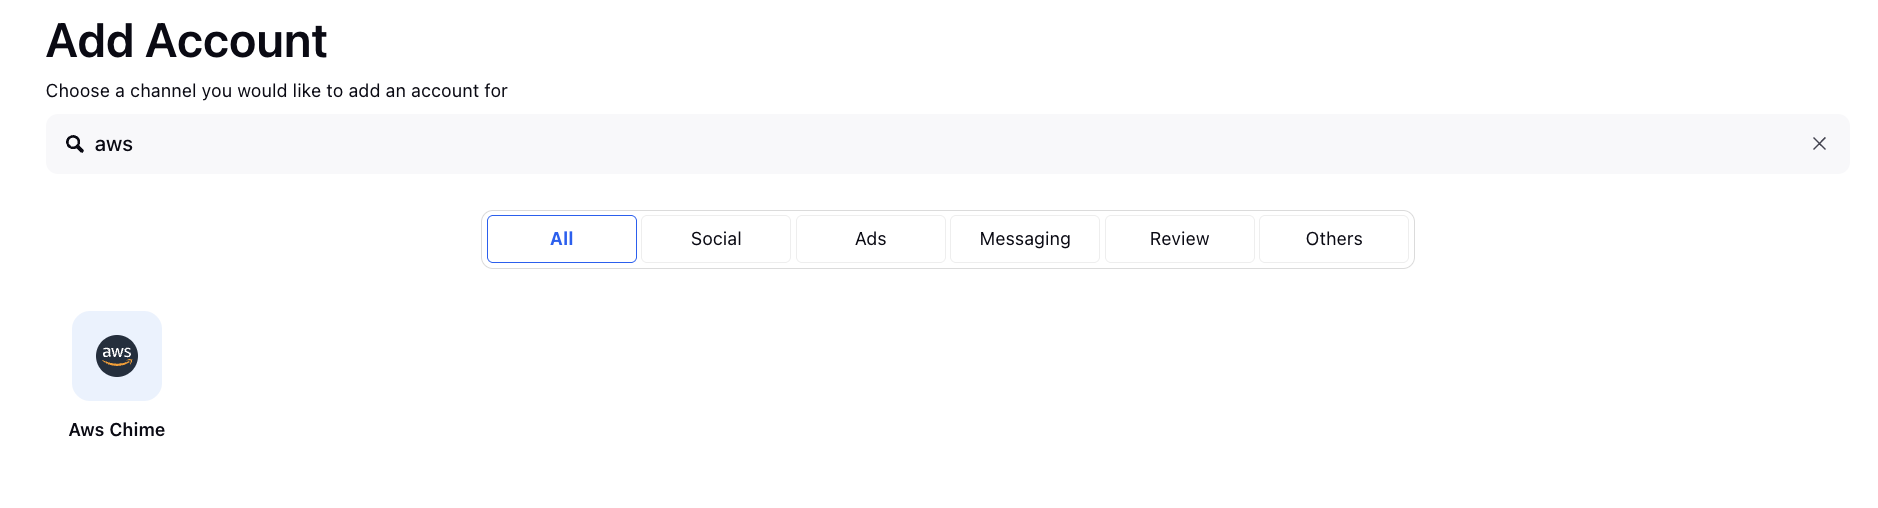
4. In the search bar, type AWS Chime, then select it from the search results.
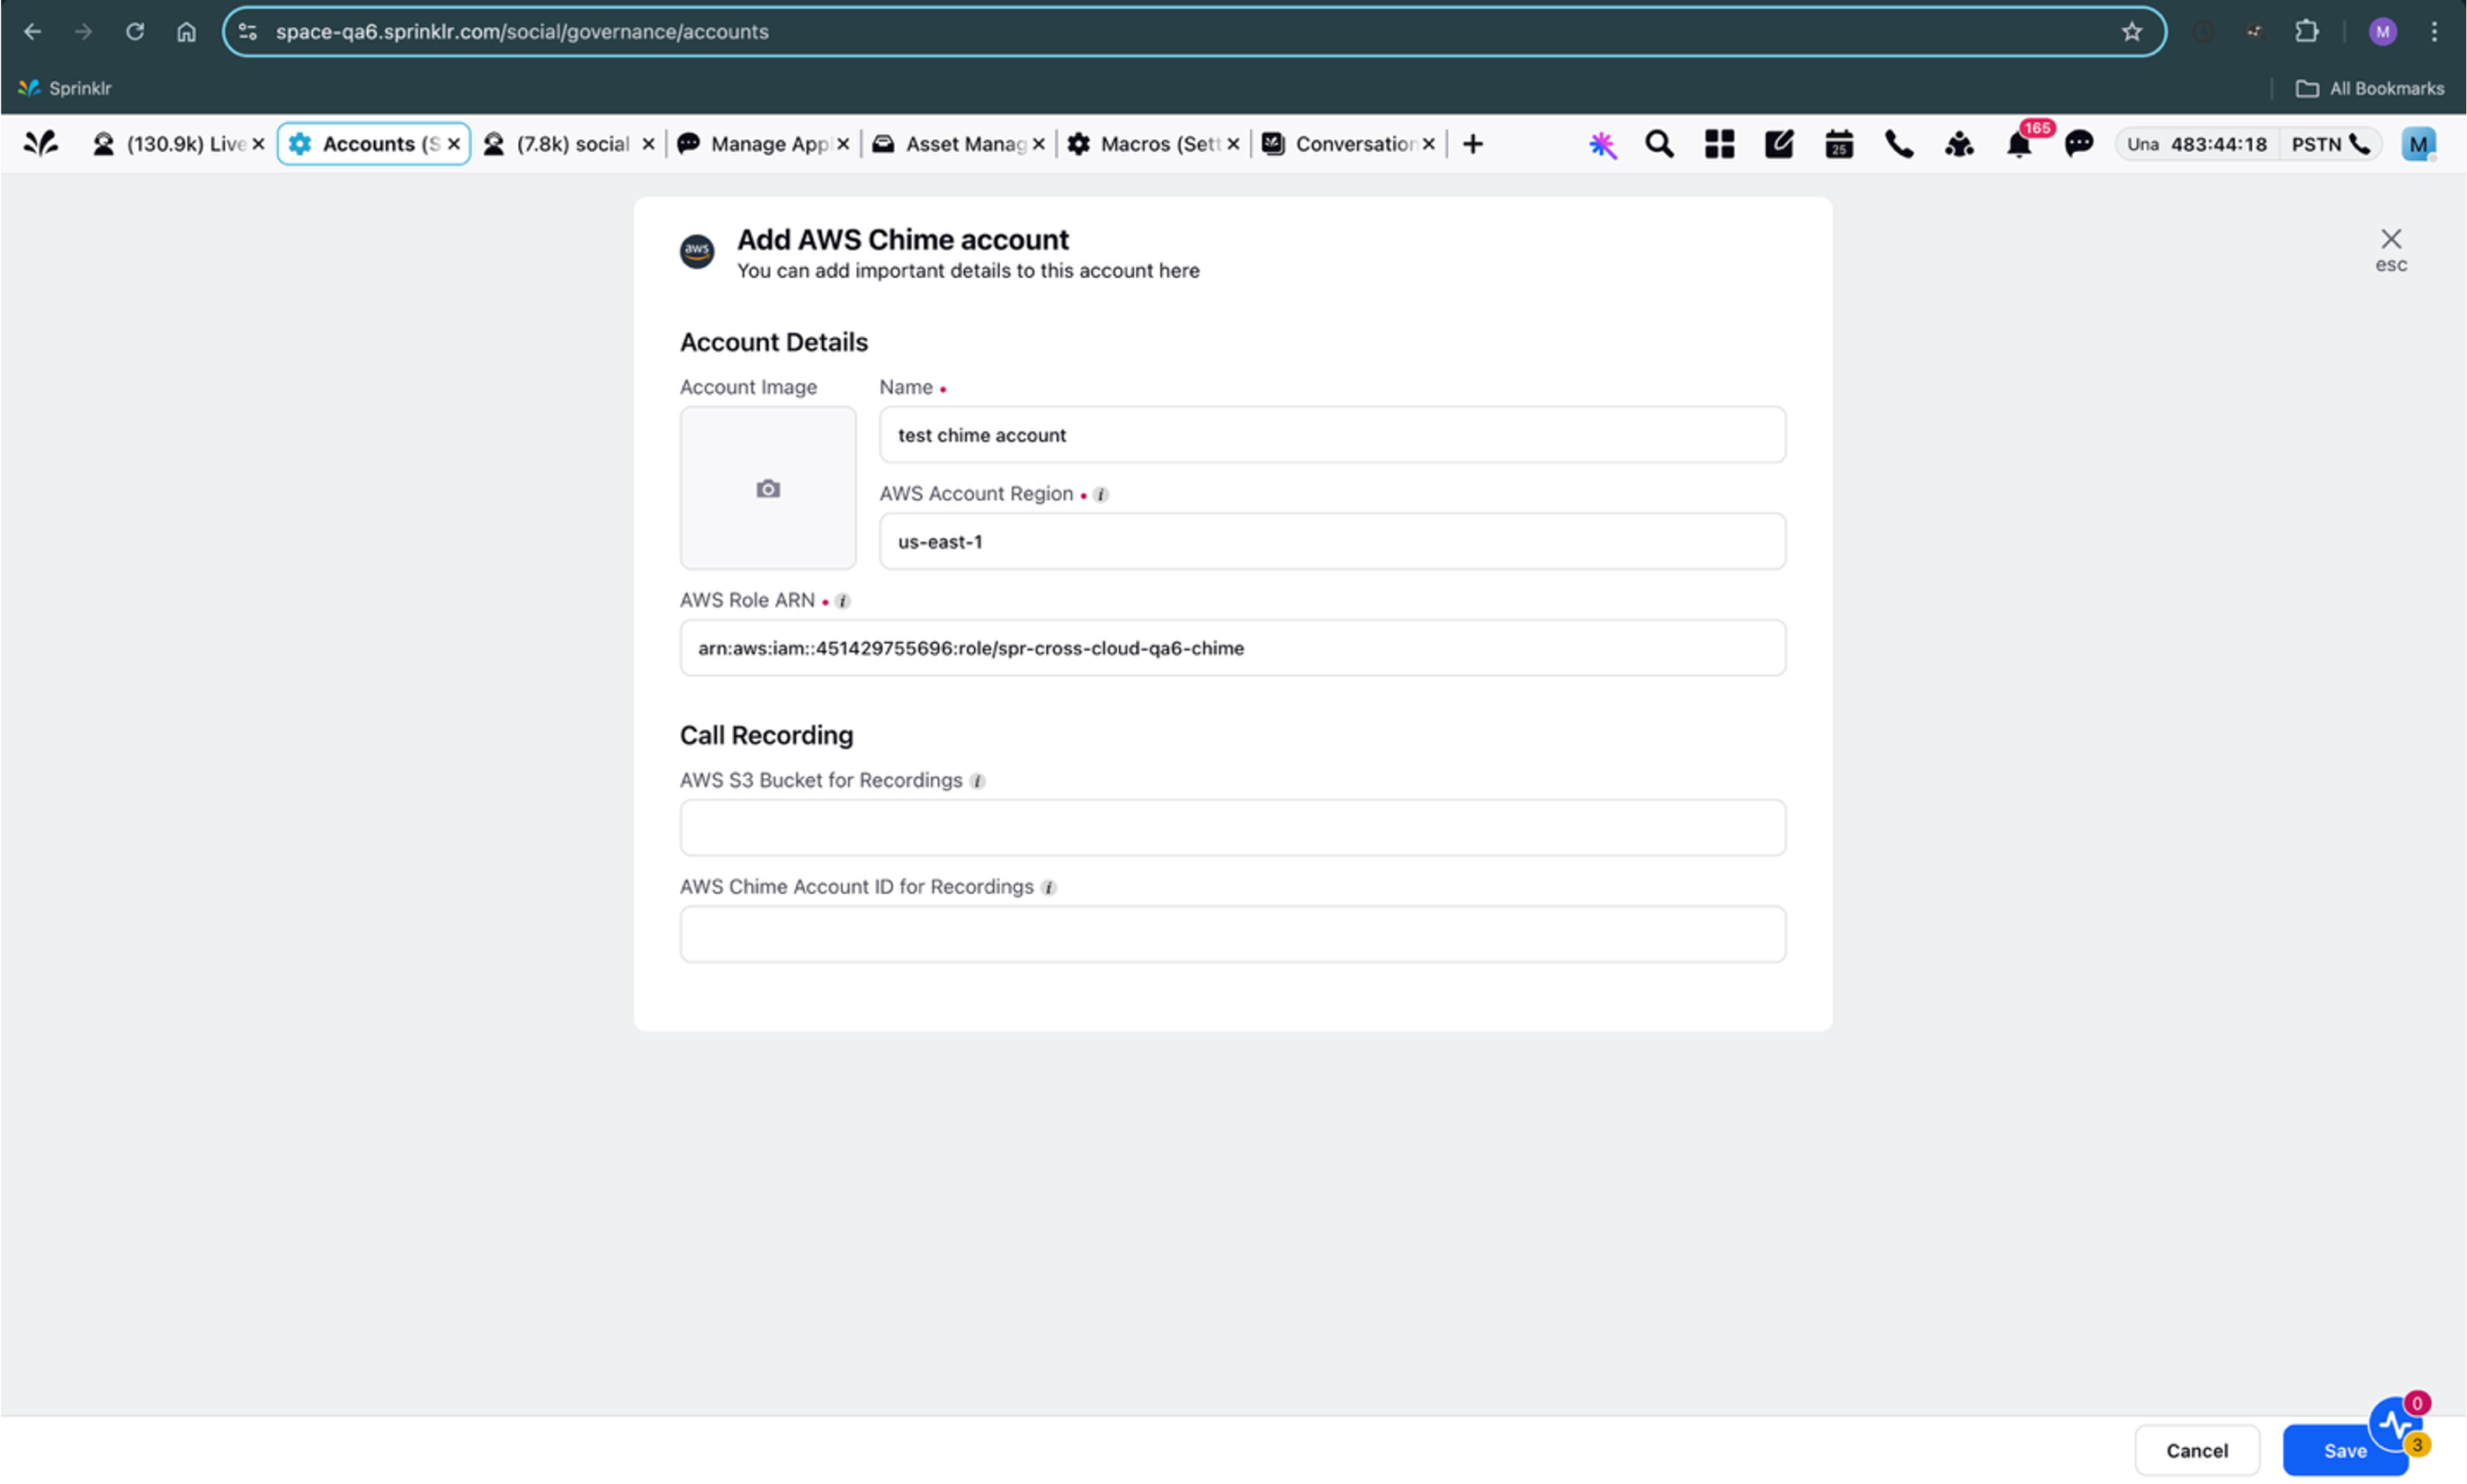
5. On the Add AWS Chime Account screen, enter the following key AWS Chime account details.
Field | Description |
Name | Enter a name for the AWS Chime account. |
AWS Account Region | Specify the AWS Account Region. |
AWS Role ARN | Enter the ARN you copied in Step 1. |
![]() Note: You can skip the Call Recording fields for now. These can be configured after the AWS Chime account has been added in Sprinklr.
Note: You can skip the Call Recording fields for now. These can be configured after the AWS Chime account has been added in Sprinklr.
Step 3: Link a Live Chat App with AWS Chime in Sprinklr
1. In Sprinklr, click the New Page (+) icon to open the Launchpad.
2. Navigate to Sprinklr Service > Listen, then select Live Chat Care.
3. On the Live Chat Applications page, find the Live Chat app you want to link to your AWS Chime account.
4. Click the three‑dot menu next to the app.
5. Select Edit Live Chat.

6. In the Live Chat Builder, expand the Video and Audio section.
7. Toggle Enable Video and Audio Call. The Select account drop‑down will appear.
8. From the drop‑down, choose the AWS Chime account you added.

![]() Note: Live Chat Video Call allows users to join a video call without needing microphone access. By removing the requirement for mandatory microphone permissions, Live Chat makes communication more inclusive and accessible for all participants.
Note: Live Chat Video Call allows users to join a video call without needing microphone access. By removing the requirement for mandatory microphone permissions, Live Chat makes communication more inclusive and accessible for all participants.
This capability is especially valuable for individuals who rely on sign language, use devices without microphone hardware, or prefer not to share audio for privacy reasons. Users can still participate fully in video‑only mode, keeping communication open and accessible.
Add Support for Video Chat Recording and Transcription
You can record and transcribe video calls using AWS Chime in Live Chat. To enable this functionality, follow these steps:
Create Service-Linked Roles for Recording and Transcription
![]() Note: For detailed steps, refer to Amazon Chime SDK Documentation.
Note: For detailed steps, refer to Amazon Chime SDK Documentation.
Follow these steps:
1. Log in to your AWS account.
2. Go to IAM Console.
3. Click Role > Create role.
For recording, in Trusted entity type, select AWS service. In Use case section, select Chime - SDK Media Pipelines.
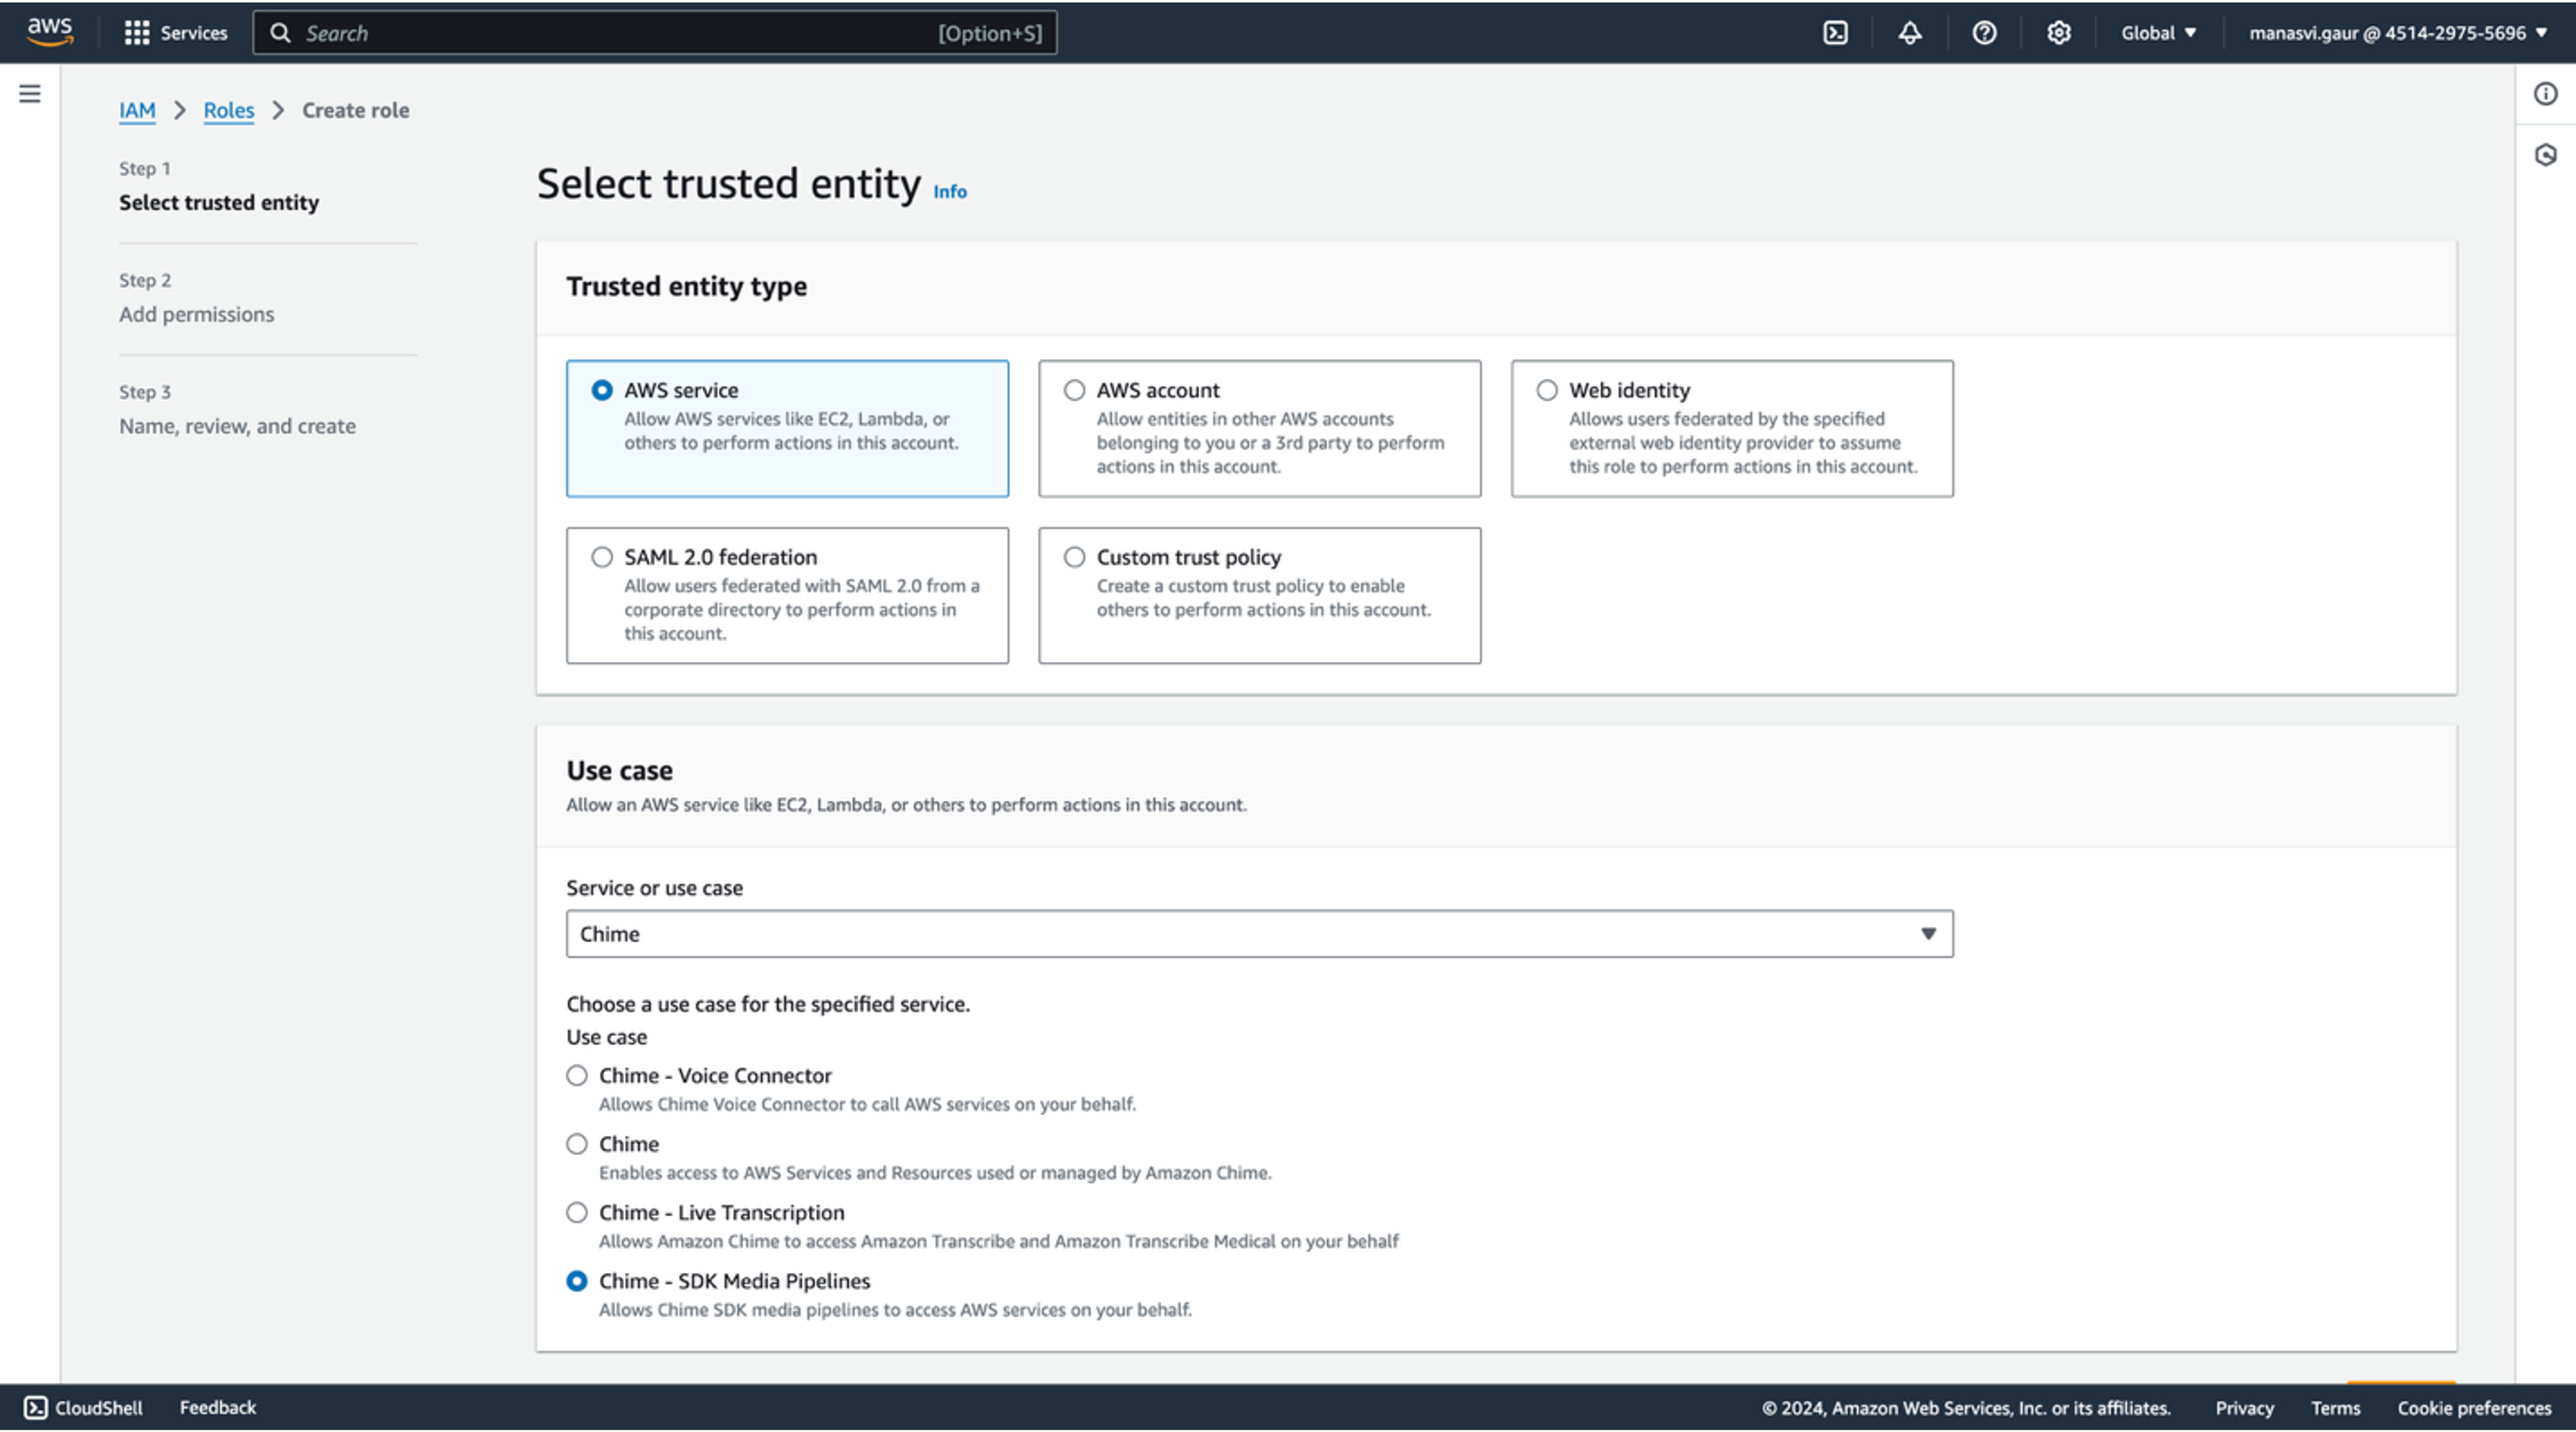
For transcription, in Use case section, select Chime - Live Transcription.
![]()
Create an S3 Bucket with Policy for Recording and Transcription
This step is to create an Amazon S3 buckect and configure it to store Chime recordings and transcripts.
Follow these steps:
1. Log in to your AWS account.
2. Navigate to the Amazon S3 service.
3. In the left-hand menu, click Buckets.
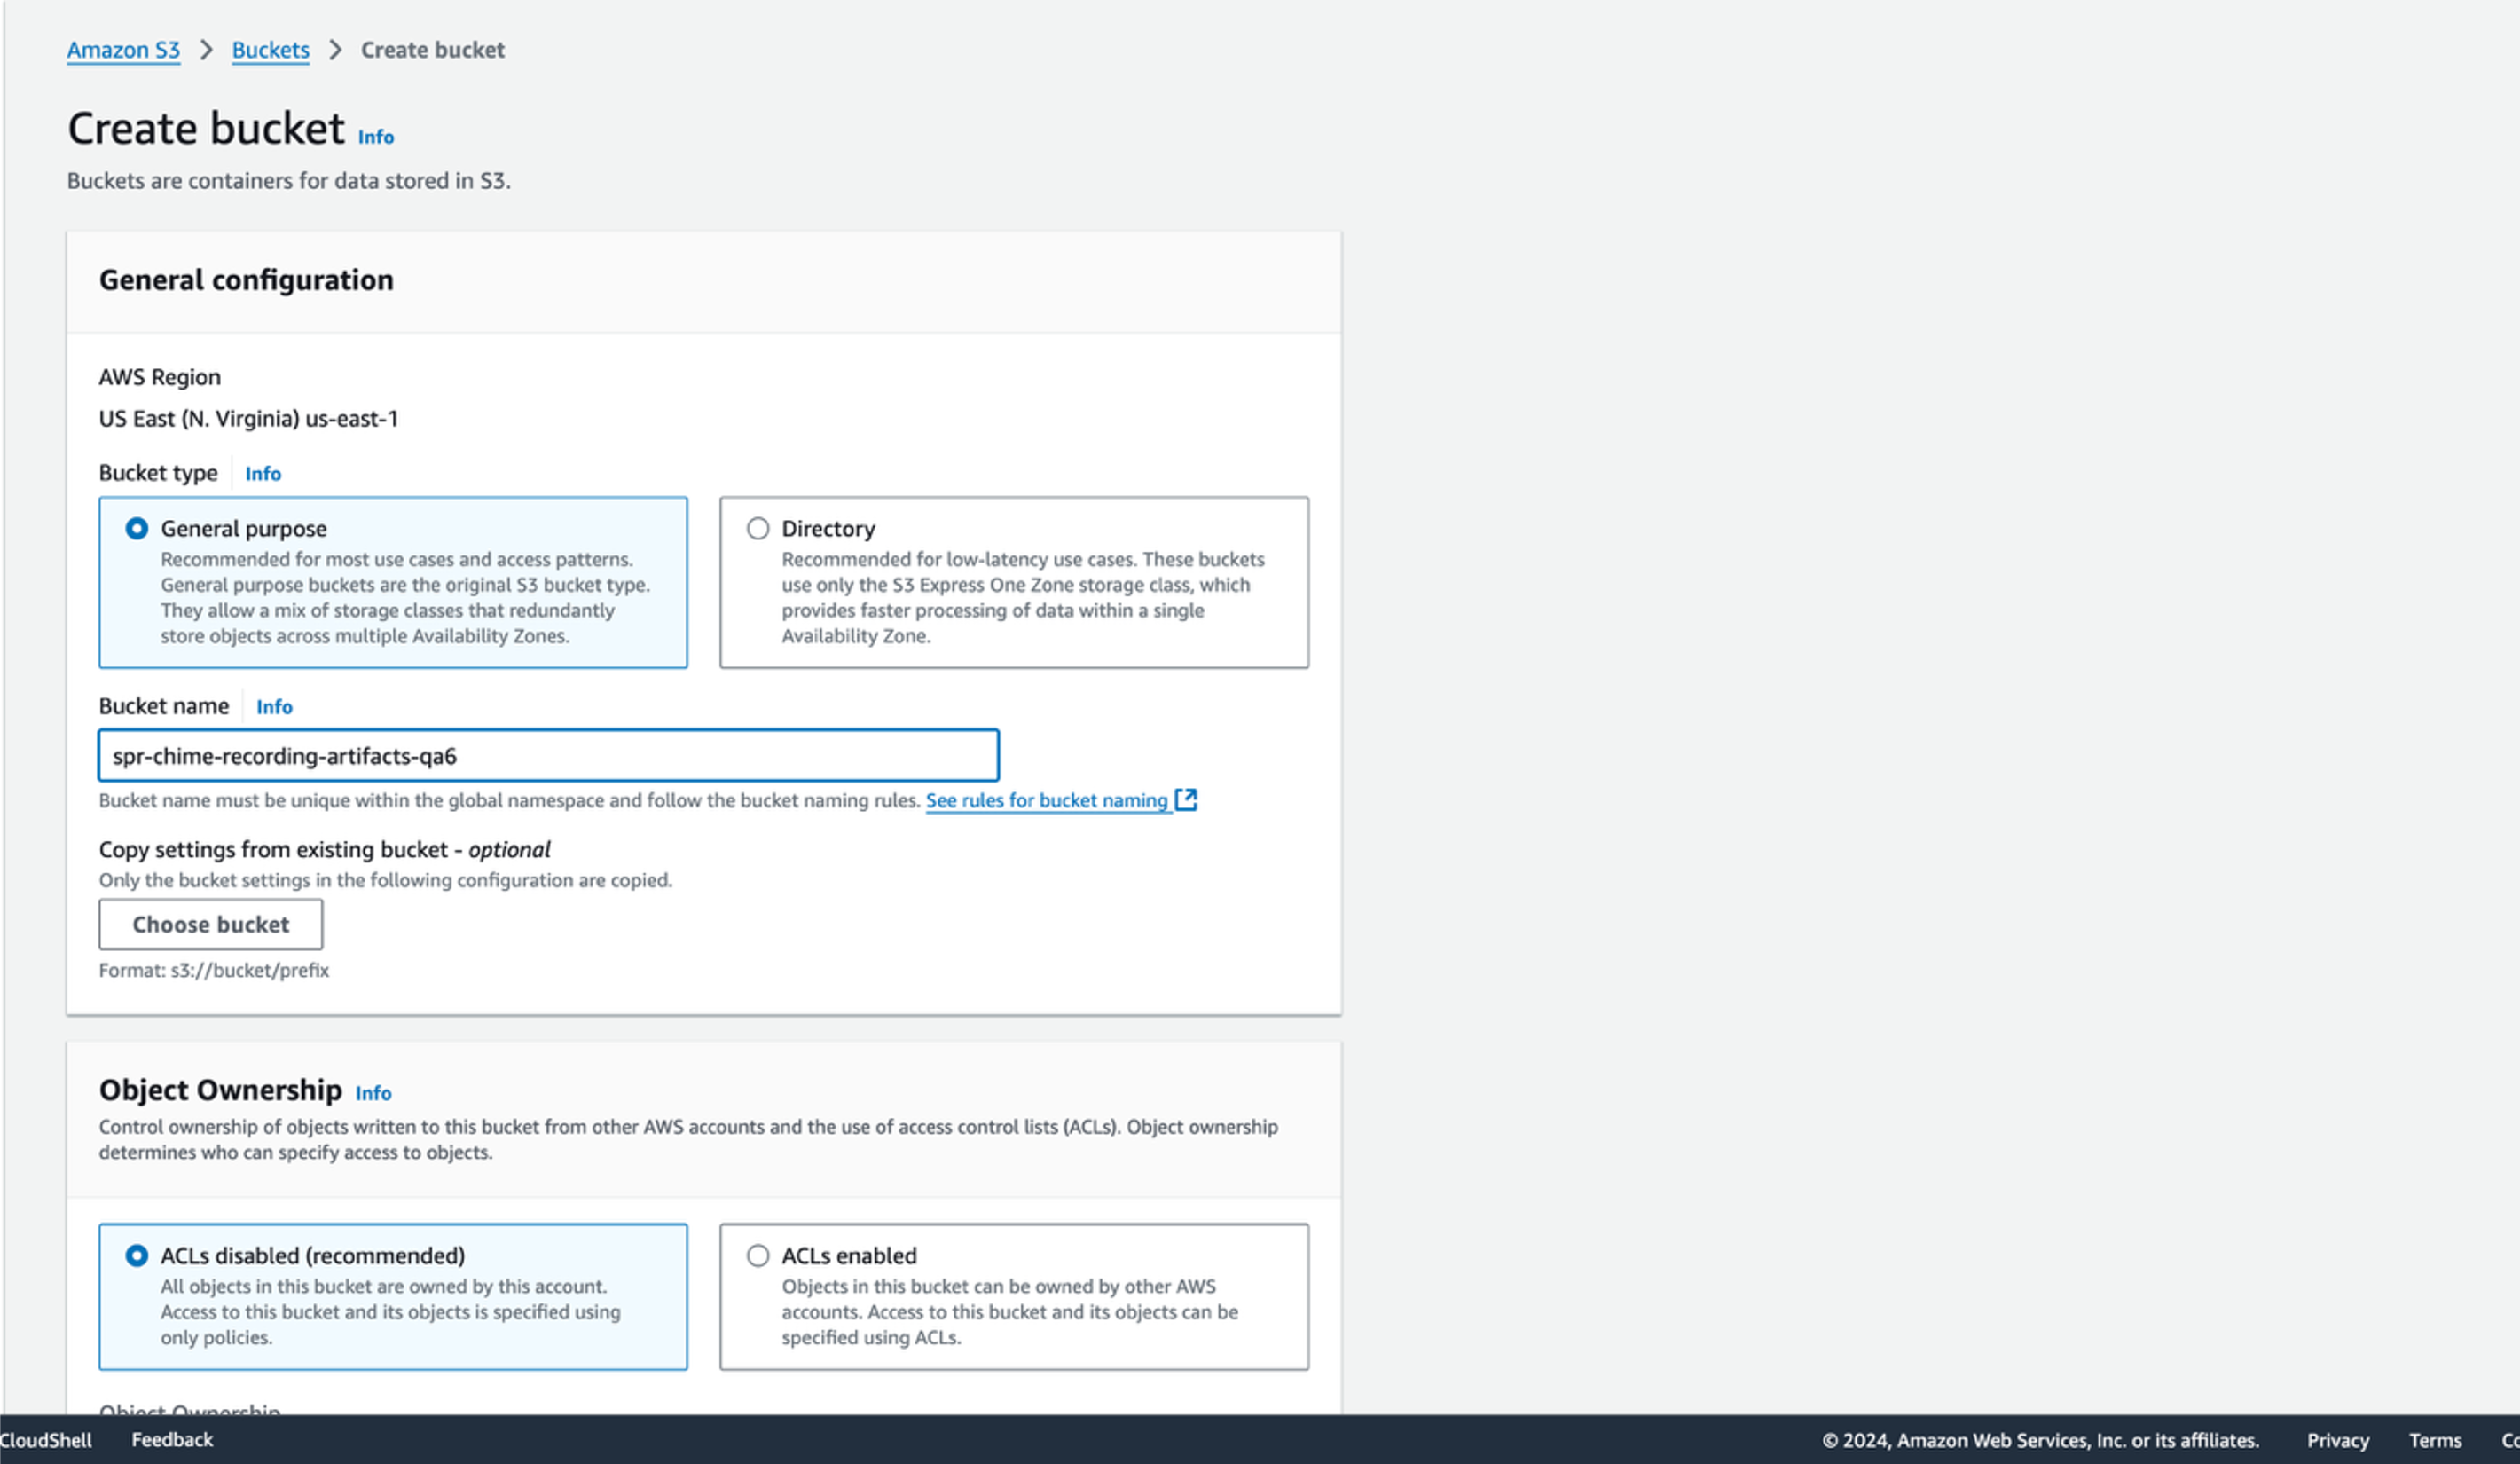
4. Click the Create bucket button.
5. For Bucket type, select General purpose. Enter the bucket name.
6. Edit the bucket. In the Permissions page, add bucket policy to allow Media Capture Pipelines to put objects.
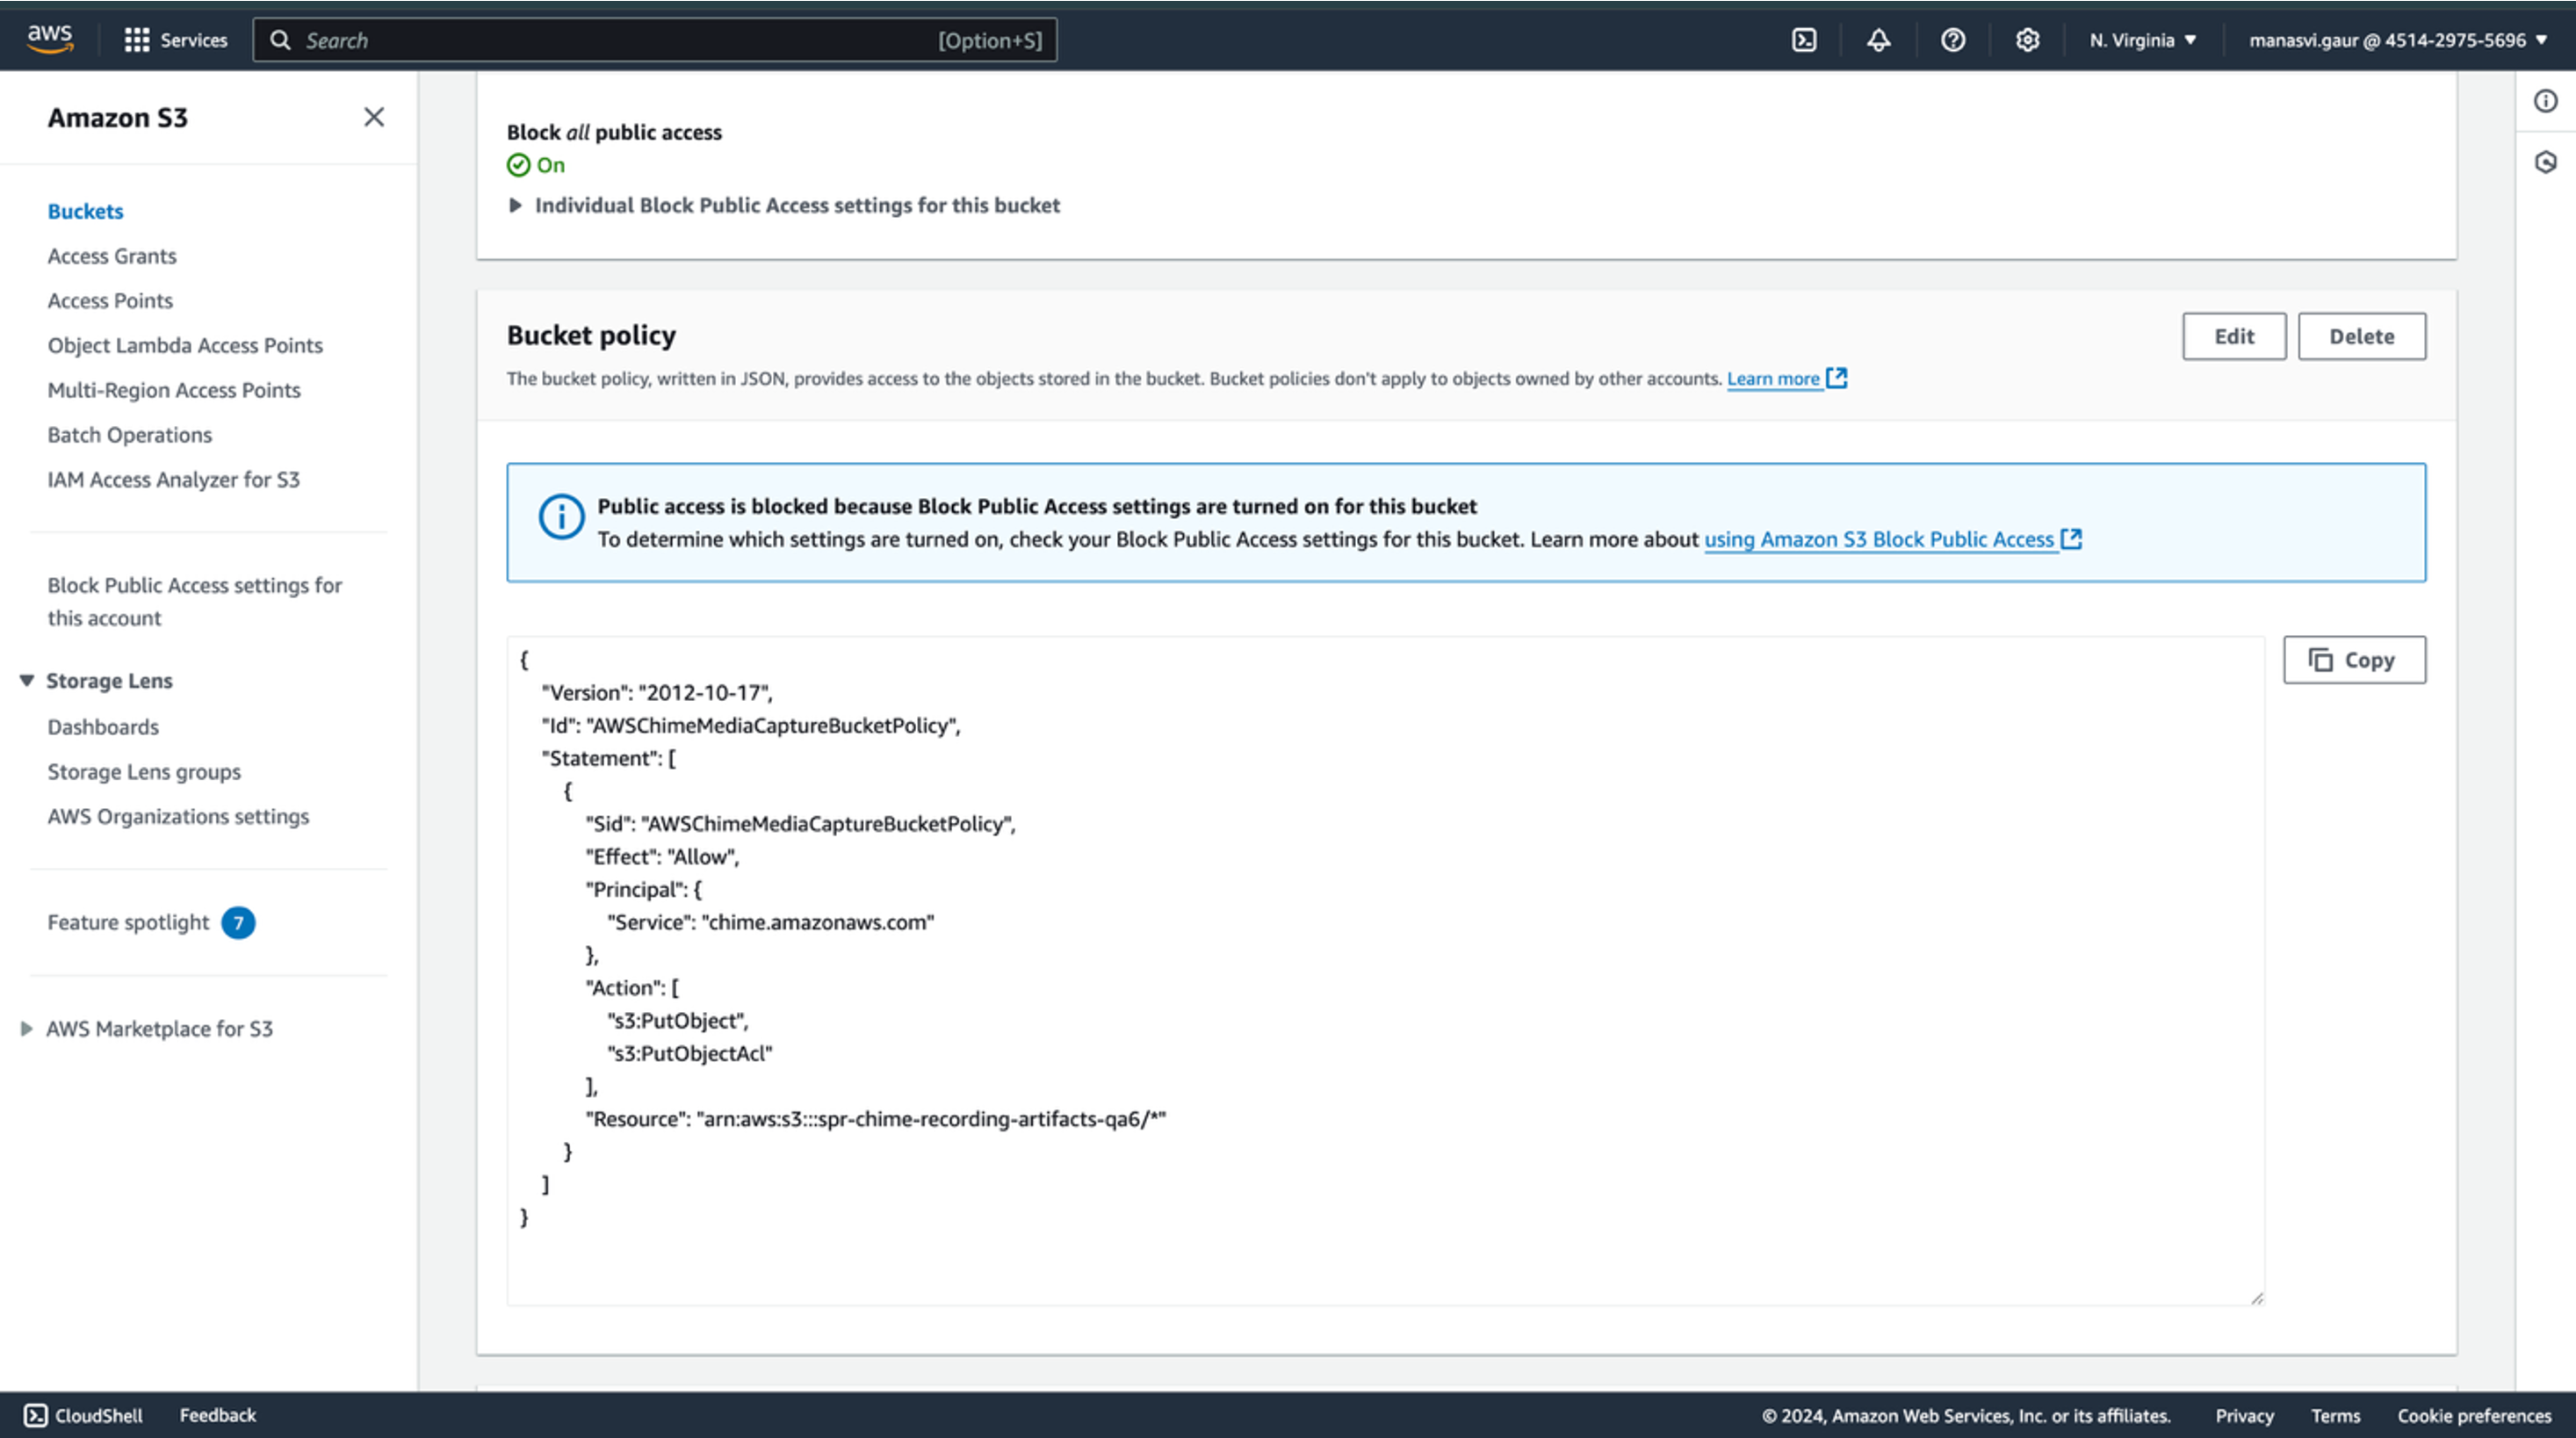
Bucket policy:
{"Version": "2012-10-17","Id": "AWSChimeMediaCaptureBucketPolicy","Statement": [{"Sid": "AWSChimeMediaCaptureBucketPolicy","Effect": "Allow","Principal": {"Service": "chime.amazonaws.com"},"Action": ["s3:PutObject","s3:PutObjectAcl"],"Resource": "arn:aws:s3:::[bucket_name]/*"}]}
Add the Bucket Name and AWS Account ID to the Chime account in Sprinklr
Follow these steps:
1. Log in to Sprinklr.
2. Navigate to the Sprinklr Accounts page.
Click the New Page (+) icon. Under Platform Modules, select All Settings. Search for Accounts and select it to open the Accounts page.
Alternatively, you can go directly to the Accounts page using this link: https://space.sprinklr.com/social/governance/accounts.
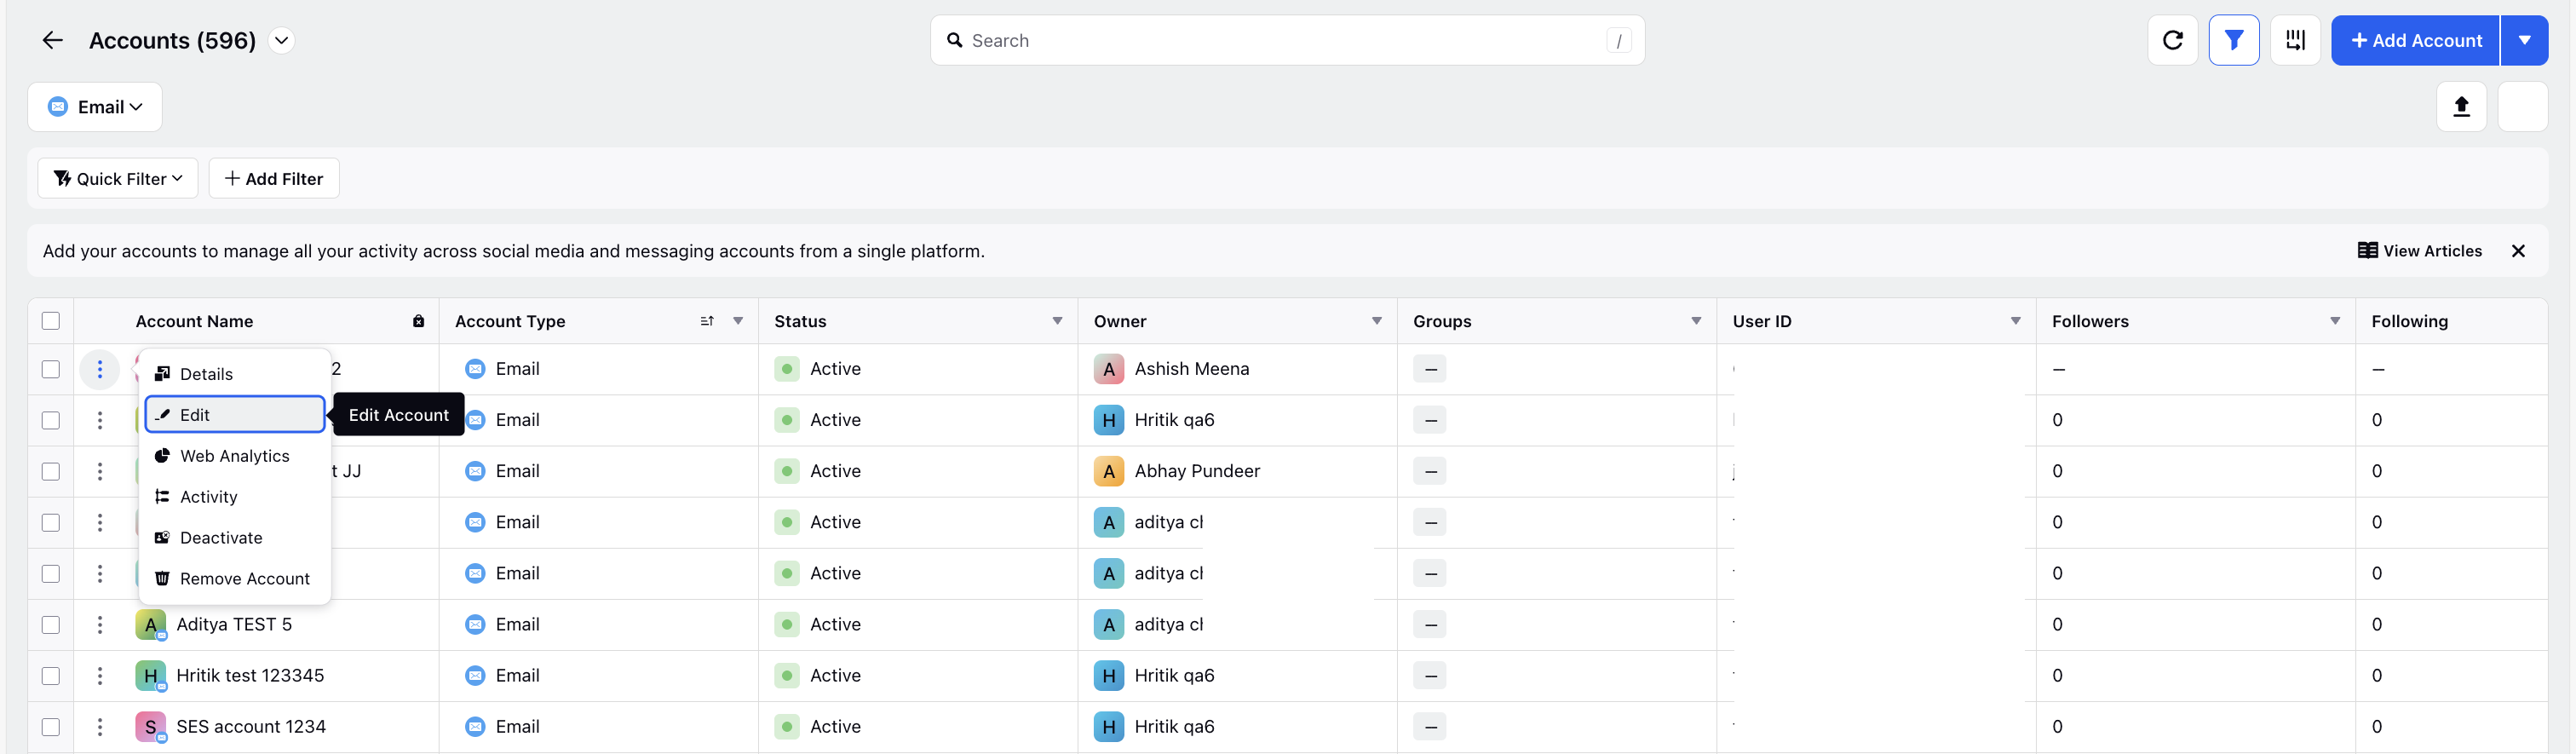
4. On the Accounts page, find the AWS Chime account you added.
5. Click the three-dot icon alongside the AWS Chime account. On the options menu, click Edit.
6. Add the AWS S3 Bucket name and AWS Chime Account ID.
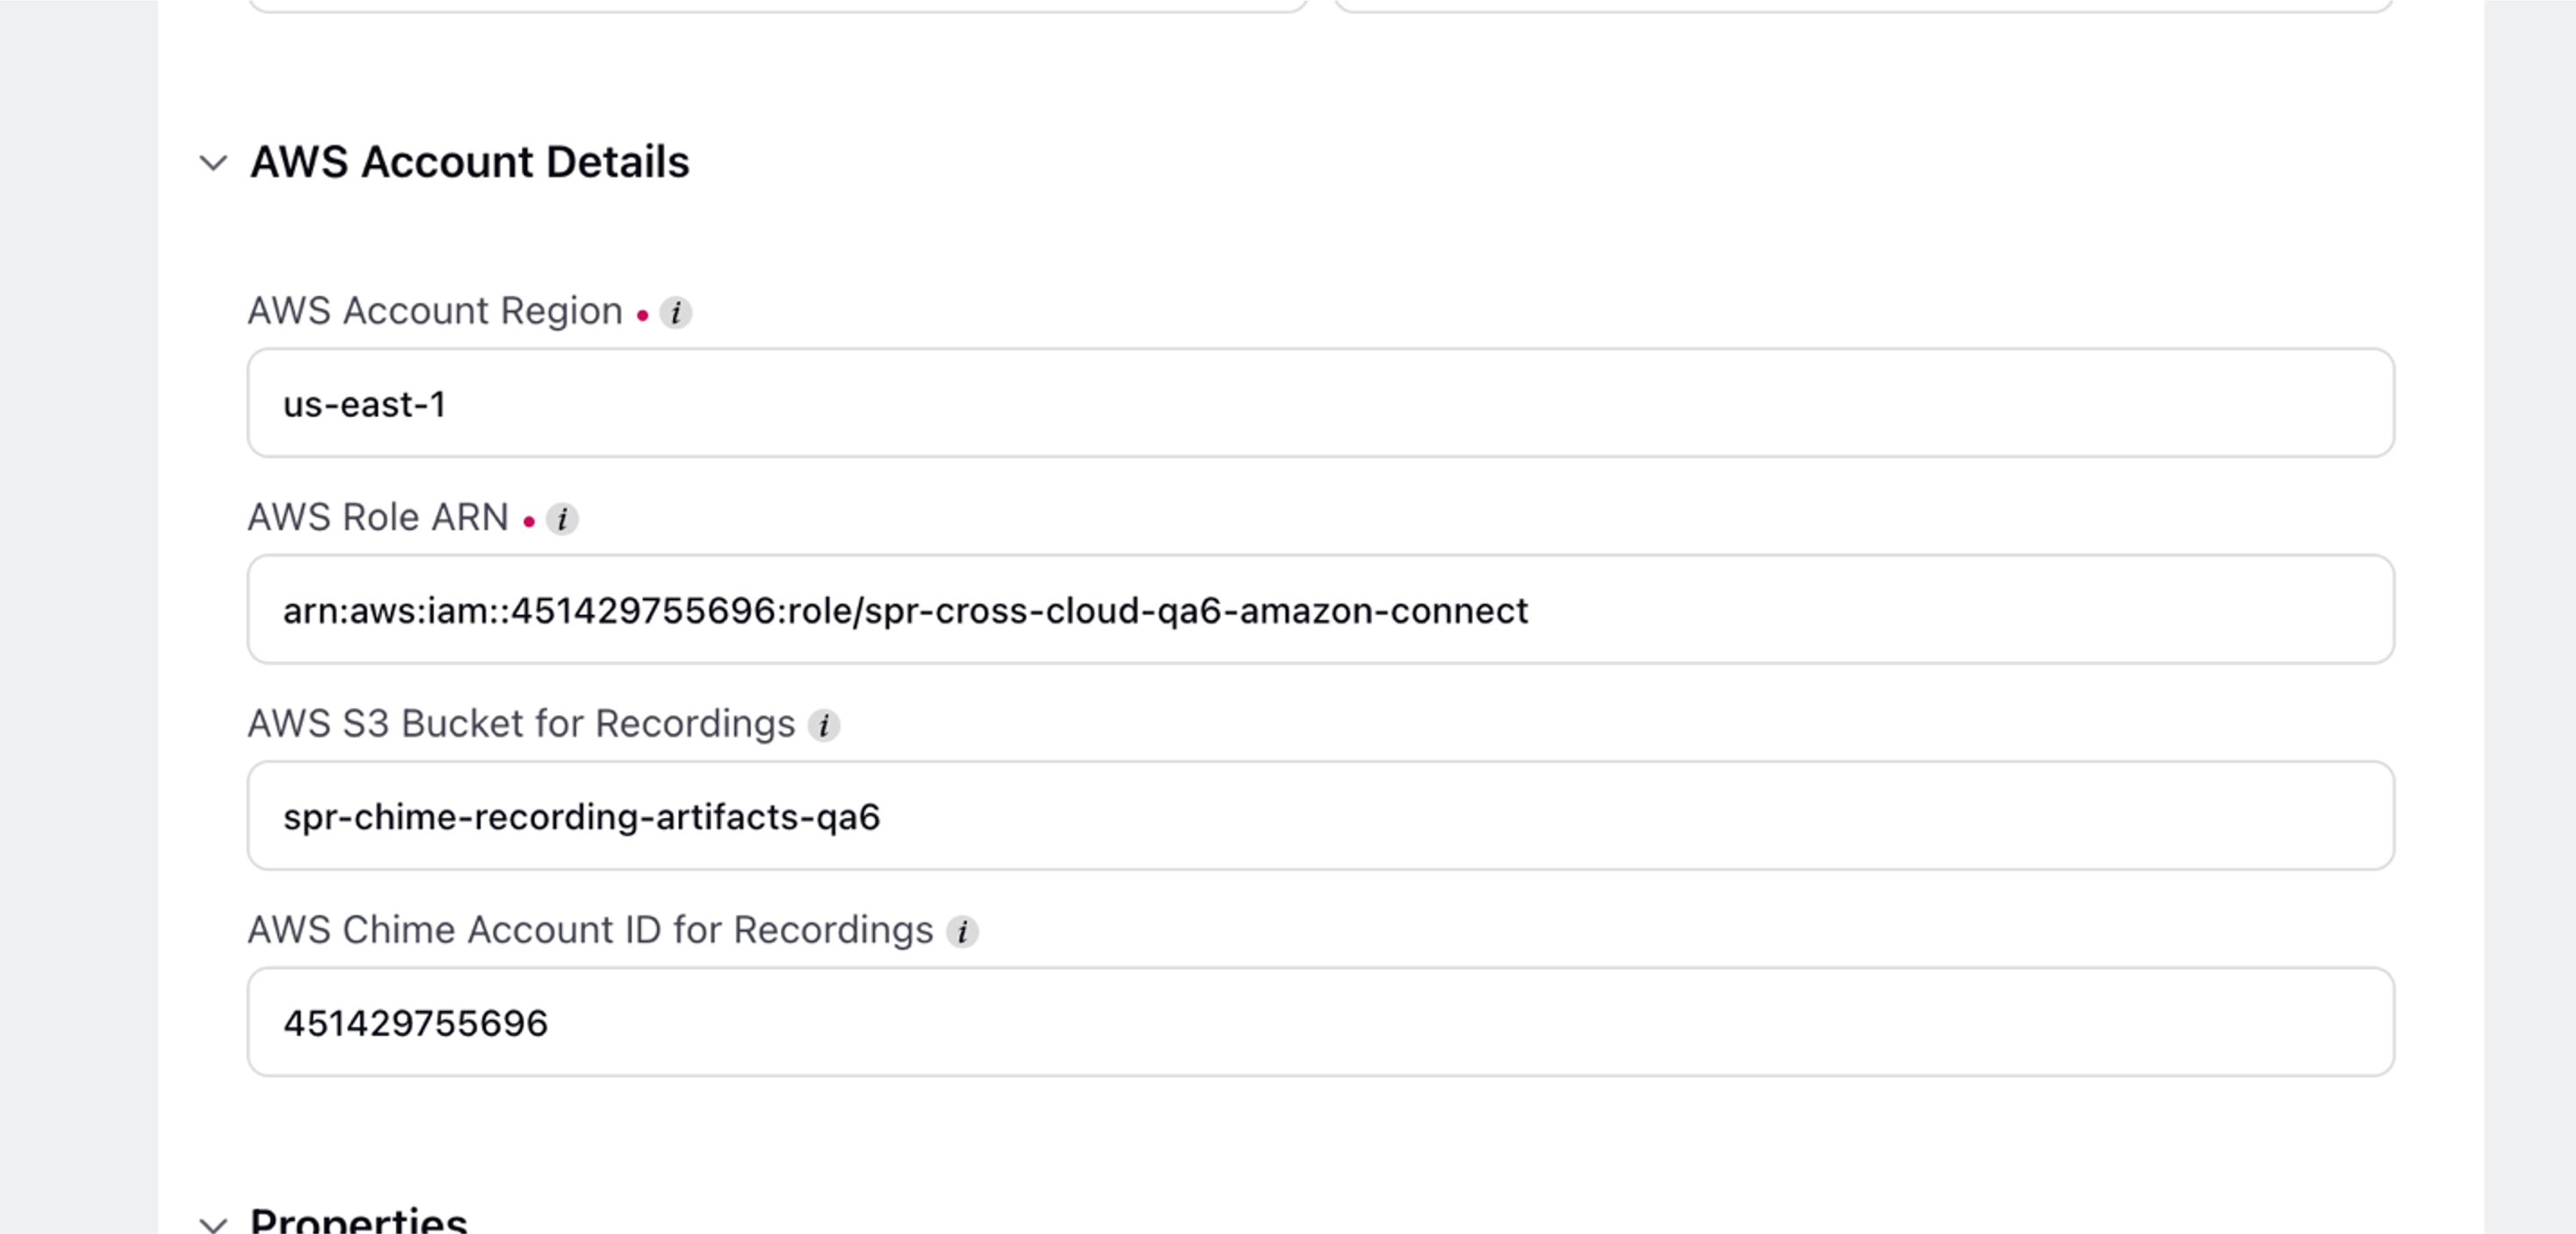
The video chat recordings will be saved in the AWS S3 bucket.