Publish to LINE
Updated
LINE supports many types of posts that can be published via Sprinklr including Text, Photo, Video, Audio, and Image Map. You can easily schedule your post and publish it to a specific target audience in LINE from the Publisher. You can also customize the images to be published using the image editor.
Prerequisites
Before you begin, ensure that a LINE account is added in Sprinklr. For steps, see Add a LINE Account.
Publishing Steps
To publish a post through a LINE account, follow these steps:
1. Click the New Page (+) icon. Under the Sprinklr Social tab, go to Engage > Quick Publish.
2. In the Create Post window, use the Select Accounts dropdown to search for and choose the LINE account you wish to send the message from.
You can use Advanced Search to search the account based on various filters.
3. From the Type of Message dropdown, select the message format you want to send.
Based on the message type you select, the relevant input fields are displayed.
Compose your message in the message textbox. Add media, buttons, or attachments depending on the chosen message type.
If you want to publish the post as a broadcast message, check the Publish this post as Broadcast Message box.
4. Click Add Targeting to this post to select from saved target audiences or create new audience.
5. From the Campaign dropdown, select a campaign to associate your post with. You can set the campaign as default by clicking Set as Default. From the Sub-Campaign dropdown, select a sub-campaign.
6. You can select URL Shortener to shorten every link that you paste in your message. This helps you make the most of the character limit.
7. Select Tags and Social Bars from the dropdown menu respectively.
Add properties to your post.
8. Under Approval, set an Approval Type for your post. You can also add an Approval Note.
The preview of the post will render on the right pane. Also, you can click the Preview icon in the bottom left corner if you have minimized the Create Post window.
9. Choose one of the publishing options at the bottom of the Create Post window:
Post: Send the post immediately.
Save as Draft: Store the post in draft mode for later editing.
Schedule Post: Set a future date and time for publishing.
Publish Another: Enable this option to create and publish another post immediately afterward.
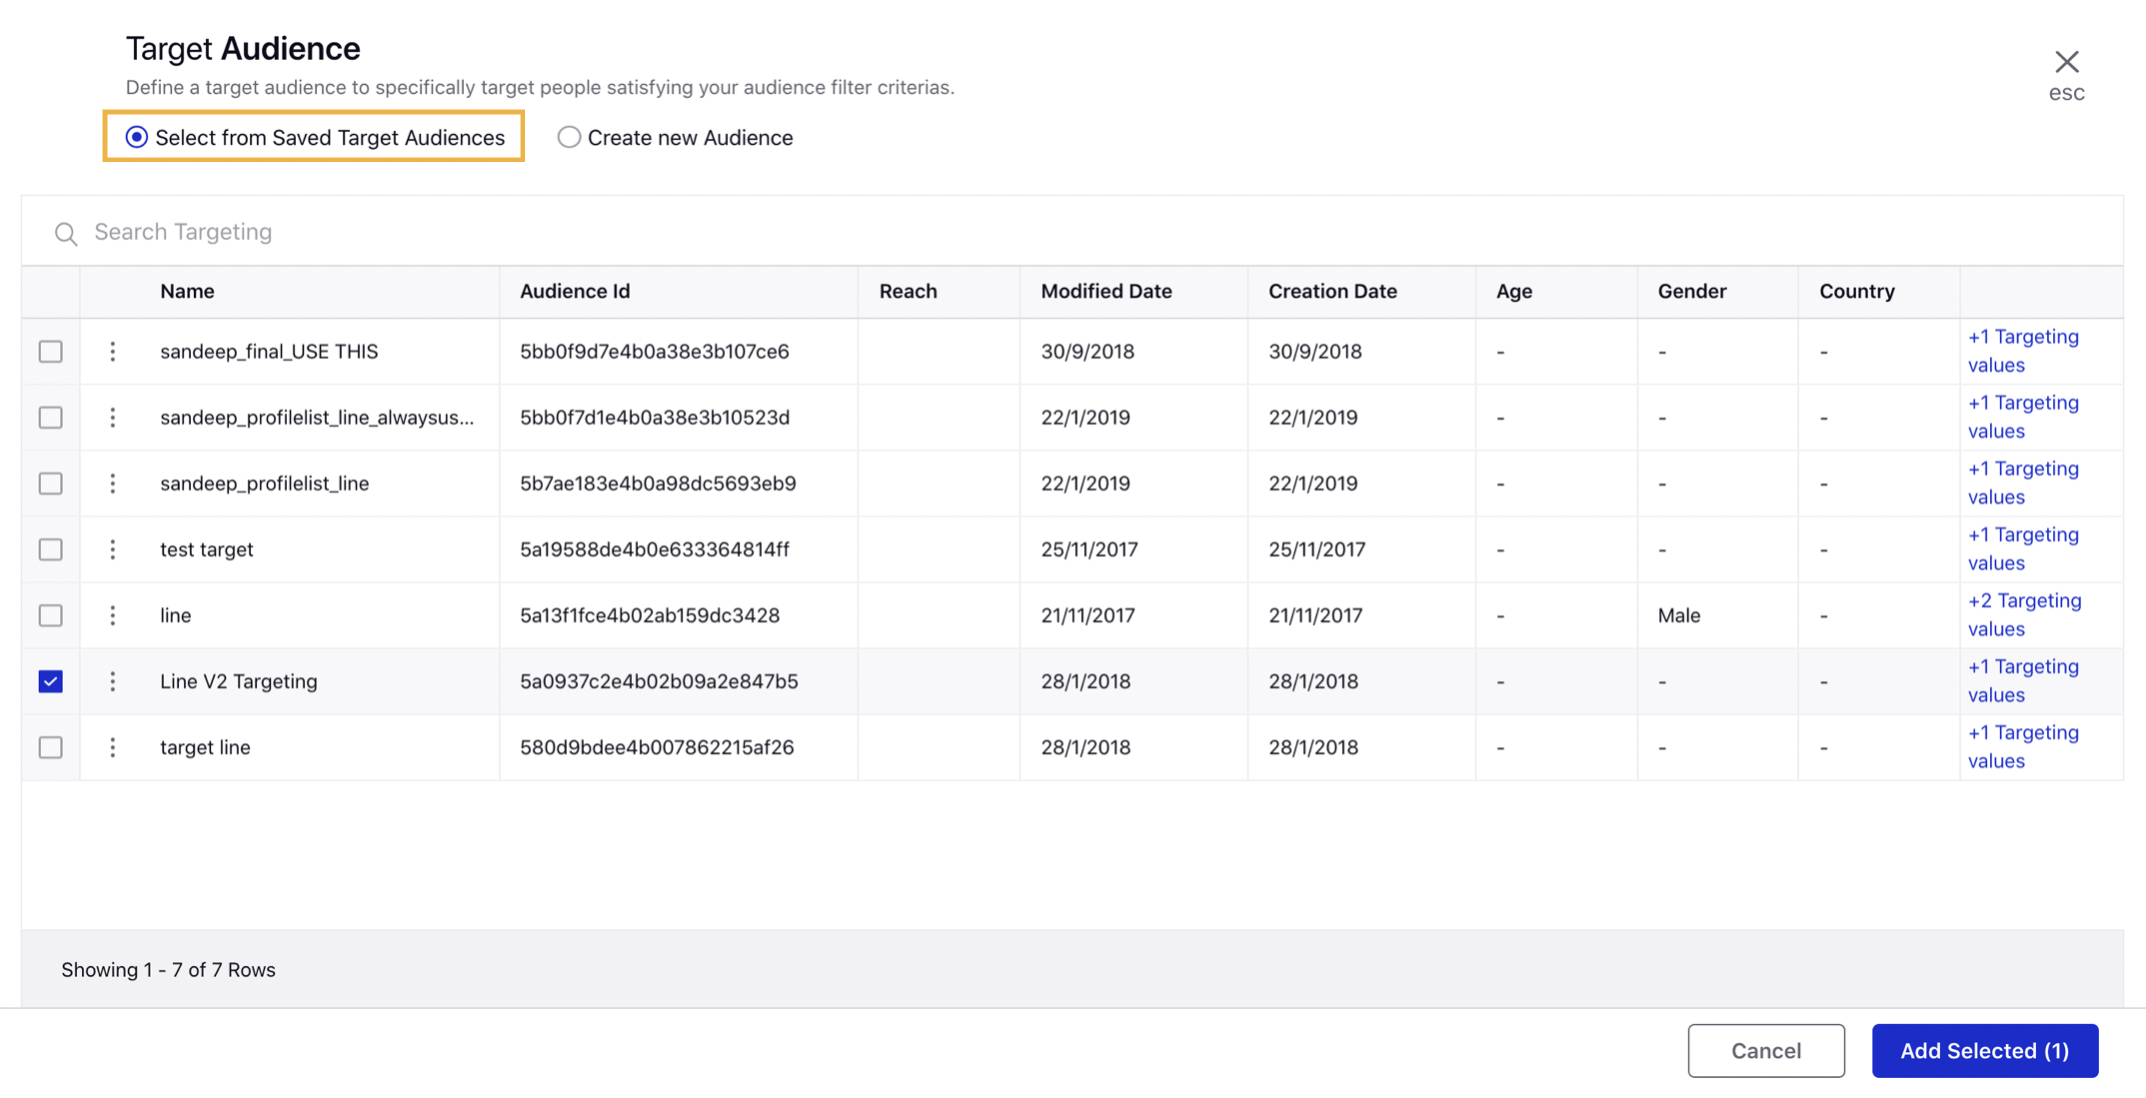
Add Audience Targeting to LINE Post
To add the targeted audience to your post:
In the Target Audience window, either Select from Saved Target Audiences to select a pre-existing Audience Targeting asset. Or, select Create New Audience to create a new Gender/Language-based Audience.
In the Select from Saved Target Audiences section, search and select the desired target audience and click Add Selected in the bottom right corner.

In the Create New Audience section, fill in the required details and click Set Target Audience in the bottom right corner. For more information, see Create a New Audience — Field
Create a new audience field description
Term | Description |
Gender | Select the gender from the drop-down menu. The following options are available: Male Female |
Language | Search and select the languages from the drop-down list. |
Client Profile List | Search and select the client profile list(s) from the drop-down list. |
Partner Profile List | Search and select the partner profile list(s) from the drop-down list. |
Save this Target Audience for Future | Check the box to save created target audience for the future. |
Message type field description
Internal Note: Rich Image, Rich Video and Timeline Photo were deprecated.
|
Terms | Description |
Text | |
| |
Message |
|
Photo | |
| |
Photo | Click Select Photo to add a photo from the (or Upload Photo to select media to upload from your device). |

Video | |
| |
Video | Click Select Video to add a video from the Media Uploader (or Upload Video to select media to upload from your device). |

Audio | |
| |
Audio | Click Select Audio to add a media from the (or Upload Audio to select media to upload from your device). |
Image Map | |
| |
Image Grid Type | Select the image grid type from the drop-down menu. |
Image - Select Photo/Upload Photo | Click Select Photo to add a photo from the Media Uploader (or Upload Photo to select media to upload from your device). |
Image - Description | Enter a description of the image for the visually impaired. |
Section - Label | Enter a label for the highlighted image grid section. |
Section - Type | Select the type of section from the drop-down menu. |
Section - Text / Url | Enter the text or URL depending on the section type. This field will appear only when text or URL type is selected. |