Guided Workflow Canvas
Updated
The Guided Workflow Canvas is the central workspace for designing and managing workflows in Sprinklr. It provides a user-friendly, visual interface that allows you to create, configure, and connect various nodes representing specific actions or decisions. This intuitive design simplifies understanding and optimizing task flows, ensuring seamless and consistent customer interactions.
Click on the info icon next to the Guided Workflow name on the canvas header to view the description of the Guided Workflow. The description that is displayed here is configured on the Create Guided Workflow page.

Steps to add a Node
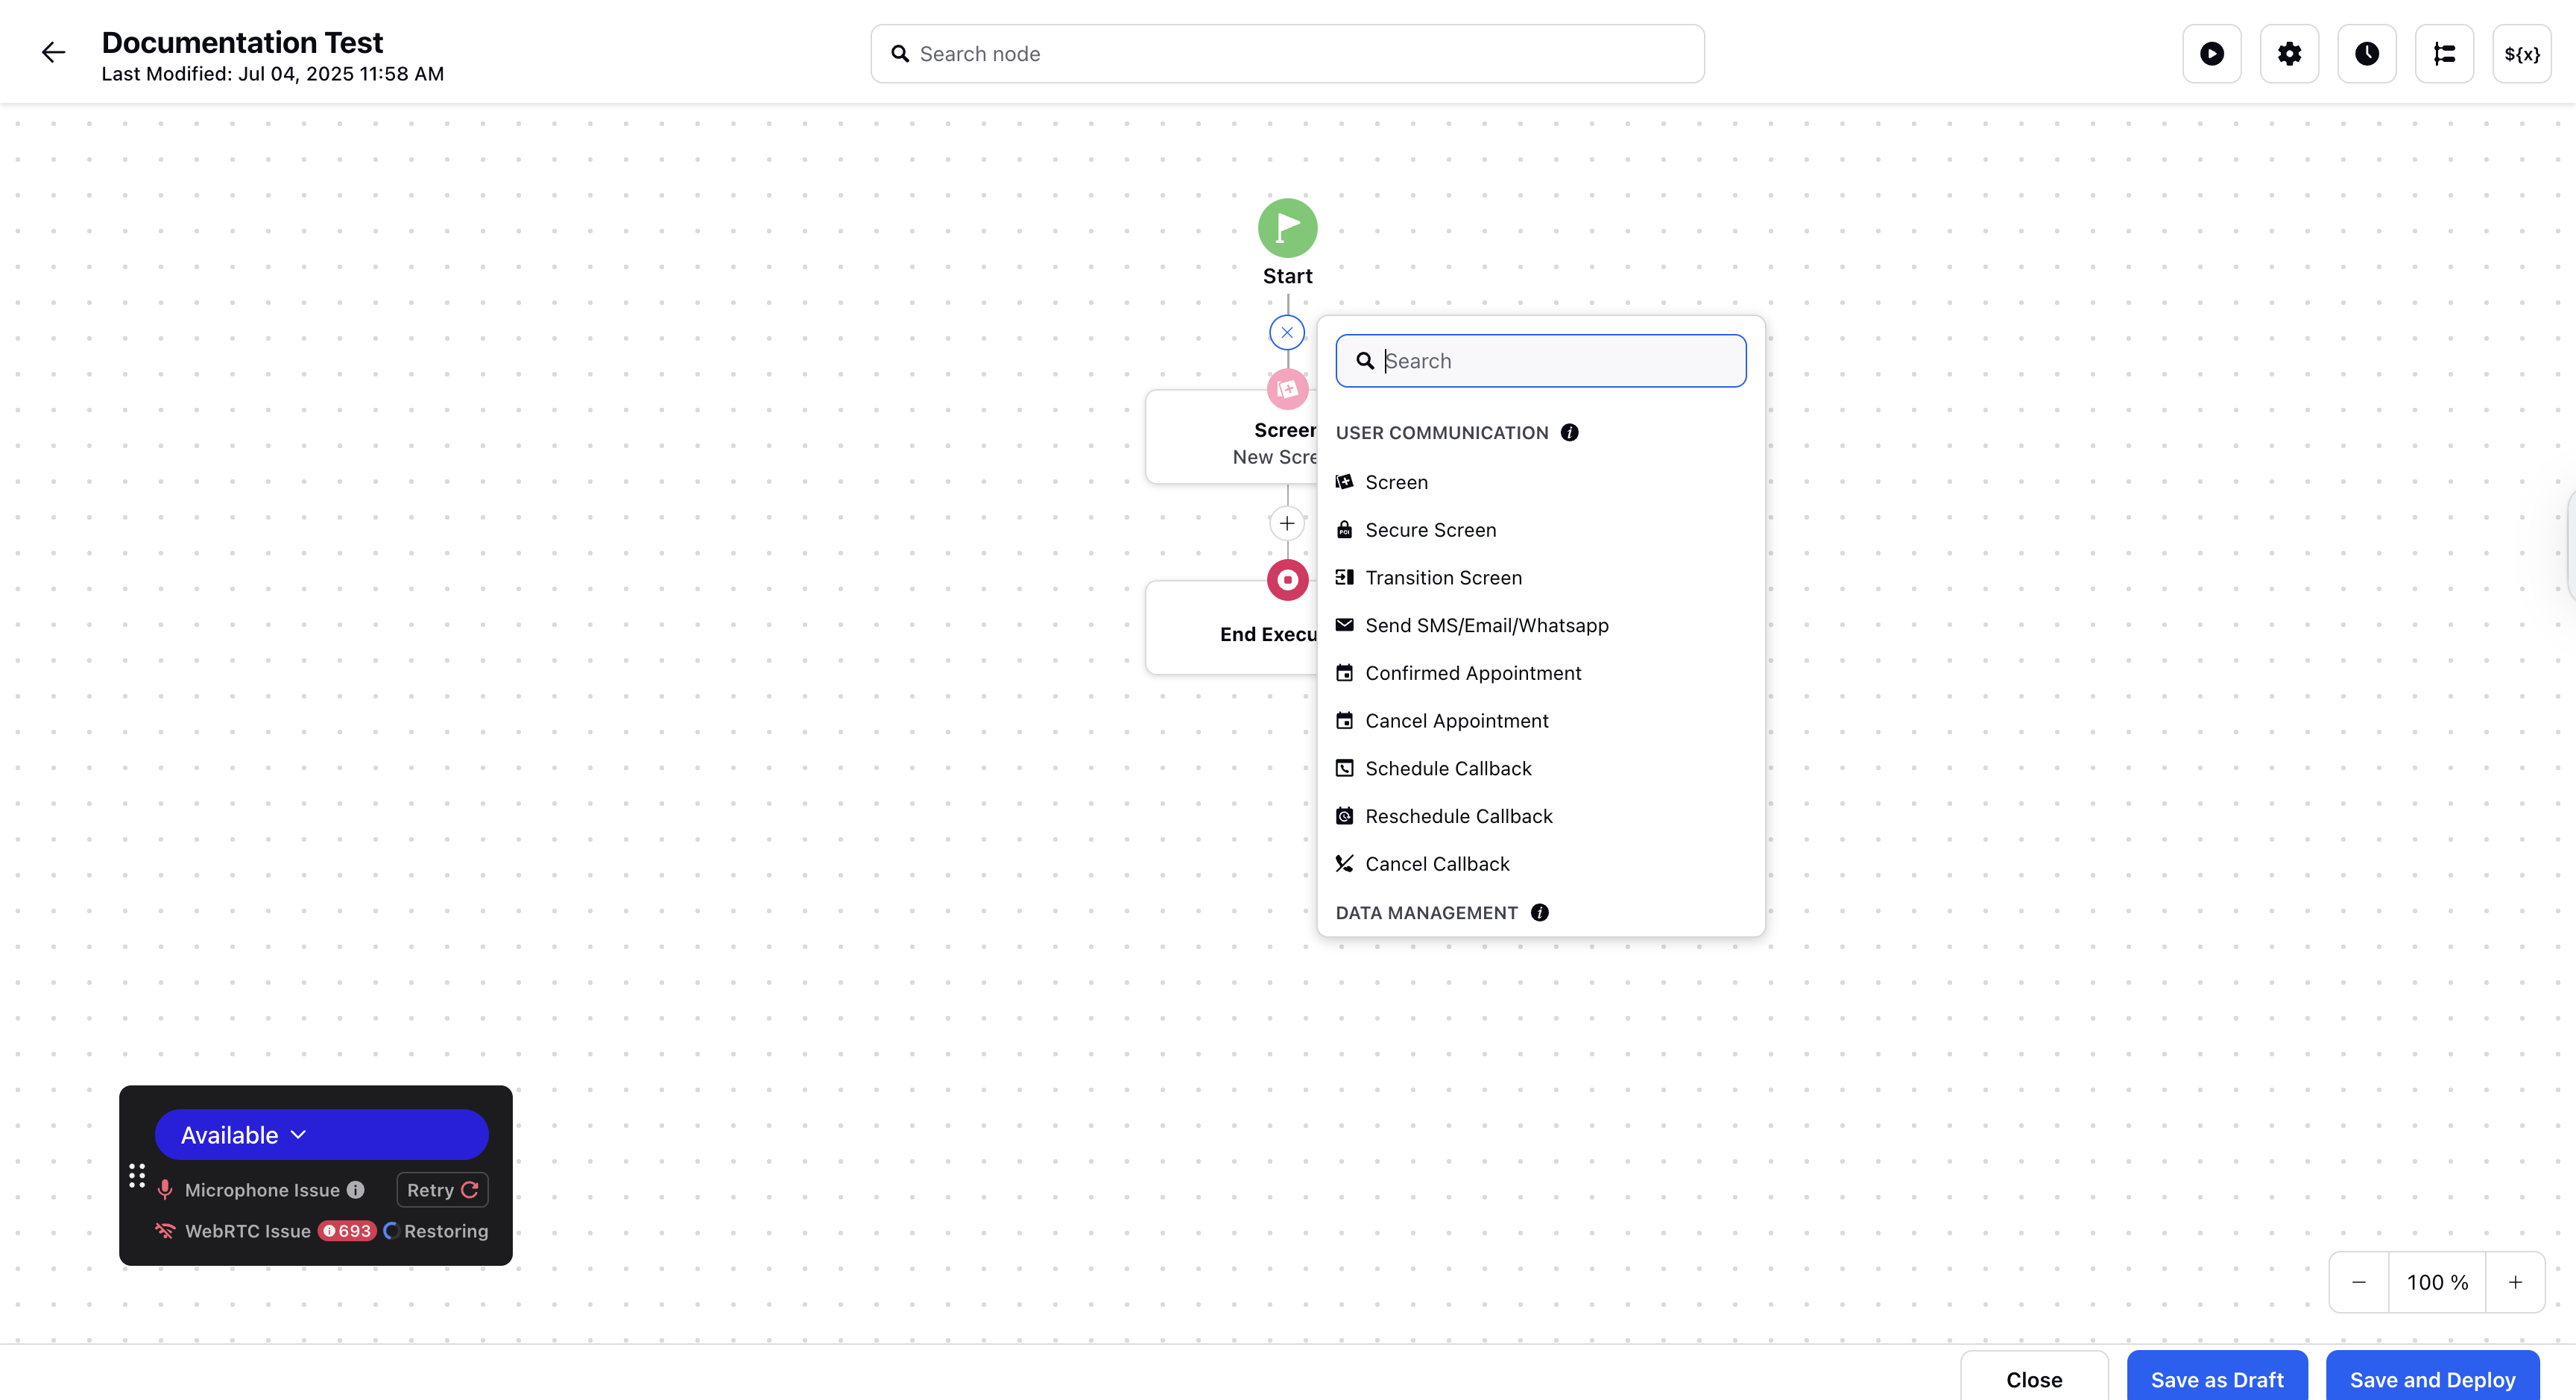
To view the list of actions available for adding nodes, click on the Plus (+) icon. This opens a menu where you can explore and select from a variety of actions to enhance your guided workflow.

To explore actions, simply browse through the menu to discover a variety of options you can add to your workflow. These include:
These elements serve the purpose of communicating a message, update, or any other details to the user executing a guided workflow. The component elements include – Screen, Secure Screen, Transition Screen, Send SMS/Email/Whatsapp, Confirmed Appointment, Cancel Appointment, Schedule Callback, and Reschedule Callback.
These elements serve the purpose of managing data records in the Sprinklr’s internal database or via third party APIs. The component elements include – Get Records, Update Records, Create Records, Count Records, Delete Records, and Add API.
These elements serve the purpose of determining the logical actions to be taken within a workflow. The component elements include – Update Properties, Decision Box, Call Another Guided Workflow, and Embed Guided Workflow.
These elements serve the purpose of managing the actions to be taken on the user profiles while executing a guided workflow. The component elements include – Profile List Change, Add Auth Profile To Case, Merge Profile, and Add to Suppression List.
These elements serve the purpose of performing actions, such as assignments, transfers, custom field updates, etc., on the case on which the guided workflow is being executed. The component elements include – Execute Action, Custom Fields Action, Add or Remove from Queues, Add Note, Work Queue Properties, and Assign Case.
The component elements include – Create Support Case, Generate Document, Create External Workflow URL, and Create Customer Session.
Note: Click on the title of each element for detailed knowledge.