Customize Zero Shot Intents through AI+ Studio
Updated
Overview
AI+ Studio is a unified platform designed to manage various AI+ features across Sprinklr’s product suites. It enables businesses to streamline the integration and deployment of AI capabilities with ease. From model configuration to deployment, AI+ Studio offers a flexible and intuitive interface for managing AI workflows.
This article focuses on the newly introduced support for Zero-Shot Intent Detection within AI+ Studio, specifically enabling users to edit the Zero-Shot prompt directly through the UI. For more information, refer to the article Introduction to AI+ Studio .
Zero-shot intent detection
Zero-Shot Intent Detection allows users to classify text inputs into predefined intent categories without requiring prior training data. This is achieved by leveraging large language models (LLMs) like OpenAI’s GPT, which interpret user-defined prompts to perform classification.
Previously, the system and user prompts were hardcoded in the backend. However, users can now edit both the system and base prompts directly in AI+ Studio, have a configuration of PII masking, guardrails, and LLM configuration offering greater flexibility and control over how the model interprets and classifies intents.
Accessing Zero-Shot Configuration in AI+ Studio
Open AI+ Studio from the Sprinklr platform and select Deploy your use cases.
Click on Sprinklr Service and select Zero shot intent detection under conversational AI .
Click on +Deployment to create a new deployment.
Enter a deployment Name and Priority.
Toggle on Deploy on all records to enable the deployment on all records. Else, select the filter criteria to deploy it on select records.
Set the template as Conversational AI Zero Shot Intent Detection.
Click save.
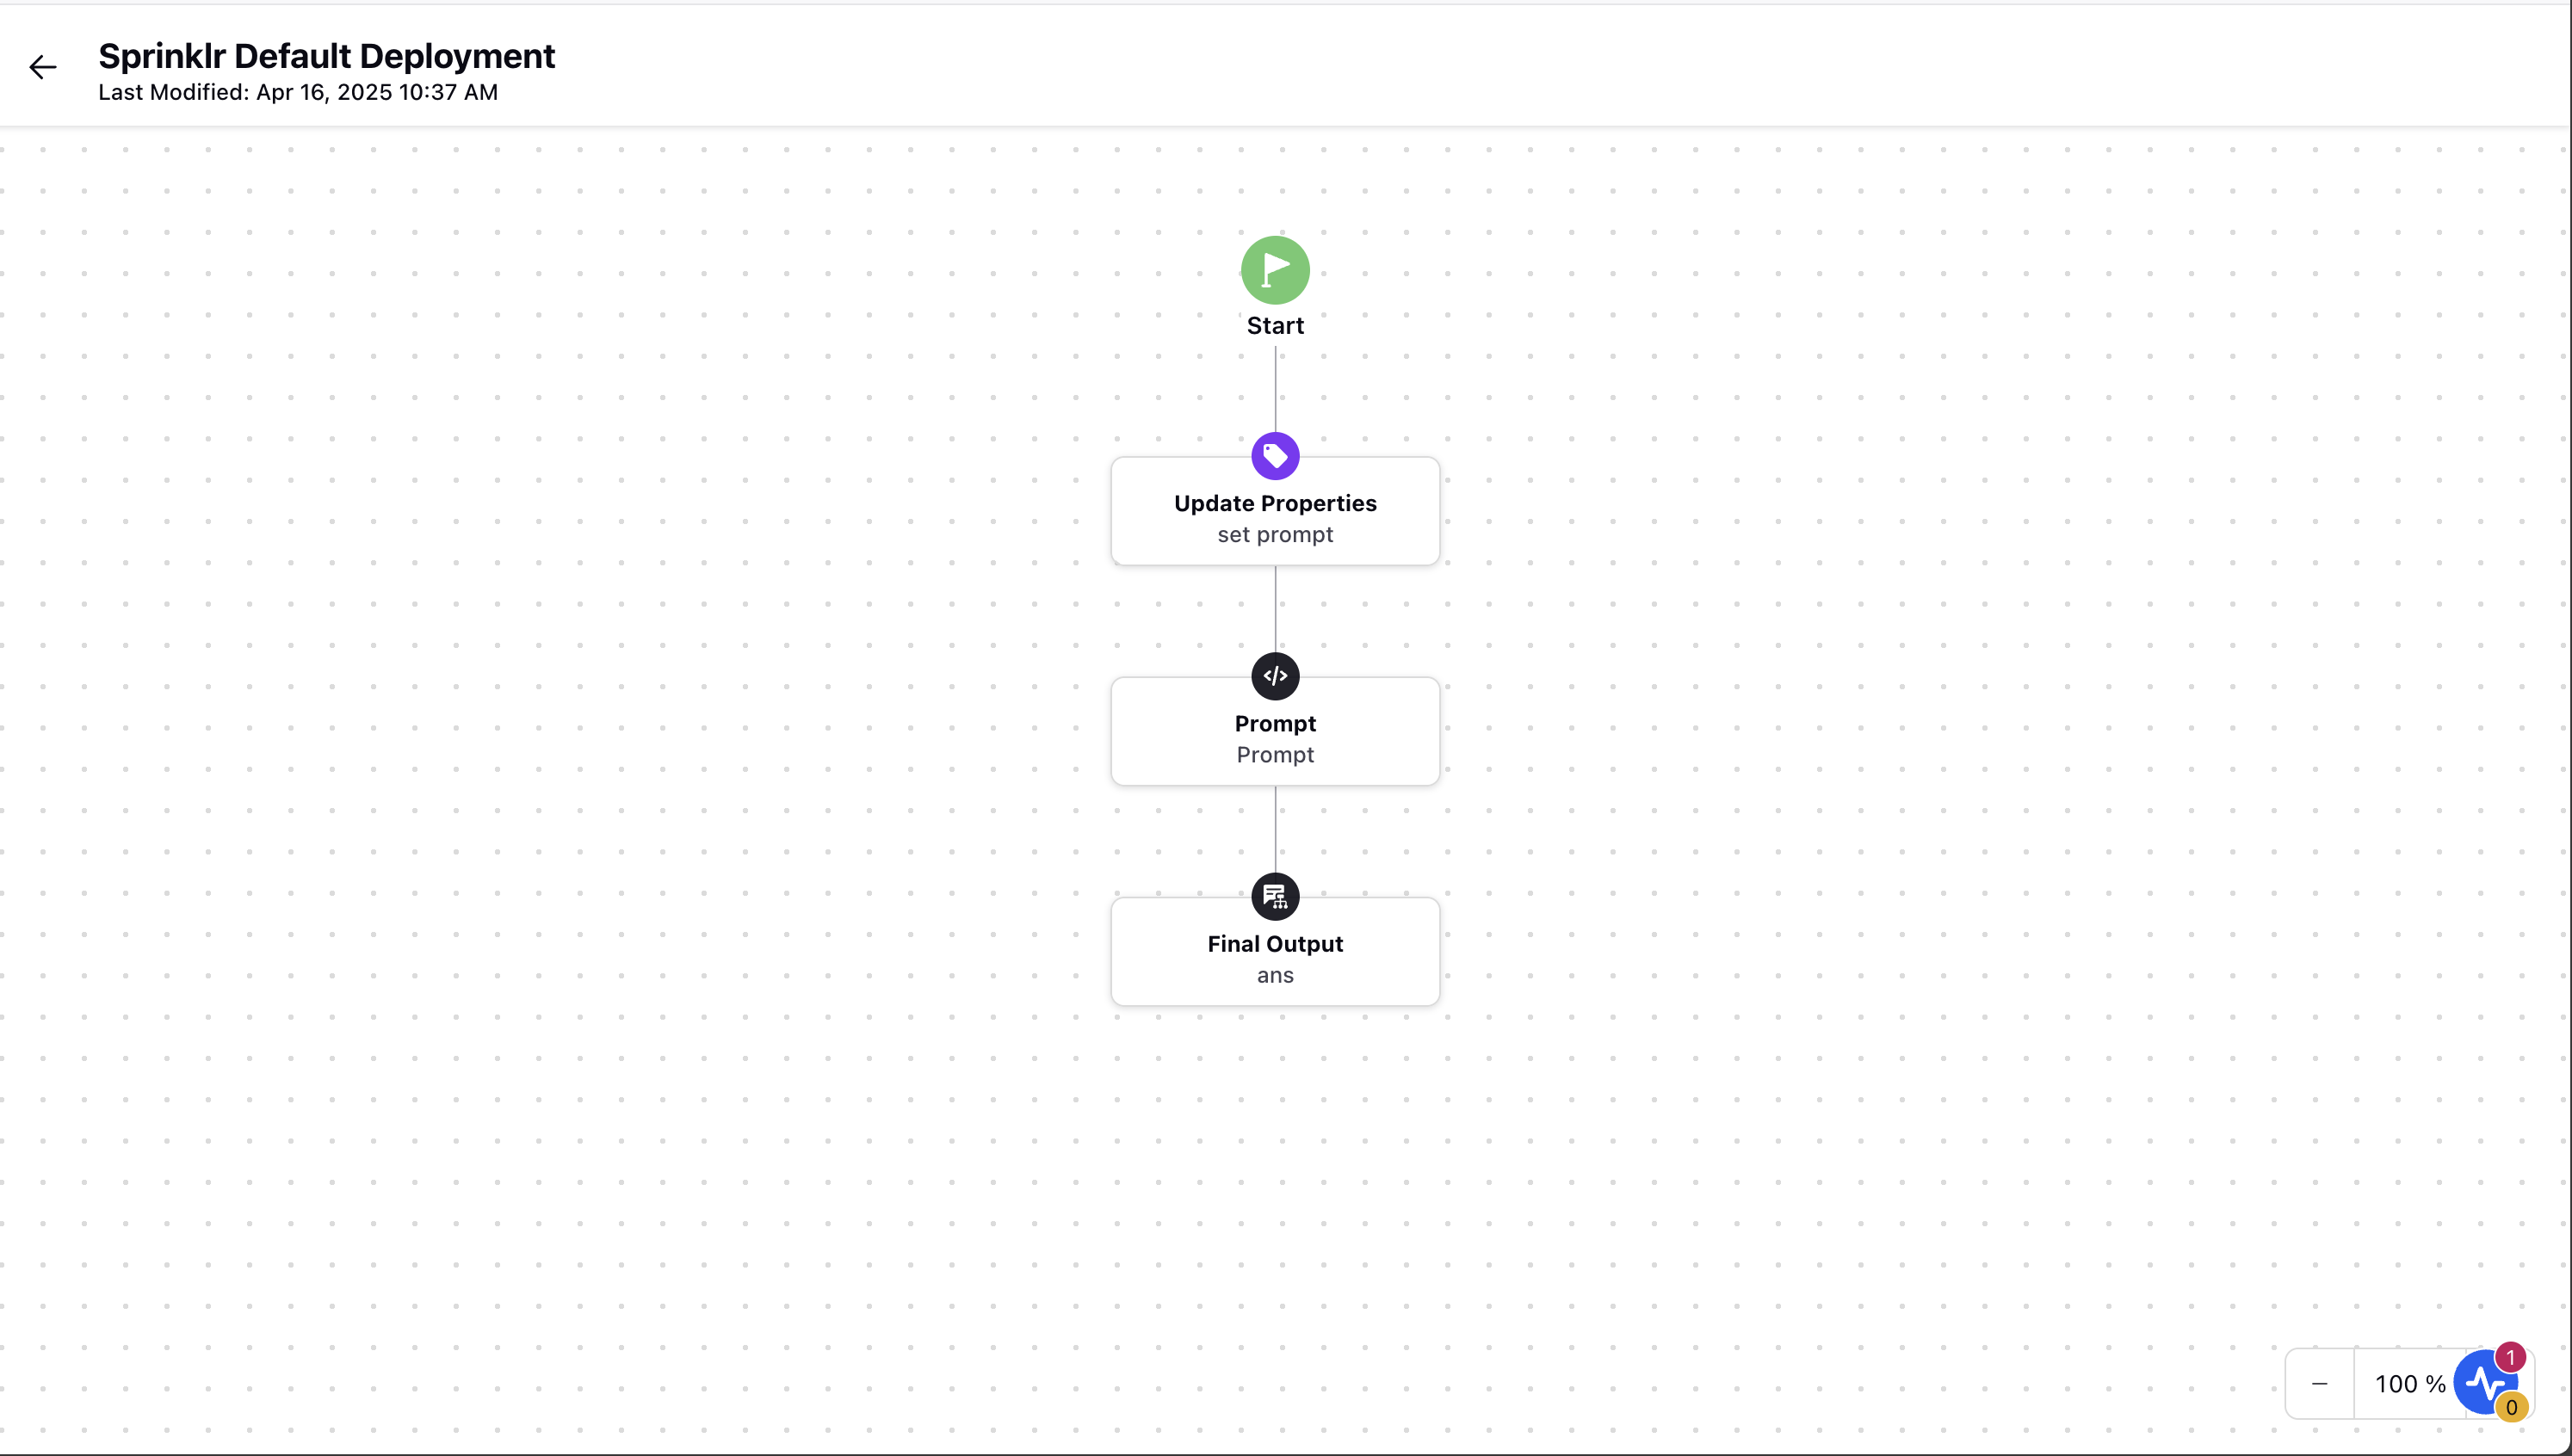
This opens up a canvas displaying the build for a basic deployment.
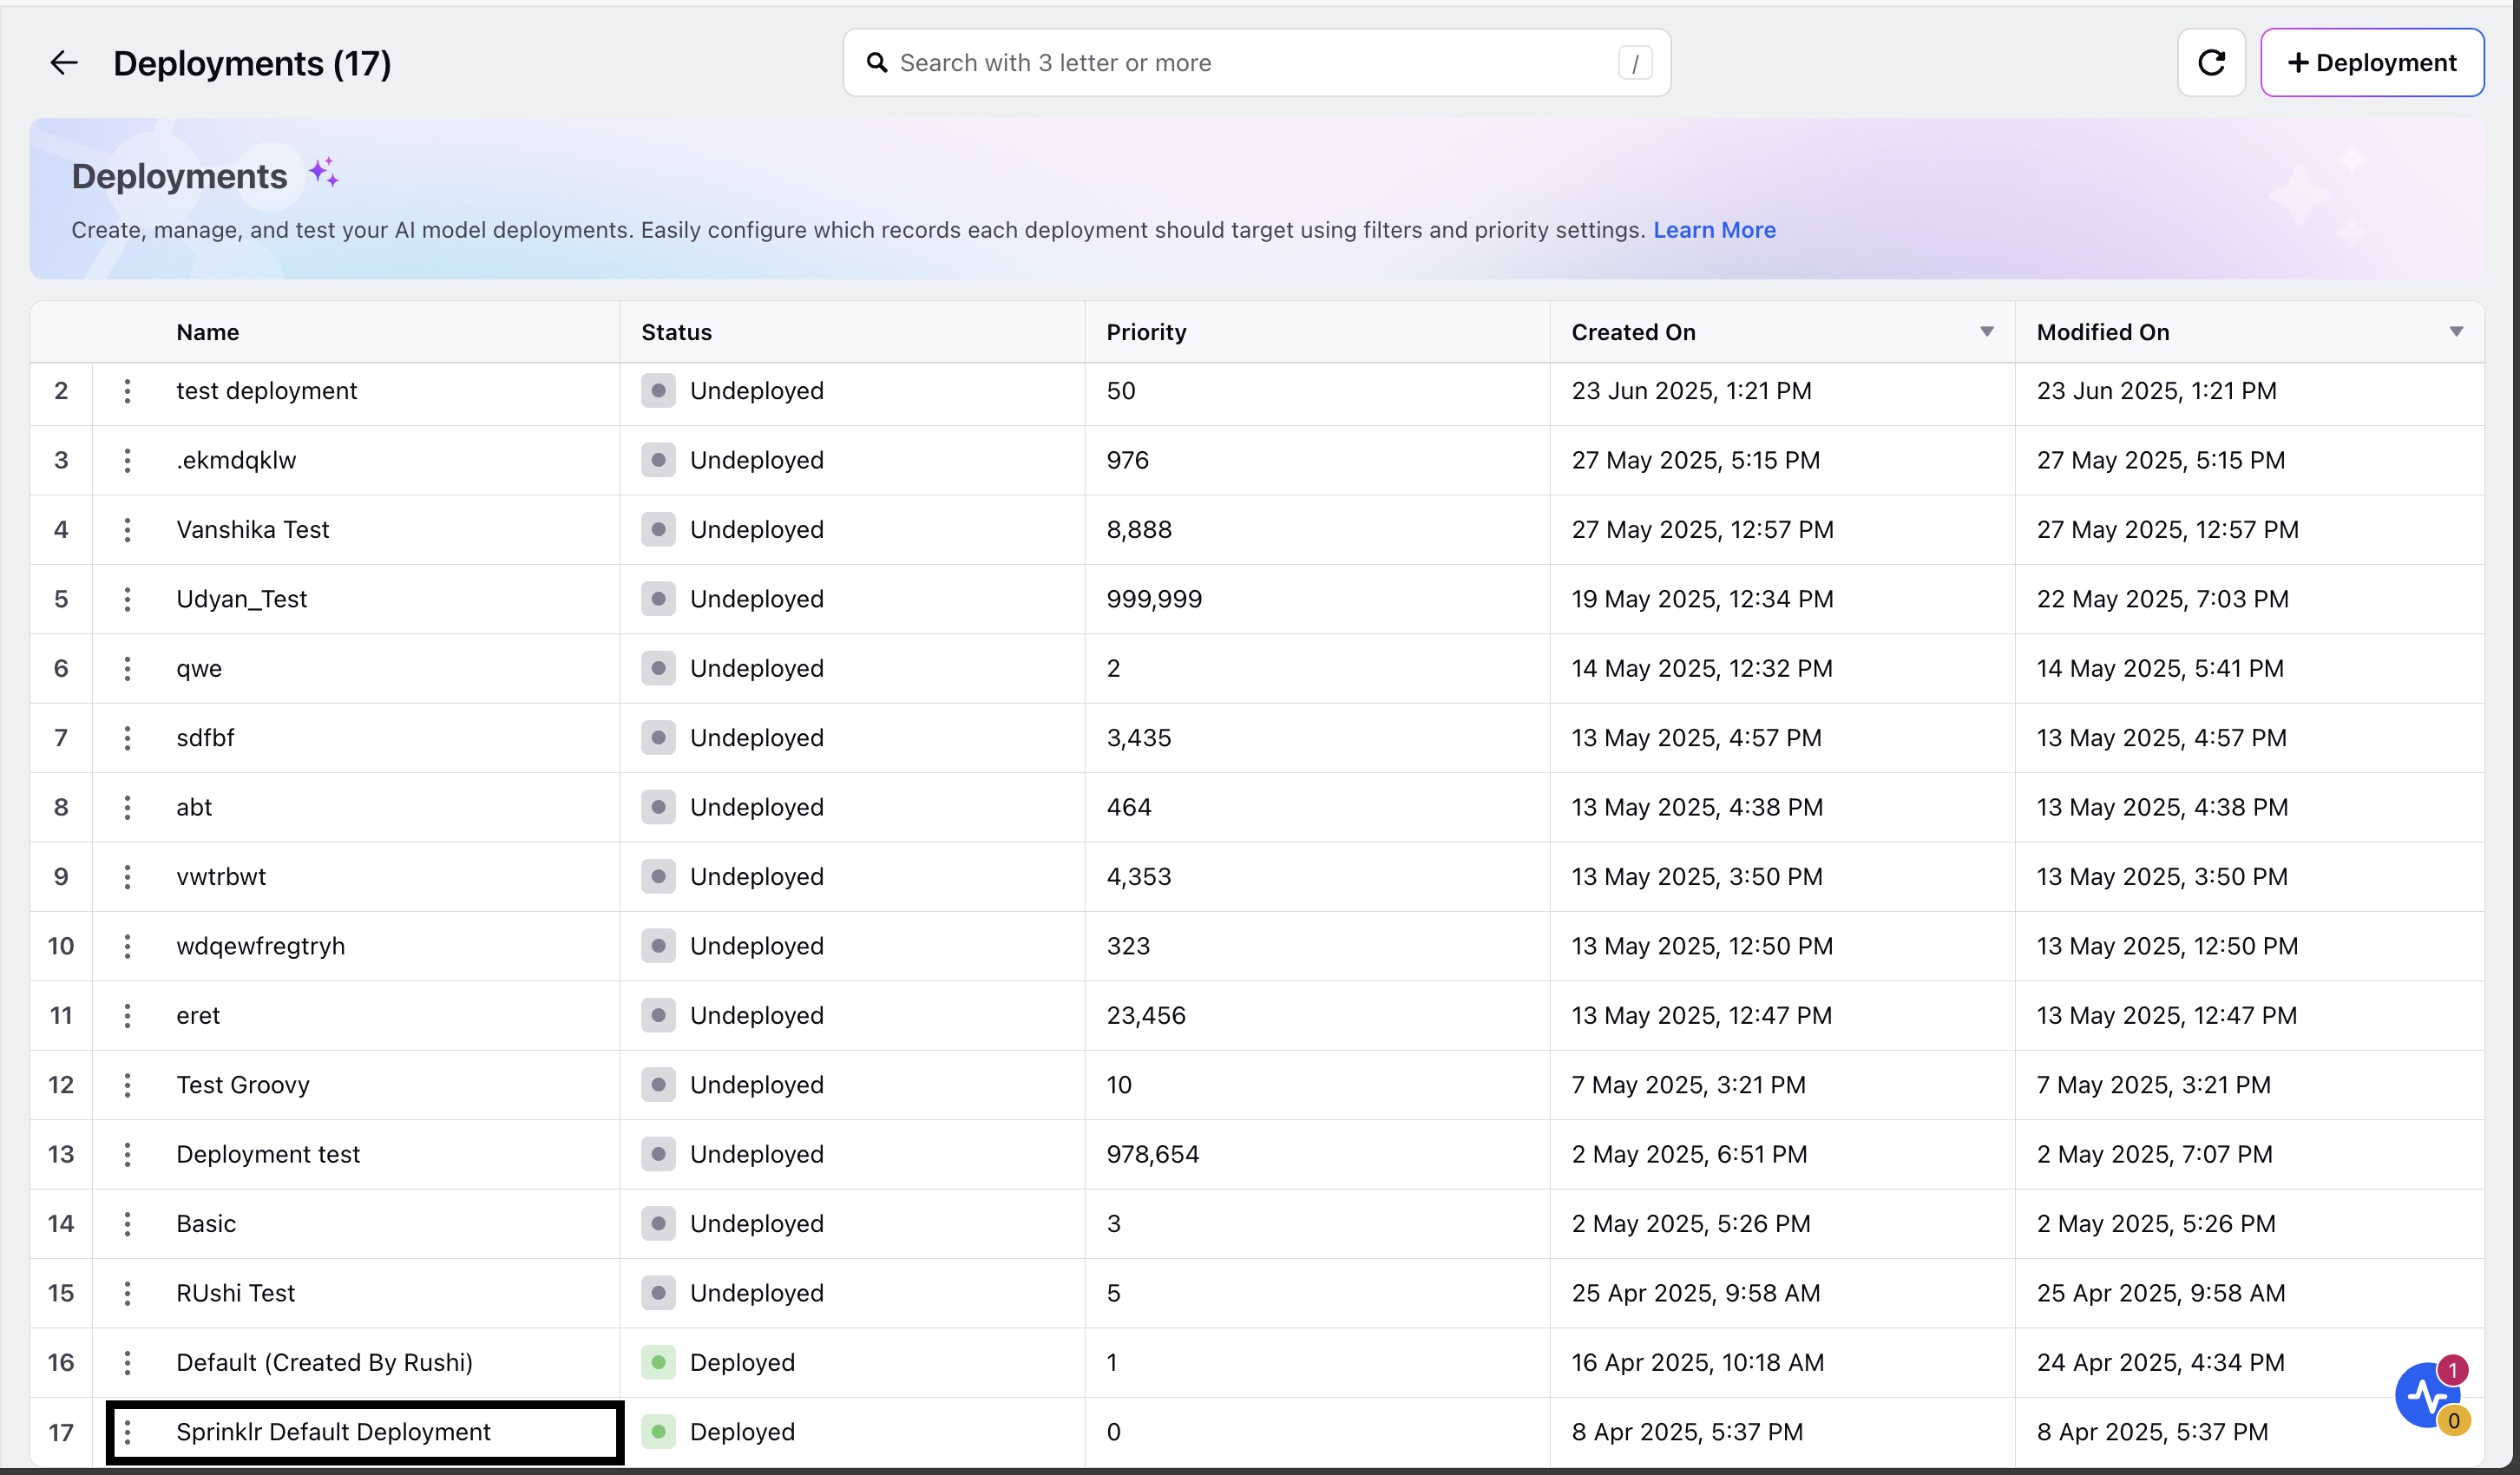
Sprinklr Default Deployment
Under Zero Shot Intent Detection , you have the option of either proceeding with a default sprinklr deployment or creating your own deployment.
Creating a Simple Deployment
Once you have created new deployment, its time to manage the basic deployment. To do this :
Click on Properities node , map the field entityDetails using the below custom code .
return JSON_UTILS.parseJsonList(entity_details);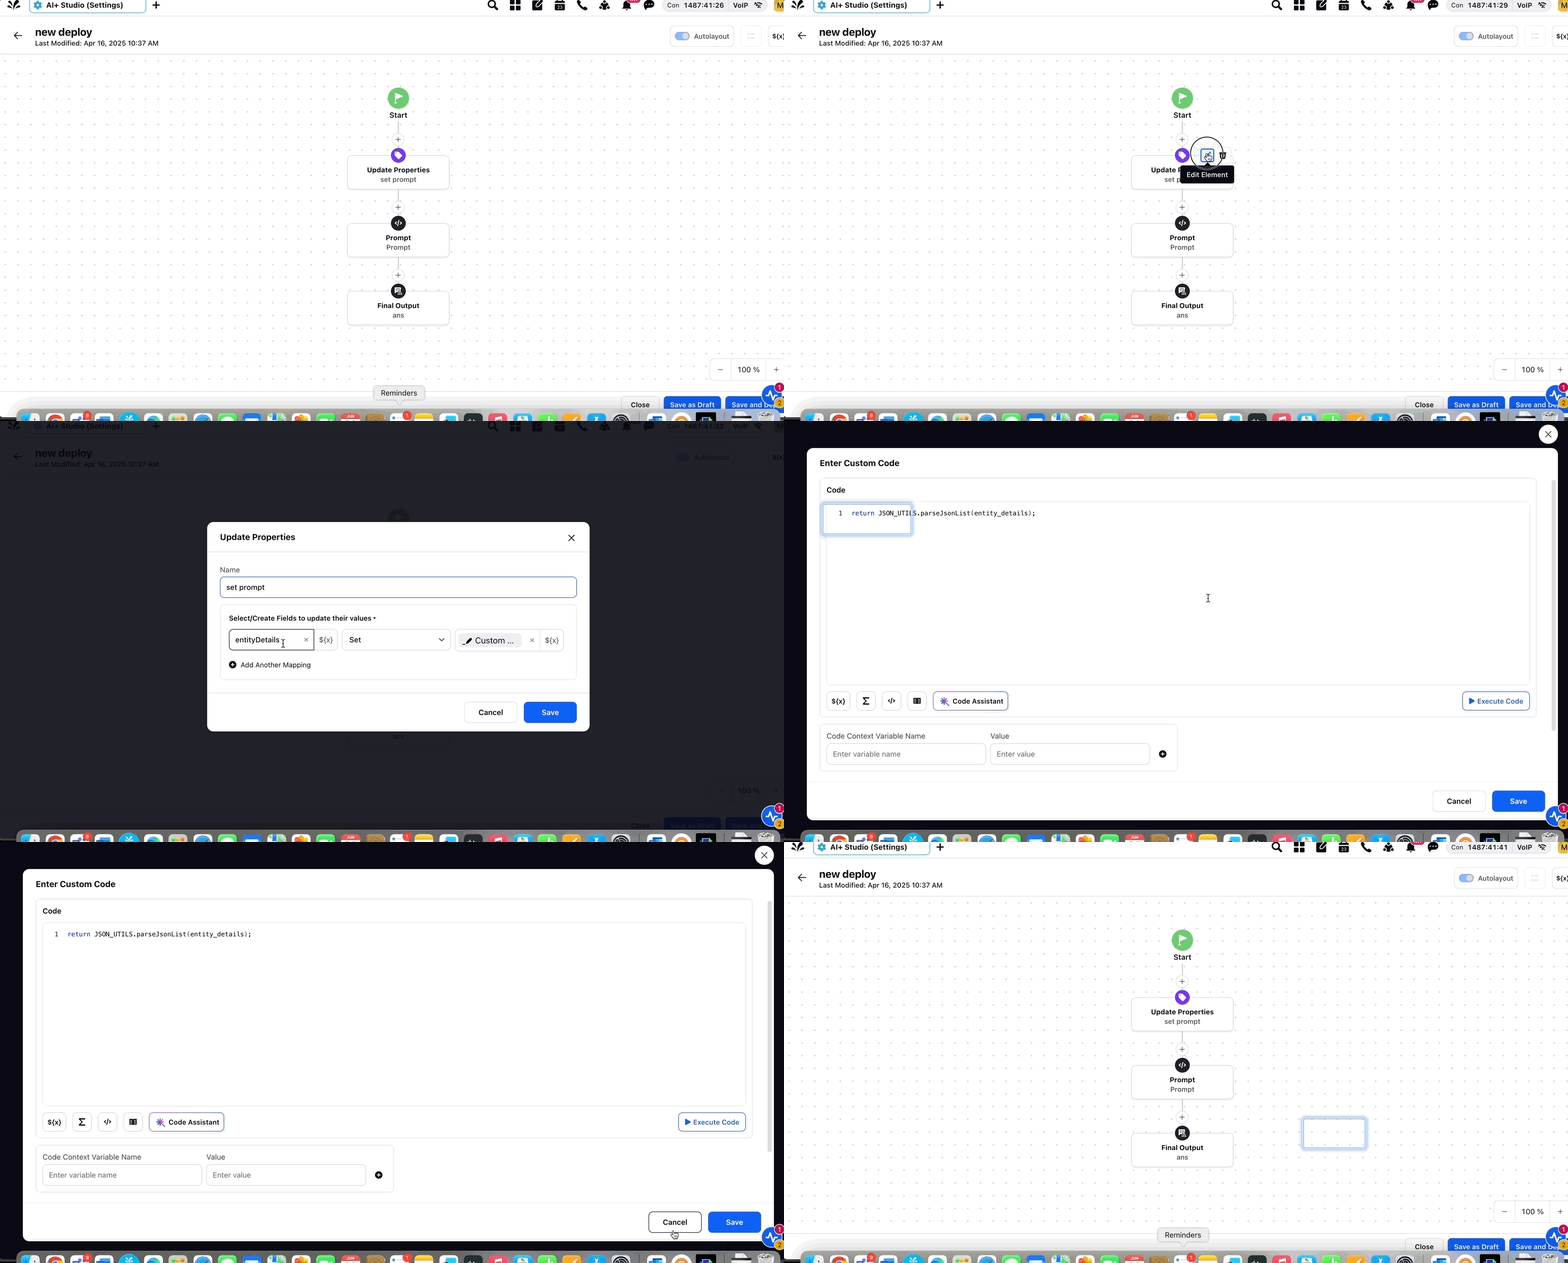
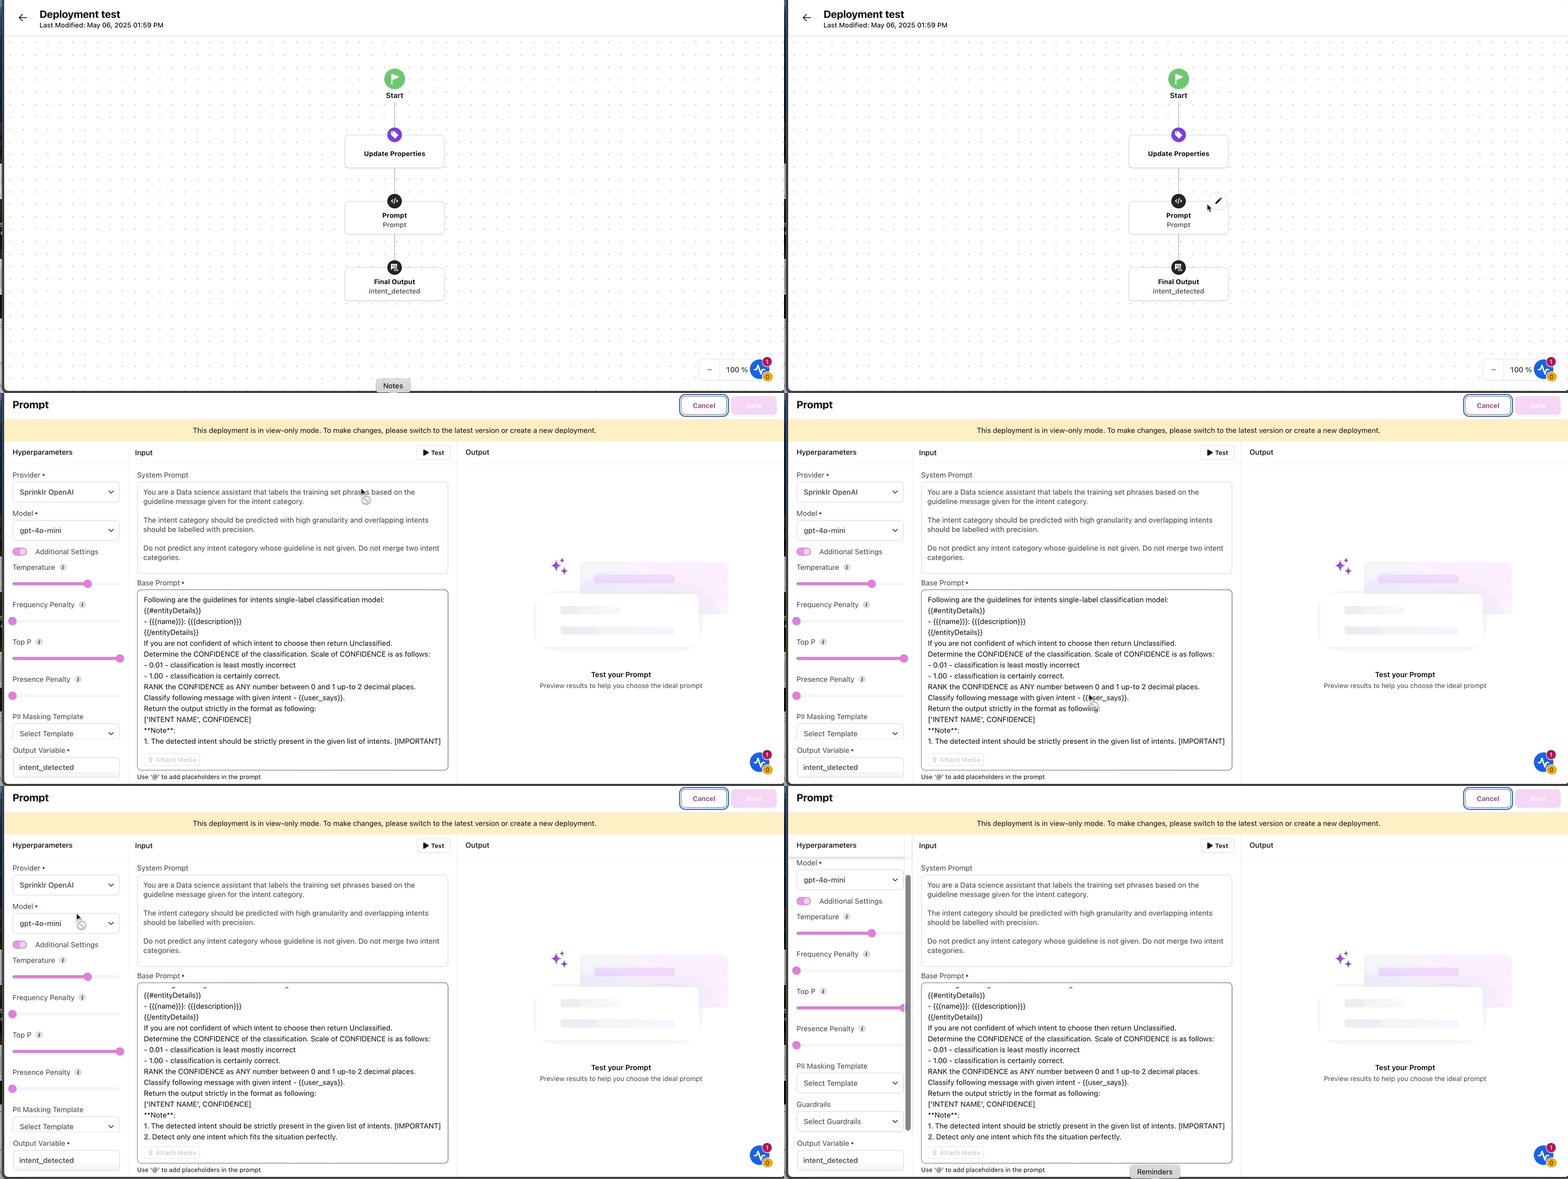
In the prompt node , you can :
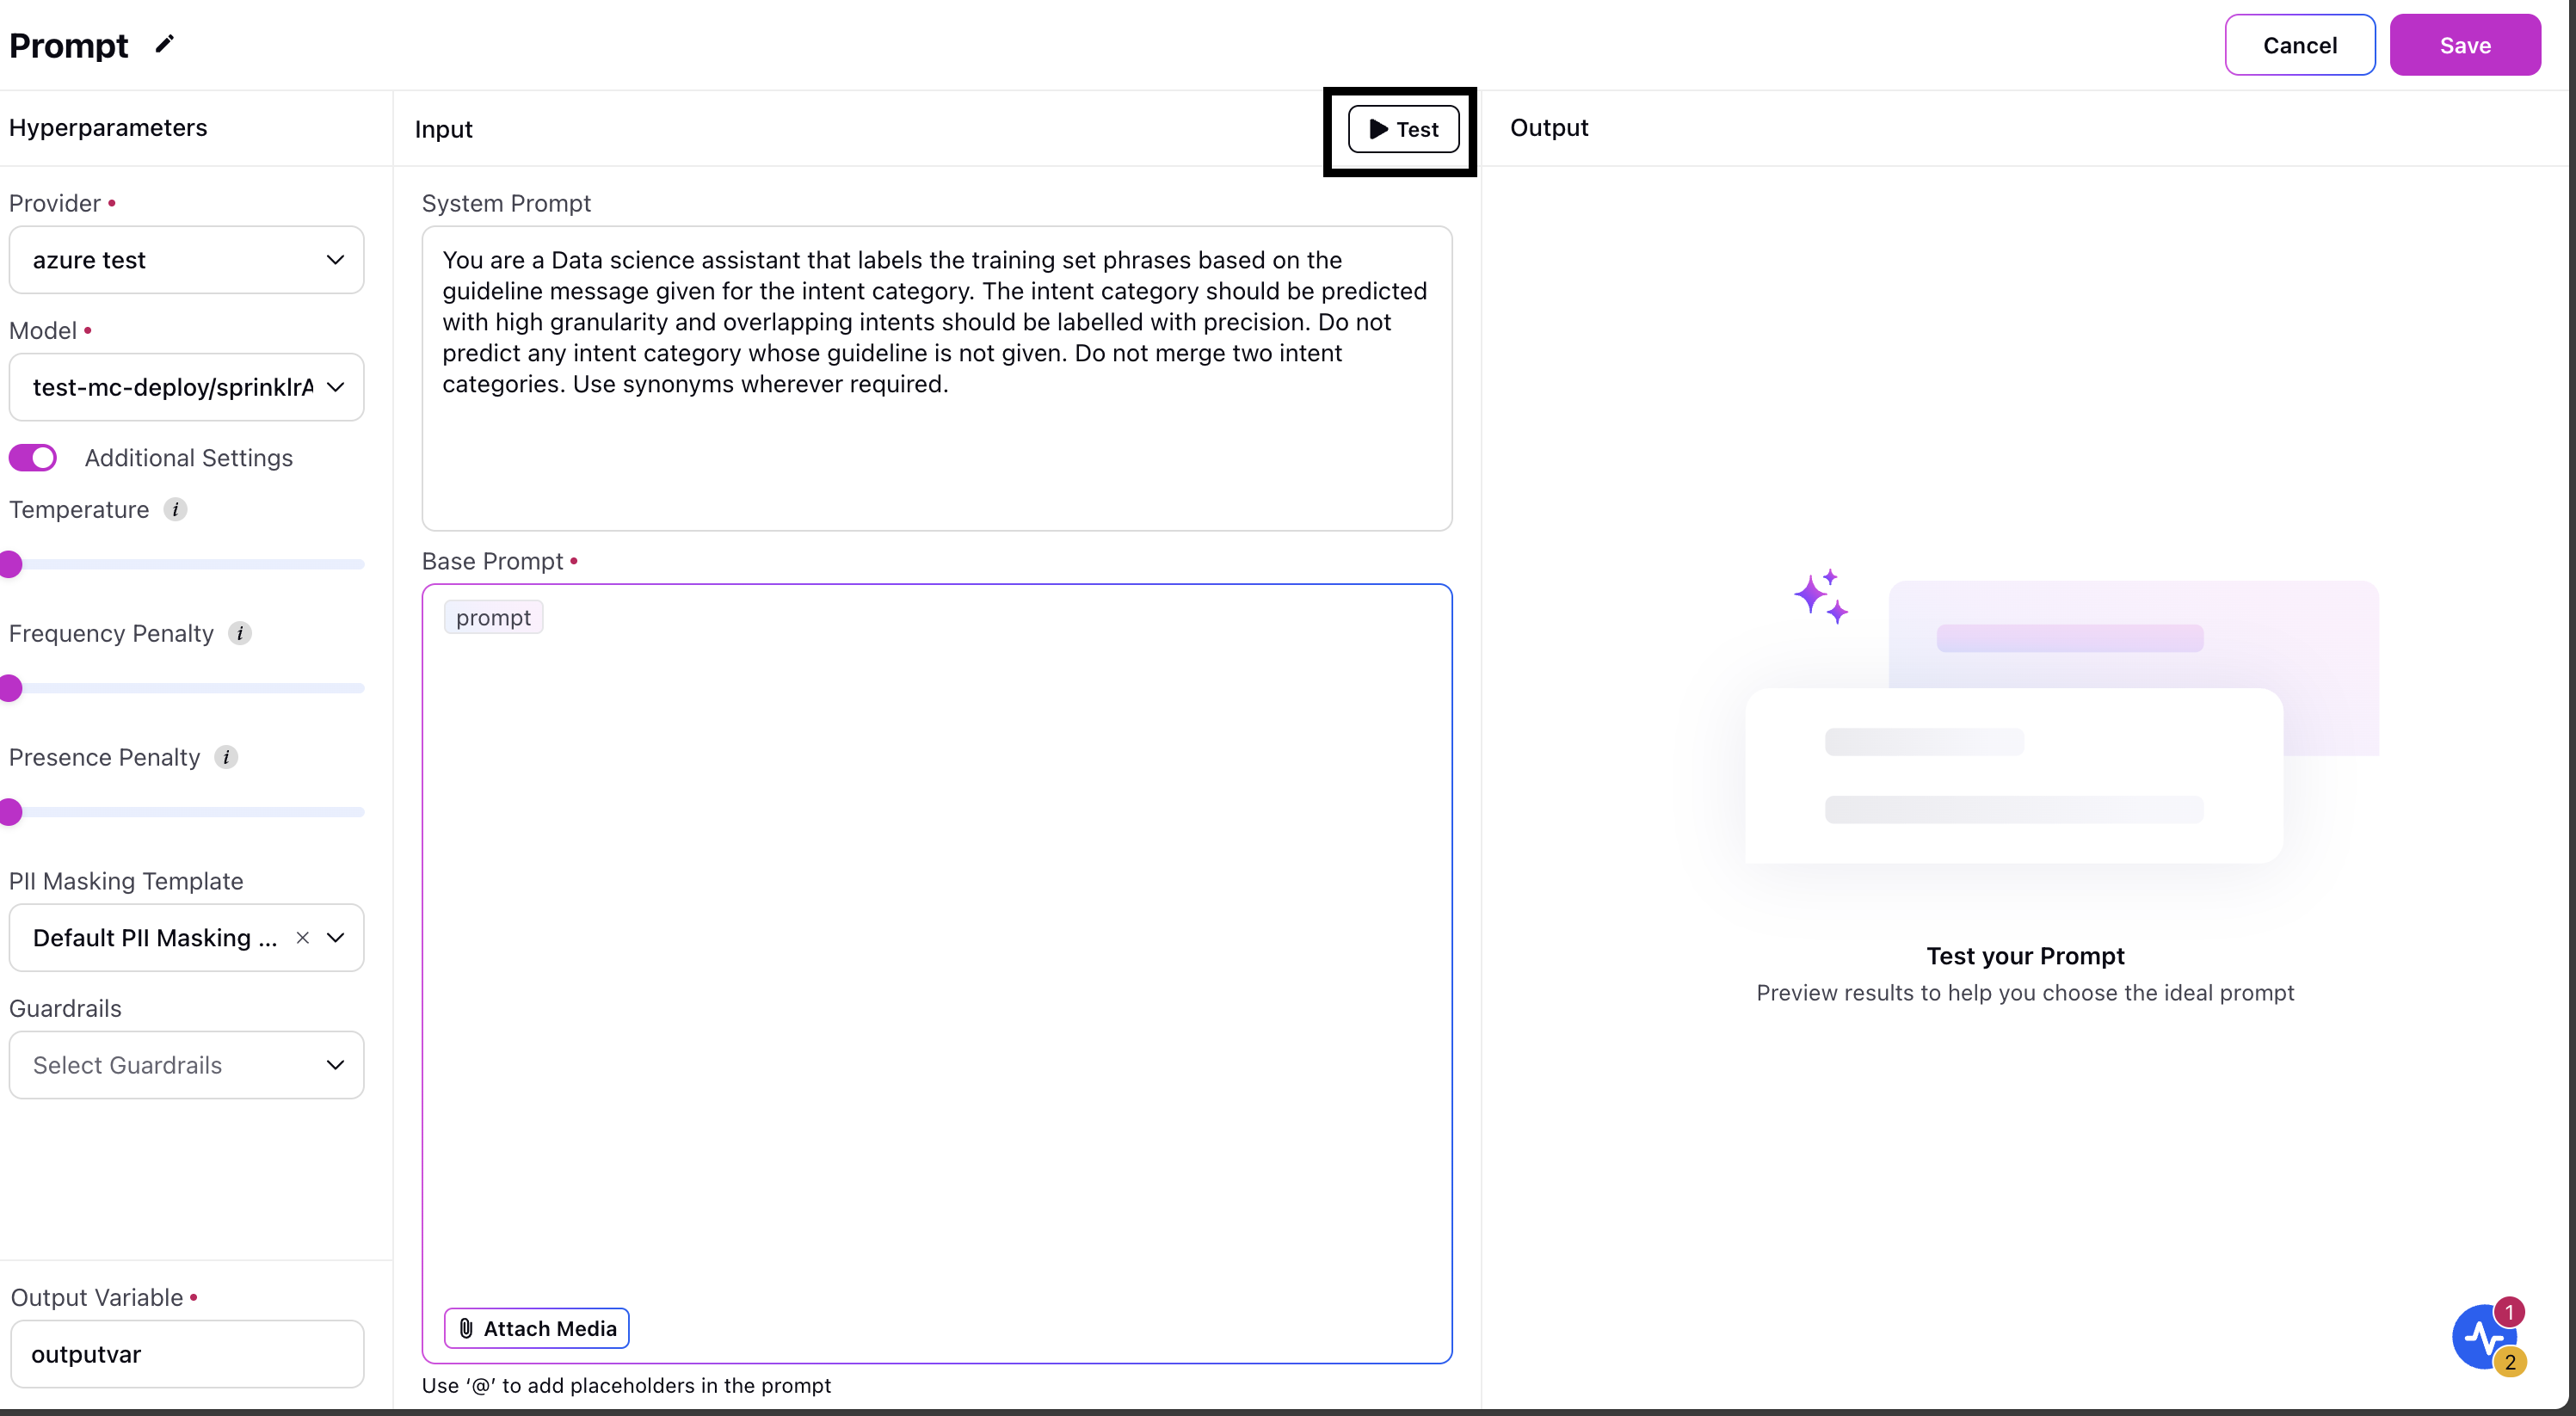
edit the base prompt and system prompt
define hyperparameters such as :
selecting the LLM provider under Provider
selecting the model name
specifying additional settings such as temperature, frequency penalty and presence penalty.
Enter an output variable name.
Click on final output node and set the output variable name to the one you defined in step 3.
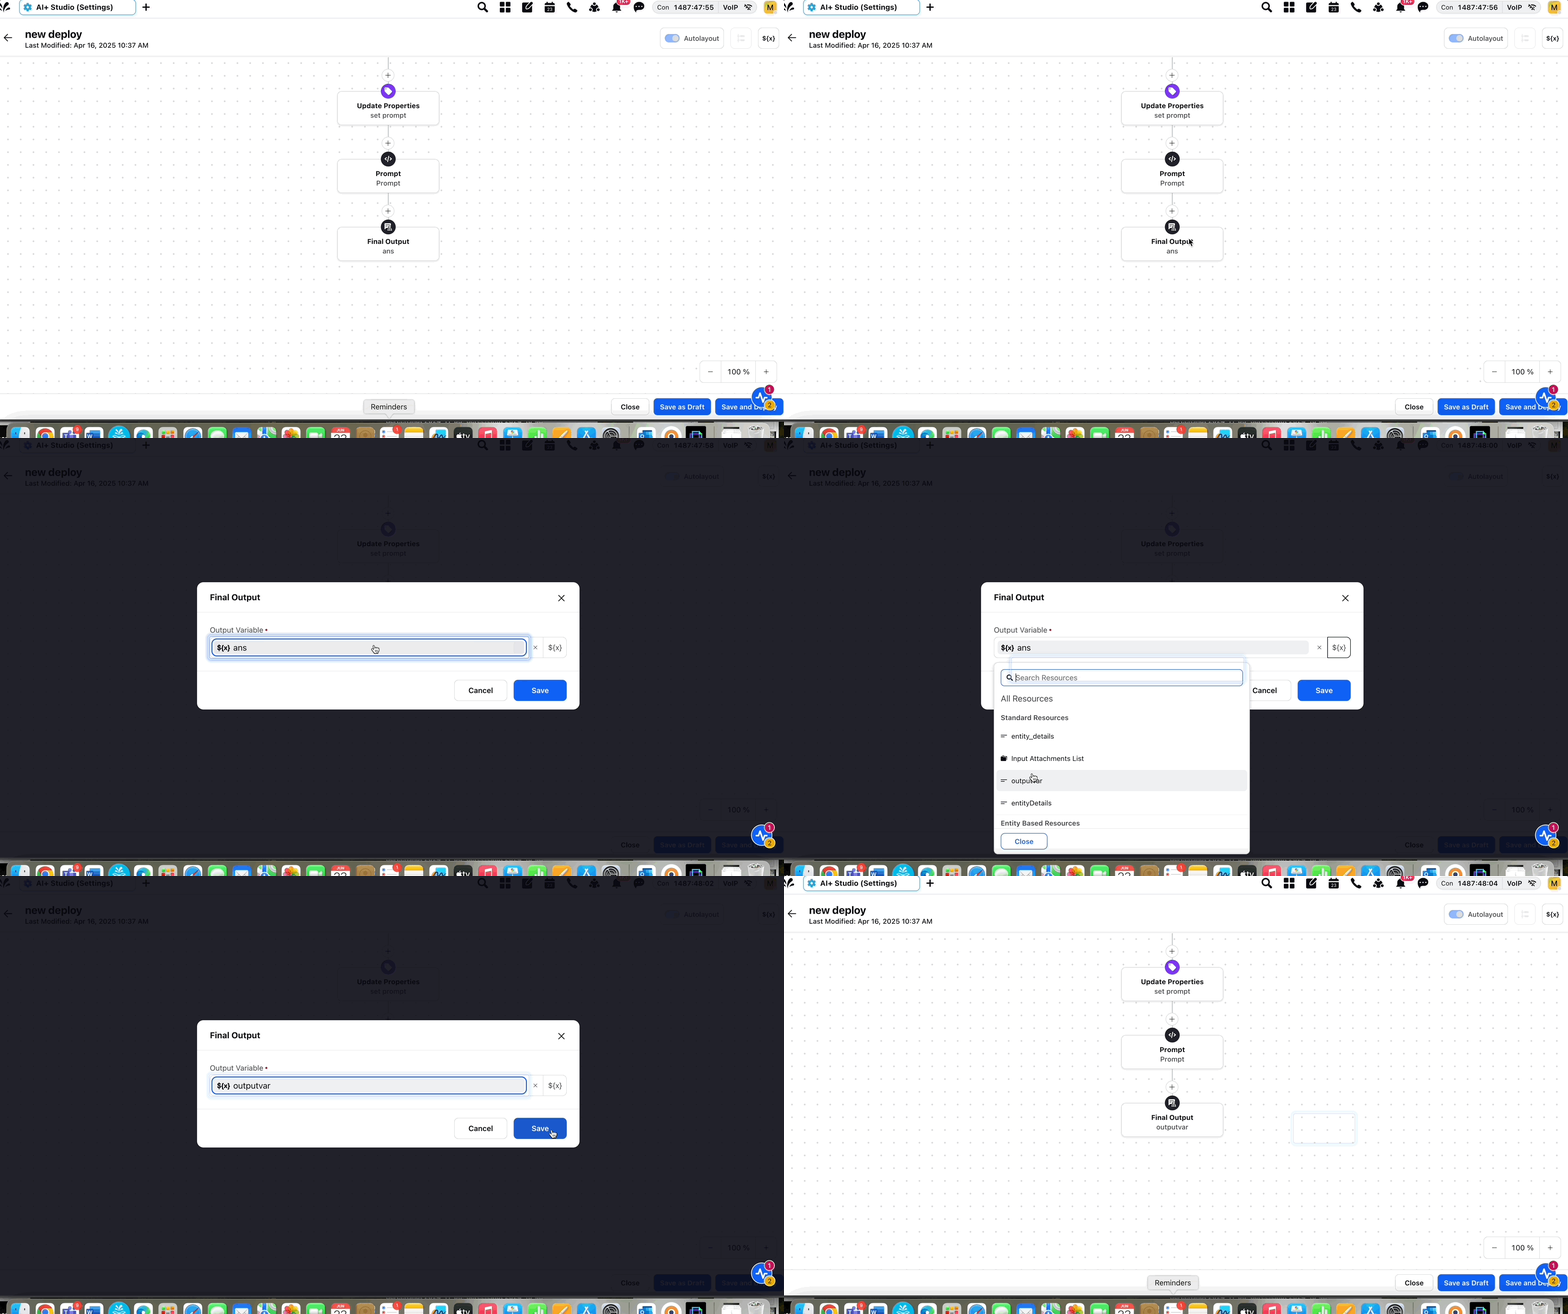
Note: The Test button in the prompt configuration screen is currently non-functional. Users cannot test prompts directly from the UI at this time.
Important Guidelines for Prompt Editing
When editing the base prompt, ensure the following:
Use Mustache Templates
{{#entityDetails}}
{{{name}}}: {{{description}}}
{{/entityDetails}}: This is a placeholder and detches intent names and descriptions.
{{user_says}}: Represents the user input to be classified.
Output Format: Return the output strictly in the format as following:
['INTENT NAME', CONFIDENCE]