Guided Workflow on Live Chat Home Screen
Updated
You can integrate a guided workflow into Live Chat by adding an information card with a Guided Workflow action. This allows customers to launch a guided workflow directly from the Live Chat home screen, offering step-by-step support for common issues without having to leave the conversation.
Guided workflows provide an interactive, user-friendly interface that empowers customers to resolve their queries independently. They support a wide range of functionalities, including collecting customer information, triggering real-time API calls to CRMs, sending messages via SMS, WhatsApp, or email, scheduling callbacks, and booking appointments.
Prerequisites
Before you begin, ensure the following prerequisites are met:
Sprinklr Guided Workflows (GW): Ensure that you have a fully functional guided workflow within Sprinklr. Create the specific guided Workflow that you intend to trigger from the home screen of the Live Chat application.
Sprinklr Live Chat Application: Make sure you have the Live Chat application where you intend to trigger the guided workflow.
Configuration Steps
To configure a guided workflow with Live Chat involves the following steps:
Step 1: Create a Guided Workflow
To create a guided workflow, follow these steps:
1. In Sprinklr, go to Guided Workflows.
2. Create a new guided workflow and save it.
For detailed steps, see Guided Workflow Manager.
Step 2: Create a Guided Workflow Application
To create a guided workflow application, follow these steps:
1. In the Guided Workflows left navigation bar, navigate to the Guided Workflow Applications section.
2. Click Add Application in the top-right corner. From the Guided Workflows dropdown, select the guided workflow you created in Step 1.
3. Toggle on Enable Authentication. In Authentication Type, select Live Chat OTA.
4. Click Save.
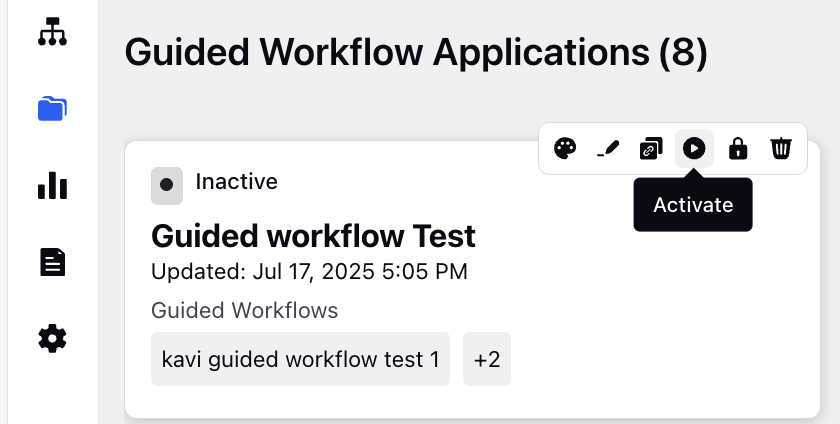
5. On the application card, click Activate to enable the application.
For detailed steps, see Guided Workflow Application Manager.
Step 3: Configure Live Chat with Guided Workflow Application
To configure Live Chat with Guided Workflow Application, follow these steps:
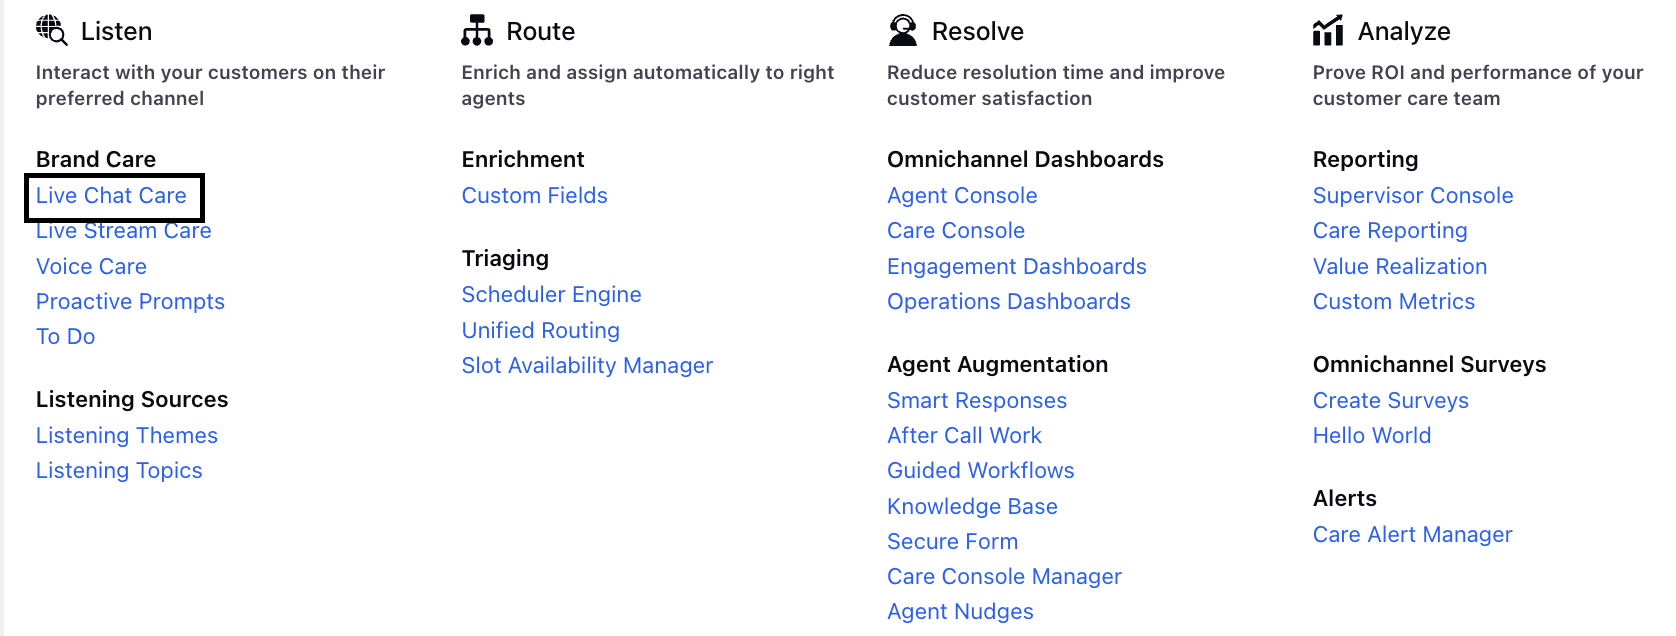
1. Go to Live Chat Applications.
Click New Page (+) to open the Launchpad.
Under Listen, click Live Chat Care.
2. Locate the desired Live Chat application and click the three-dot menu > Edit Live Chat to open it for editing.
Alternatively, you can create a new Live Chat application. The Live Chat Builder screen is displayed.
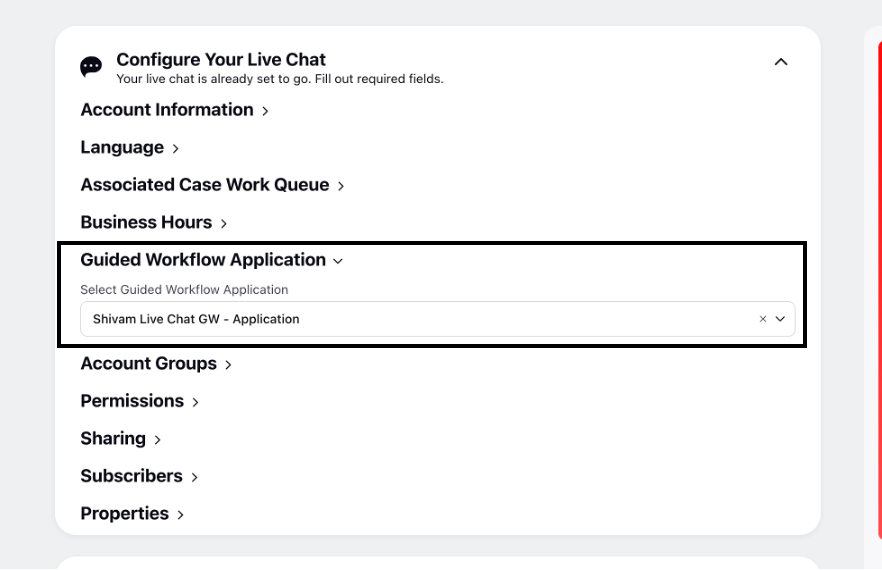
3. In the Guided Workflow Application section, select the application you created in Step 2.
Step 4: Add Guided Workflow Card on the Home Screen
To add Guided Workflow card on the Home screen, follow these steps:
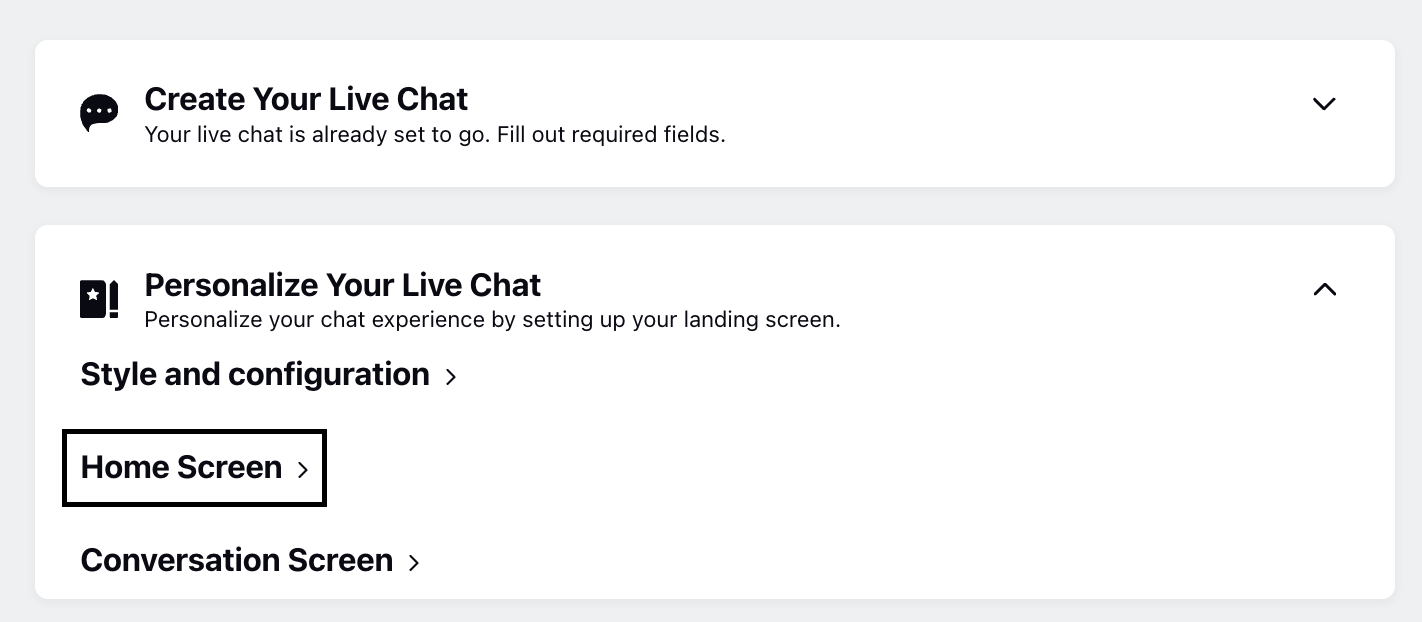
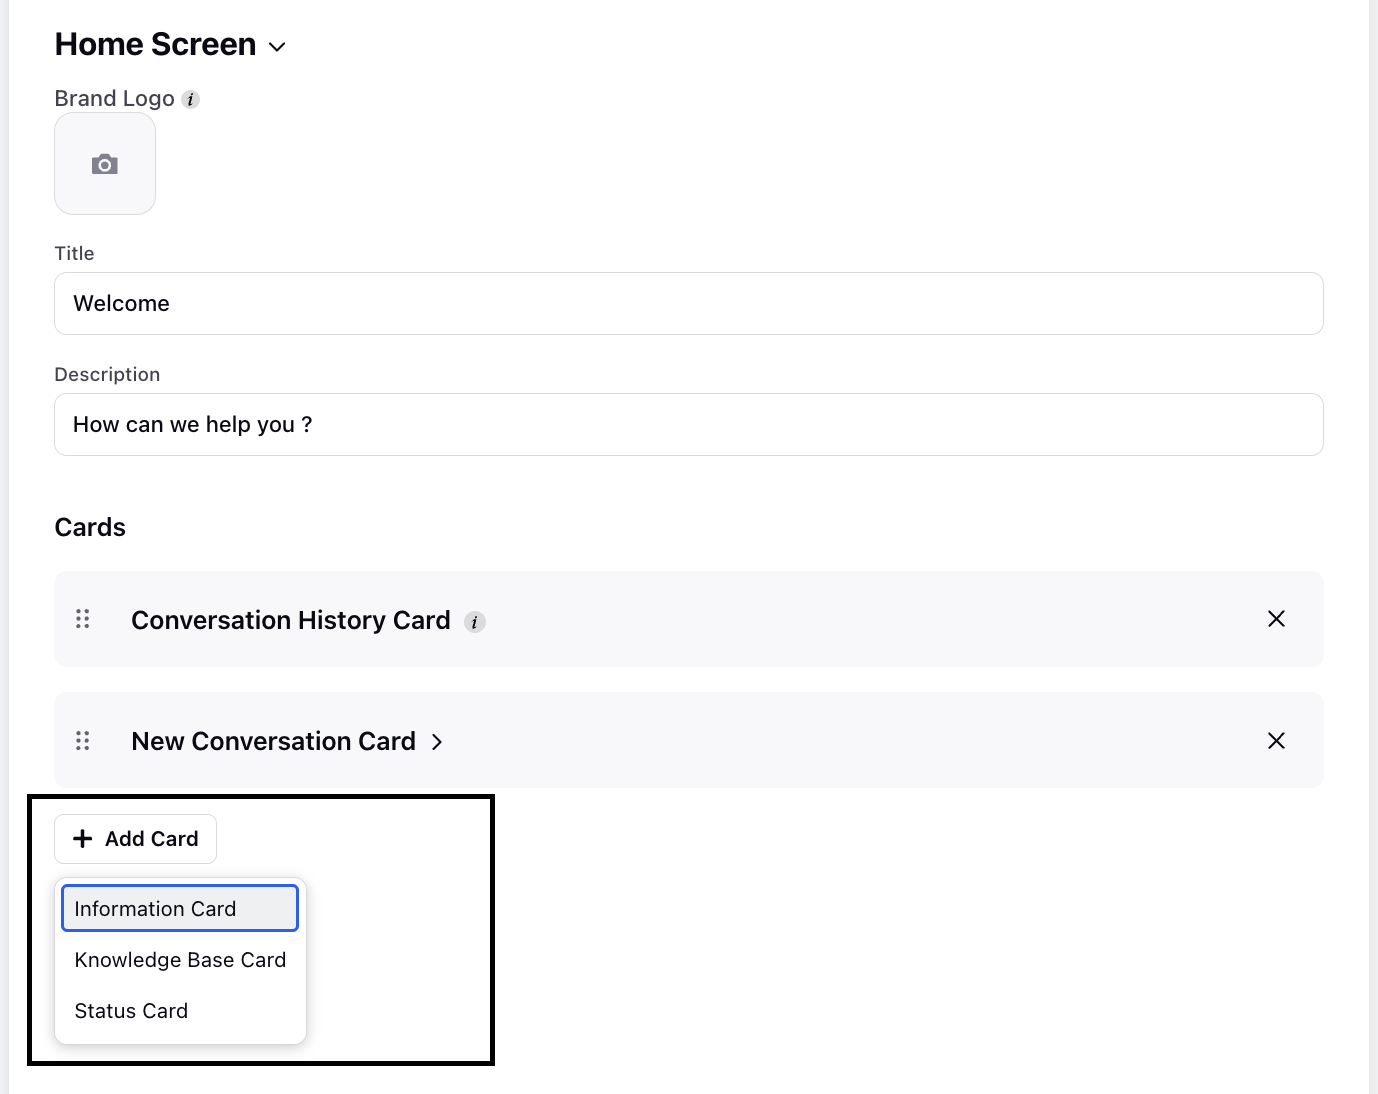
1. In the same Live Chat Builder flow, navigate to Personalize Your Live Chat > Home Screen.
2. Click Add Card and choose Information Card.
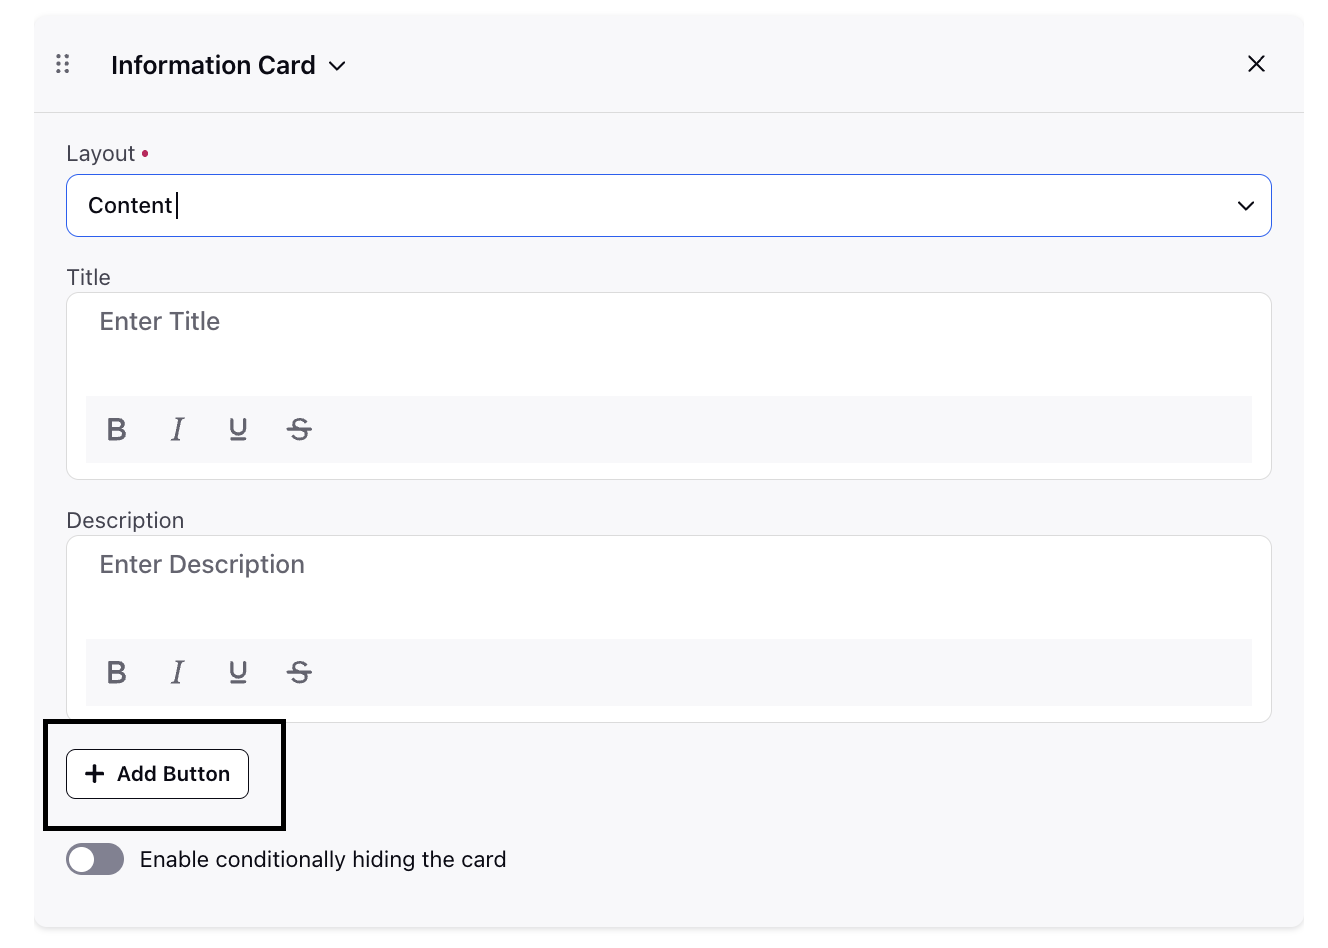
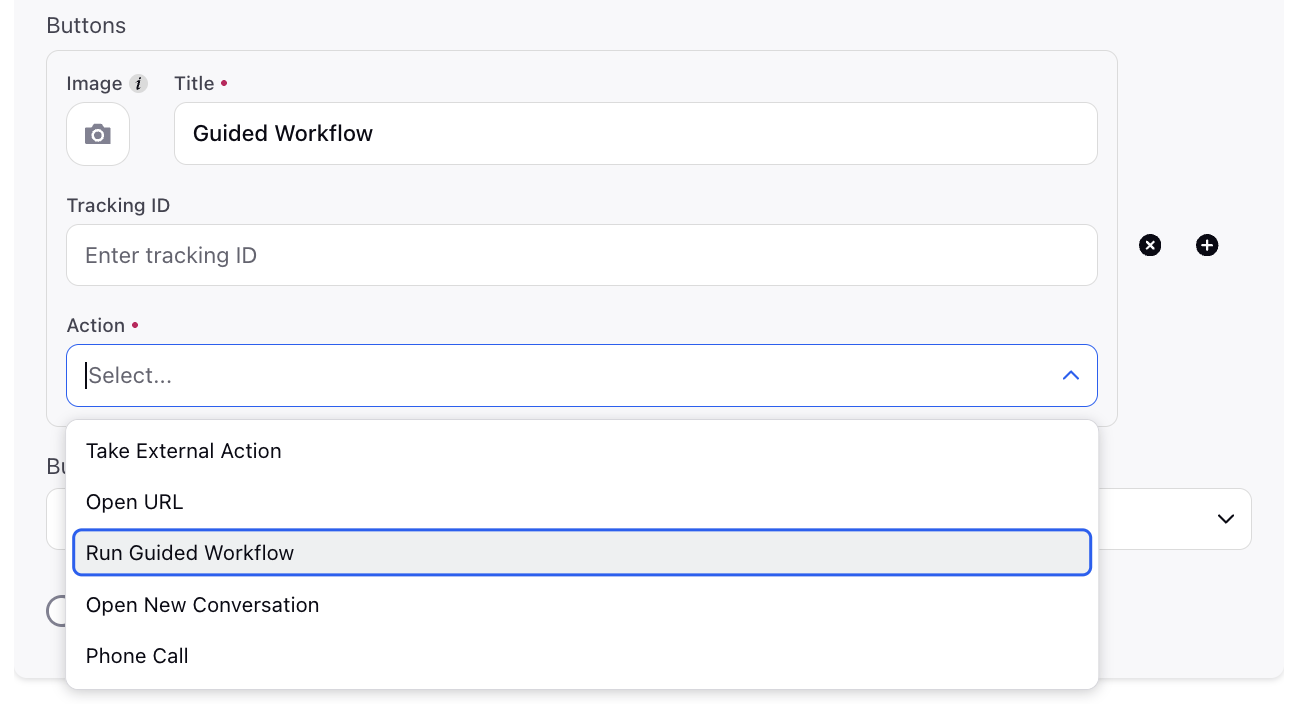
3. On the Information Card, click Add Button. Then, enter the necessary details such as Button Name and Tracking ID.
4. Under Action, select Run Guided Workflow.
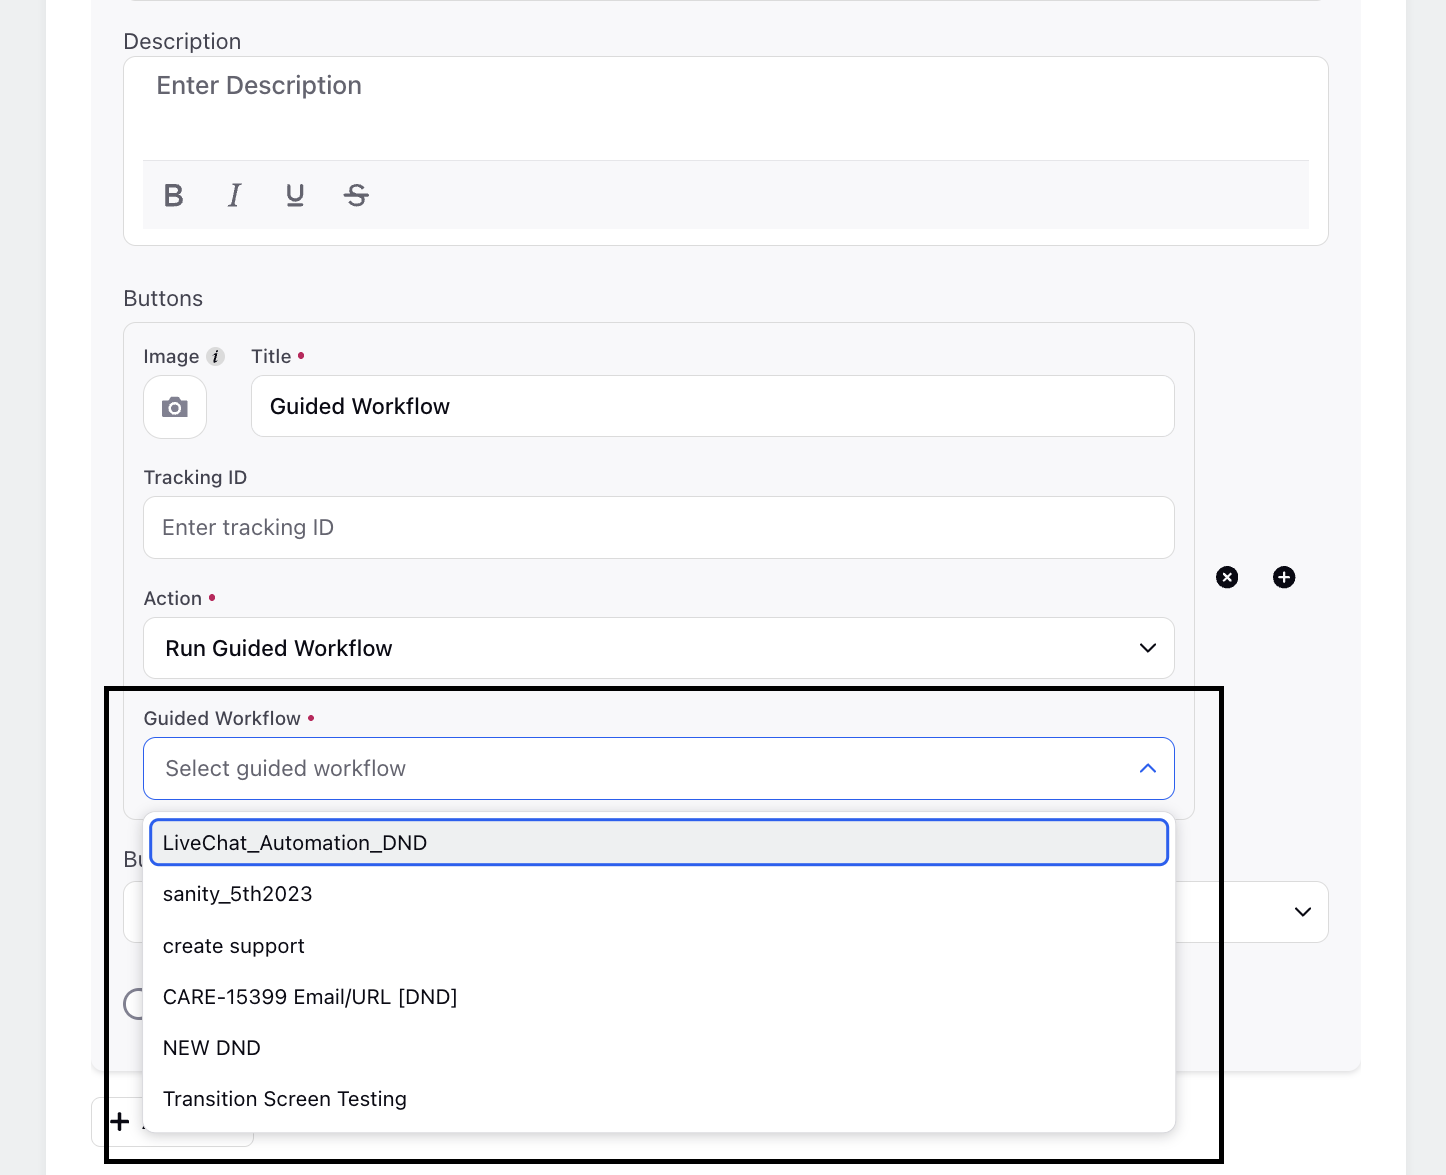
5. From the Guided Workflow dropdown, select the workflow you want to link to this Live Chat application.
Only workflows available in the selected Guided Workflow Application will appear. You can add multiple cards as needed.
6. Once your Live Chat configuration is complete, click Save.
Example
The following video demonstrates how the integrated guided workflow will appear to the customer within the Live Chat experience.