Manage Split Profiles in Forecast Scenarios
Updated
Split Profiles help you break down a Forecast Scenario into smaller parts to share it across different locations or contact centers. They are created using Child Work Types and are part of a larger Forecast Scenario. Split Profiles are helpful when you want each area to have its forecast based on specific needs, while still being part of the overall plan.
When you create a Split Profile, you're basically telling the system how to divide the total forecasted volume among different teams or sites. This makes it easier to plan and manage work more accurately, particularly if your organization operates in multiple locations.
This section outlines the essential steps for managing Split Profiles in Forecast Scenarios, including:
Creating Split Profiles
Run Split Profiles
Editing Split Profiles
Delete Split Profiles.
Navigate to Split Profiles Record Manager
Navigate to the Forecast Scenario record manager.

Click the View Forecast (Eye icon) button corresponding to the Forecast Scenario. This will open a detailed view of the Forecast Scenario.

Select Split Profiles from the navigation tree on the left to open the Split Profiles record manager.
Note: The Split Profiles record manager is available only for Forecast Scenarios that utilize Work Types configured to include Child Work Types.
This record manager only shows details on Split Profiles of the selected Forecast Scenario.
Create Split Profiles
Navigate to the Split Profiles record manager of the required Forecast Scenario.

Click the Create Split Profile button at the top right to open the Split Profile creation page.
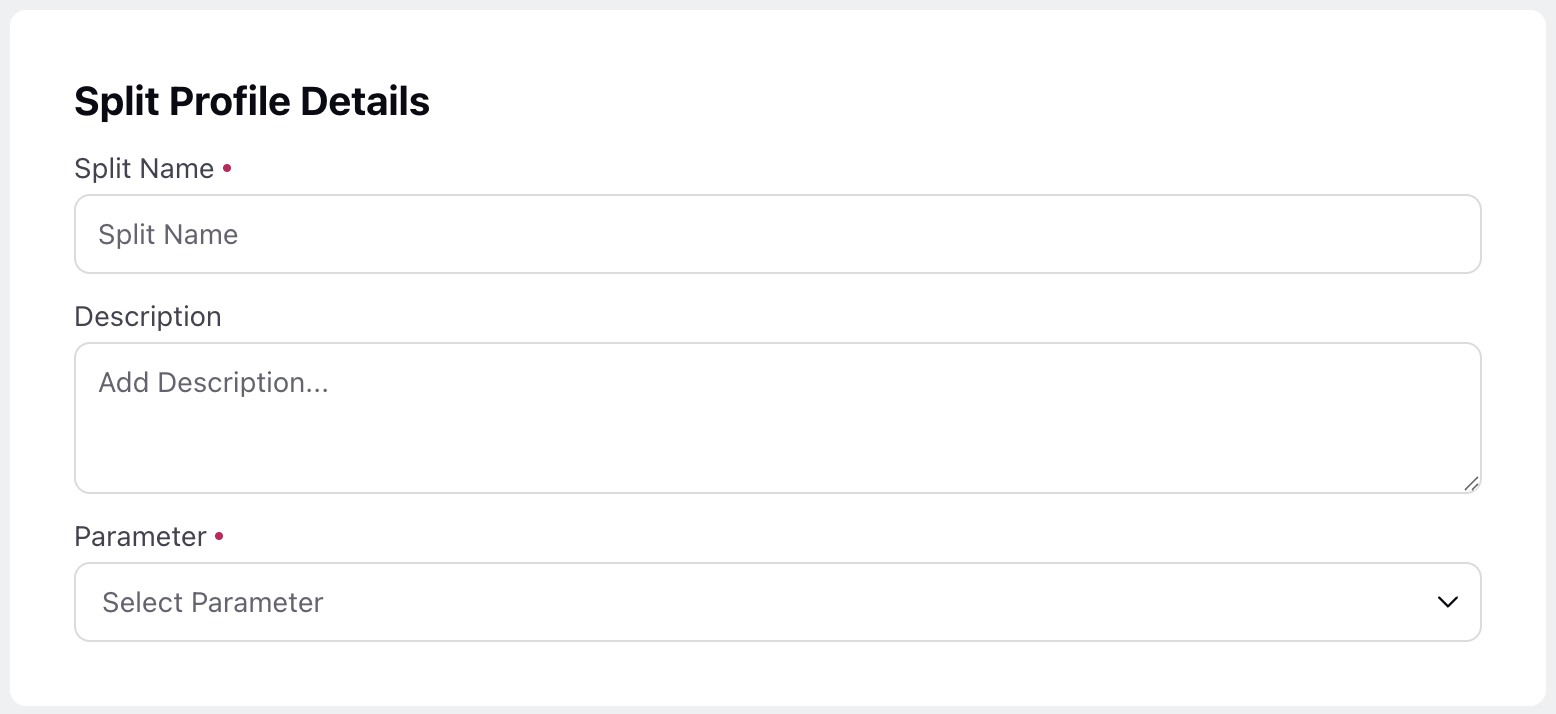
Fill in the required fields on the Split Profile Details page. Fields marked with a red dot are mandatory. Below are the descriptions of the fields on this page:

Split Name: Enter the name of the Split Profile. (Required)
Description: Enter a brief description of the Split Profile.
Parameter: Select Volume. (Required)
Click the Next button at the bottom right to open the Work Types page.
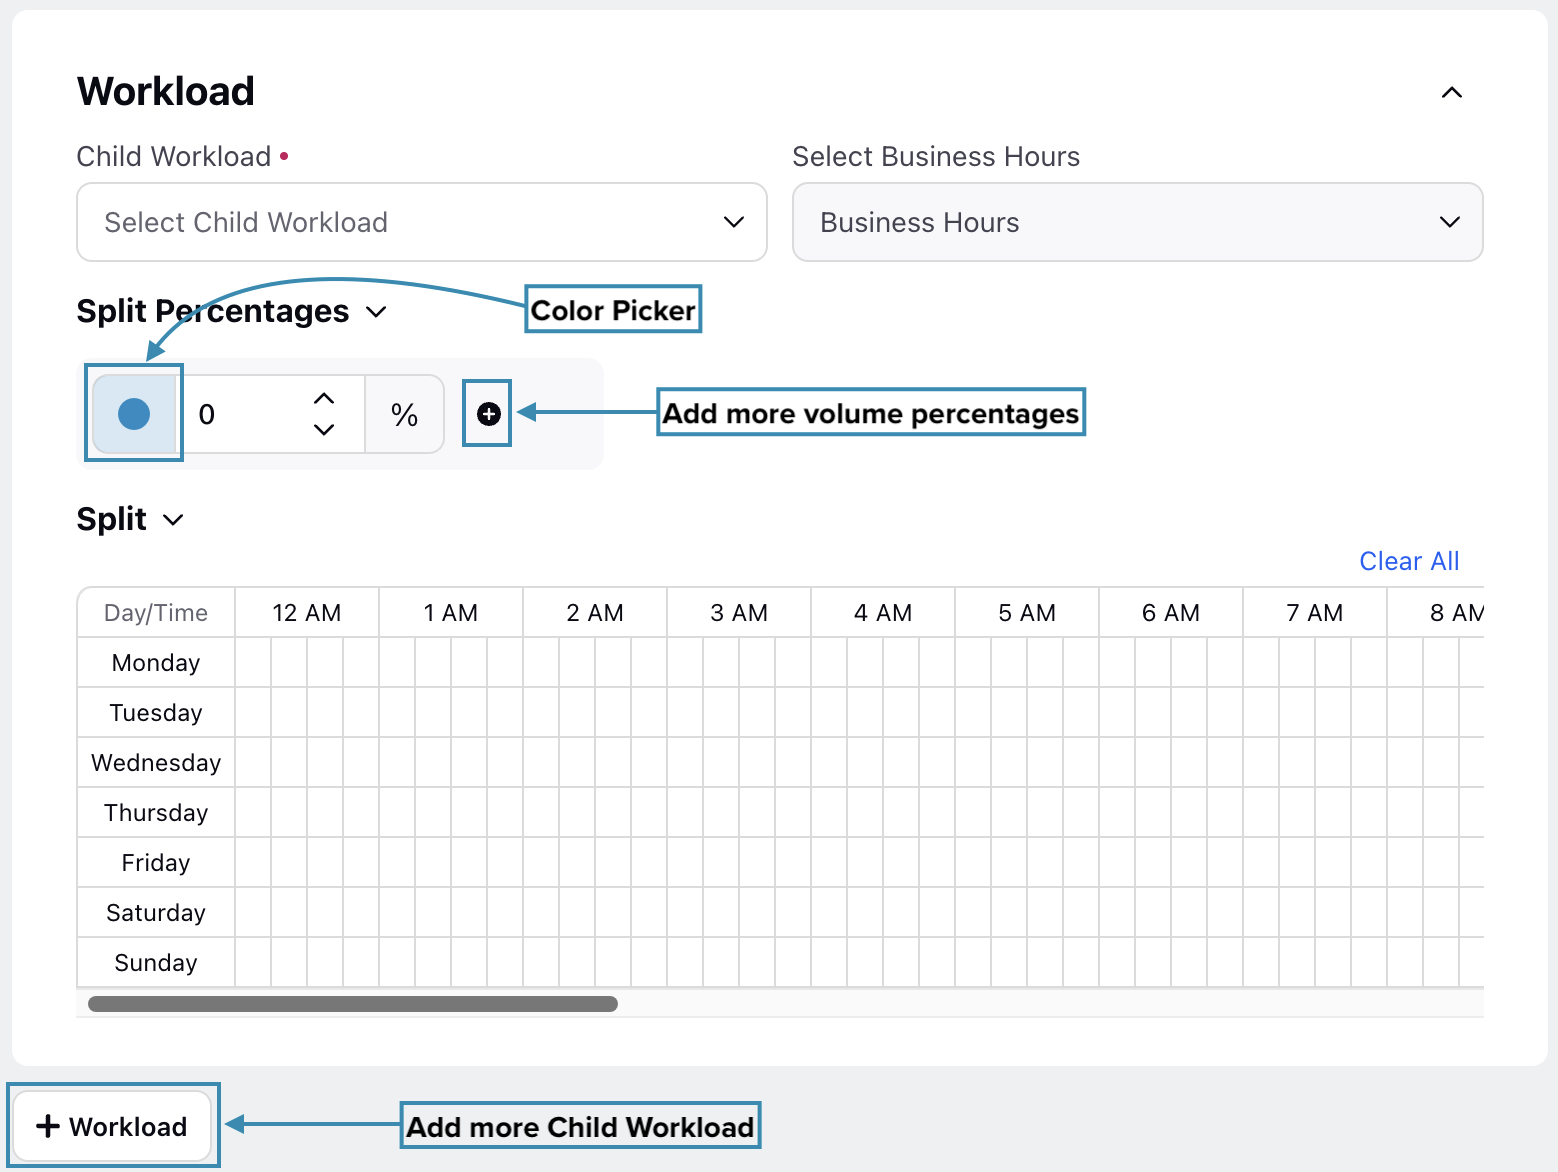
Fill in the required fields on the Work Types page. Fields marked with a red dot are mandatory. Below are the descriptions of the fields on this page:

Child Work Type: Select a Child Work Type. (Required)
Note: Only the Child Work Type(s) of the Parent Work Type used to create the Forecast Scenario will be available for selection.
Select Business Hours: The system will automatically popuplate the Business Hours preset used to create the Child Work Type. You cannot modify this field.
Split Percentages: Enter the volume percentage for that interval. You can customize the color by clicking on the Color Picker. Click the Add Value button to add more volume percentages. (Required)
Note: The volume percentage must be between 0 and 100%.
Split: Plot the volume percentages on the canvas. Refer to the Plot Split Percentages section for more details on plotting volume percentages on the canvas.
Click the +Work Type button to add more Child Work Types to the Split Profile.
Click the Create button at the bottom right to create the Split Profile with the entered details.
Plot Split Percentages
The start and end times of the canvas are determined by the selected Business Hours. Each row on the canvas represents a weekday, while the columns represent time intervals throughout the day. Each hour is divided into segments of 15, 30, or 60 minutes, depending on your environment's configuration.
Click on the corresponding cells to assign or unassign the volume percentage for that cell. To assign or unassign volume percentage for multiple cells, click and drag the cursor across the desired cells. If multiple volume percentages have been created, a sub-menu will appear during assignment, allowing you to select which volume percentages should be assigned to the selected cell(s). Plotting volume percentages on the canvas follows the same design illustrated in Plot Hourly Time Off Slots section.
Note: The combined volume percentage for each cell must total 100%. When multiple Child Work Types are configured, the sum of the volume percentages for each cell across all Child Work Types must equal 100%.
Volume Distrubution
Scenario 1: Parent Forecast Scenario consists of only 1 Parent Work Type
If the Parent Forecast Scenario consists of a single Parent Work Type, the Parent Work Type volume at the interval level is distributed across the corresponding Child Forecast Scenarios based on the volume percentage allocations defined for each interval.
Example: If an interval contains 1,000 calls and the percentage distribution for four BPO Work Types is set as 10%, 15%, 25%, and 50%, the volume will be split accordingly: 100 calls, 150 calls, 250 calls, and 500 calls, respectively.
Scenario 2: Parent Forecast Scenario consists of mulitple Parent Work Types
When a Parent Forecast Scenario includes multiple Parent Work Types, the total volume at each interval is first aggregated across all Parent Work Types. This combined volume is then distributed to the corresponding Child Forecast Scenarios based on the predefined percentage allocations for each interval.
Example: Suppose an interval includes 1,000 calls for Parent Work Type 1 and 800 calls for Parent Work Type 2, resulting in a total volume of 1,800 calls. If the volume allocation percentages for four Child Work Types are defined as 10%, 15%, 25%, and 50%, the distributed volumes would be:
Child Work Type 1: 180 calls (10% of 1,800).
Child Work Type 2: 270 calls (15% of 1,800).
Child Work Type 3: 450 calls (25% of 1,800).
Child Work Type 4: 900 calls (50% of 1,800).
Note: The system adjusts the distributed volume for each Child Work Type to ensure that all values are whole numbers.
Note: In both scenarios, the Average Handling Time (AHT), Minimum Service Level, In Office Shrinkage, Out of Office Shrinkage, and Maximum Occupancy of the Split Forecast Scenario is fetched from the selected Staffing Preset of the Child Work Type.
Required FTEs Calculation
If Unitary Method is selected as the Staffing Algorithm field while creating the Child Work Type, the required FTEs are calculated using the distributed volume (as described above), Average Handling Time (AHT) from the Staffing Preset of the Child Work Type, concurrency, and granularity.
If the Erlang C is selected, the required FTEs are calculated using the distributed volume (as described above), Average Handling Time (AHT), and Minimum Service Level are fetched from the Staffing Preset of the Child Work Type.
Run Split Profiles
Follow these steps to trigger a Split Profile:
Navigate to the Split Profiles record manager.

Hover over the vertical ellipsis (⋮) icon corresponding to the Split Profile you want to trigger. This will show a list of options.
Select Run from the list of options.
This action will initiate the creation of Forecast Scenario(s) using the details from the Split Profile.

These scenarios will appear in the Forecast Scenario record manager and will be labeled as Split Forecast Scenario type. They will first be in the Processing state. Once processing is complete, they will move to the Draft state, after which they can be published.
Note: The Split Forecast Scenario will be named using the following format: “[Original Forecast Scenario Name]” Split for “[Child Work Type Name]” using “[Split Profile Name]”.
For example, suppose the original Forecast Scenario is named "Q3 Support Forecast", the Child Work Type is "Email Support (APAC)", and the Split Profile is "Regional Distribution". In this case, the resulting name of the Split Forecast Scenario will be: “Q3 Support Forecast Split for Email Support (APAC) using Regional Distribution".
Review Workflow for Split Forecast Scenarios
Once Split Forecast Scenarios are created, they can be shared with users across different locations or contact centers as proposals to manage a portion of the forecasted data from the parent Forecast Scenario. Managers or administrators of these contact centers can review and moderate the details of the Split Forecast Scenario assigned to them and provide comments or feedback as needed.
Send Split Forecast Scenarios for Moderation
Follow these steps to send a Split Forecast Scenario for moderation:
Navigate to the Split Profiles record manager of the required Forecast Scenario.

Click the Activate button at the top right of the page to open the Activate Split Profile dialog box.
Select the Split Profile to be activated from the list in the Split Profile field. Only one can be selected.
Click Activate to set the selected Split Profile as active.
![]()
This will move the Split Forecast Scenario(s) associated with the selected Split Profile into the In Review state.
Note: Split Forecast Scenario(s) associated with the already active Split Profile, if any, will be moved to the Draft state after this action.
Moderate Split Forecast Scenarios
Once the Split Forecast Scenarios transition to the In Review state, authorized users can moderate them.
Follow these steps to moderate a Split Forecast Scenario:
Navigate to the Forecast Scenarios record manager.
View the required Split Forecast Scenario.

Click the Review button at the top right of the page to open the Review Forecast Scenario confirmation box.
Note: The Review button is disabled if the Split Profile associated with the Split Forecast Scenario is not active.

Select either Approve or Reject, and leave a note for the reason for your decision. Please review carefully before proceeding, as this action cannot be undone.

Depending on your selection, the Split Forecast Scenario will transition either to the Approved or Rejected state.
This completes the review workflow of Split Forecast Scenarios.
Note: Split Forecast Scenarios can be published only when the associated Parent Forecast Scenario is published.
Note: A Parent Forecast Scenario can only be published after all Split Forecast Scenarios linked to the active Split Profile have been approved.
Edit Split Profiles
Follow these steps to edit an existing Split Profile:
Navigate to the Split Profiles record manager.

Hover over the vertical ellipsis (⋮) icon corresponding to the Split Profile you want to edit. This will show a list of options.
Select Edit from the list of options to open the Split Profile updating page.
Update the desired details for the selected Split Profile. The fields are identical to those used when creating a Split Profile.
Click the Save button at the bottom right of the page.
This completes the process of editing Split Profiles.
Delete Split Profiles
Follow these steps to delete a Split Profile:
Navigate to the Split Profiles record manager.

Hover over the vertical ellipsis (⋮) icon corresponding to the Split Profile you want to delete. This will show a list of options.
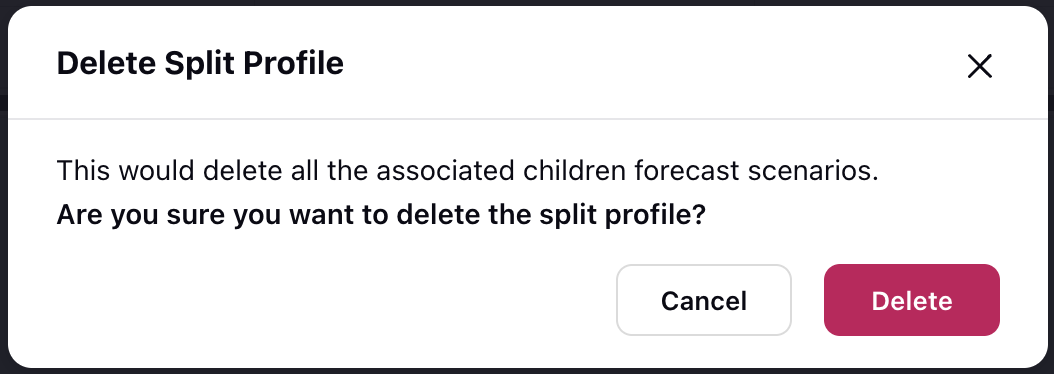
Select Delete from the list of options to open the Delete Split Profile dialog box.

Click the Submit button at the bottom right of the dialog box. This action cannot be undone.
This will delete the Split Profile and all the associated Child Forecast Scenarios generated using the Split Profile.
View Activity Log of Split Profiles
Follow these steps to view the activity log of Split Profiles:
Navigate to the Split Profiles record manager.

Hover over the vertical ellipsis (⋮) icon corresponding to the Split Profile whose audit log you want to view. This will show a list of options.
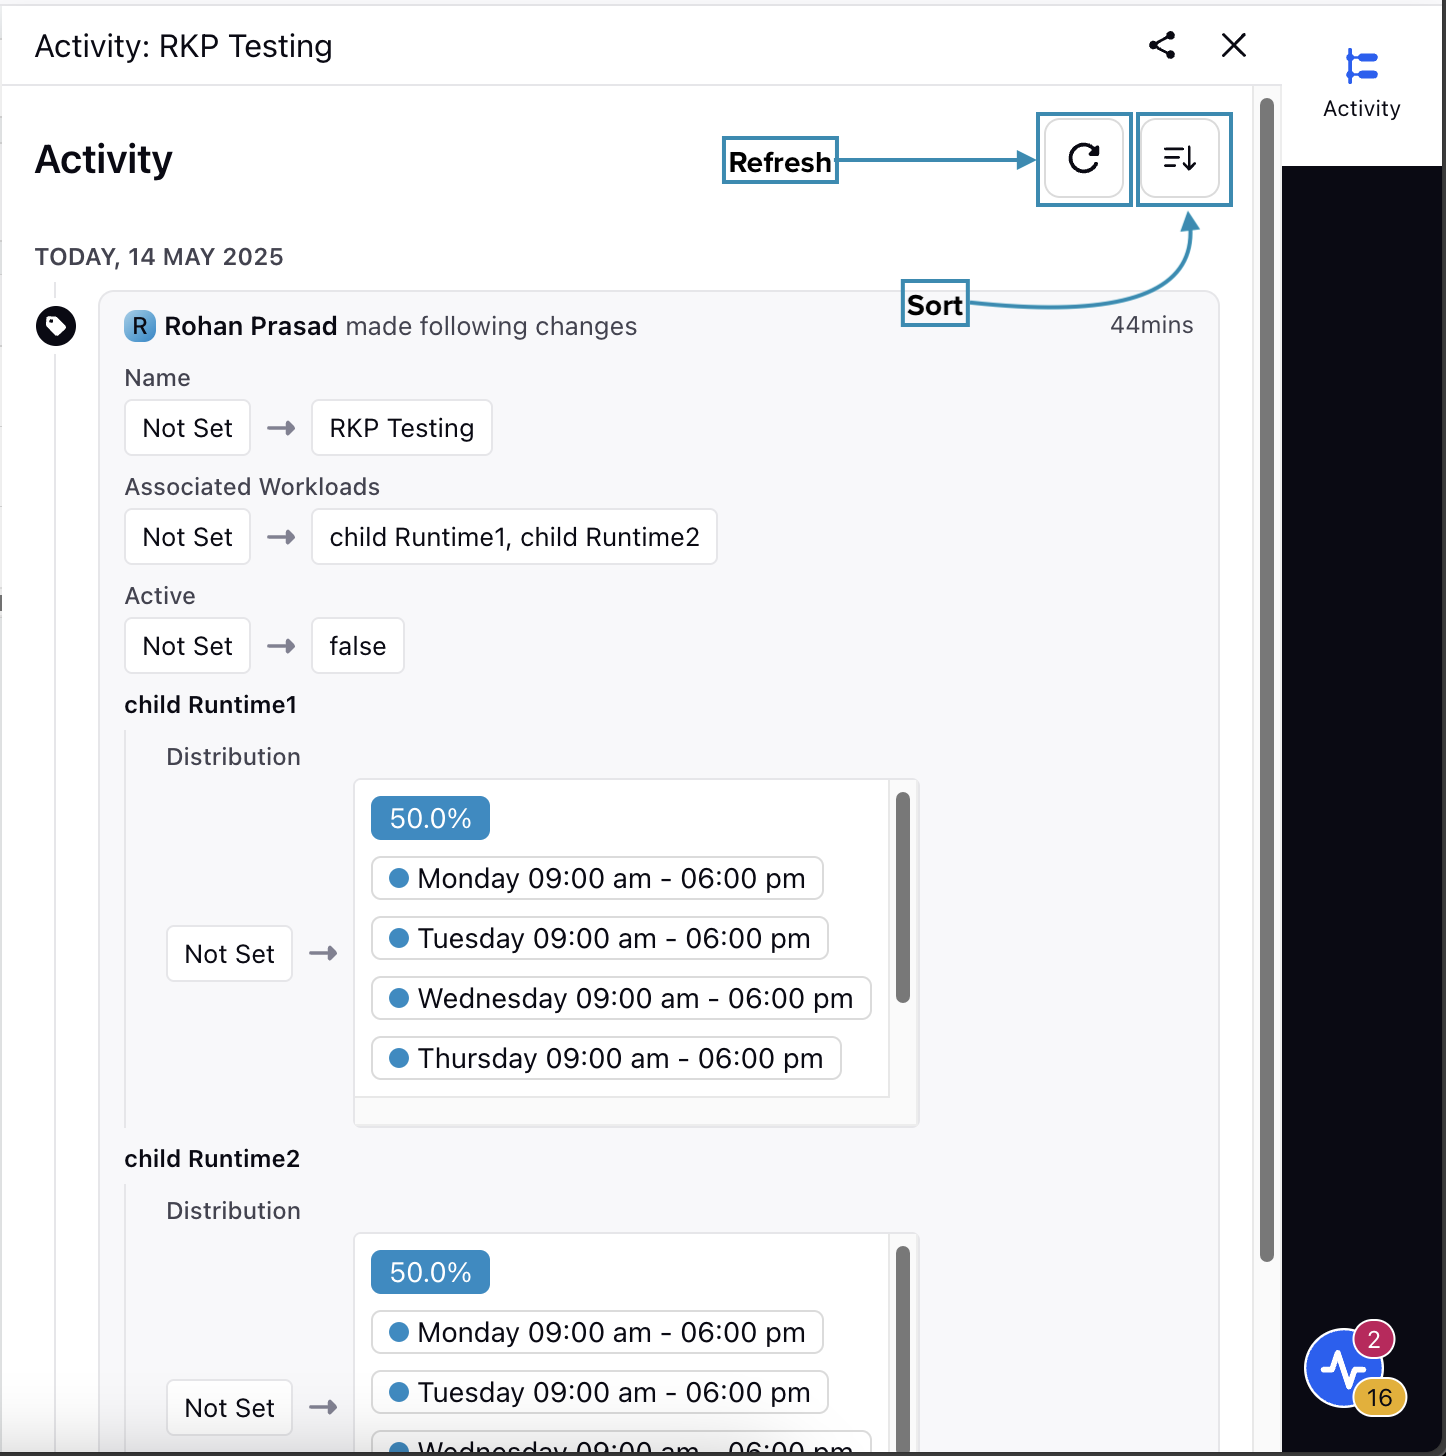
Select View Audit from the list of options to open the Activity window from the Third Pane.

This will show all the changes made to the Split Profile, including who made them and when. You can refresh the data and sort it by the date of updates in ascending or descending order.
This completes the process of viewing the audit log of Split Profiles.