Canned Responses
Updated
Canned Responses are predefined, brand-compliant replies to routine customer questions such as "How can I add a credit card to my account?" or "How do I apply for a refund?". You can document responses to such frequently asked questions in advance, save them as canned responses, and allow your agents to use them whenever those questions come up. To keep these canned responses organized and easy to access, you can also group canned responses into folders.
Agents can modify these responses before sending them to customers, ensuring each message feels relevant and personal. These pre-formulated replies help reduce average handling time and provide faster, more consistent resolutions.
Create a Canned Response
You can create a canned response in two ways:
Create a Canned Response in DAM: Build a new text asset from scratch in the Digital Asset Management (DAM) and save it as a canned response.
Save a Sent Response as a Canned Response from Care Console: Convert an already sent message into a canned response directly from the Care Console.
Create a Canned Response in DAM
To create a canned response in DAM, follow these steps:
Save a Sent Response as a Canned Response
To save a sent response as a canned response, follow these steps:
Send a Canned Response
Agents can send a canned response through Care Console or Agent Console.
Send a Canned Response from Agent Console
To use canned responses in Agent Console, follow these steps:
Send a Canned Response from Care Console
To send a canned response from Care Console, follow these steps:
Canned Response with Attachments
Within the Care Console, you can send canned responses with attachments using the reply box. In the blueprint, we have provided some templates for different types of attachments and this can be used in the discovery time to showcase the Attachment Support in Canned Response.
Canned Responses Widget
In Care Console Layout Manager, you have the option to select the "Canned Responses Mode" as a Widget, enabling you to incorporate a canned response widget into the Care Console interface.

This feature simplifies the process of accessing and utilizing canned responses, enhancing efficiency and facilitating smoother communication workflows.

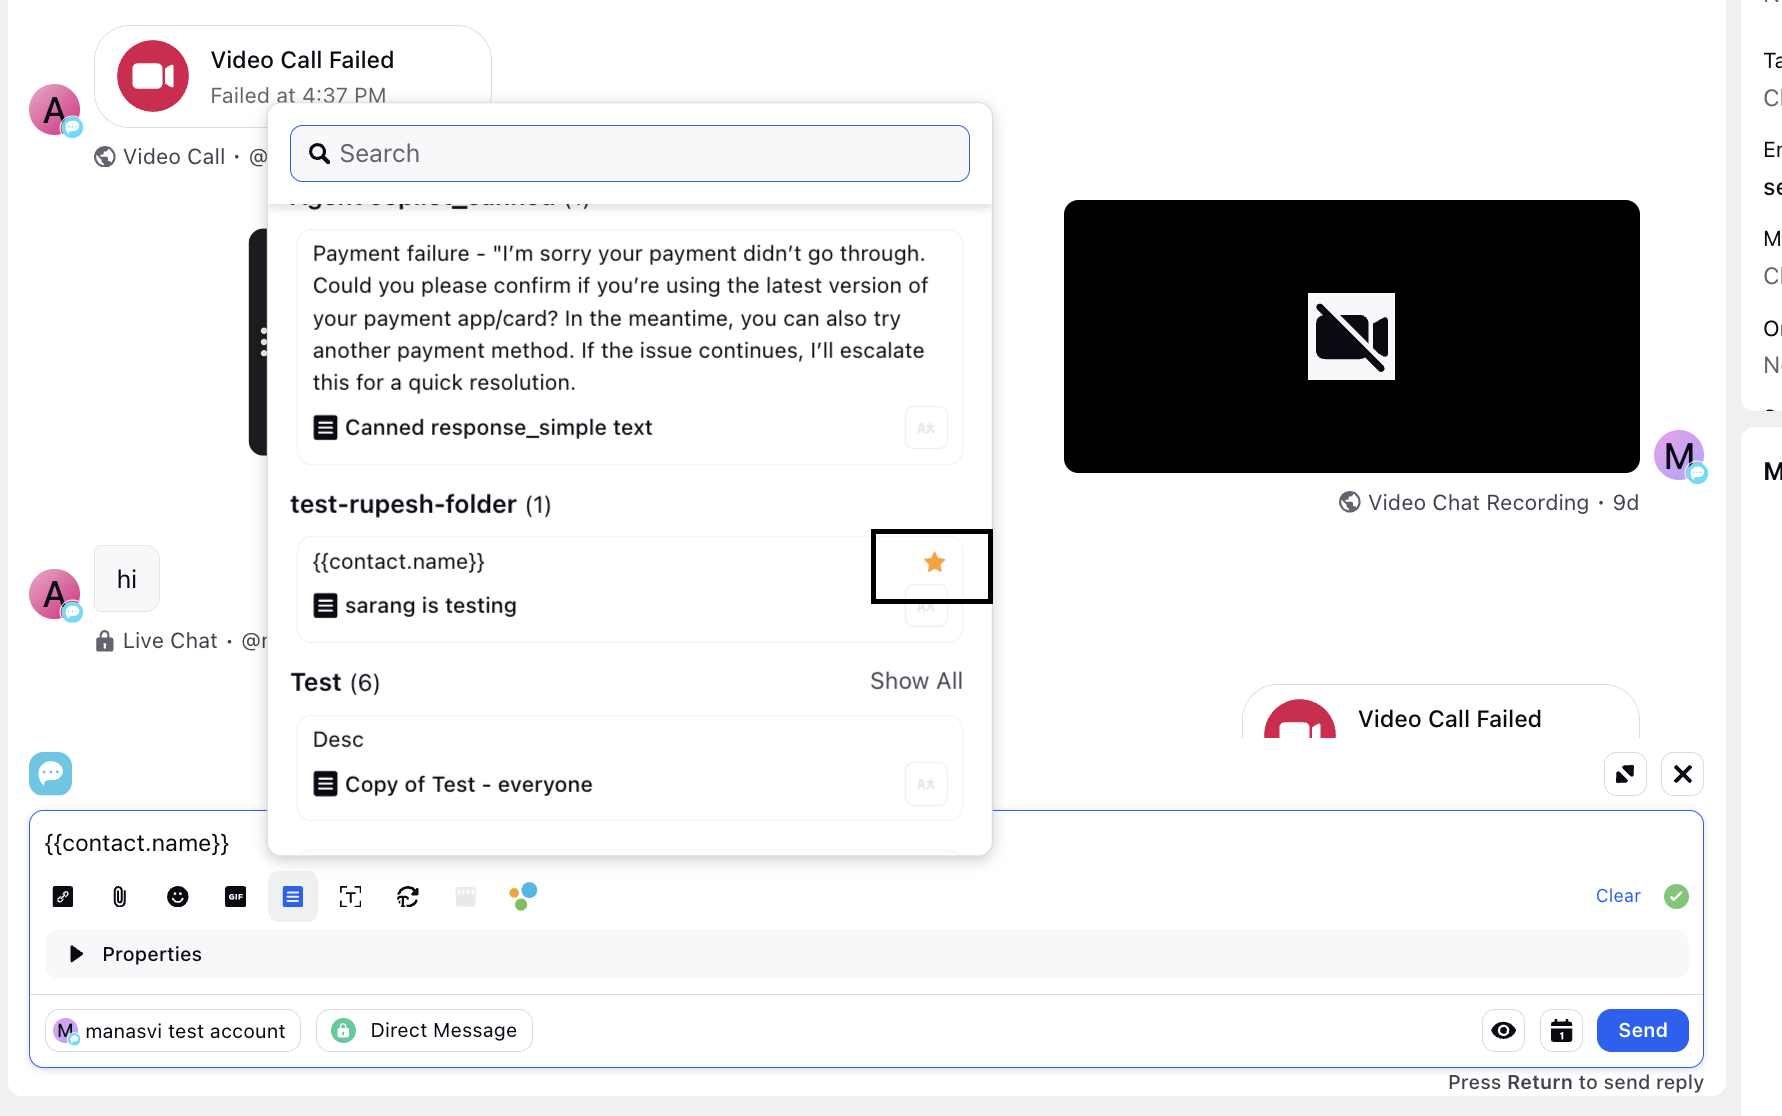
Grouped Canned Responses
In the Digital Asset Manager (DAM), you can create folders and group your canned responses within them. This helps keep your canned responses better organized. For example, you can group canned responses based on their purpose such as shipping, inventory, or returns. Grouped canned responses make it easier for agents to find the relevant template.
In the Care Console, you will be able to view canned responses grouped under folders created in the Digital Asset Manager.
![]() Note: To get this feature enabled, reach out to your Success Manager or raise a support ticket at tickets@sprinklr.com.
Note: To get this feature enabled, reach out to your Success Manager or raise a support ticket at tickets@sprinklr.com.

Mark Grouped Canned Response as Favourite
You can mark grouped canned responses as favorites, just like individual canned responses. When marked as a favorite, the grouped canned response will be displayed prominently for quick and easy access.