Community Alert Manager
Updated
Sprinklr allows you to configure alerts directly from any reporting widget, making it easy to monitor specific trends. This is the simplest and most efficient way to set up an alert within the platform. All data filters applied to the widget are automatically carried over to the alert configuration, ensuring you receive notifications only for the most relevant data.
You can easily access Volumetric Alerts directly from the widget. Let's follow this article to learn how to create Widget Level Alerts in Reporting.
Steps to Set a Reporting Widget Alert
Let's have a look at the steps:
Go to Sprinklr Service and navigate to Care Reporting within Analyze.
Select a reporting dashboard of your choice.
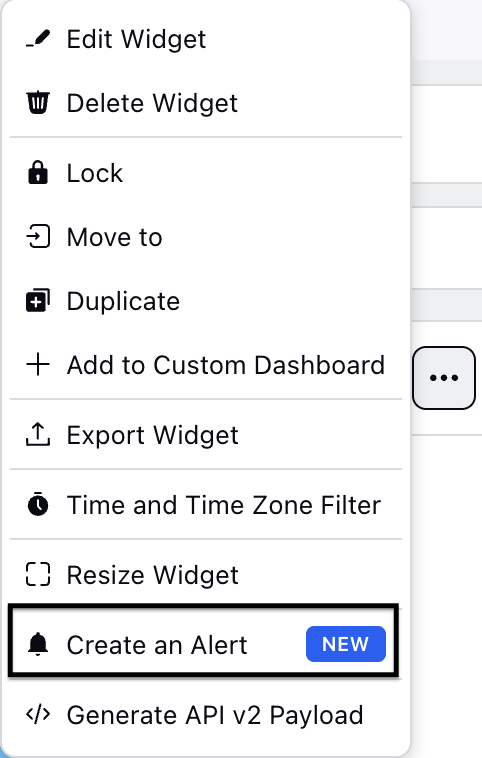
Once the dashboard is opened, identify a widget on which you want to set Alerts. Hover over the Horizontal Ellipses (3 dots) and select Alerts.

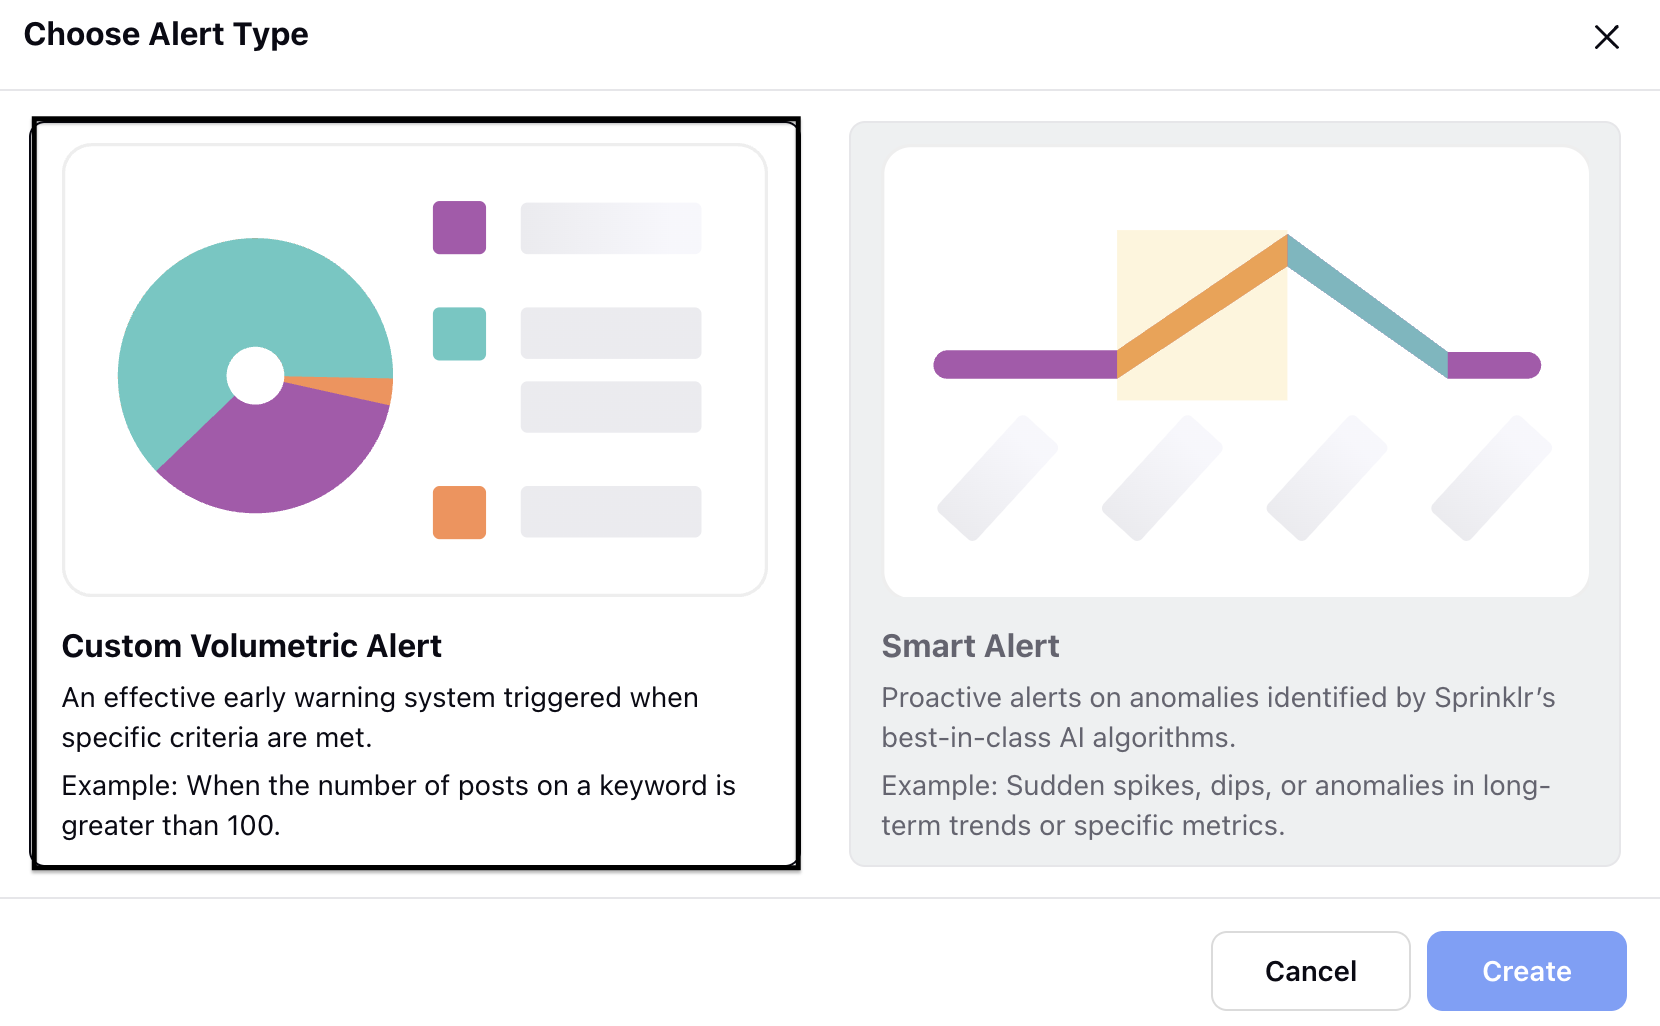
Select Custom Volumetric Alerts and click Create.

In the Create Volumetric Alerts page, fill in the following details:

Alert Name: Enter a meaningful name to the alert (Mandatory).
Description: Add a description to the alert.
Tags: Add tags to the alert to identify it easily.
Module: Select the module type, as it determines which metrics you can set an alert for (Mandatory).
Alert Type: Select Custom Volumetric Alert. It helps set up an effective early warning system that is triggered when specific criteria are met. Example: An alert can be set when the number of posts containing a particular keyword exceeds 100 (Mandatory).
Alert Dimension: Select the Alert Dimension. Example: Asset Class.

Go to the Alert dimensions filter section, select the filters, and define the value. You can select the filters based on the Day of Week, Time of Day, Month of Year, Media Type, Campaign Name, and Asset ID.
Example: If you select Day of Week, you can set the value to Monday to define it as the start of the week.
Note: You can add multiple dimensions by clicking + Add New Filters.
Go to the Trigger conditions section and select Threshold-based alerts or Irregular activity alerts from the dropdown. Let's have a look at the 2 types of trigger conditions.


Threshold-based alerts: Get alerted when the threshold value is breached for your chosen metric within the specified time frame.
Irregular activity alerts: Get alerted when there is a change in the metric value compared to the previous time frame. The comparison can be based on either a percentage or an absolute value, and it supports both increases and decreases.
In the trigger conditions, specify the metric by selecting it from the dropdown menu, choose the type of change (increment or decrement), pick the measurement method (absolute value or percentage), and enter the threshold value (mandatory).
Under Previous Date Range select a date range from which you want the alerts. This helps for back filling (Mandatory). Previous Date Range is only applicable for Irregular activity alert.
Under Date Range select the date range between which you want the alerts to be triggered (Mandatory).
Select the Business Hours during which you want the alerts to be triggered.
Go to the "Avoid spam by adding maximum notification frequency" section, where you can adjust the maximum notification frequency (how many maximum alerts should be sent in hours/days/weeks/months).

Enter Maximum alerts in numeric value.
Select Duration (hourly, daily, weekly, bimonthly, monthly).
Go to Permissions section inorder to share with selected Users, User Groups, and Clients alert manager permissions.

View Permissions: You can view the permissions provided to the specific workspace, users or user groups.
Edit Permissions: You can edit permissions by adding or removing users, usergroups or workspace.
Click Next.
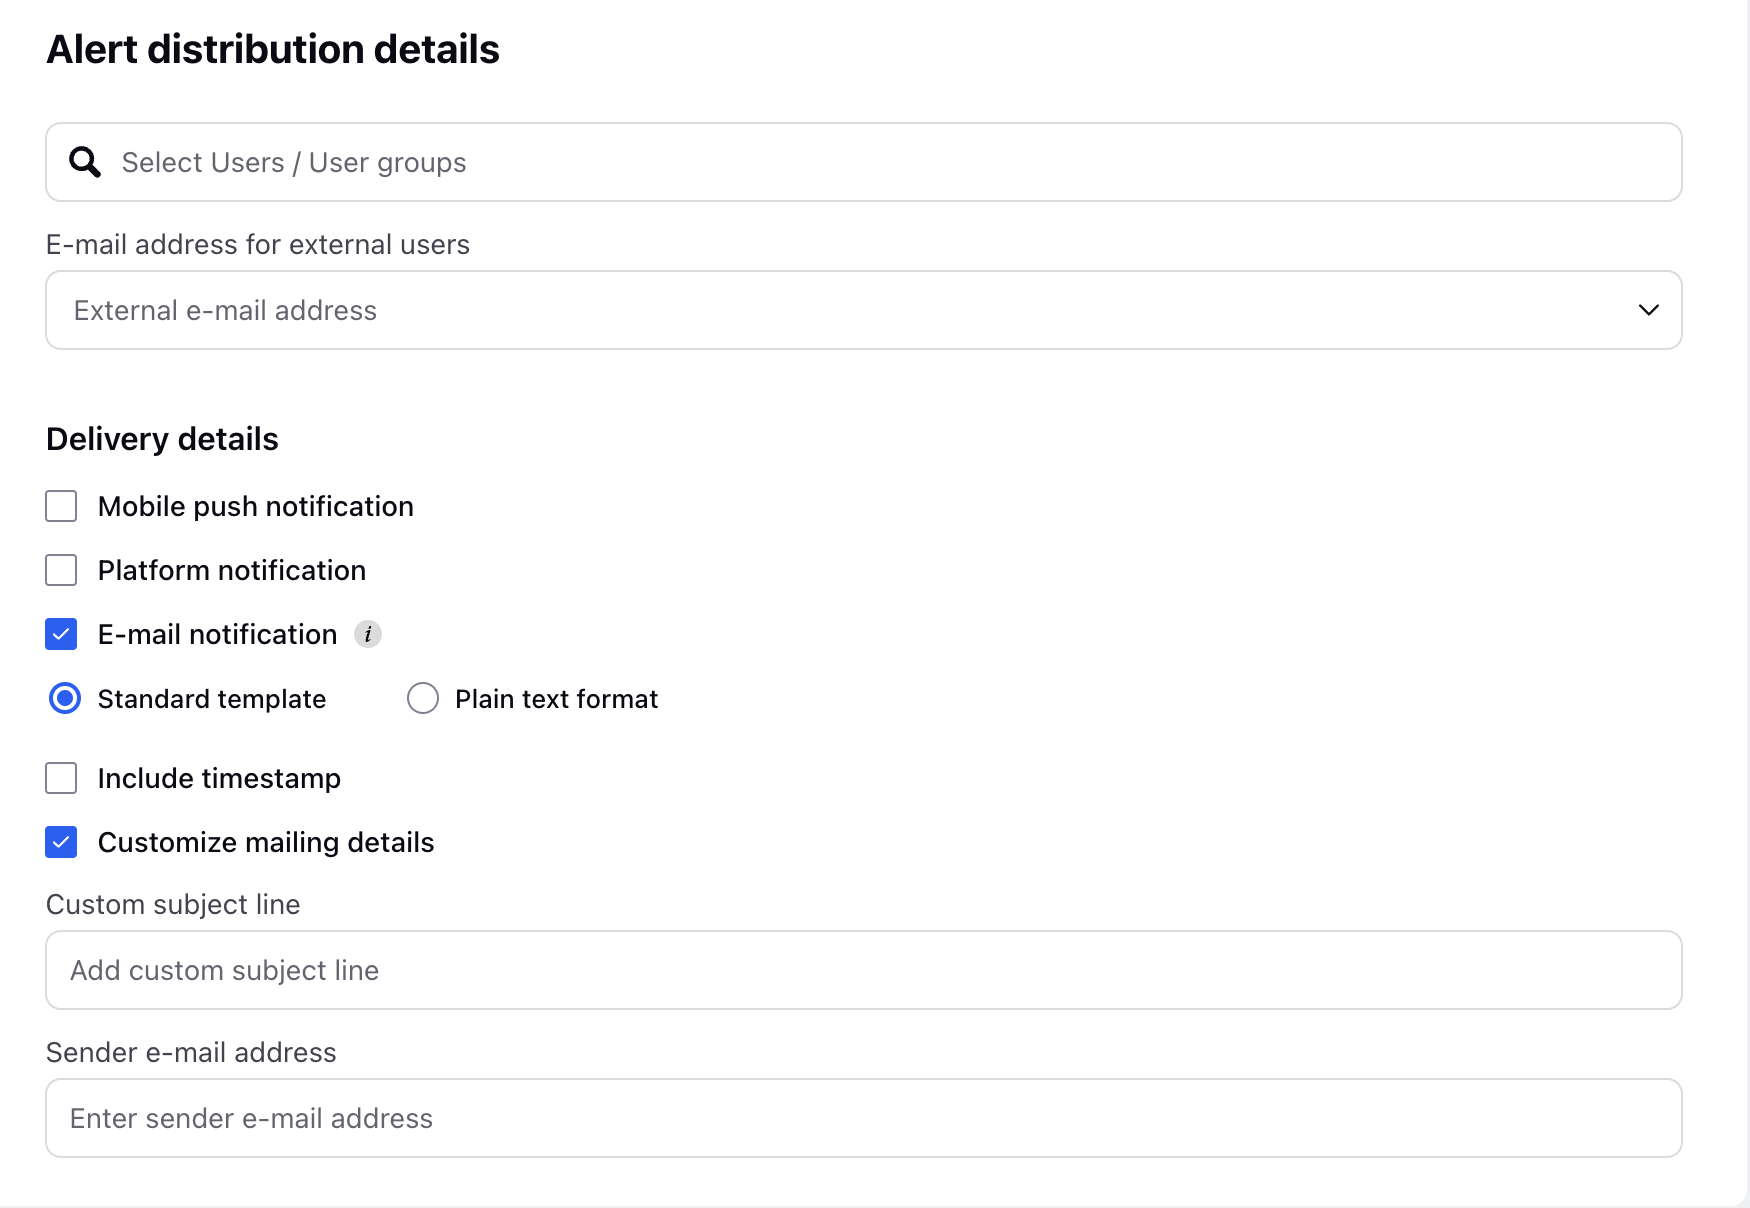
Go to the Alert distribution details page and select users or user groups; you can even notify external users by adding their email IDs to receive alerts.
You can select the alert Delivery details:

Mobile push notification: Provides notification on the mobile.
Platform notification: Provides notification on the platform
Email notification: There are 2 types of email notifications:
Standard template: Sprinklr generates a standard alert report containing data that corresponds to the alert's specified time frame.
Plain text format: A plain text email containing all relevant posts in a truncated view, ideal for high-level CXO reporting.
Include timestamp: Select this option to include timestamps of alerts.
Customize mailing details: You can select this option to customize mailing details.
Custom subject line: Allows you to add a custom subject line for the e-mail.
Sender e-mail address: Allows you to add a e-mail address of the sender.
Click Save.
Note: Once the Alert is saved it will appear in the Alert Manager.