Add a Twilio Voice Account
Updated
Adding a Twilio Voice account allows Sprinklr to receive call traffic from your Twilio telephony infrastructure and route those calls through Sprinklr Service. Once connected, Sprinklr can deliver each call to your IVR flows, voice bots, or live agents based on your configured workflows.
Enablement Note: Access to this feature is controlled by the dynamic property SPRINKLR_VOICE_ENABLED_PROVIDERS - Add Twilio.
To enable this feature in your environment, contact your Success Manager. Alternatively, you can submit a request at tickets@sprinklr.com.
To add a Twilio voice account in Sprinklr
Log in to your Twilio account on native.
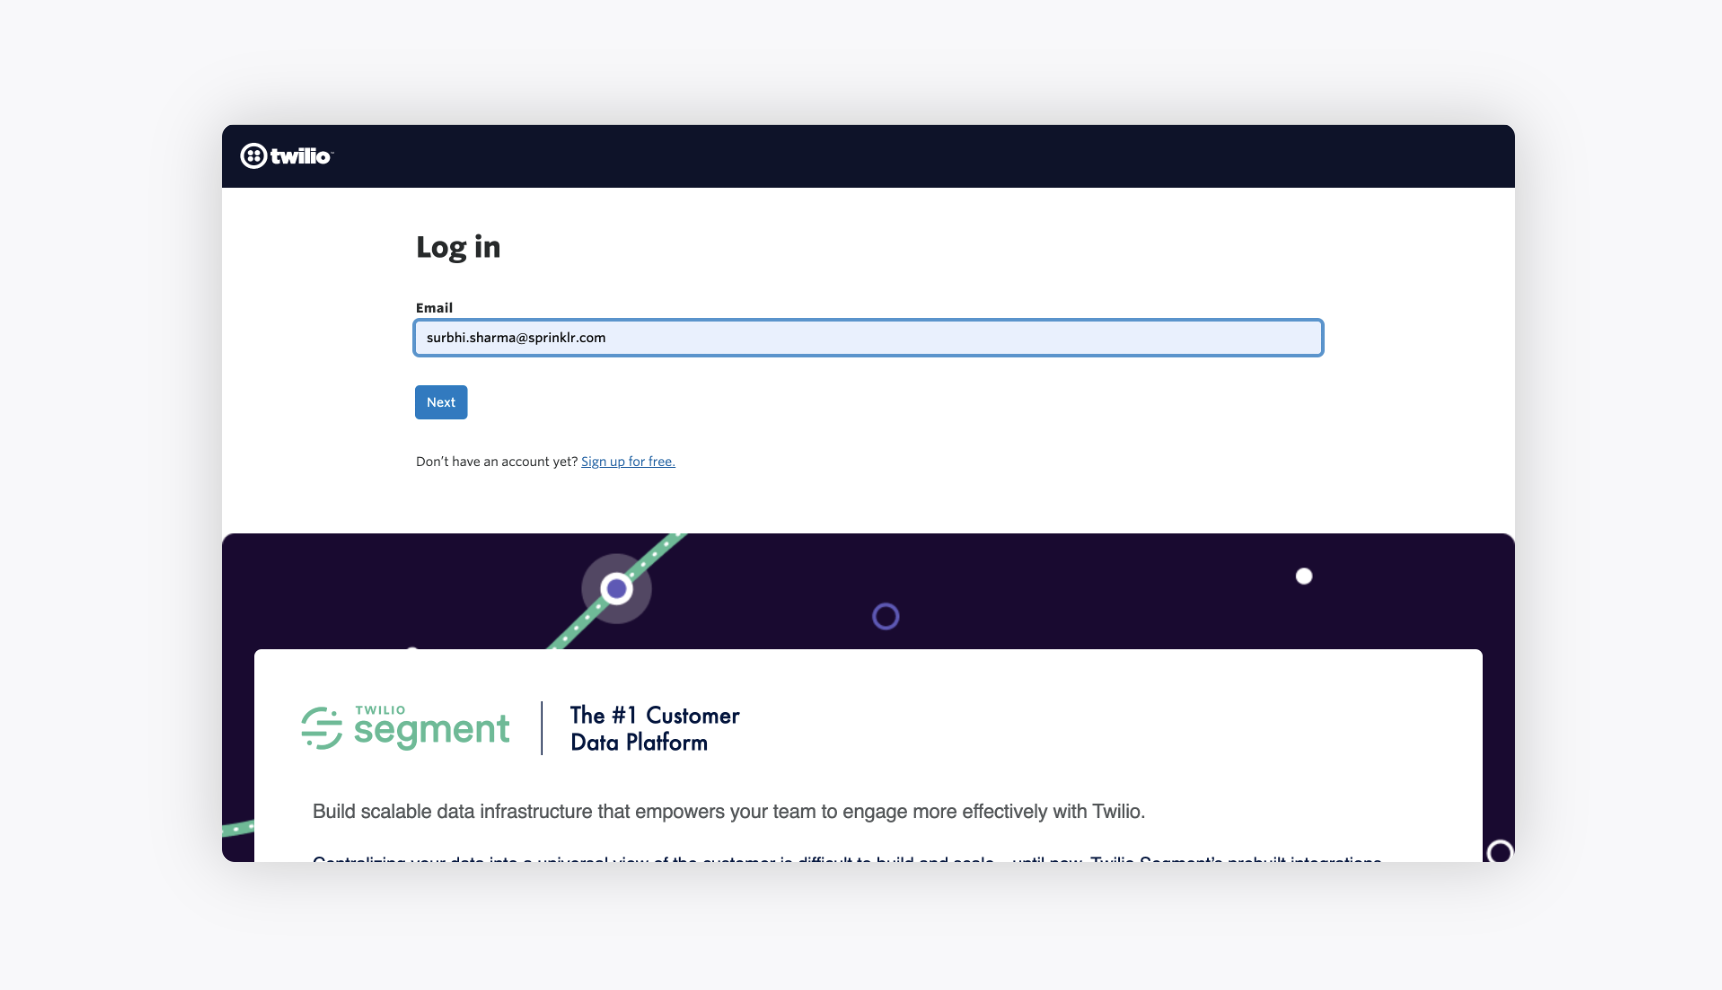
Copy the Account SID, which acts as a username, and the Auth Token which acts as a password.

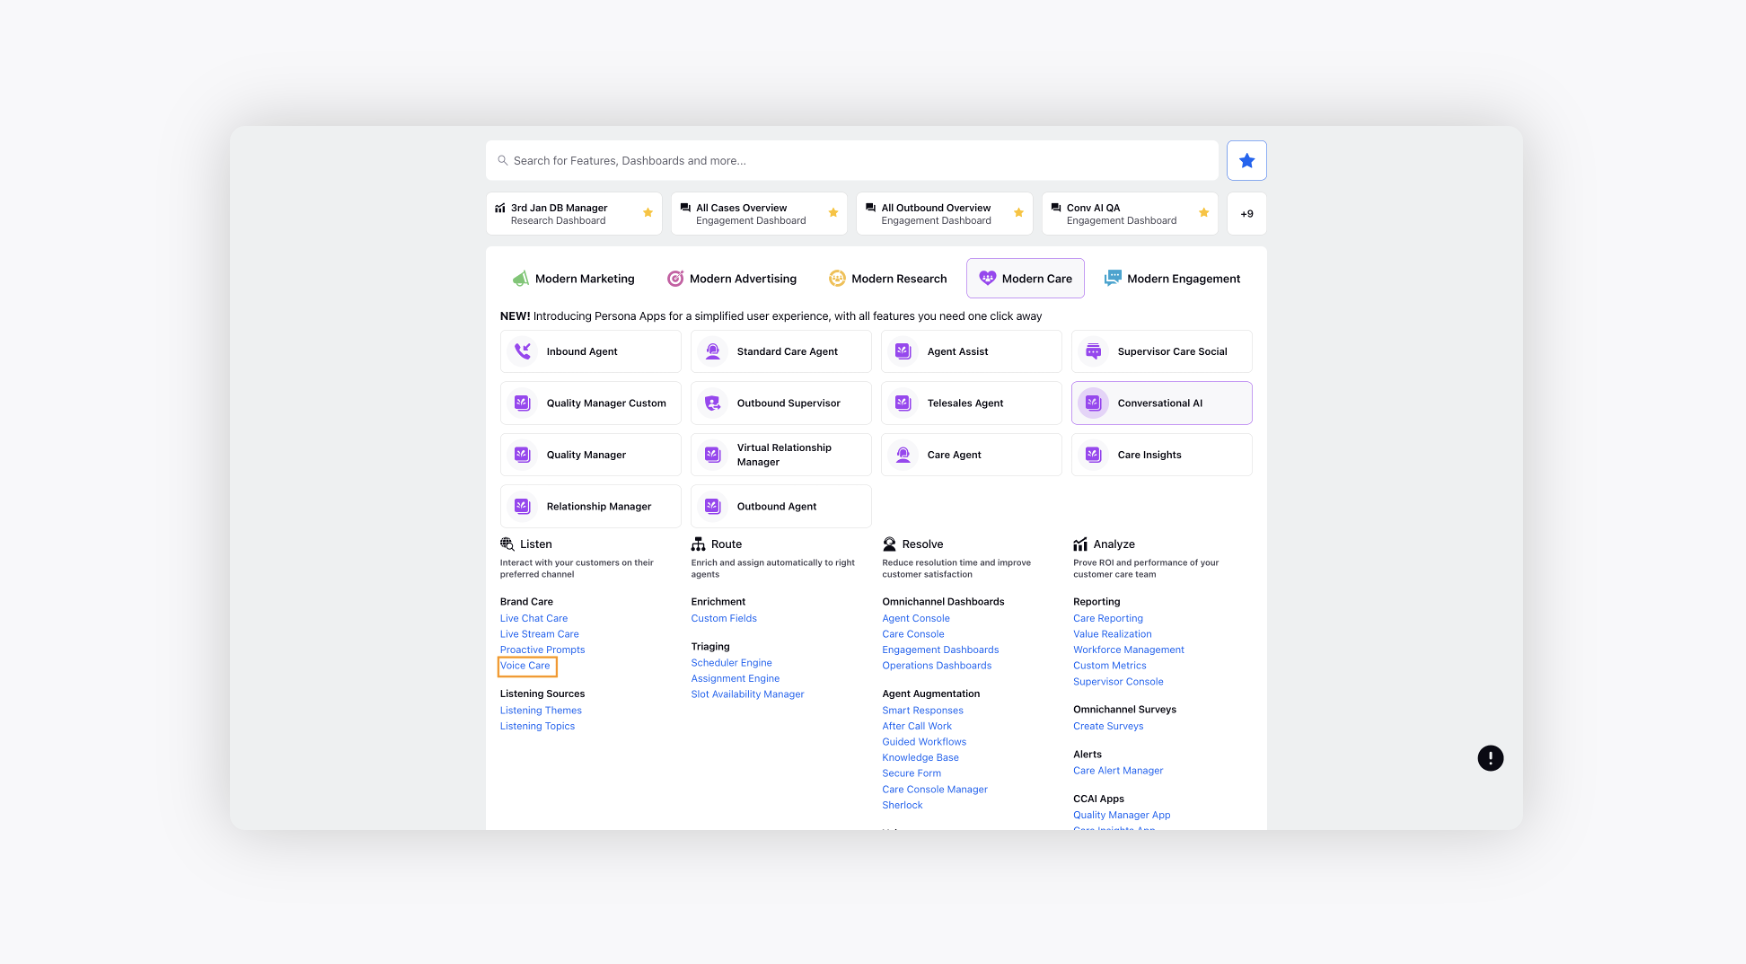
Log in to the Sprinklr platform. Navigate to the Sprinklr Service tab, under Listen click Voice Care.
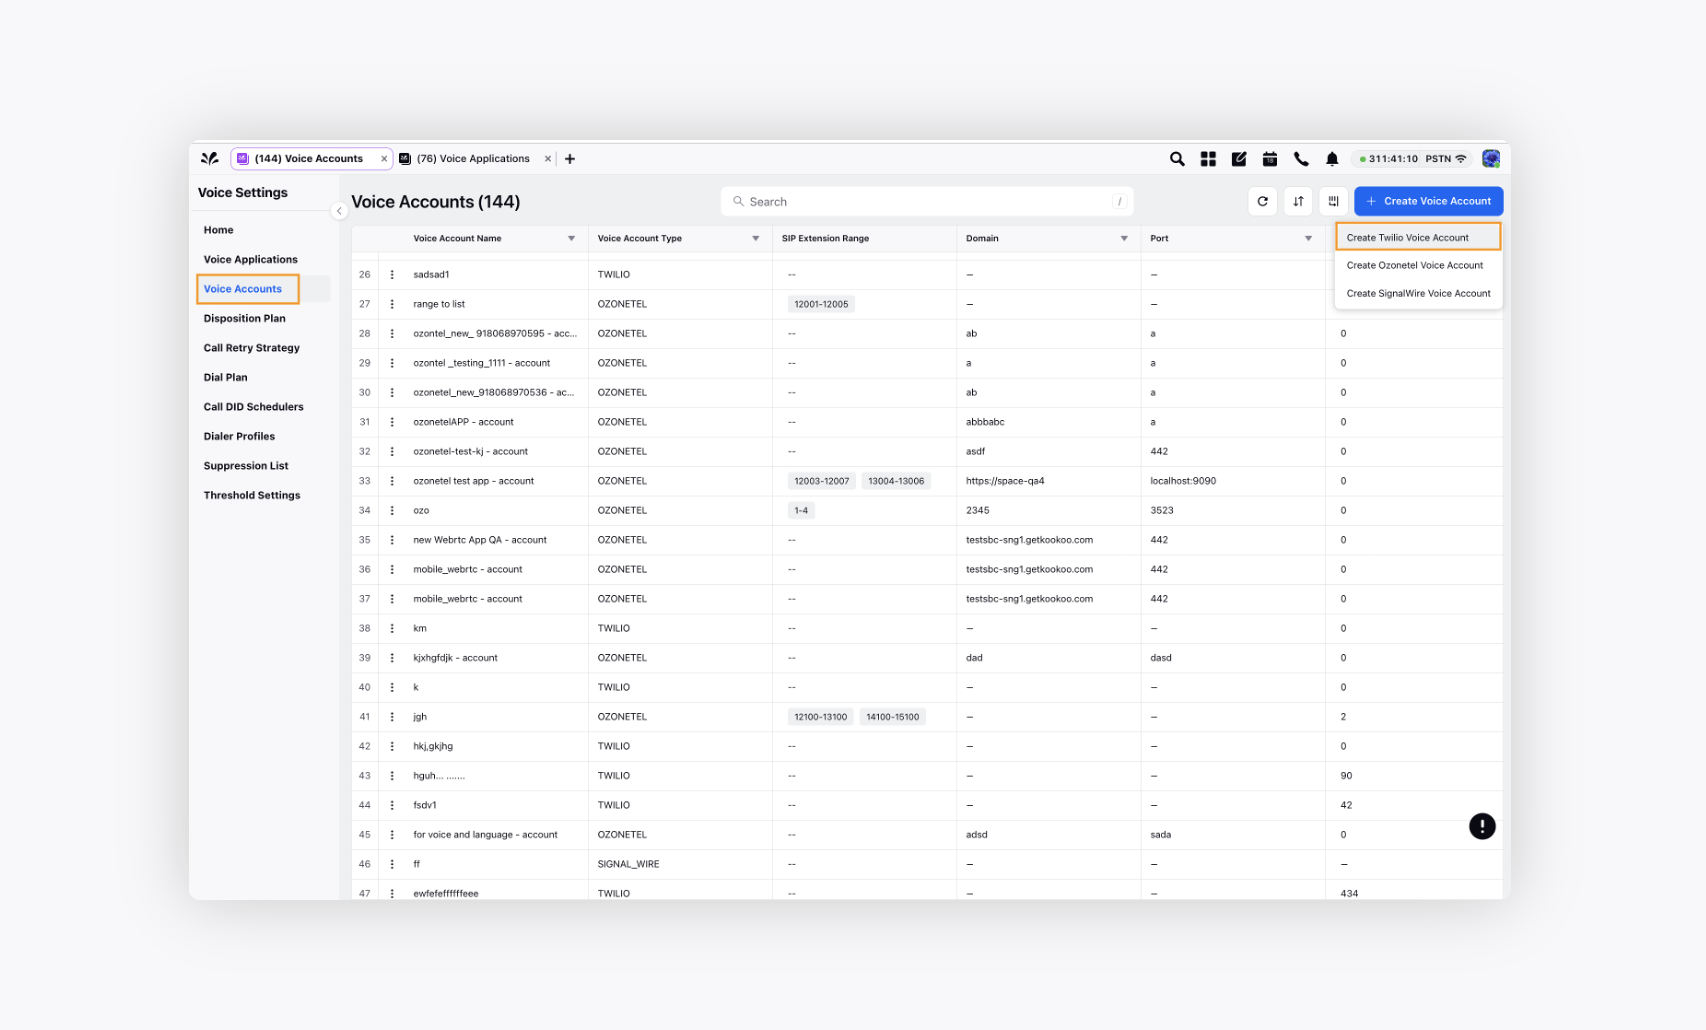
Select Voice Accounts from the left pane.
In the top right corner of the Voice Accounts page, click Create Voice Account and select Create Twilio Voice Account.
On the Add Voice Account page, add the Account Name and Number of Outbound Channels. The account name will be visible on Sprinklr and will be used next in the voice application. Next, add the API Key and Account SID to add the voice account. API Key will be provided by the telephony provider when a number is purchased.
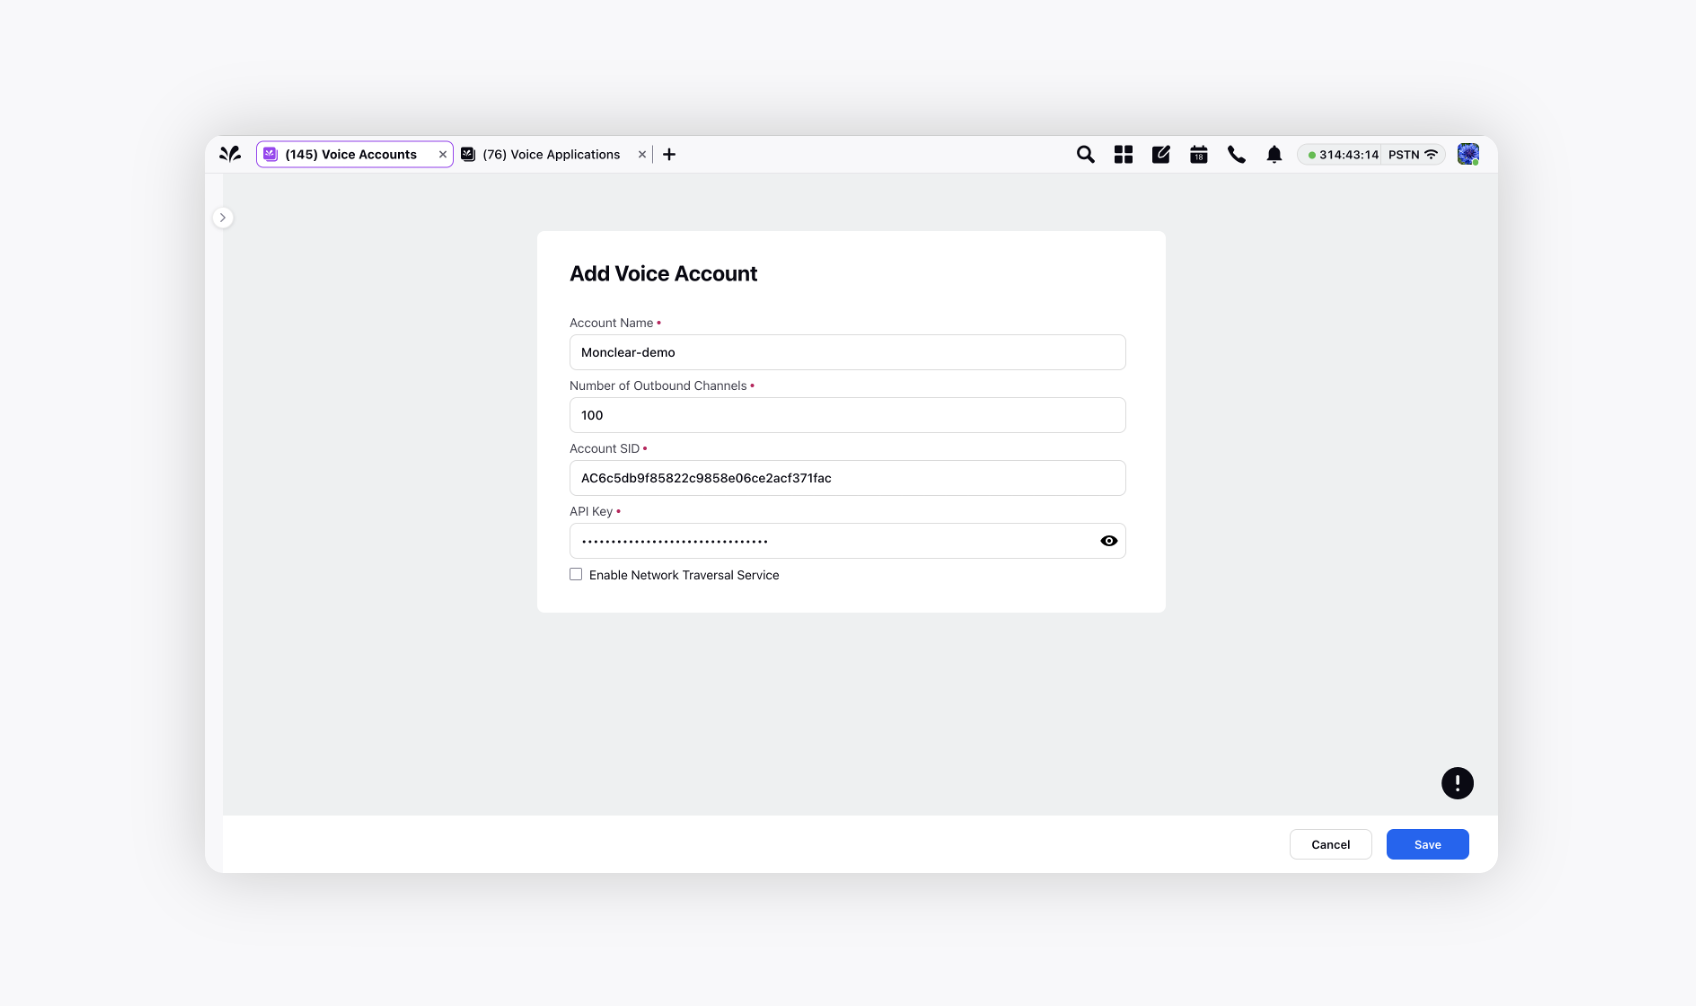
Click Save in the bottom right corner. Once the voice account is added, you can set up a Voice Application. Select Voice Applications from the left pane.
In the top right corner of the Voice Application window, click Add Voice Application and select Add Twilio Voice Application.
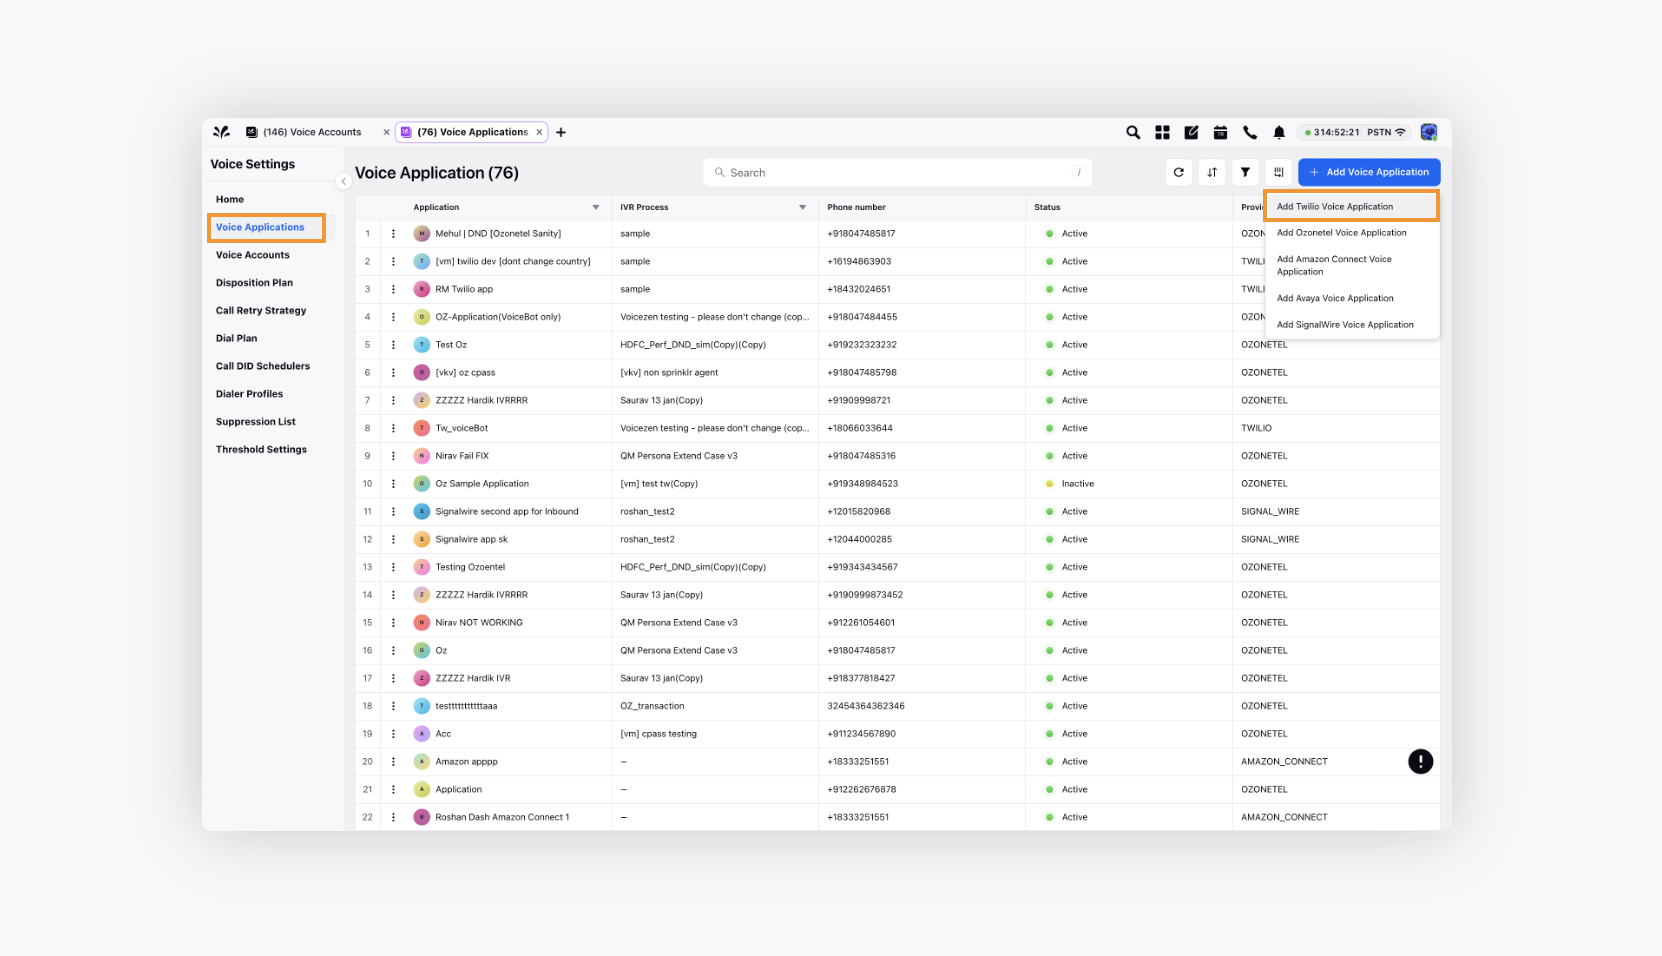
The Create a Twilio Voice application appears as shown in the following image. This application will act as an interface where inbound and outbound calls can be made using this application.
For more information on the description of the fields in the Create Twilio Application page, refer to Fields in the Create Twilio Application page.

To improve call efficiency, the Twilio Voice Application allows you to choose your location from the Region picklist in the user interface. This allows calls to be routed to the appropriate server locations. Previously, because of the great distance between the caller, the server location, and the agent, the API calls used to get delayed resulting in poor call quality. This call setup time is now reduced with the Region picklist.
Fields in the Create Twilio Application page
The following is the description of the fields available in the Create Twilio Application page:
Application name: Specify a name for the application.
Phone number: Contains the DID number of the application which can be taken from the Twilio account on native.
Secondary Phone Number(s): You can fetch secondary number for any IVR process by creating a different voice application.
Voice Account: Select the Twilio voice account that you have created.
IVR Process: Select the IVR to connect this voice application to.
Country: The country to which the phone number belongs.
Fallback ACW: Contains the ACW which gets triggered if there is no ACW configured at the queue level.
FallBack IVR Process: If there is any unexpected failure in the main IVR then the call will get redirected to this fallback IVR, instead of getting dropped.
Supervisor Eligible for ACW on Barge in: Enables the ACW for the supervisors who barge in any calls.
Caller IDs: The phone numbers to make the outbound calls to customers.
Enable DND on: Set on which type of calls you want to enable DND.
DTMF Timeout: The value of DTMF timeout in seconds.
Audio and voice settings: Set how the 'Text to Speech' used in the IVR should be voiced out. You can set the pace and voice.
Add Wait Music: Add the MP3 audio file from Digital Asset Manager which will be played whenever the agent puts the customer call on hold. You can add multiple hold music options which will be played in a random manner for the customers when they wait in the queue or are put on hold.
Add Ringtone: Ringtones alert agents when they receive an incoming voice call.
A ringtone is a short, recognizable audio tone, similar to the alert on a business desk phone or headset, that helps agents quickly identify that a new call is waiting for them.
You can upload audio files from Digital Asset Manager or from your computer to use as ringtones.
Sprinklr also lets you configure conditional ringtones, so different tones can play for different Case or Campaign scenarios. This helps agents understand the type or priority of an incoming call before they accept it. For example, you might use one ringtone for high‑priority Cases and another for calls associated with a specific Campaign.
Ringtones always play before the agent accepts the call. After acceptance, Sprinklr may play either a standard beep or a whisper tone, depending on how the application is configured. These post‑acceptance sounds are separate from ringtones.
Note: In case there is no customization, the Sprinklr default ringtone will be played.

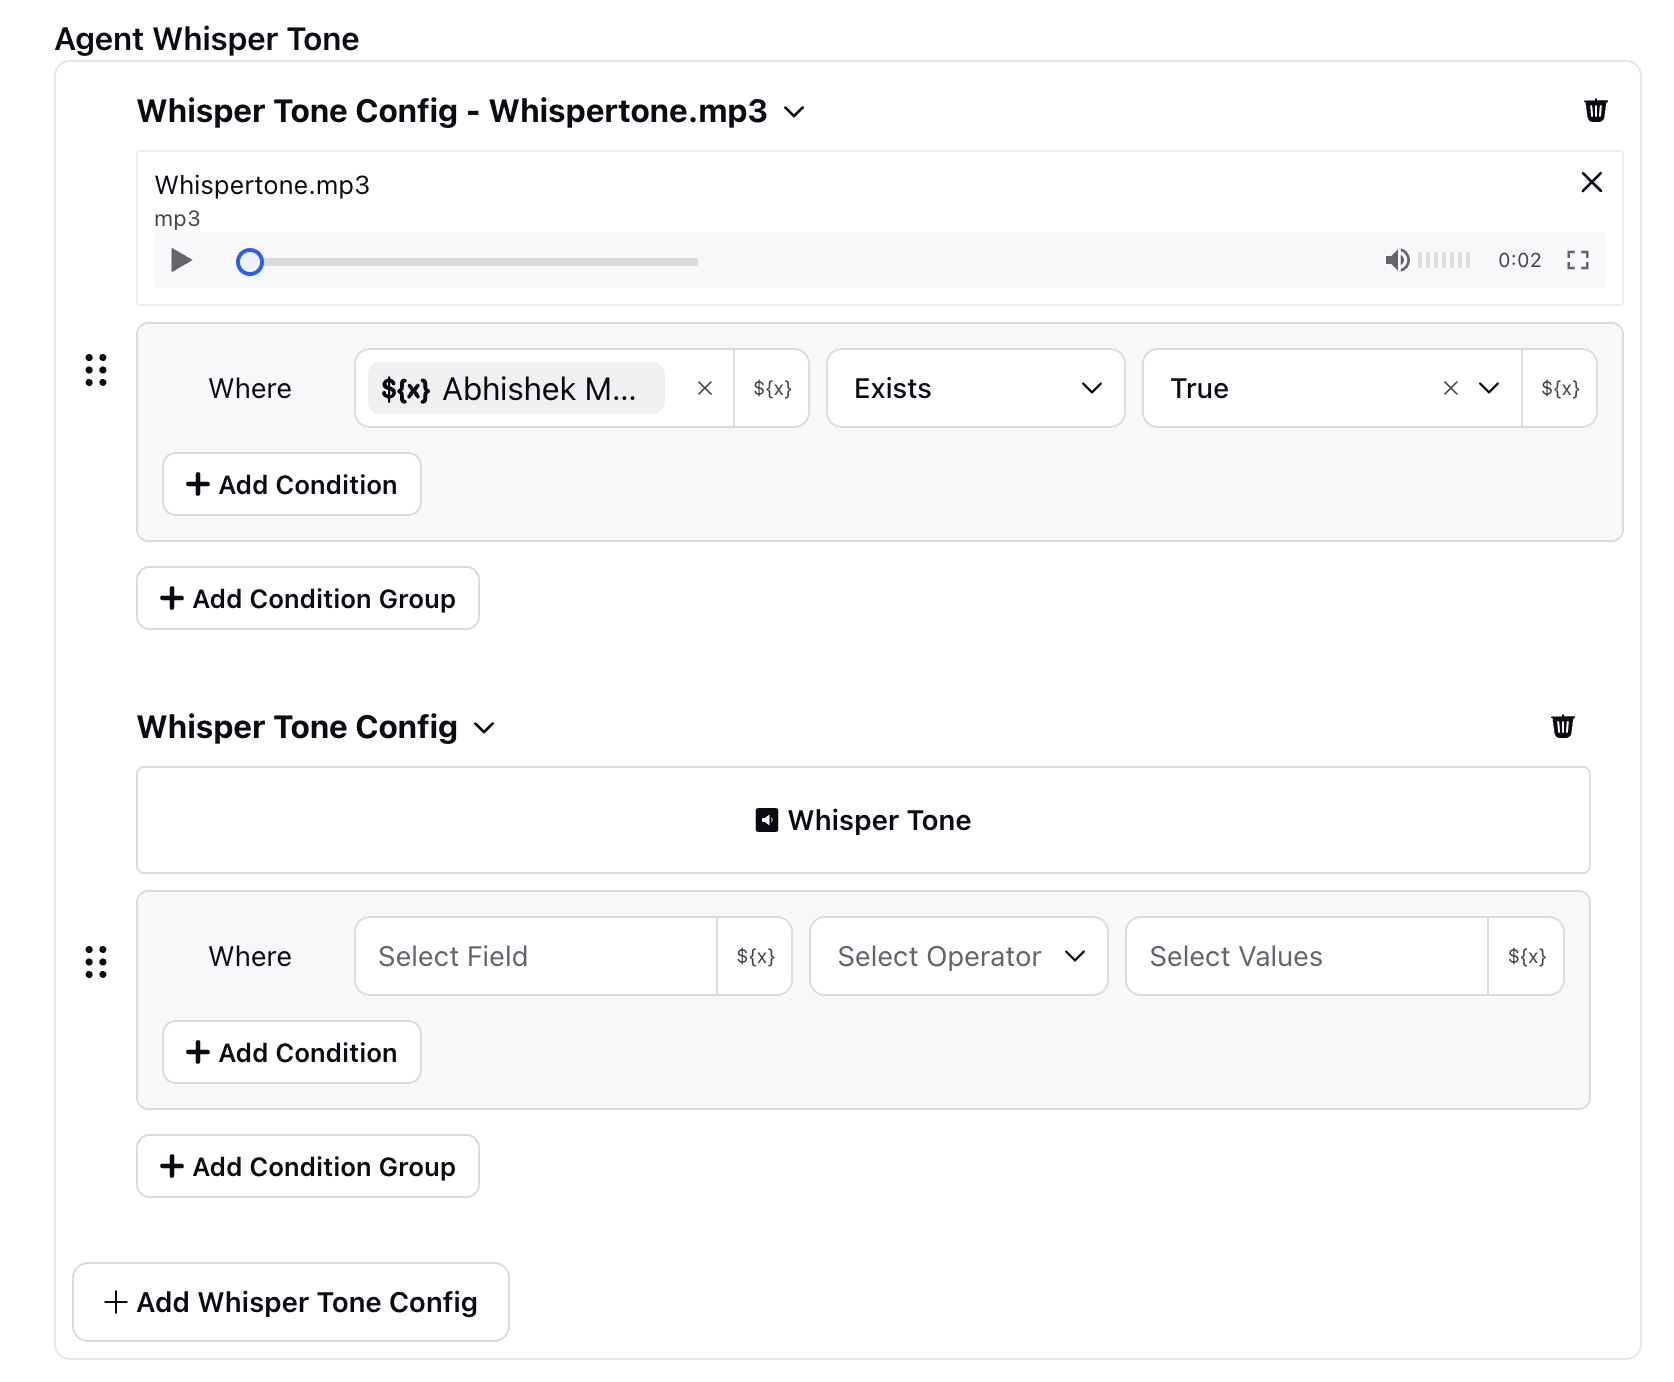
Add Whispertone: Whisper tones provide helpful context to agents after they accept an incoming call and before they are connected to the customer.
Whisper tones play only for the agent and can include details such as queue, language, skills, or Case‑based information. This brief message helps the agent prepare for the conversation.
You can upload whisper tones from Digital Asset Manager or from your computer.
You can also apply conditions so different whisper tones play for different types of Cases or other configured properties. For example, if a Case is categorized as a laptop issue, you can play a whisper tone that says, “This call is about a laptop issue.”
If both a standard beep and a whisper tone are configured, the whisper tone takes priority and plays instead of the beep.
Groups to include account in: Add the groups to include your voice application.
Highlighted Fields for Warm Transfer: You can now configure custom fields to be displayed during the call popup for warm transfers. When a call is transferred, the receiving agent will see the selected highlighted fields from the original call, ensuring important context is preserved.
For example, fields like Case Number and Case Creation Time can be highlighted so the receiving agent has immediate access to critical case details, enabling faster resolution. This is applicable for all the voice applications.
Highlighted Fields for Blind Transfer: Similarly, you can configure custom fields to appear during the call popup for blind transfers, ensuring the receiving agent receives key contextual information even without prior conversation. This is applicable for all the voice applications.
Share across workspaces: Add workspaces and users to share this application with.
Click Save in the bottom right corner. The Twilio Voice application will be created.
Note: Ensure that a voice application is shared across all the users.
For more information on importing and exporting Voice Applications, refer to Importing and Exporting Voice Application.