Route to Agent Tool
Updated
The Route to Agent Tool allows an AI Agent to seamlessly transfer a conversation to a human agent when automation reaches its limits. This ensures that users receive timely assistance during complex or sensitive interactions. It enables smooth handoffs from AI Agent to human agent to improve user satisfaction, reduce frustration, and increase resolution rates.
Key Scenarios
Payment Issues: When a user encounters errors while processing payments or abandons the flow after entering payment details.
Service Escalation: When the AI Agent completes initial triage, but the user requires actions such as modifying a reservation or resolving a complex inquiry.
Sensitive Conversations: When the interaction involves high-impact or emotionally charged topics where human empathy is needed.
Steps to Configure Route to Agent Tool
Follow these steps to configure the Route to Agent Tool:
1. Access the Route to Agent Tool
Navigate to AI Agent Studio from the Sprinklr Launchpad.
Select the AI Agent where you want to configure the tool.
Expand the Build section and open Tools.
Click + Add Tool and select Route to Agent from the list.
2. Configure Route to Agent Tool Fields
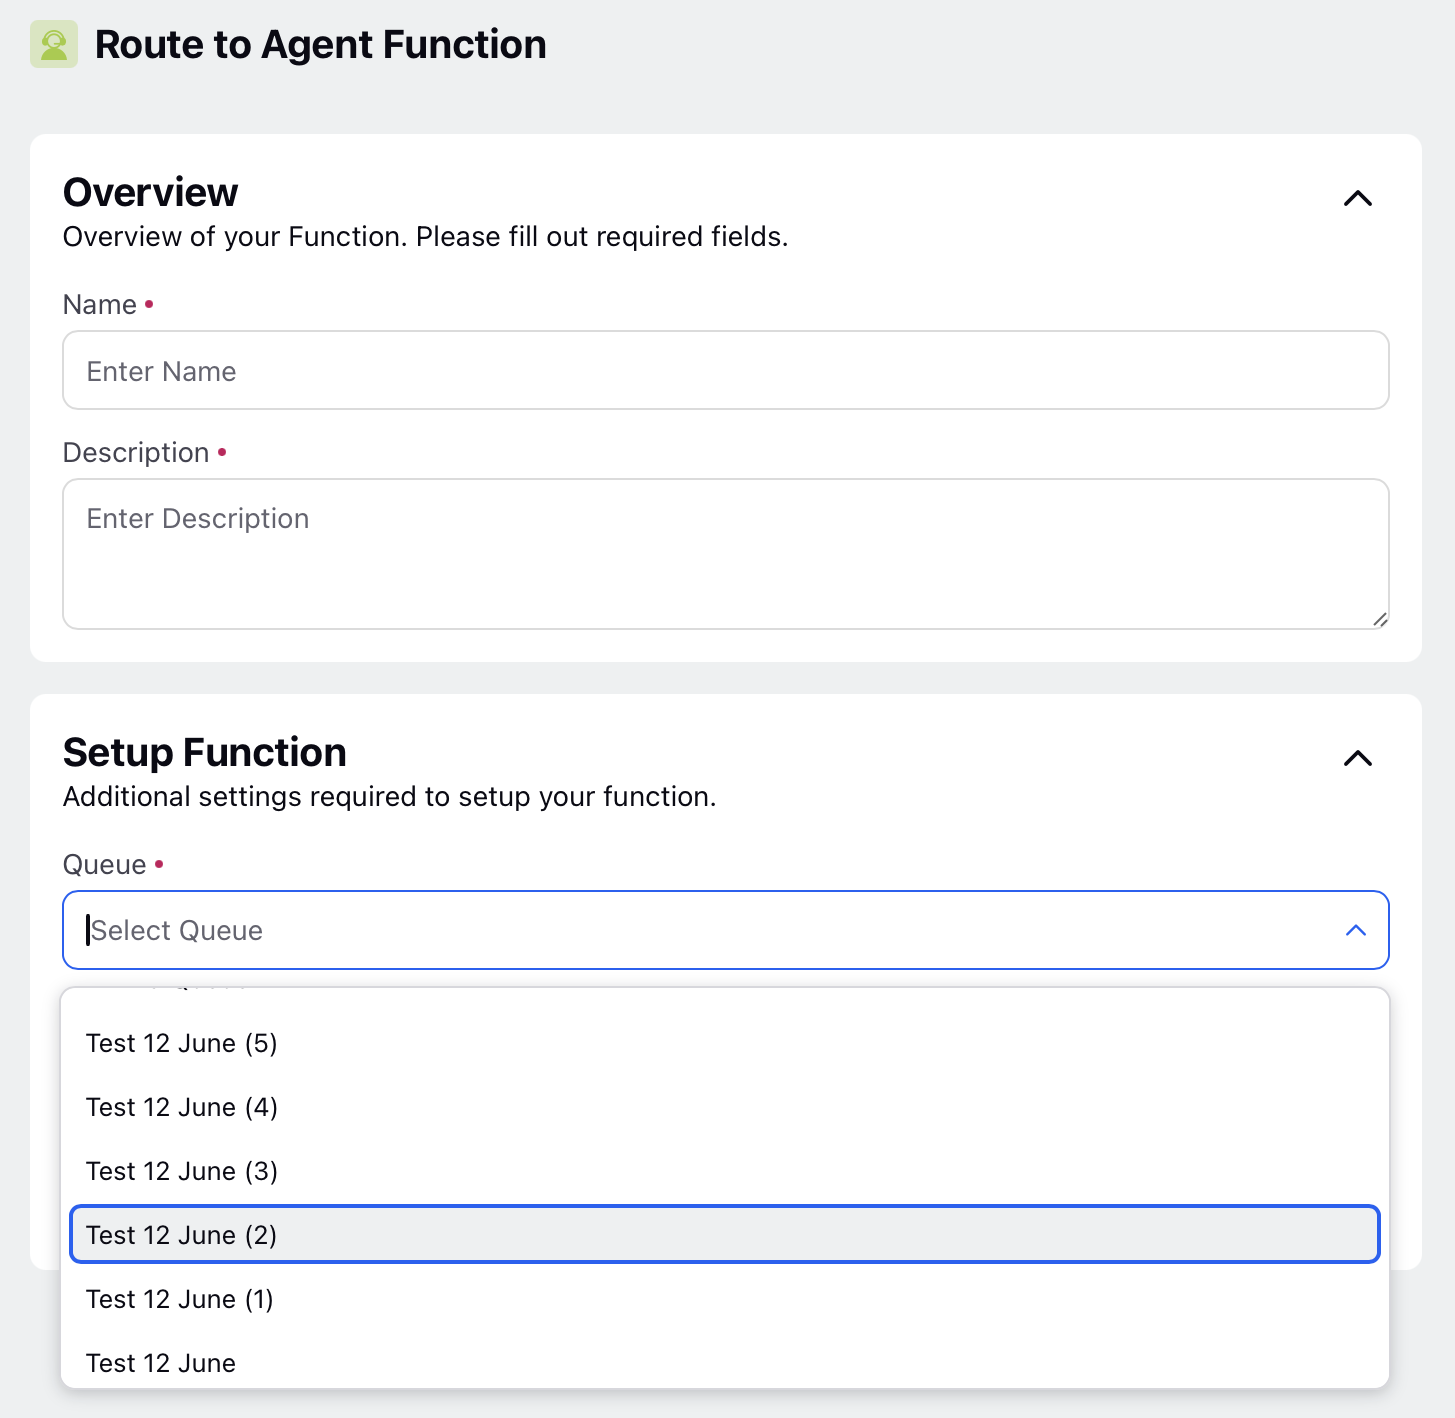
On the Route to Agent Tool window, fill in the following details:
Name: Assign a name to the Tool.
Description: Provide a brief description outlining the specific actions or commands.
In the Setup Function field, select the Queue to which the agent will be routed.
Note: In this context, Queue refers to the Work Queue.

3. Save Configuration
Once you have completed the configuration, click Save.
The tool will now appear in the Tools Record Manager and can be used in your AI Agent workflows.