Export Voice Recording using Data Connector
Updated
The Data Connector Export feature in Sprinklr enables voice administrators to automate the extraction and export of voice recordings (e.g., .wav, .mp3) and their metadata. With an intuitive UI and no dependency on backend setups, you can create, manage, and schedule extracts on-demand or at regular intervals.
This guide focuses on configuring exports specific to voice or snippet recordings, assuming you are familiar with the general steps outlined in the Data Connector Export Module documentation.
Prerequisites
Data Connector V2 Persona App must be enabled for your environment.
Note: Access to Data Connector is controlled by a Dynamic Property. Contact your Success manager to enable this in your environment, or you can alternatively submit a request at tickets@sprinklr.com.
Accessing the Export Module
Follow the instructions under "Accessing the Data Connector Export Module" in the Data Connector Export Module documentation to launch the interface.
Step-by-Step Configuration for Recording Exports
Follow these steps to configure recording exports:
1. Create a New Export Connector
Navigate to the Data Connector Export Module, and
Click + Install Connector button at the top right corner to create a new export configuration.
This starts the setup process for exporting recording data from your environment.
2. Data Type Selection
You will be prompted to select the type of data to export. Configure the input fields as mentioned below:
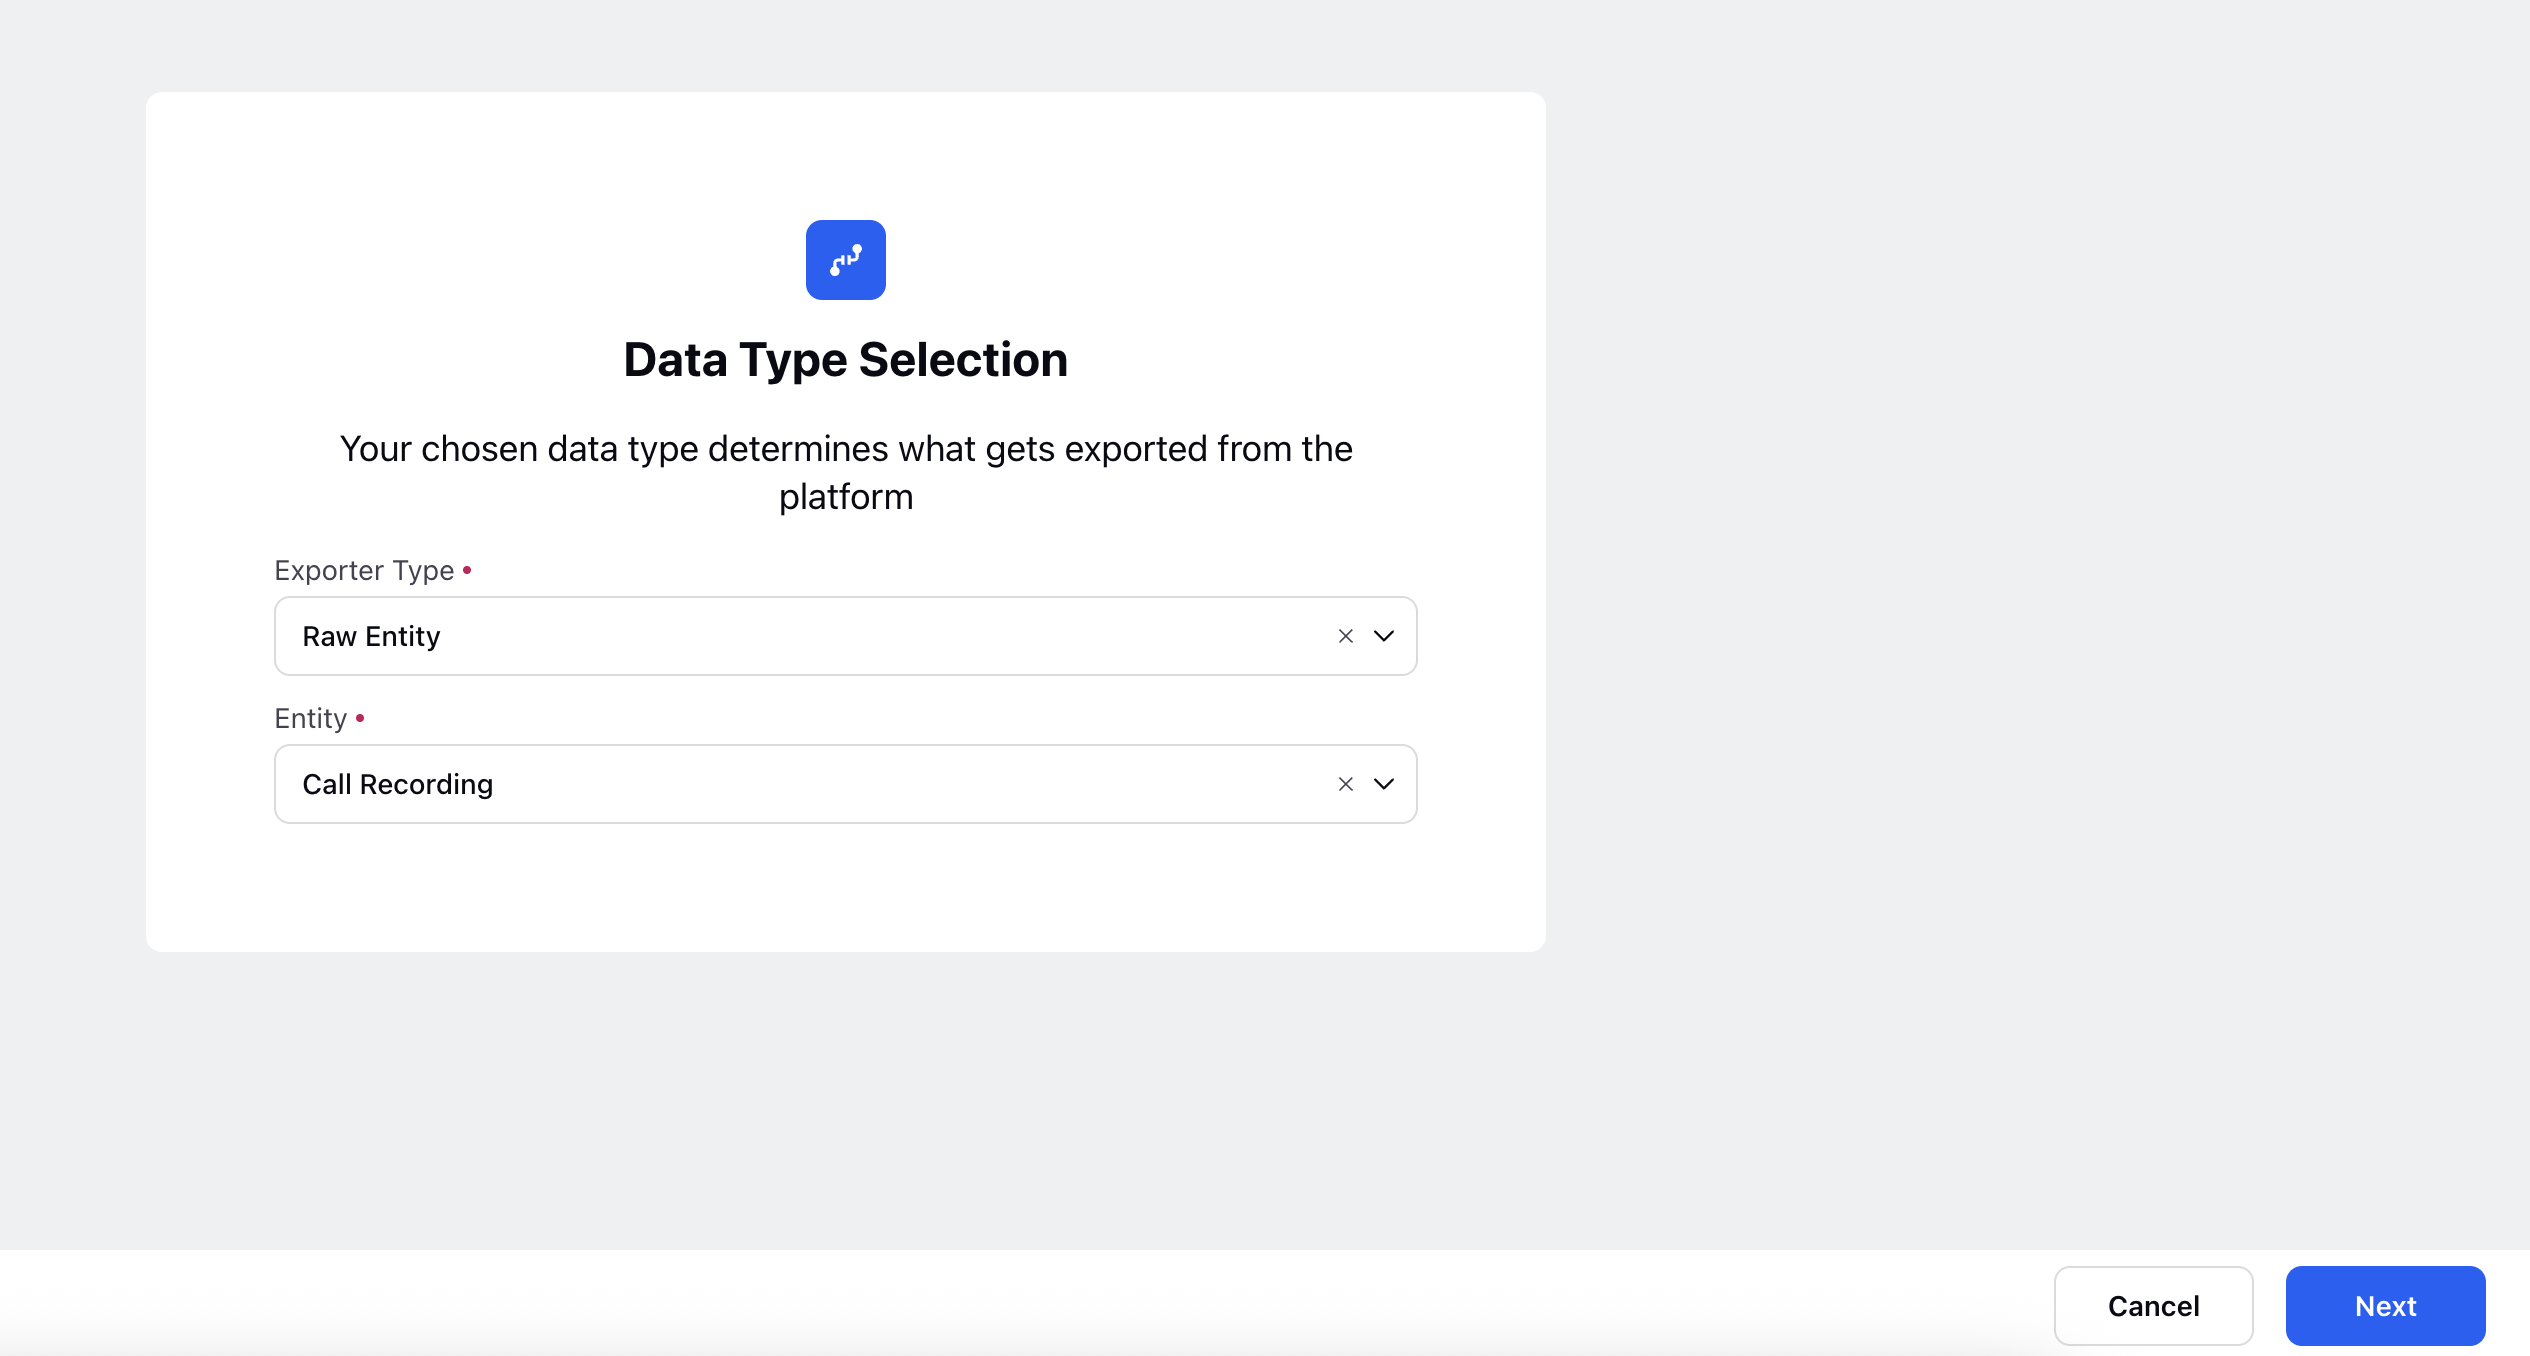
Exporter Type: Select Raw Entity from the dropdown. This indicates you are exporting unprocessed data.
Entity: Select Call Recording from the dropdown. This includes the call recordings and their associated metadata.
Click Next to proceed.
Refer to the Data Type Selection Screen section of the main guide.
3. Filter Configuration
Set filters to include only voice recording messages.
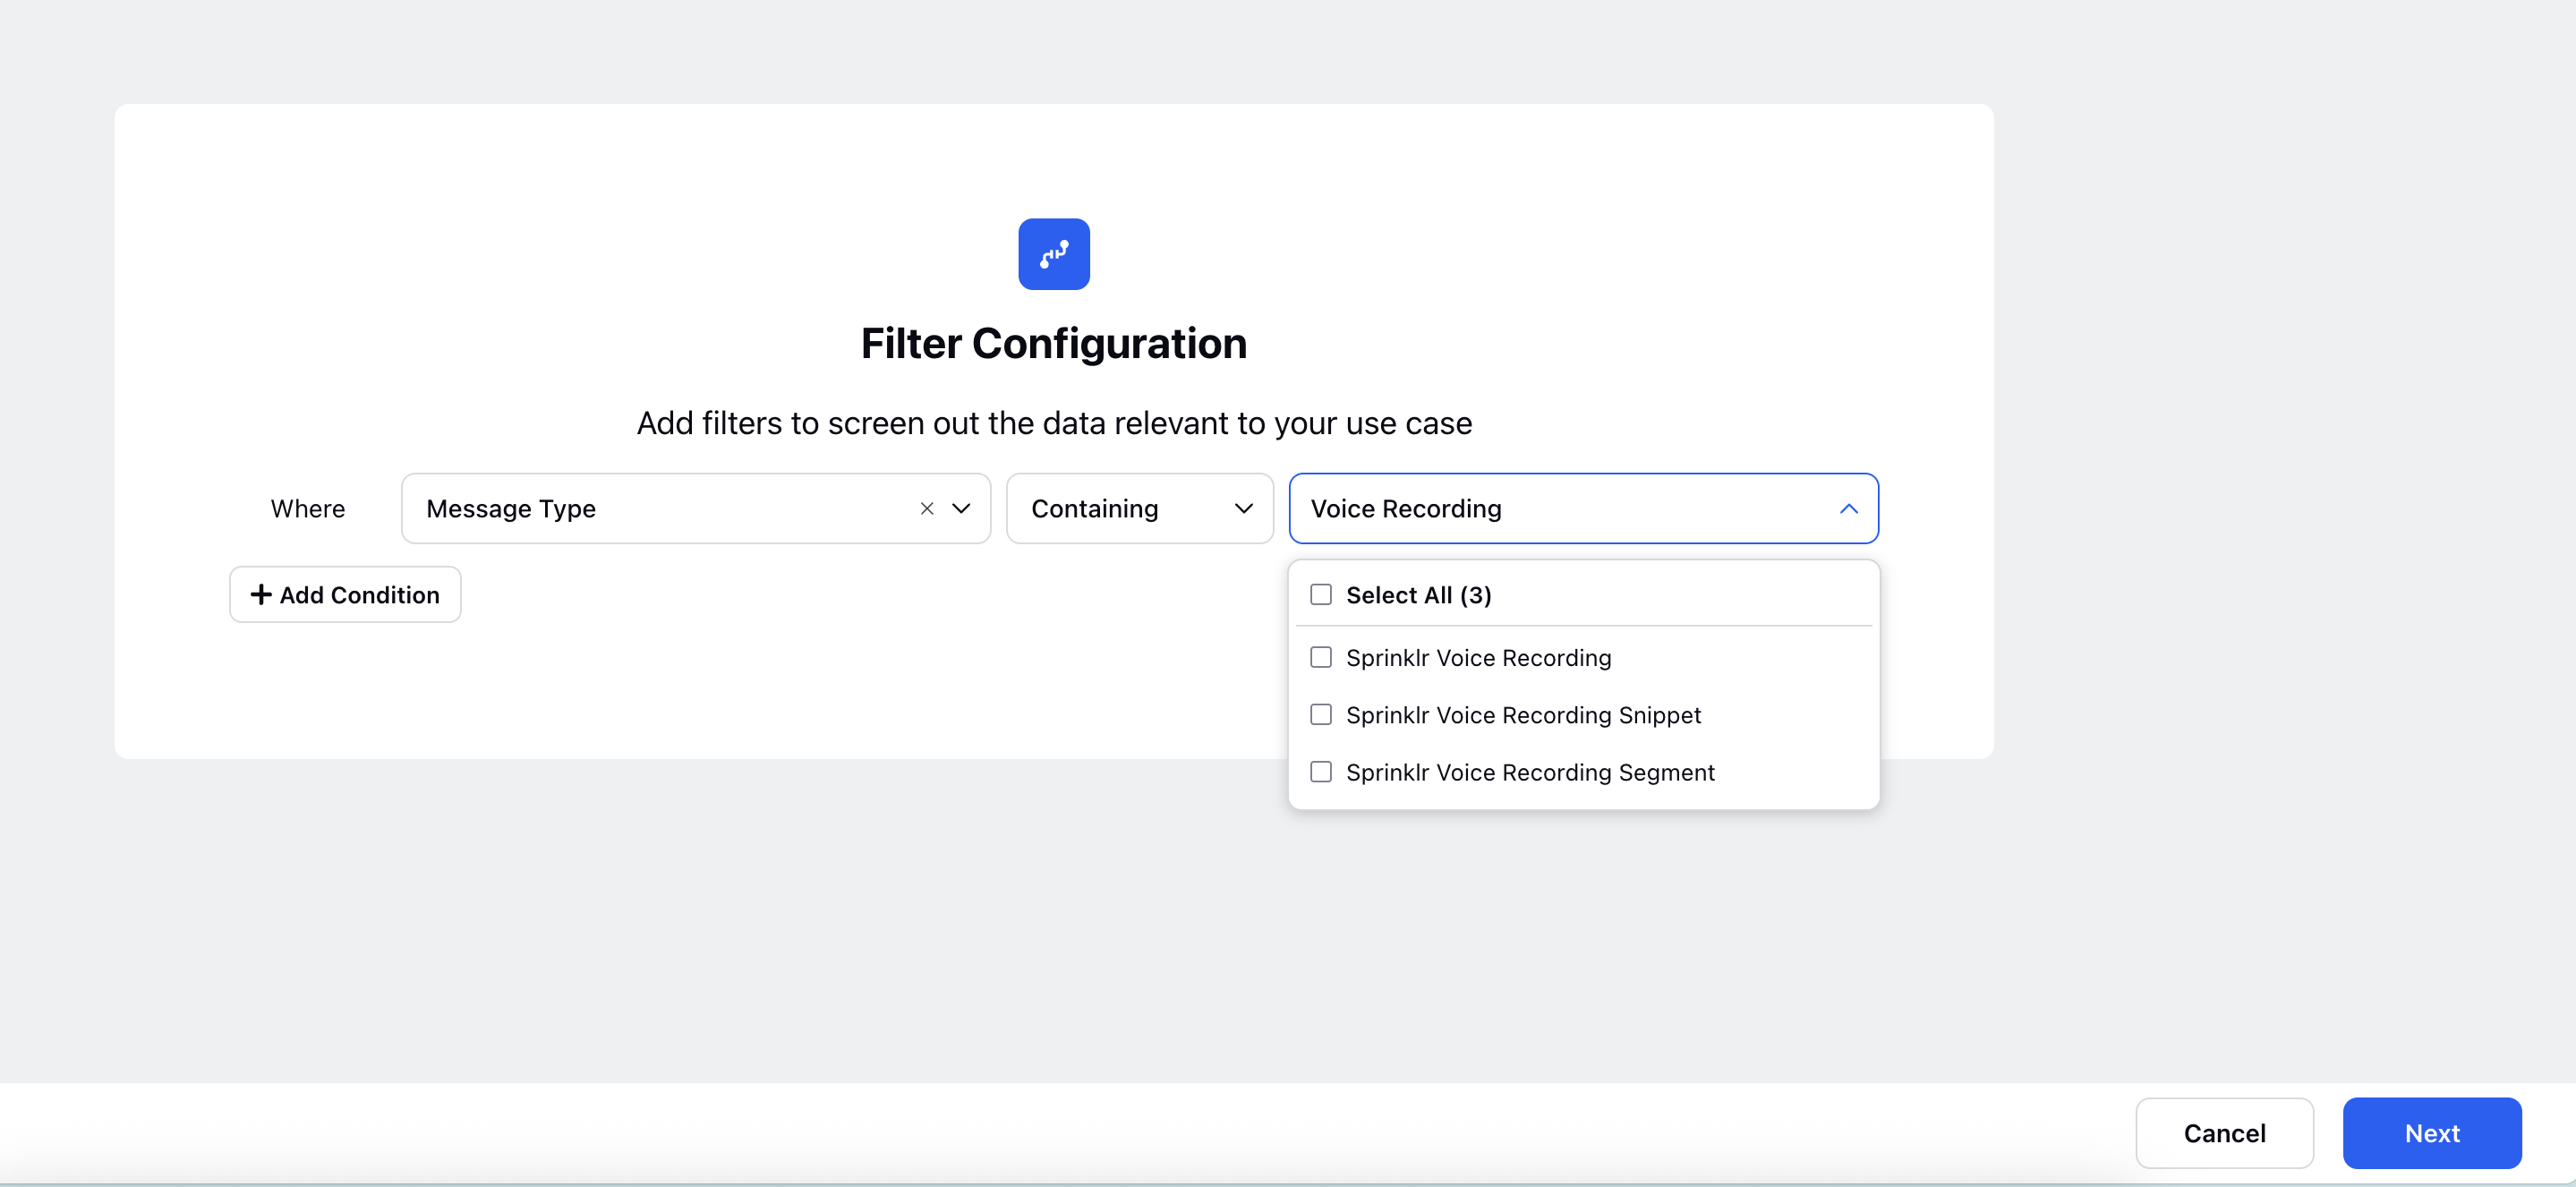
Use the following filter under Message Type:
Sprinklr Voice Recording
Sprinklr Voice Recording Snippet
Sprinklr Voice Recording Segment
Note: You may select one or more of the above to capture full-length recordings, segments, or snippets based on your workflow.
Refer to the Filter Configuration Screen for advanced filter logic.
4. Destination Selection
Specify where the exported recordings will be delivered.
Mandatory fields:
Destination Type: Choose the destination for your export from SFTP or S3
Connector Name: Provide a unique and descriptive name for your export connector.
Description: Add details about the export purpose (e.g., “Monthly Export of Support Call Recordings”).
Export Owner: Assign the user responsible for this export configuration. This can be modified later if needed.
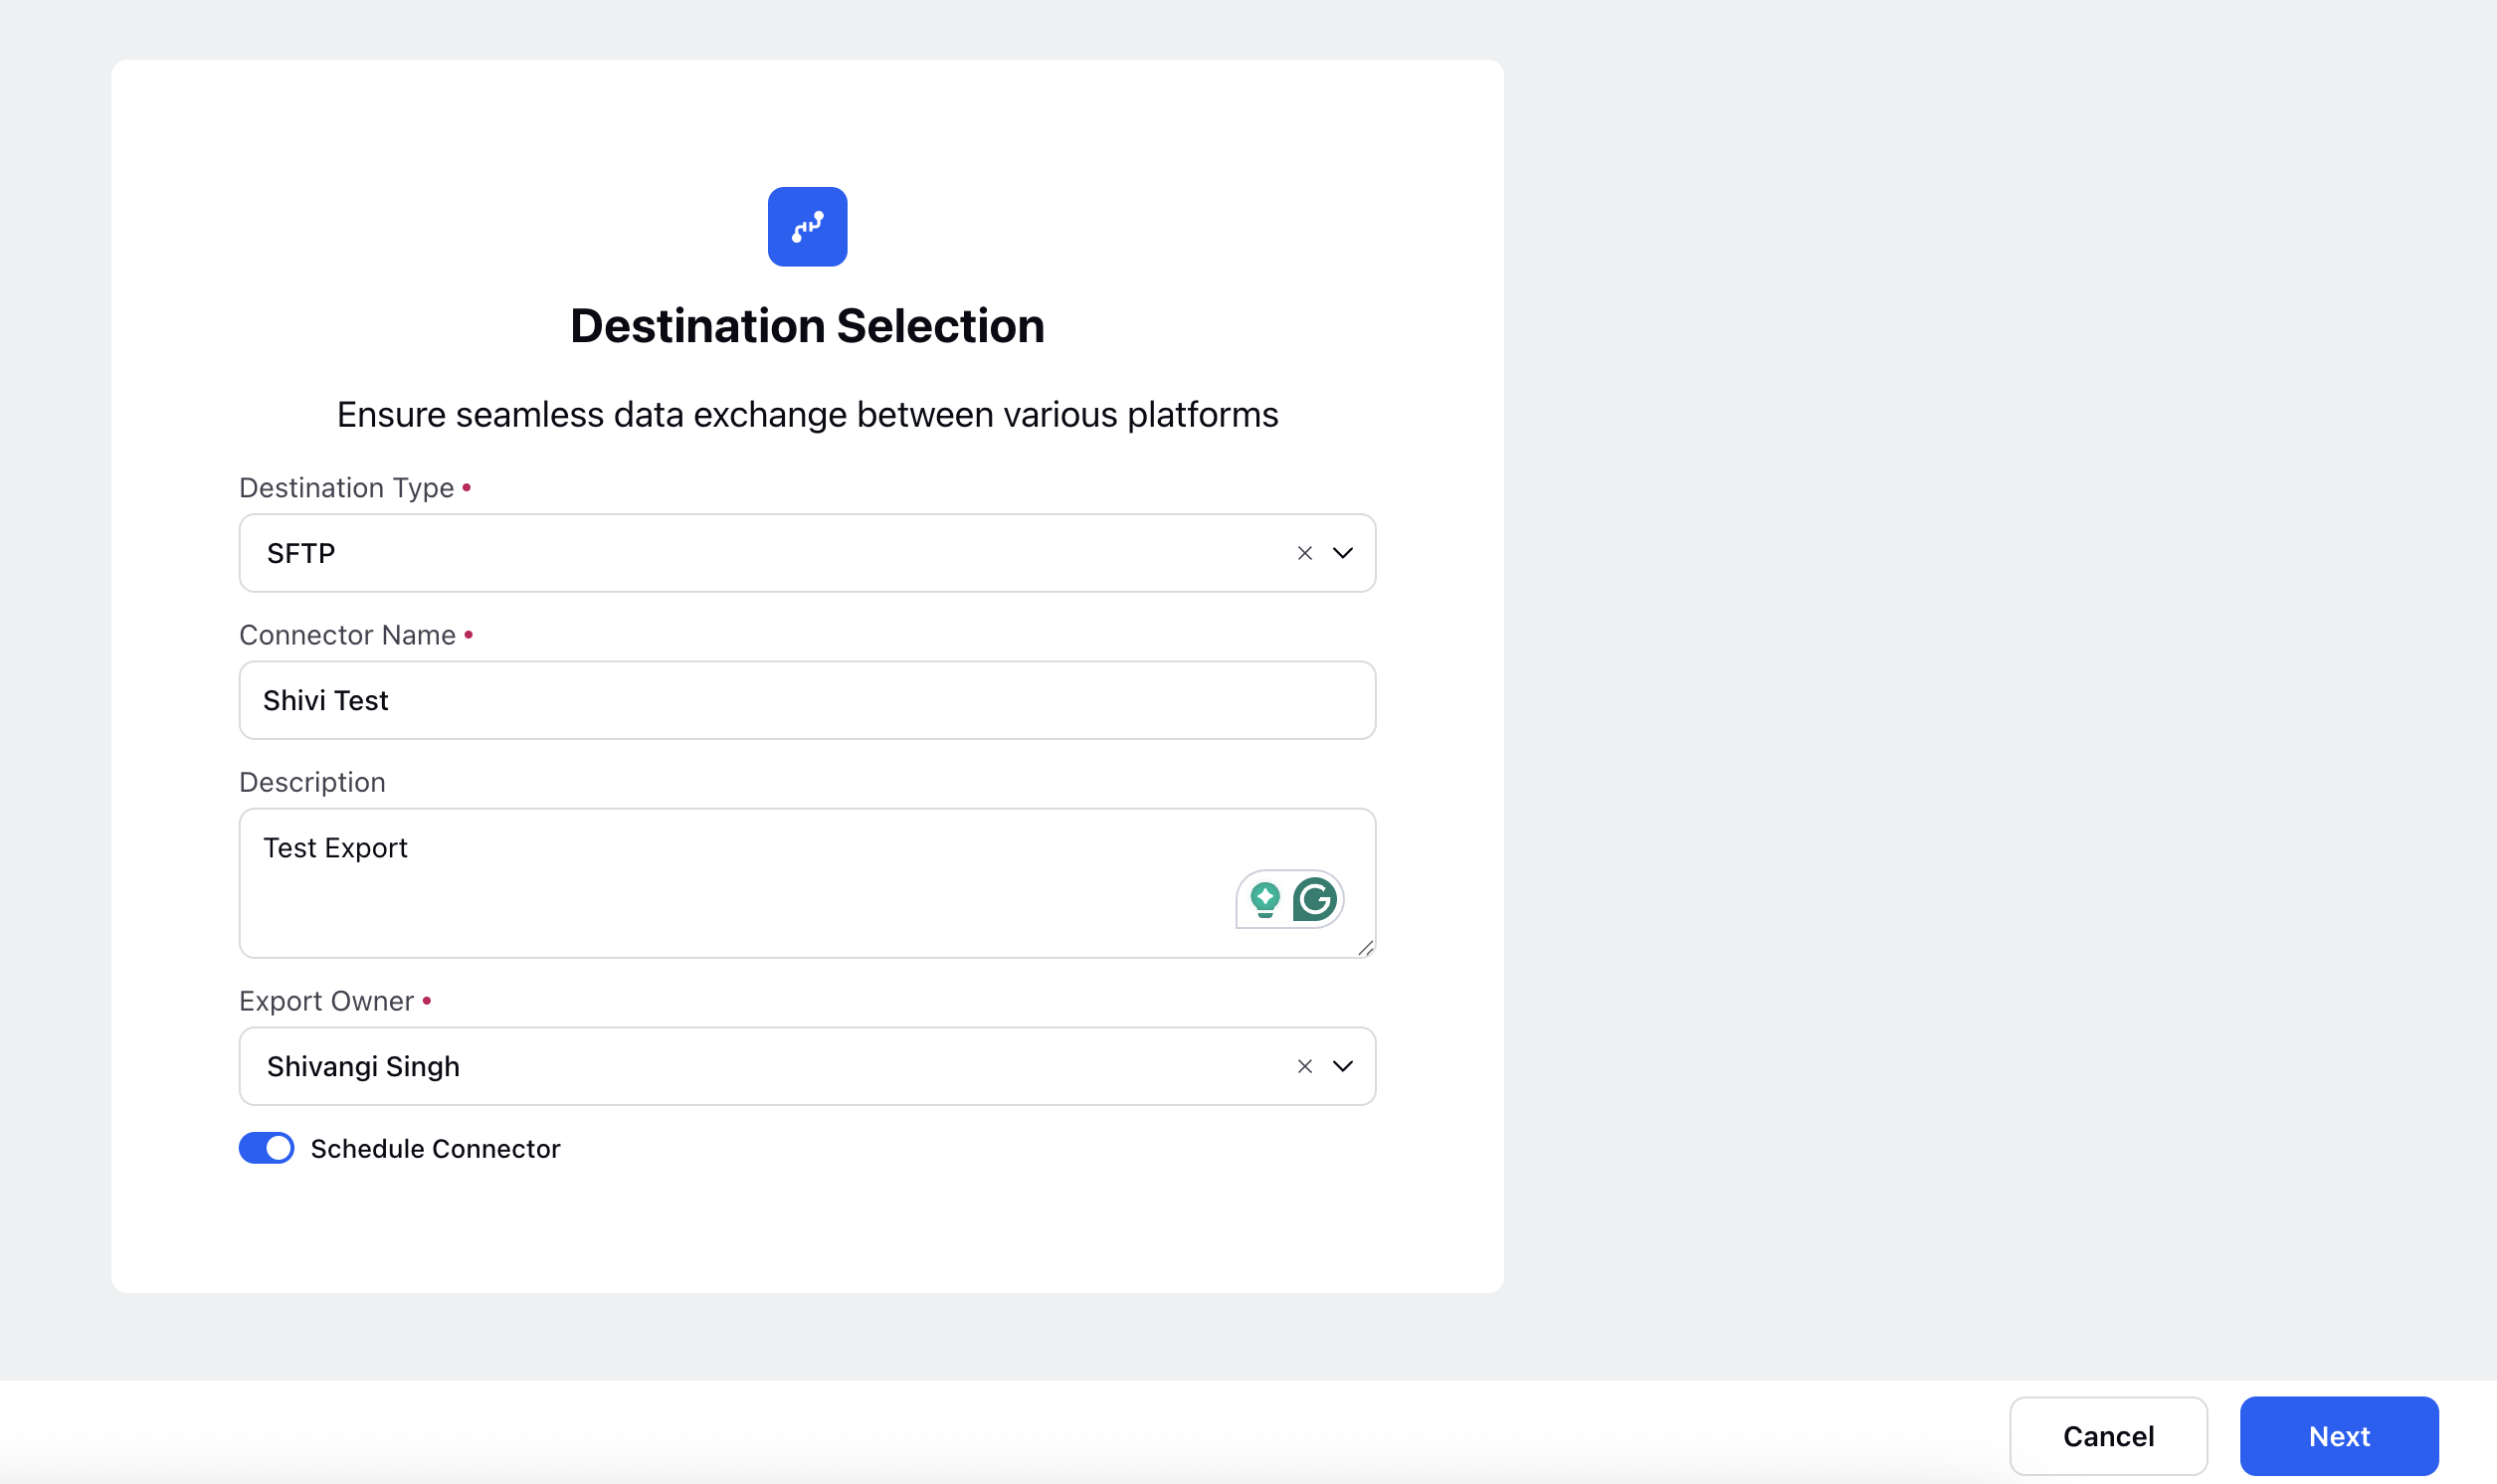
Refer to the Destination Selection Screen section for more details.
5. Destination Specific Settings
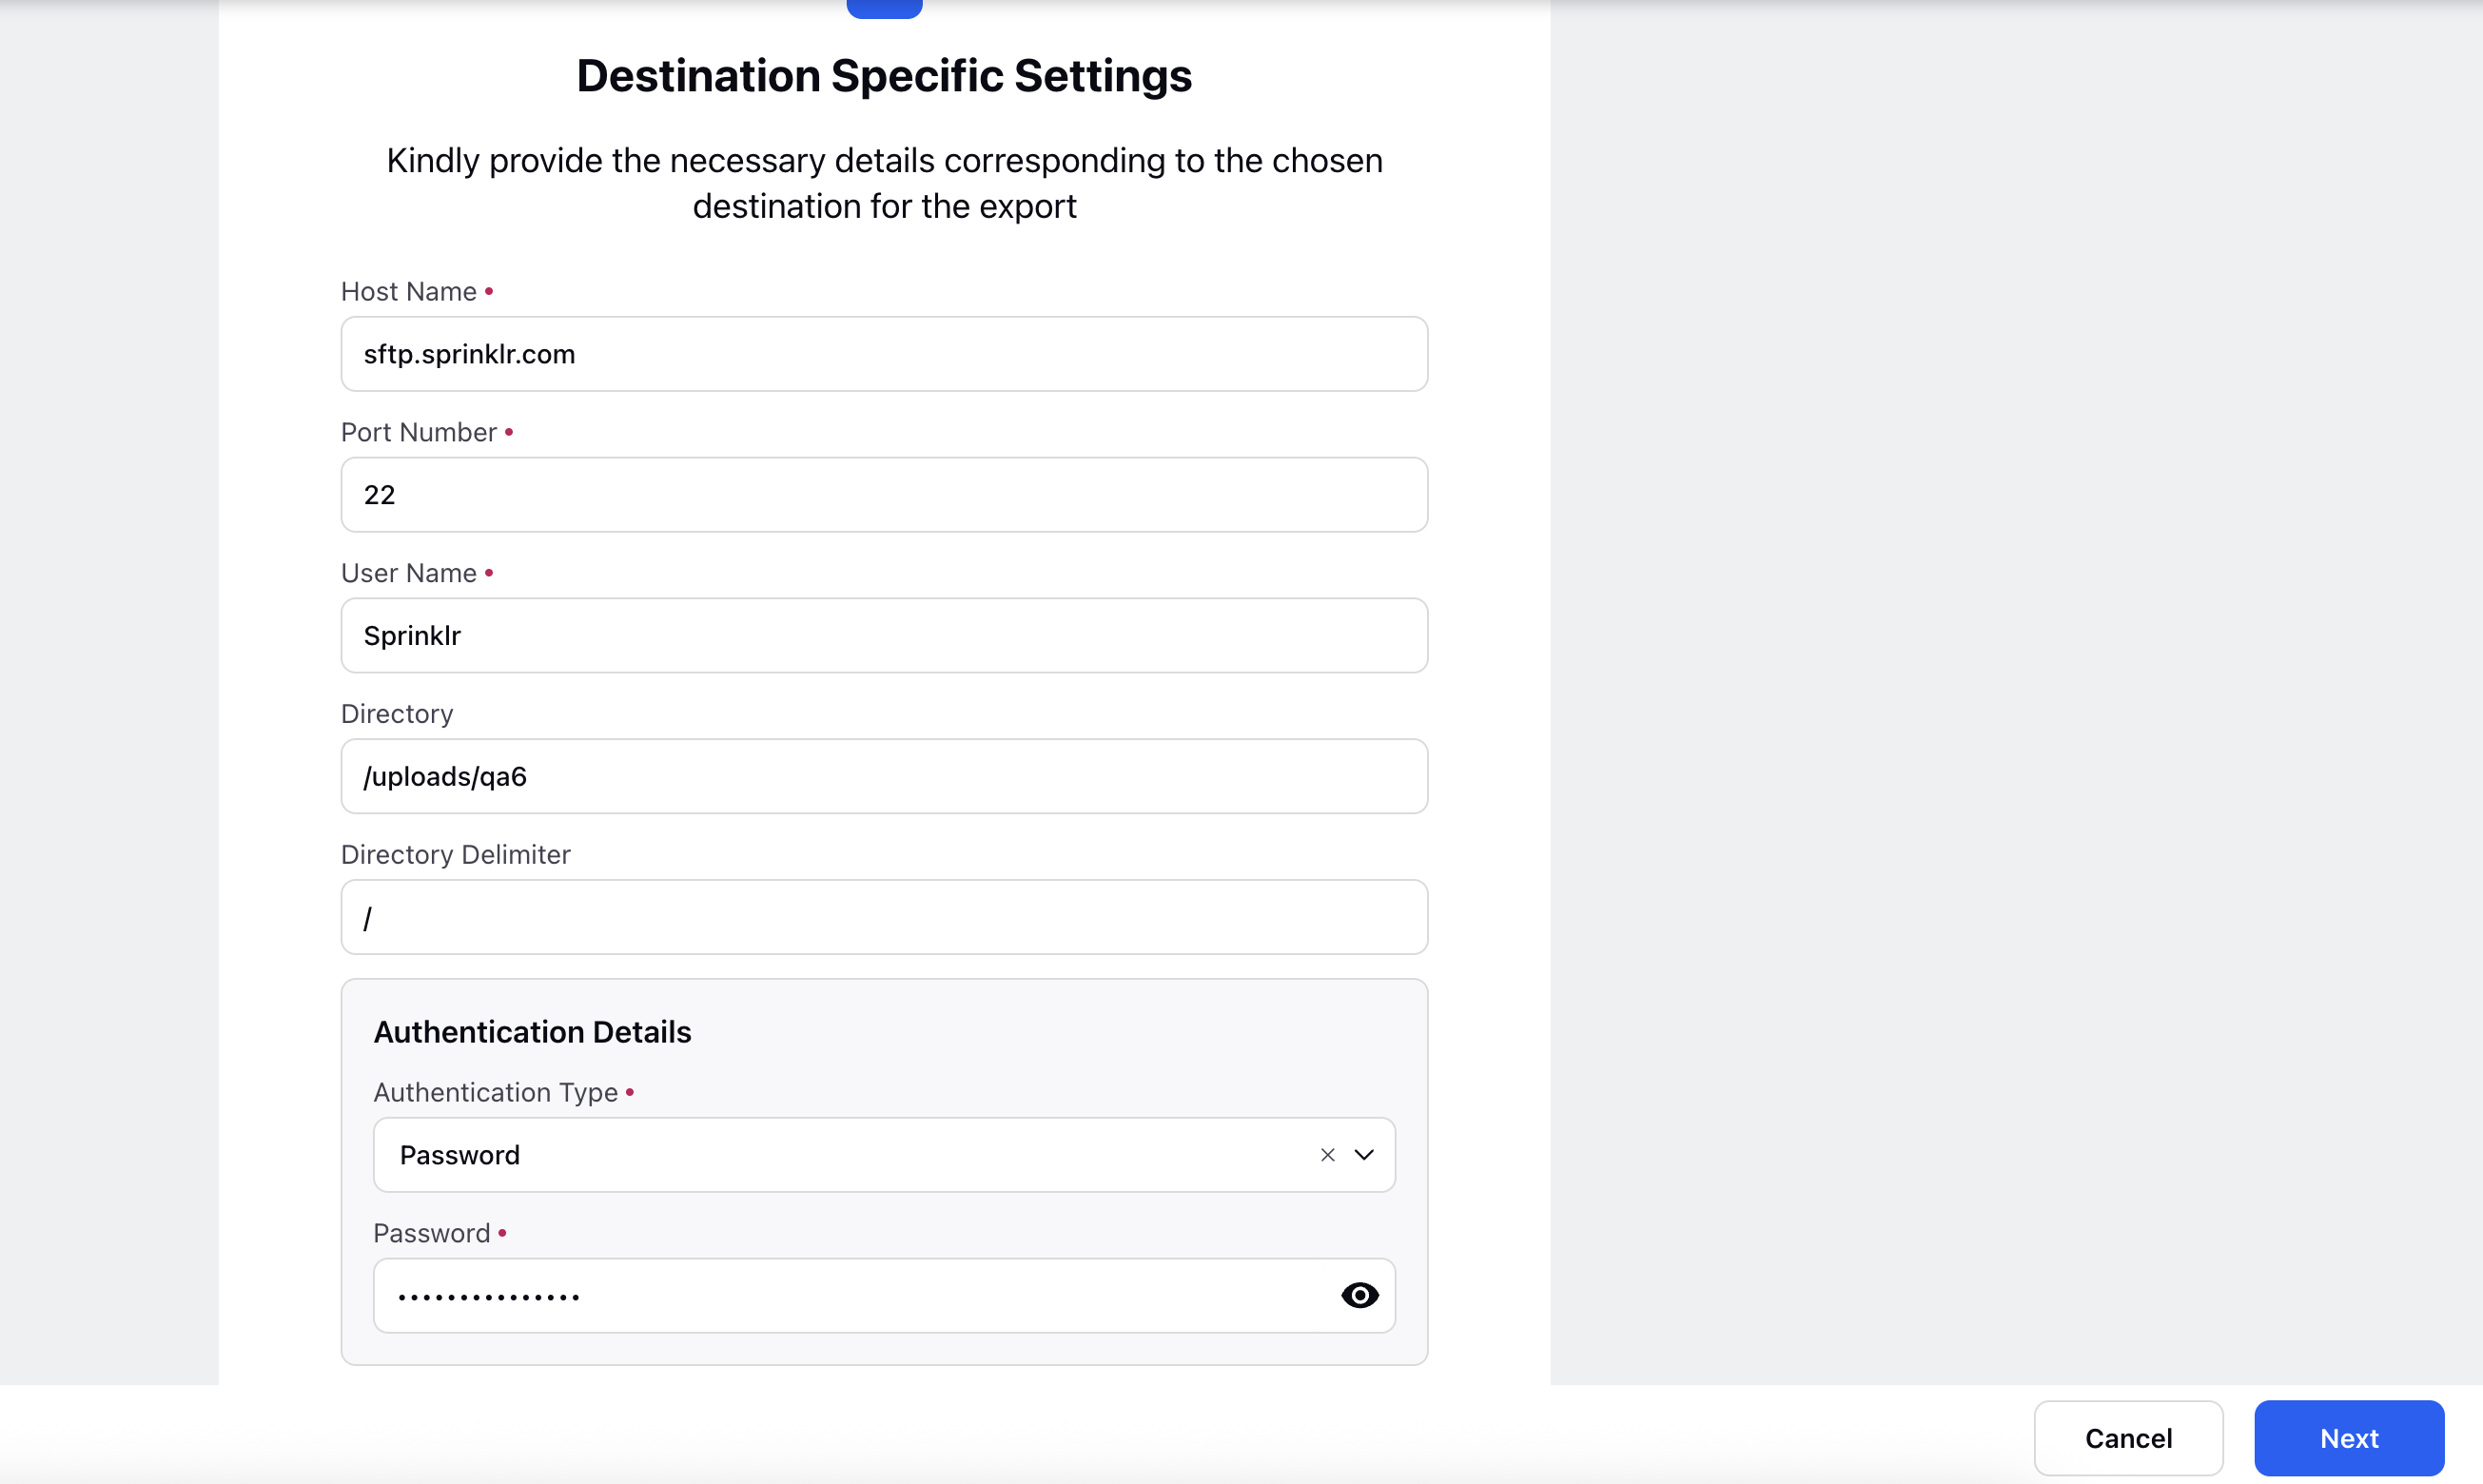
Provide destination-specific credentials and folder structure information.
For recordings, configure:
Host Name: Destination server host
Port Number: Default for SFTP is 22
User Name: Valid user for accessing the destination
Authentication Details (e.g., password, token): Choose password or token-based authentication.
Directory: Directory path where recordings will be saved
Directory Delimiter: Symbol used to separate folder hierarchy (e.g., / or \)
File structure format for exports:
Year > Month > Date > Case# > Metadata & Recording
Example: 2025 > January > 21 > Conversation#12345 > 12345.csv & 12345.wav
Note: Ensure the destination server allows file uploads to the specified directory path.
See Destination Specific Settings Screen in the main document for more details.
6. Schedule Exports
Set up a recurring export schedule.
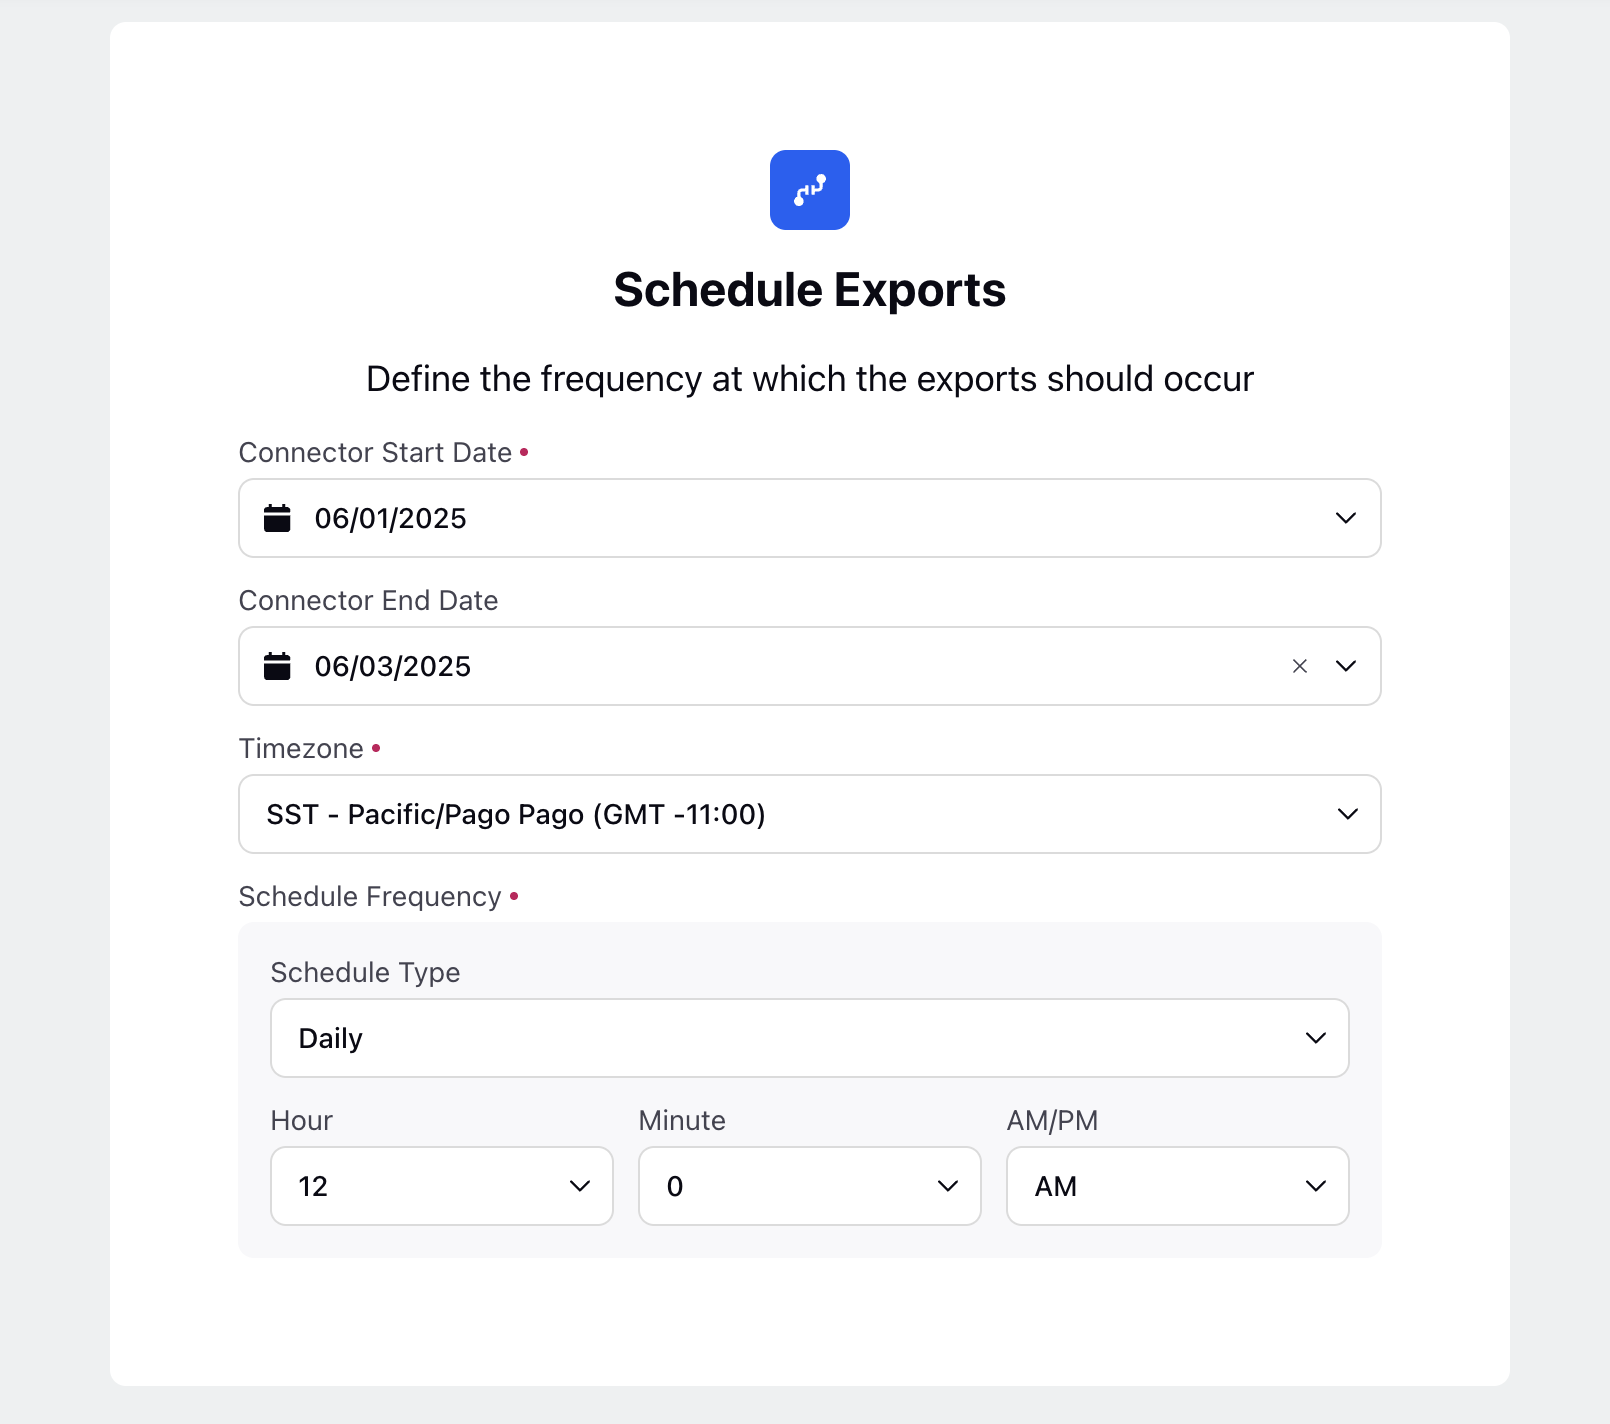
Recording-specific scheduling fields include:
Connector Start Date: The date from which the export schedule becomes active.
Connector End Date: The date after which the export schedule stops running.
Timezone: Set the appropriate time zone for the schedule.
Schedule Frequency: Set Schedule Type and Frequency.
Schedule Type can be Monthly, Weekly, Hourly, Daily, Daily (exclude) Weekend or Custom
Set Frequency in Hours, Minutes and Seconds
Refer to the Schedule Exports Screen in the main guide.
7. Additional Settings
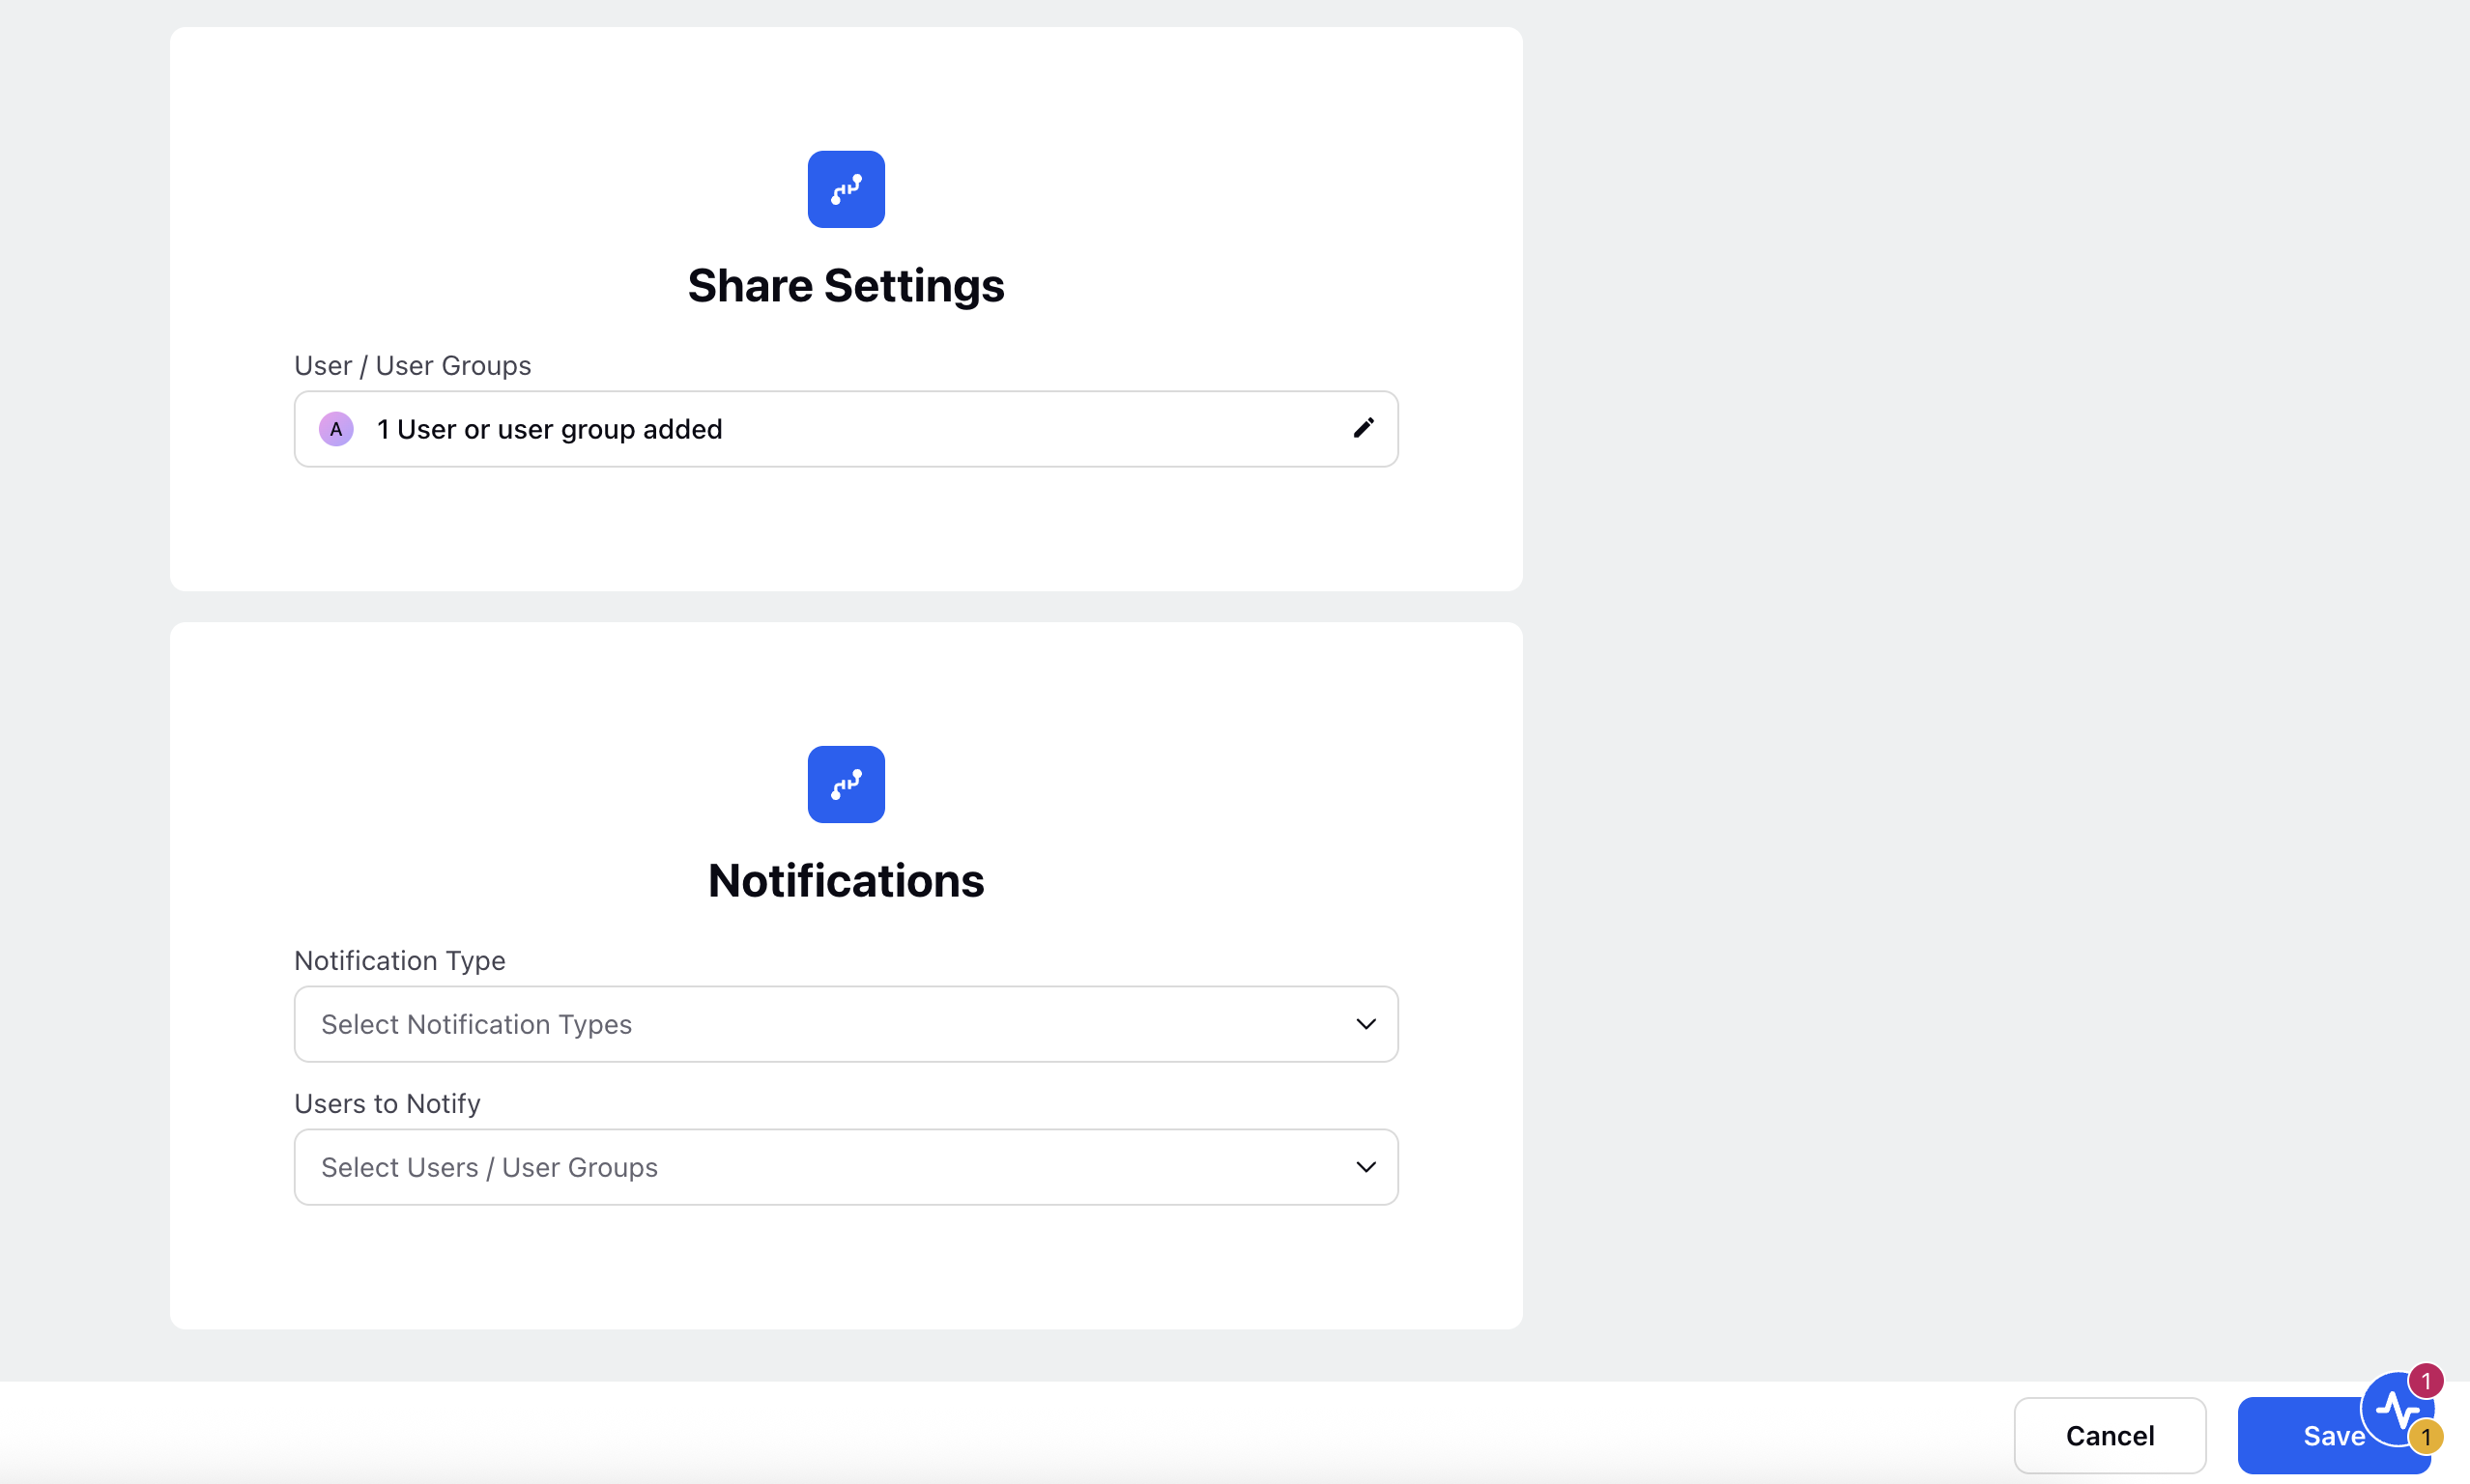
Share Settings:
Use this field to share access with users or user groups.
In the Share window, type the name or email address of the user or group you want to share access with.
Assign permissions (View Only, Modify, Delete, Admin).
Notifications:
Configure Notification Type (Email, Platform).
Choose Users to Notify.
See Share Settings and Notifications Screen from the main guide for more details.
Click Save to complete the configuration.
Your export connector will now run based on the schedule and destination settings defined above.