Category Hierarchy Management
Updated
Effective organization of information and content is paramount for facilitating seamless navigation and enhancing user experience. Categories and Topics serve as valuable tools in achieving this goal. By utilizing Category Hierarchy Management, community administrators can create well-defined categories and topics and establish their hierarchical relationships. This ensures a logical and consistent structure within the community, allowing users to easily locate relevant discussions, resources, and information. Whether it's a broad category with subcategories or a specific topic with related threads, the implementation of Category Hierarchy Management enables users to access the content they seek efficiently, fostering a cohesive and user-friendly community environment. It promotes discoverability by presenting a clear map of the community's content landscape, enabling users to explore different areas of interest.
Note: Users must have the appropriate Admin permissions to access all the below-mentioned features. To learn more, see Roles and Permissions. |
To Create a Category
Click the New Tab icon '+' . Under the Sprinklr Service tab, select Community Builder within Resolve.
On the Community Admin window, hover over the three dots Options alongside the desired community and select Category Hierarchy Management.
On the Community Hierarchies window, click Create Hierarchy in the top right corner and then click Create Category.
On the Create Category window, add an Image from SAM or Media Valet, or upload a new image to uniquely identify the category within.
If you have selected the secondary languages in the Overview section of the Community Builder, then change the language from the top right corner to translate the content into.
Enter a Name and Description for your category. The Location will always be selected as the last hierarchy location you are creating the category within.
Enter a number in the Order field to decide the sequence for the categories to appear on the main page of the Community.
Under Banner, you can either select Image (Desktop Image and Mobile Image) or Color for your category banner that will appear at the top of the Category page. If you select an image as your category banner, you can also add the Alt/Title Text to help screen-reading tools describe images to visually impaired readers.

Enable Message Approval Workflow to implement an approval flow for this category within the community. All user posts will undergo review by admins before they are published.
To make the category Private, enable the toggle and select the Profile Lists you want to make the Category accessible to.
Set the category to be hidden. With hidden categories, access is restricted unless the user possesses the specific URL.
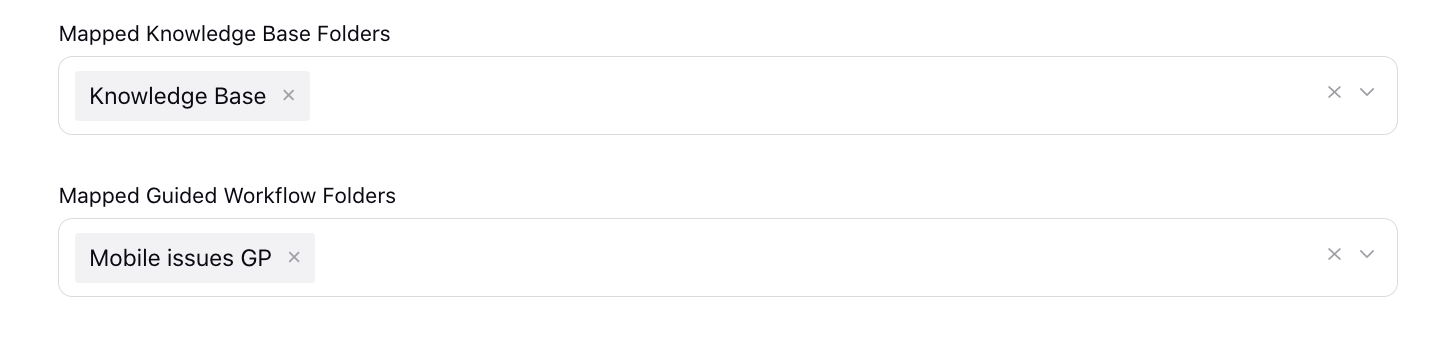
Next, from Mapped Knowledge Base Folders, select the knowledge base folder(s) you want to map to this category. And, from Mapped Guided Workflow Folders, select the guided workflow folder(s).
Next, under the Configure Conversation Types section, you can select the Conversation Types (Question, Comment, Announcement, Praise, etc.) for the respective category and give permissions to the user profile to post or comment. For each conversation type, you can select the users who can post/comment.
Note that if the Profile Lists are not selected, then the Post/Comment permission will be available to all by default.
Click Save at the bottom.
After creating a Category, you can now create more Categories or Topics within Categories.
To Create a Topic
Double click the Category within which you want to create a Topic. After landing on the page, click Create Hierarchy in the top right corner and select Create Topic. You can also select Create Category if you wish to add another category within the category.
On the Create Topic window, add an Image from SAM or Media Valet, or upload a new image to uniquely identify the topic.
If you have selected the secondary languages in the Overview section of the Community Builder, then change the language from the top right corner to translate the content.
Enter a Name and Description for your topic. The Location will always be selected as the Category you are creating the topic within. You can change it to another category to move the topic to, if required.
Enter a number in the Order field to decide the sequence of the topics to appear within the category.
Under Banner, you can either select Image (Desktop Image and Mobile Image) or Color for your topic banner that will appear at the top of the Topic page. If you select an image as your topic banner, you can also add the Alt/Title Text to help screen-reading tools describe images to visually impaired readers.
Enable Message Approval Workflow to implement an approval flow for this topic within the community. All user posts will undergo review by admins before they are published.
To make the topic Private, check the box alongside and select the Profile Lists you want to make the Topic accessible to.

Set the topic to be hidden. With hidden topics, access is restricted unless the user possesses the specific URL. Moreover, posts can only be created within a hidden topic from the dedicated topic page itself.
Next, under the Configure Conversation Types section, you can select the Conversation Types (Question, Comment, Announcement, Praise, etc.) for the respective topic and give permissions to the user profile to post or comment. For each conversation type, you can select the users who can post/comment.
Note that if the Profile Lists are not selected, then the Post/Comment permission will be available to all by default.
You can define the visibility of Community Categories based on Custom Field(s). Under ‘Others’ in the Custom Fields section, search for the Custom Field(s) based on which you want to define the visibility. Select the required data for the Custom Fields to set the visibility accordingly.
 Note: You can define the visibility of Community Categories based on Custom Fields, but only for those with the following Community Category Asset Types selected.

Click Save at the bottom.
To Manage Category/Topic
For a Category, hover over the Options in three dots alongside the desired category and select Edit to make changes in the configuration or Delete to permanently delete it.
![]() Note: The creator of the Topic/Category will receive an email and platform notification when it is made public from private.
Note: The creator of the Topic/Category will receive an email and platform notification when it is made public from private.
For a Topic, hover over the Options in three dots alongside the desired topic and select Edit to make changes in the configuration or Delete to permanently delete it. You can also Move all posts from one topic to another. After selecting this option, select the desired topic to move the posts to. You must have the Move Posts Bulk permission to access this feature.
![]() Note: Contact your Success Manager to access the audit trail for Categories and Topics, including actions such as edits and deletions. This records actions such as editing and deletion, including the user who performed the actions.
Note: Contact your Success Manager to access the audit trail for Categories and Topics, including actions such as edits and deletions. This records actions such as editing and deletion, including the user who performed the actions.
After selecting the desired Topic to move the posts to, you will see the number of posts that will be moved.
View Activity Log of Community
You can view a detailed activity log for actions performed on Categories and Topics. The log shows who performed the action, what changes were made, and when they occurred. This improves traceability and accountability in Category Hierarchy Management.
Follow these steps to view the activity log of a Community:

Navigate to Community Builder from the Launchpad.

Click the vertical ellipsis (⋮) icon corresponding to the Community whose activity log you want to view. This will show a list of options.
Select View Activity from the list of options to open the Activity window from the Third Pane, displaying all changes made to the Community, including who made them and when.

The Activity window displays details about actions performed on the Community’s Categories and Topics. These actions include creating, editing, modifying (such as changing visibility to hidden or public, mapping a Knowledge Base category, or changing the order), and deleting.
Within the Activity window, you can filter the activity log to display only actions within a specific date range or focus on changes made to particular Categories and/or Topics.

To apply filters, click the Filter button at the top to open the filtering options. The following fields are available, along with their descriptions:
Set Duration: Specify the date range for which the activity log should be displayed.
Set Filter: Choose whether to filter the activity log for specific Categories or Topics.
The following filters are available:
Asset Class: Use this filter to narrow the activity log by asset type, either Categories or Topics. For example, if you select Categories in the Value field, the log will display only actions related to Categories. Similarly, selecting Topics will show actions related to Topics.
Categories: Use this filter to display activity logs for specific Categories in the Community. This is useful when you want to review actions related to particular Categories only.
Topics: Use this filter to display activity logs for specific Topics in the Community. This is useful when you want to review actions related to particular Topics only.
Condition: Select either Containing or Not Containing.
Value: Select the value(s) that correspond to the chosen filter.
Add Filter: Click this button to add more filters.
Click the Save Filters after configuring the date range and filter to apply.
![]() Note: The filtering is configured using logical expressions. For example, if you want to filter either Categories or Topics, select the Categories filter in one row, set the logical operator to "OR", and select Topics in the second row. Similarly, if you want to configure both Categories and Topics, select Categories in one row, set the logical operator to "AND", and select Topics in the second row.
Note: The filtering is configured using logical expressions. For example, if you want to filter either Categories or Topics, select the Categories filter in one row, set the logical operator to "OR", and select Topics in the second row. Similarly, if you want to configure both Categories and Topics, select Categories in one row, set the logical operator to "AND", and select Topics in the second row.
![]() Note: Once an operator ("OR" or "AND") is selected, the same operator will be applied to any subsequent rows added.
Note: Once an operator ("OR" or "AND") is selected, the same operator will be applied to any subsequent rows added.
This completes the process of viewing the activity log of Community.