Get Started with Agent Copilot
Updated
This guide provides a step-by-step walkthrough to help you get started with Agent Copilot using AI+ Studio. You will learn how to access Agent Copilot, create a new deployment, activate the Copilot with default settings, and manage it from the Record Manager.
Access Agent Copilot
Follow the steps below to locate and configure the Agent Copilot.
Navigate to AI+ Studio from the Sprinklr launchpad.
Click the Manage Copilots card.
On the Choose Your Copilot screen, select the Agent Copilot under the Sprinklr Service tab.
.gif)
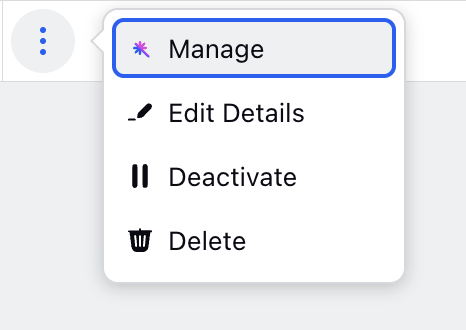
The Agent Copilot Record Manager screen opens. You can manage existing Agent Copilots deployments directly from the Record Manager screen. Click the vertical ellipsis (⋮) next to the desired deployment to access available actions.
Available Actions

Manage: Opens the configuration flow for the selected Agent Copilot deployment. You can review and update each configuration step—such as Data Management, Tasks and Skills, Additional Settings and Widget Configuration.
Edit Details: Allows you to update Basic Details for the selected Agent Copilot deployment.
Activate: Publishes the Agent Copilot deployment, making it available in the Care Console for agents.
Delete: Permanently removes the selected deployment from the system. This action is irreversible. Use with caution, especially if the deployment is active or linked to a live Care Console layout.
Note: You can deploy multiple Agent Copilot instances based on your requirements, such as applying different Copilots for specific User or Case-level filters. In the event of overlapping conditions, the system will prioritize the Copilot deployment with the highest assigned priority.
Add Agent Copilot
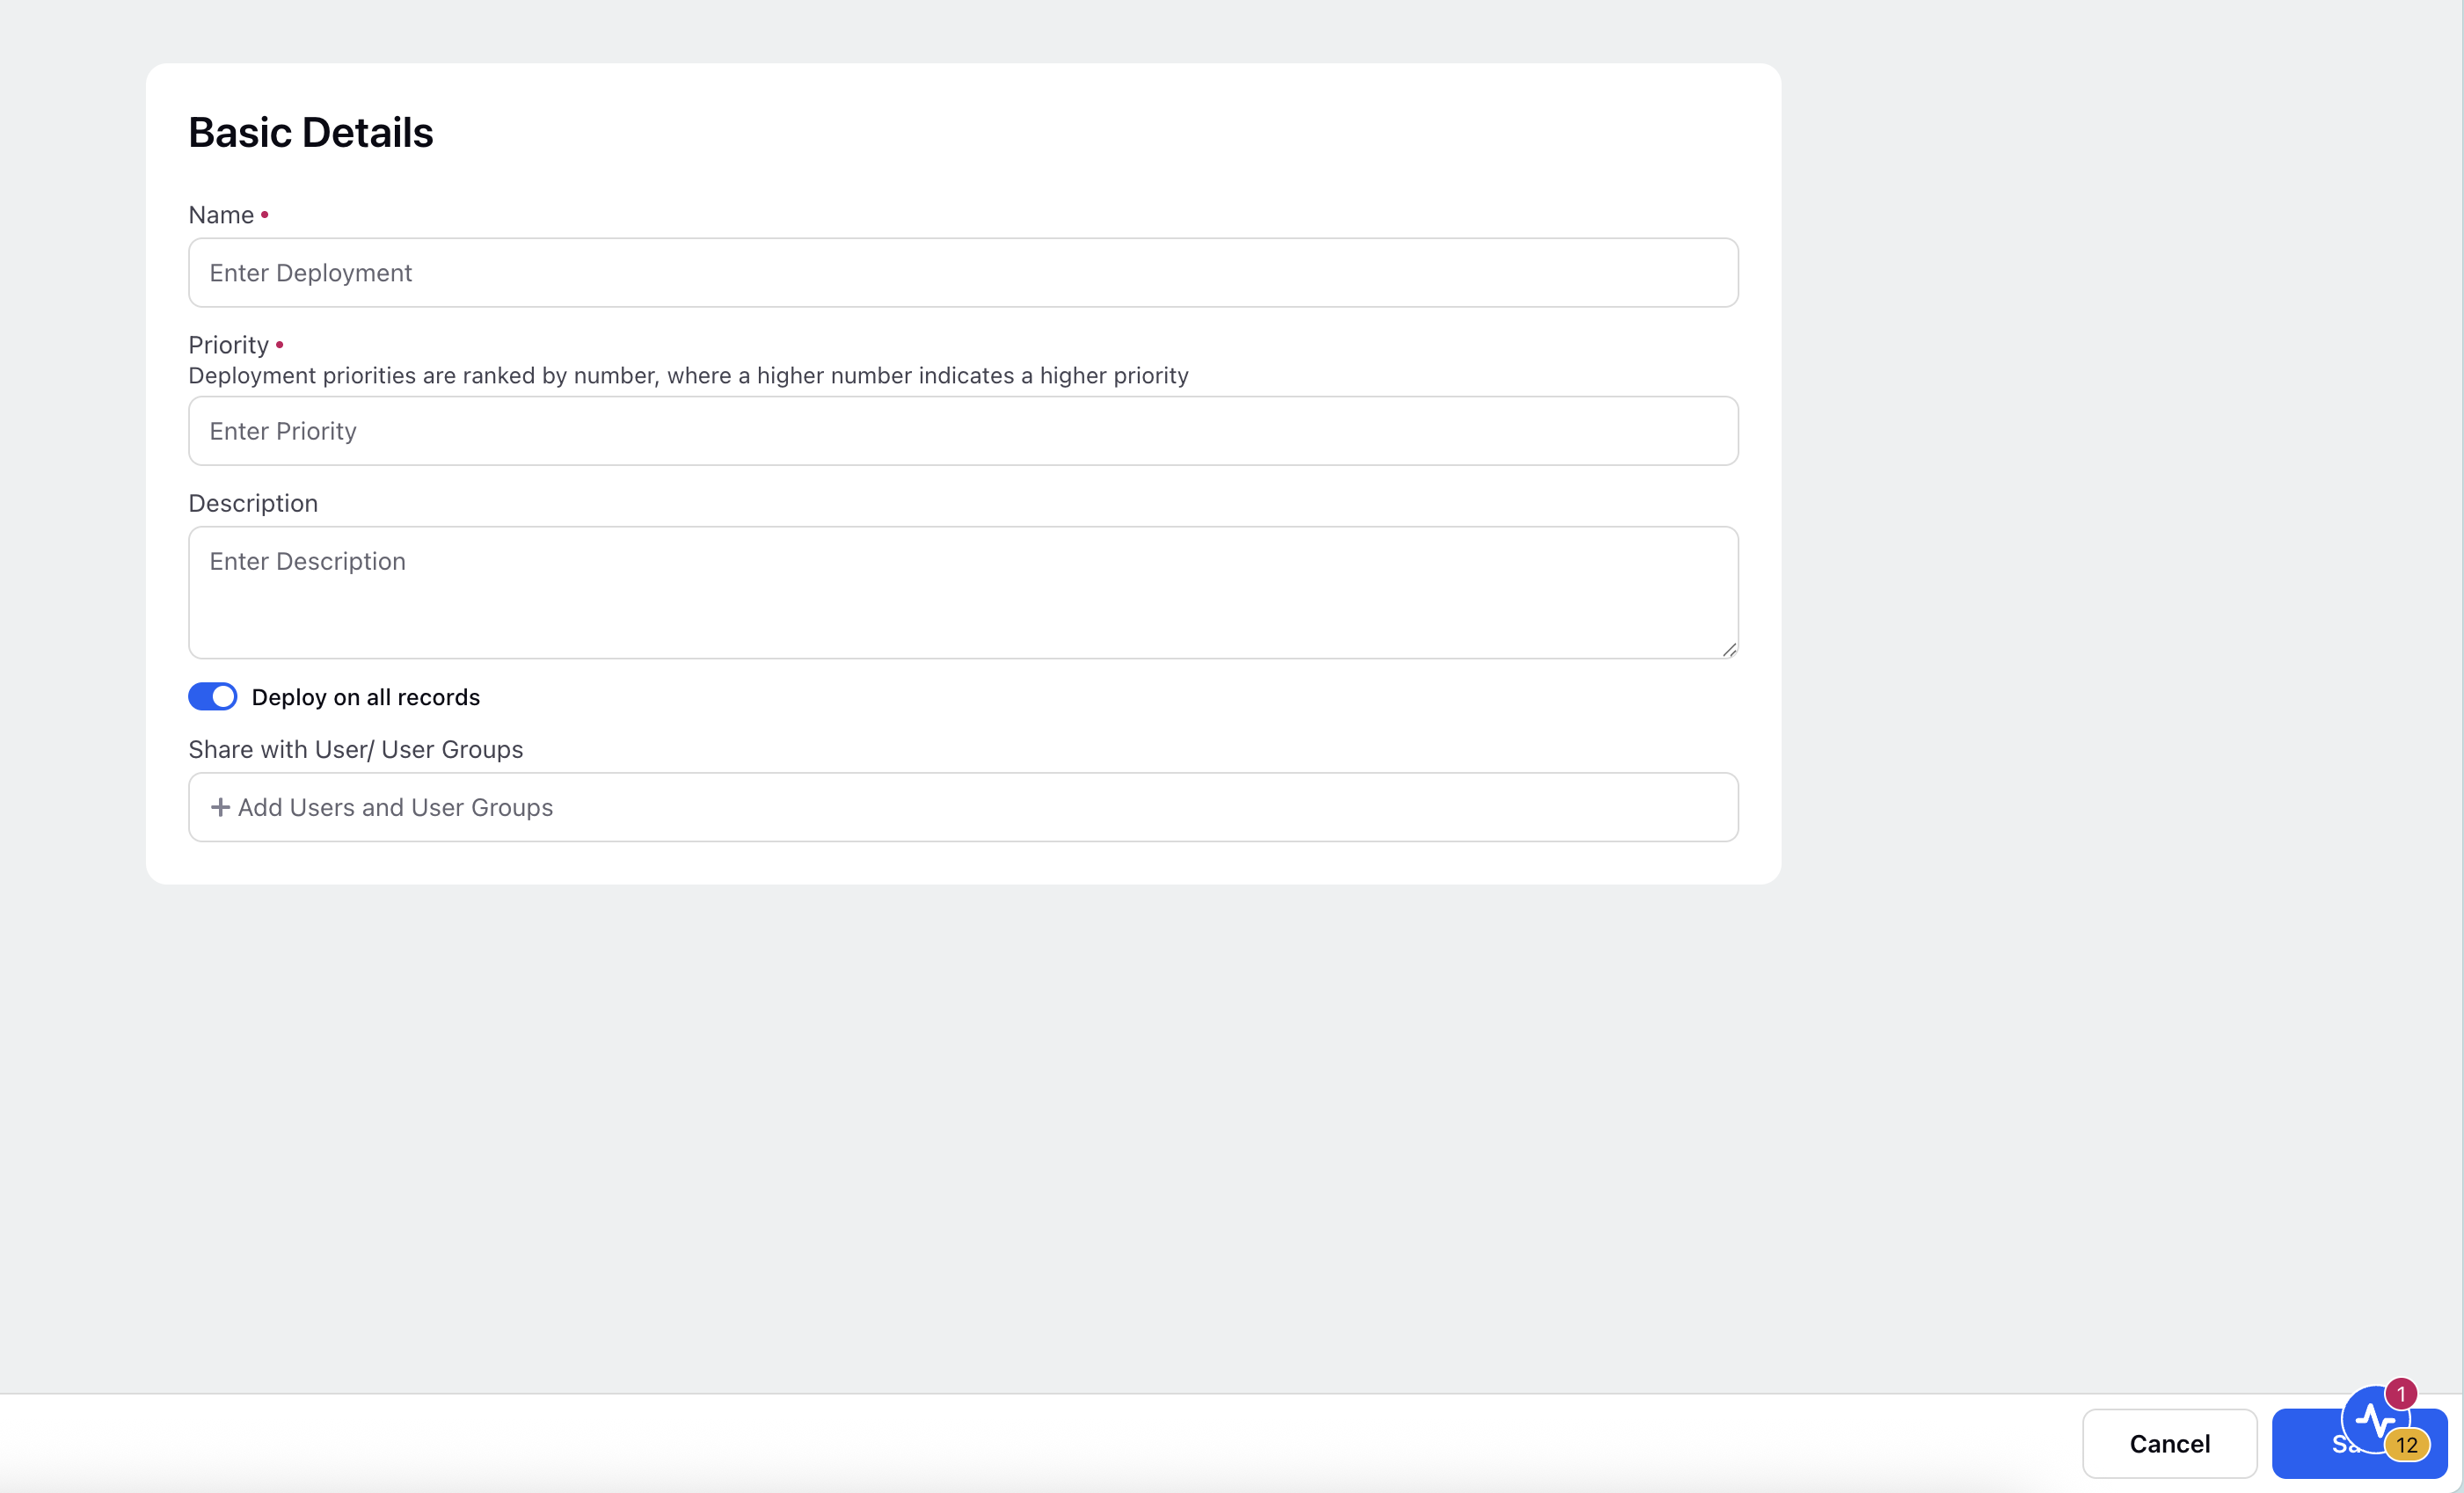
Click the ‘+ Copilot’ button in the top-right corner to create Agent Copilot deployment. Enter the details in the Basic Details window about your deployment.

In this step, you will define the foundational information for your Agent Copilot. This includes assigning a name, writing a description, and managing user or group access. These details help identify and control access to your Copilot instance within your organization.

On the Basic Details screen, enter the required information:
Name (Required): Enter a unique and descriptive name for your Agent Copilot.
Priority (Required): Specify the priority for your Copilot deployment. In case of multiple copilot deployments this will help determine the system which Copilot to use. A higher number indicates higher priority.
Description (Optional): Provide a short summary of your Copilot’s purpose or scope to help others understand its function.
Deploy on all records: Enable this toggle to make the Agent Copilot available on all case records by default.
If you want to restrict deployment to specific conditions, disable this toggle and apply filters based on case-level or user-level attributes as needed.

Share with User/User Groups (Optional): Use this field to share access with users or user groups.
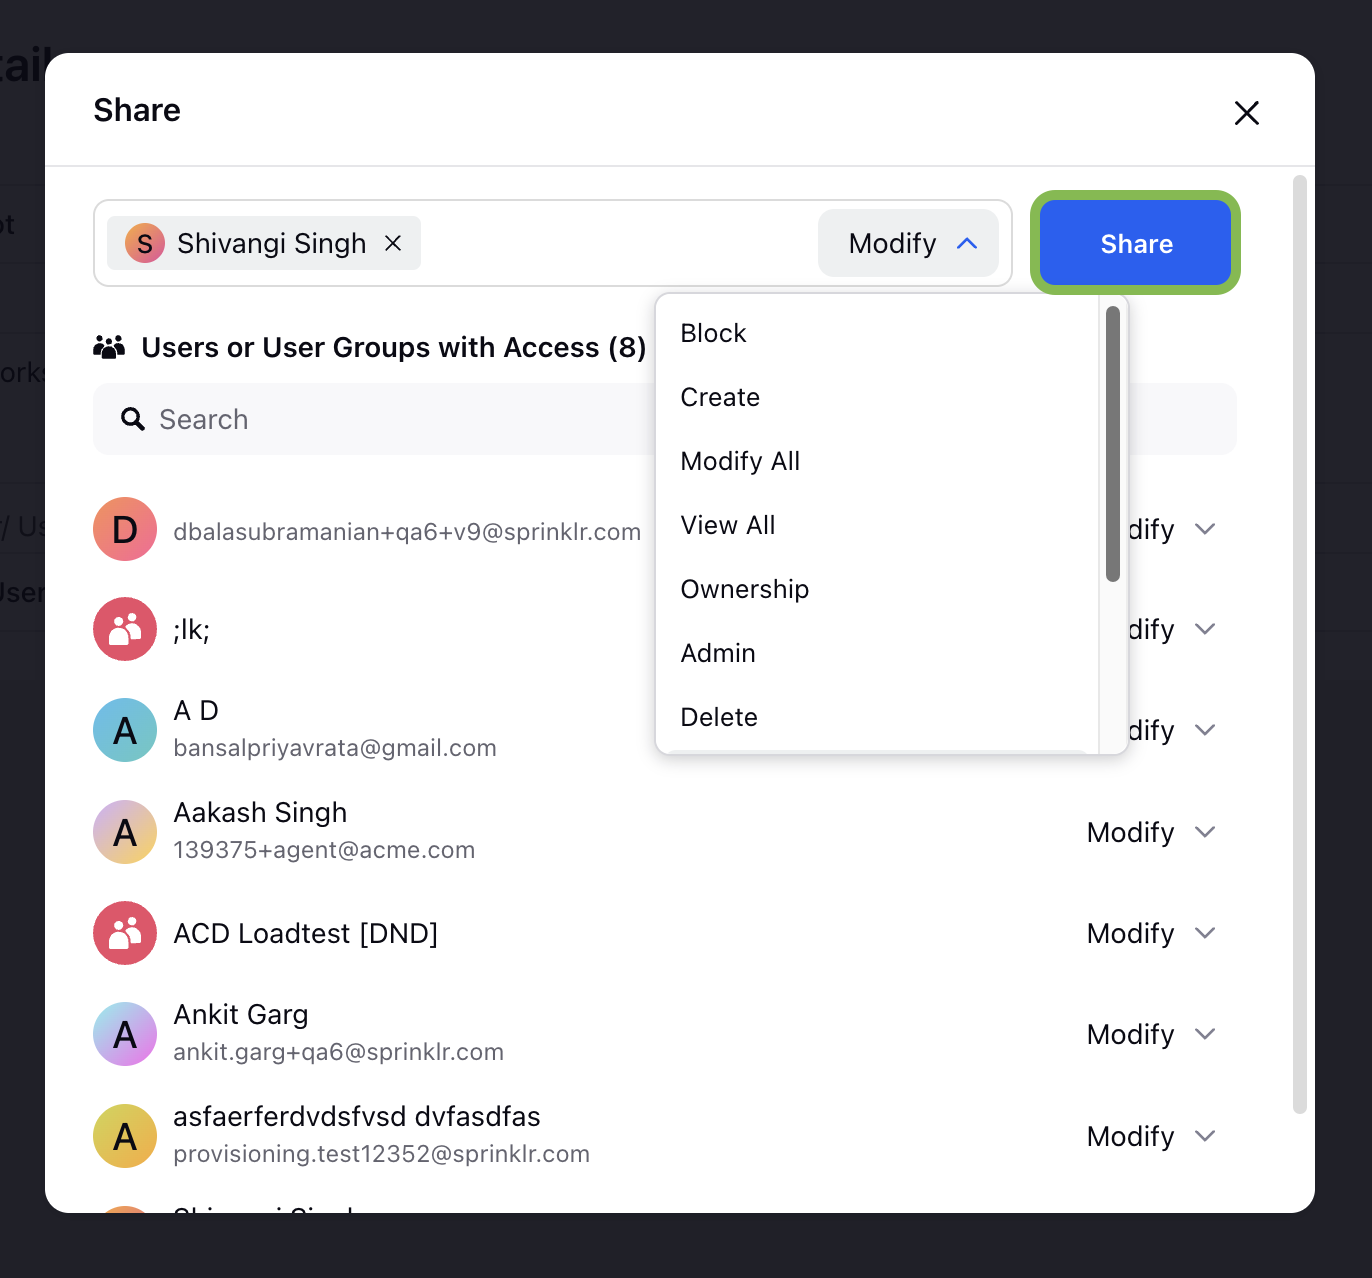
In the Share window, type the name or email address of the user or group you want to share access with.
Choose the Modify access level from the options. It permits the user to make changes to existing tasks, entries, or content.
Note: If Share with User/User Groups field is left blank, the deployment will be visible to all users and user groups on the platform.

After selecting the desired access level, click Share to apply the changes.
After completing all required fields, click Save to store your basic details.
Note: You can update these settings later if you need to change the name, description, or access permissions.
After you Save the basic details, your copilot deployment will appear in the Record Manager.
Activate Agent Copilot

Click the vertical ellipsis (⋮) icon next to your configured Copilot deployment and select Activate option from the dropdown to activate your Agent Copilot deployment.
This action enables your Agent Copilot with the default configuration, making it available for use in the Care Console.
Default Configuration Includes:
Preconfigured Tasks
Customer Profile Overview
Case Summarizer
Default AI Provider
Azure OpenAI
Model: GPT-4o
Default Widget Prompts
Summarize Case
Customer Profile Overview
Answer Customer Query
After activation, you can further customize prompts, tasks, and data sources as needed from the Manage option in the Record Manager.
Manage Agent Copilot
Click the vertical ellipsis (⋮) icon next to your configured Copilot deployment and select Manage from the dropdown to update or modify an existing Agent Copilot deployment.
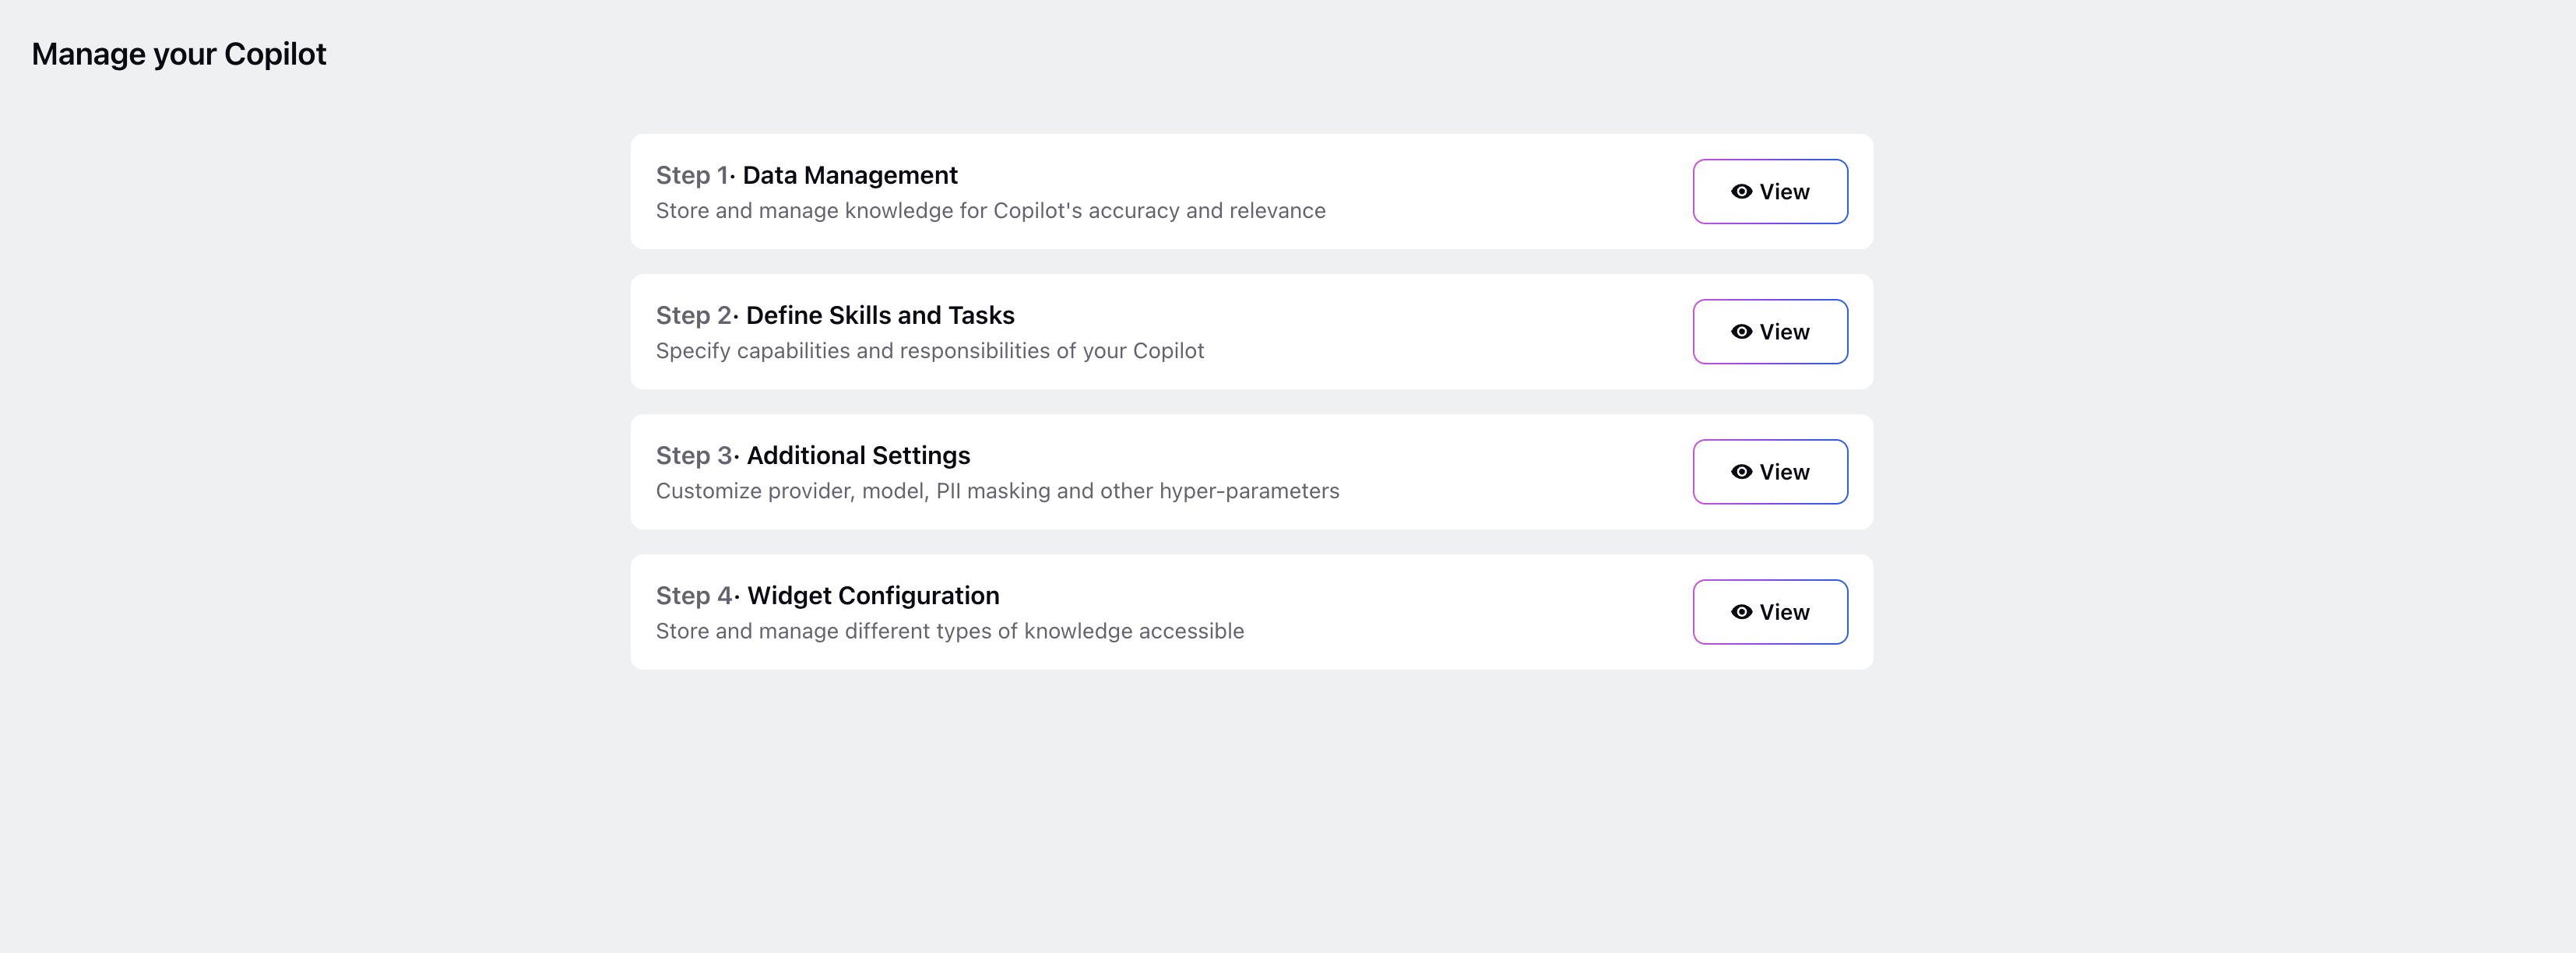
You will be redirected to the Manage your Copilot screen which is organized into four sequential configuration steps:

Step 1: Data Management: Manage the knowledge sources that power your Agent Copilot’s responses. Providing high-quality, relevant data improves accuracy and contextual understanding. Refer to Data Management guide for detailed steps.
Step 2: Define Skills and Tasks: Assign specific tasks and skills to your Agent Copilot. These define what the Copilot can do in different customer service scenarios—such as answering queries, updating cases, or escalating issues. Refer to Define Skills and Tasks guide for detailed steps.
Step 3: Additional Settings: Customize core settings such as the AI provider, model selection, and PII masking template to align with your organization’s governance policies. Refer to Additional Settings guide for detailed steps.
Step 4: Widget Configuration: Configure Agent Copilot widget prompts in the Sprinklr Care Console. Refer to Widget Configuration guide for more details.
You have successfully configured and activated Agent Co-Pilot using AI+ Studio
Next Steps