Publish to Viber Service
Updated
You can use your Viber Service account in Sprinklr to send business messages to your customers. Sprinklr offers various publishing features that allow you to send well-formatted and engaging posts through your Viber Service account.
This guide explains how to publish an individual post using a Viber Service account.
Prerequisites
Before you begin, ensure that a Viber Service account is added in Sprinklr. For steps, see Add a Viber Service Account.
Publishing Steps
To publish a post through a Viber Service account, follow these steps:
1. Click the Publishing Options (![]() ) icon in the top-right of the navigation bar. Then, select Create Post from the dropdown.
) icon in the top-right of the navigation bar. Then, select Create Post from the dropdown.
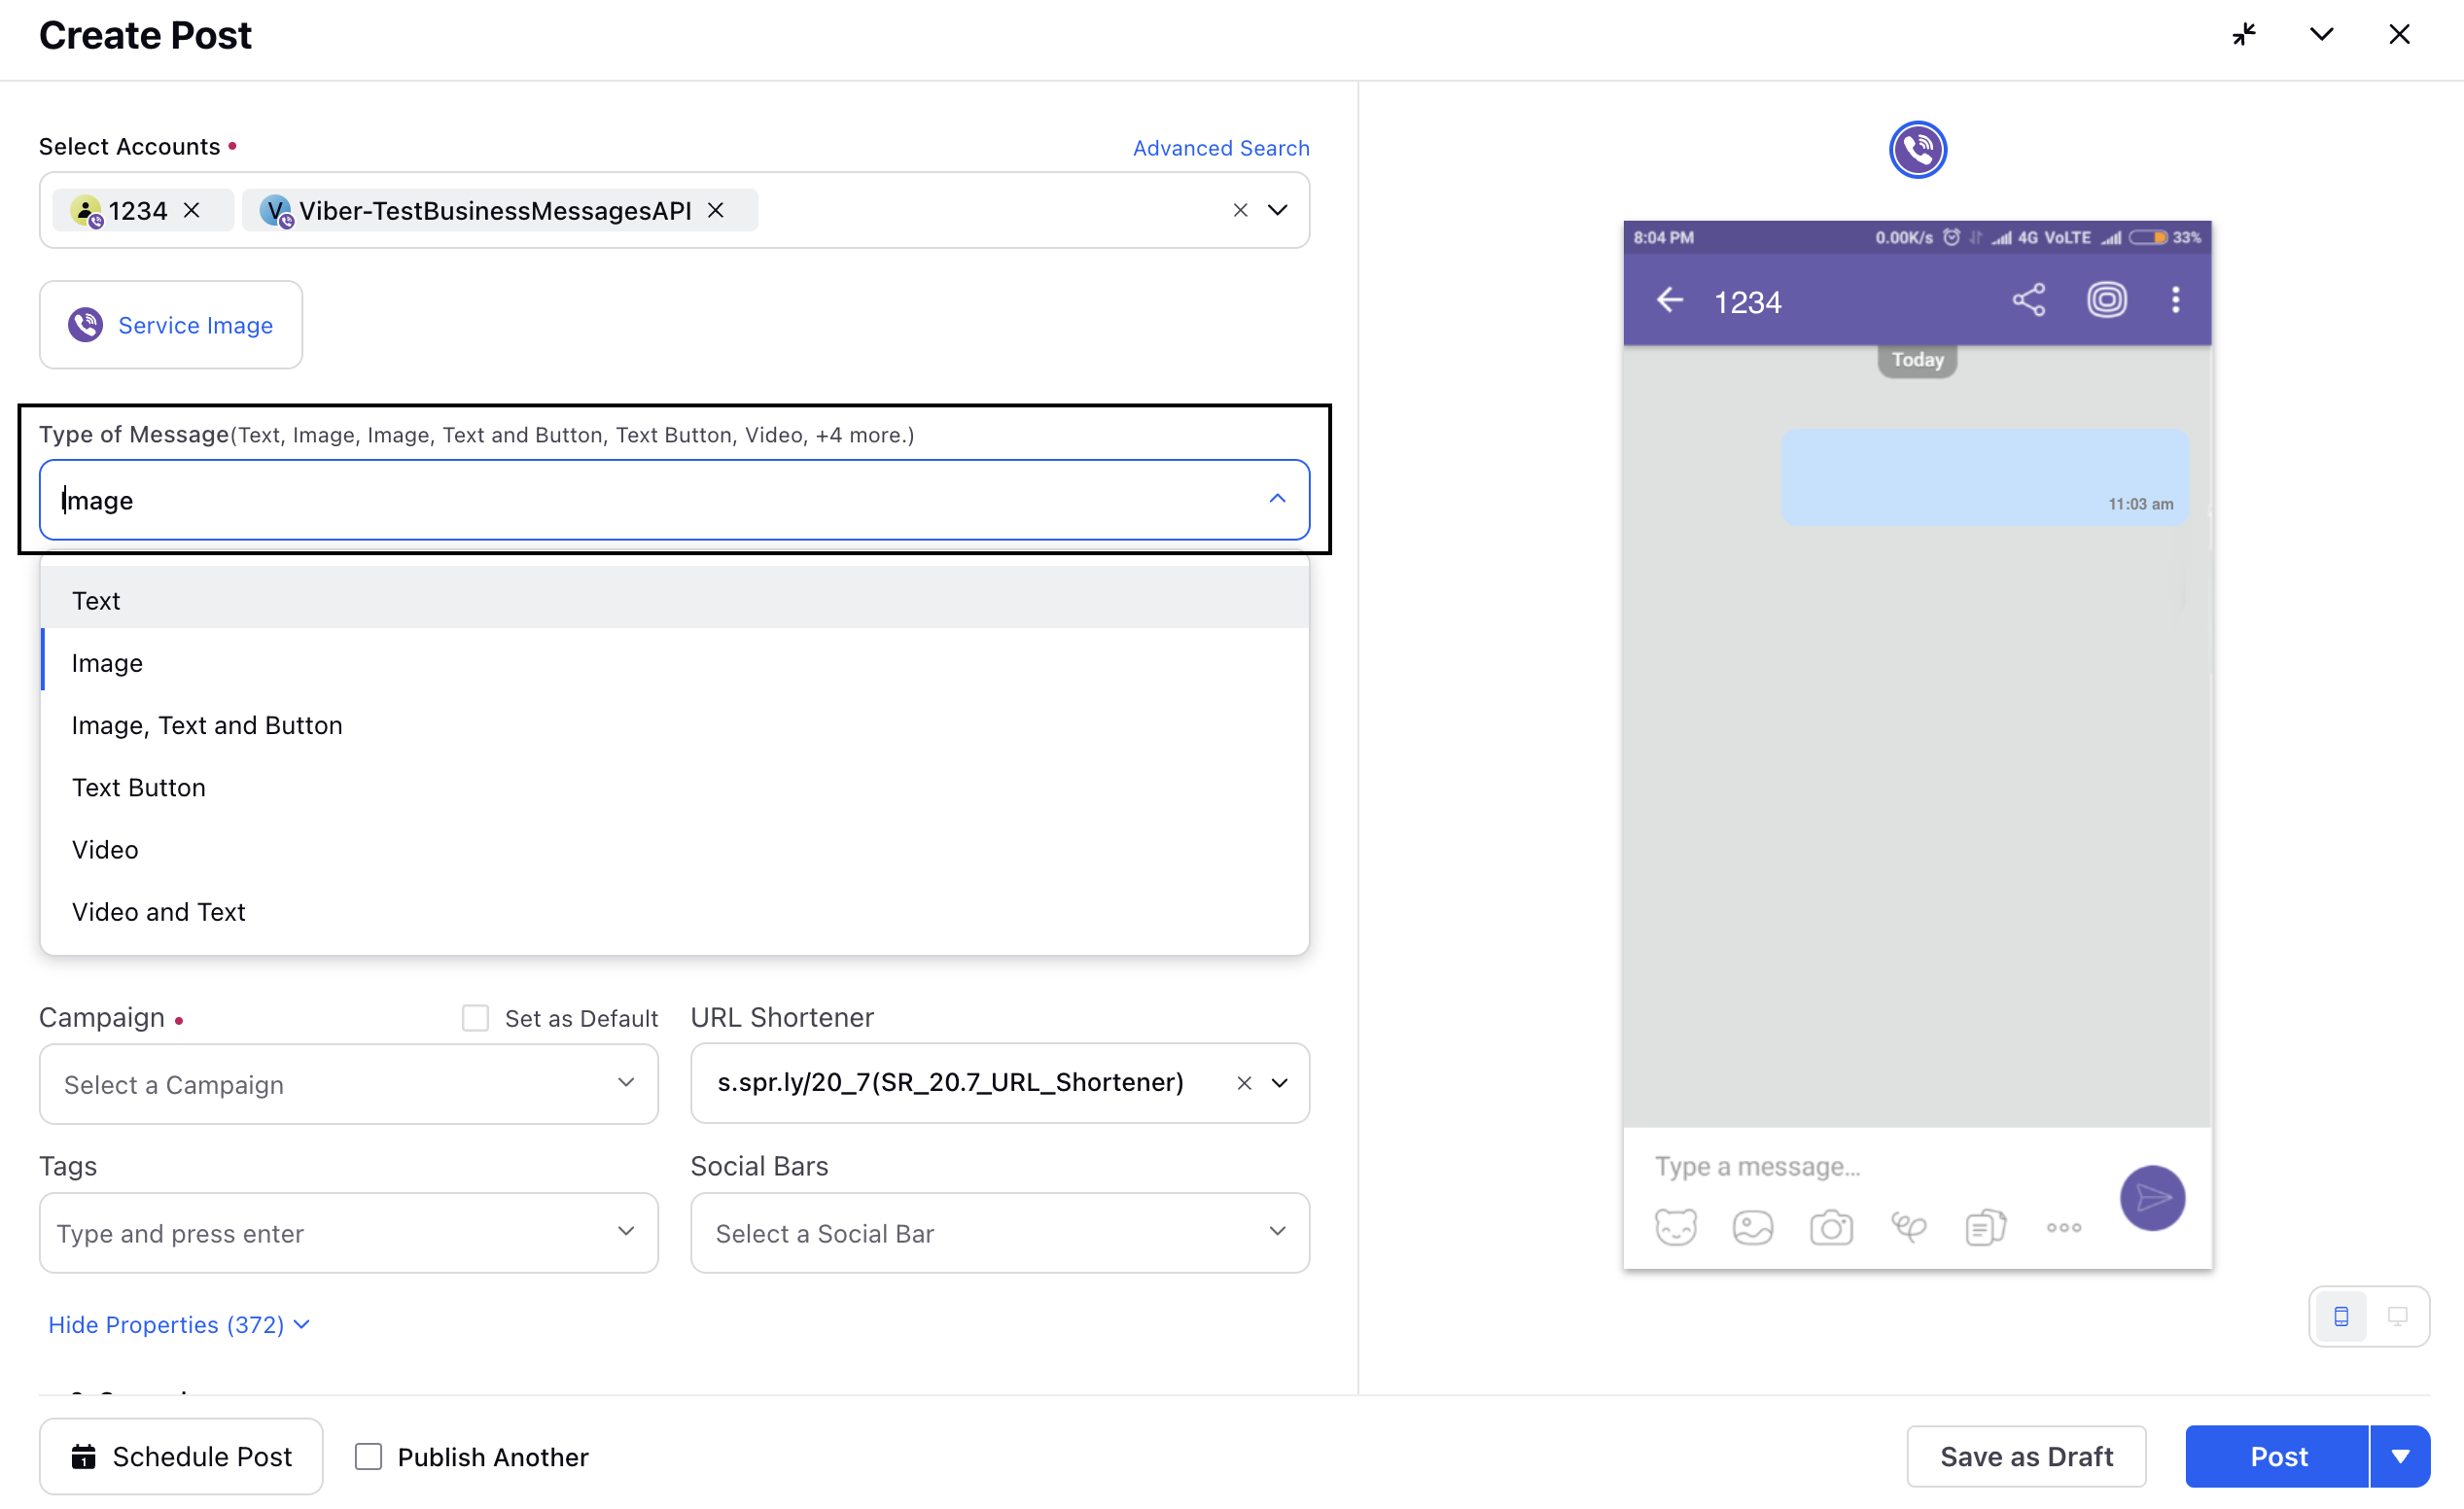
2. In the Create Post window, use the Select Accounts dropdown to search for and choose the Viber Service Account you wish to send the message from.
You can use Advanced Search to search the account based on various filters.
3. From the Type of Message dropdown, select the message format you want to send.
Based on the message type you select, the relevant input fields are displayed. For more information about what input fields are needed for each type, see Supported Message Types and Required Input Fields.
4. Compose your message in the message textbox. Add media, buttons, or attachments depending on the chosen message type.
5. Click Add Targeting to this post to select from saved target audiences or create new audience.
6. From the Campaign dropdown, select a campaign to associate your post with. You can set the campaign as default by clicking Set as Default. From the Sub-Campaign dropdown, select a sub-campaign.
7. You can select URL Shortener to shorten every link that you paste in your message. This helps you make the most of the character limit.
8. Select Tags and Social Bars from the dropdown menu respectively.
9. Add properties to your post.
10. Under Approval, set an Approval Type for your post. You can also add an Approval Note.
The preview of the post will render on the right pane. Also, you can click the Preview icon in the bottom left corner if you have minimized the Create Post window.
![]() Note: Only Mobile preview is available for Viber Service.
Note: Only Mobile preview is available for Viber Service.
11. Choose one of the publishing options at the bottom of the Create Post window:
Post: Send the post immediately.
Save as Draft: Store the post in draft mode for later editing.
Schedule Post: Set a future date and time for publishing.
Publish Another: Enable this option to create and publish another post immediately afterward.
You have successfully published a message through your Viber Service account.